github
생활코딩을 참고했다.
에디터는 vscode를 사용했다.
HTML에서 만든 3.html 파일로 다뤄볼 것이다.
📖 JavaScript 공부하기
JavaScript는 HTML을 제어하는 언어라고 한다.(동적으로 만들어준다.)
웹 브라우저한테 HTML 코드로 javascript가 시작된다 라고 알려줘야한다. 이 때 script태그를 사용한다.
⚡ h1과의 차이는 동적이라는 것이다.
    <body>
        <h1>JavaScript</h1>
        <script>
            document.write(1+1);
        </script>
        <h1>html</h1>
        1+1
    </body>
input 태그에 type속성을 버튼으로 설정해주면 버튼을 만들 수 있다.
⭐ event
value속성을 통해 버튼에 쓰여질 텍스트도 설정할 수 있다.
on~ 속성(event)의 속성 값으로는 javascript가 와야한다.
    <body>
        <input type="button" value="hi" onclick="alert('hi')">
    </body>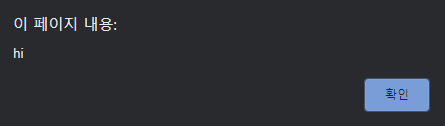
alert은 경고창이다.
event들을 이용해서 사용자와 상호작용하는 코드를 만들 수 있다.
활용해보자면
        <h1><a href="index.html">WEB</a></h1>
        <input id="night_day" type="button" value="night" onclick="
        var target = document.querySelector('body');
        if(this.value == 'night') {
            target.style.backgroundColor = 'black';
            target.style.color = 'white';
            this.value = 'day';
        }
        else {
            target.style.backgroundColor = 'white';
            target.style.color = 'black';
            this.value = 'night';
        }
        ">
        <ol>
            <li><a href="1.html">HTML</a></li>
            <li><a href="2.html">CSS</a></li>
            <li><a href="3.html">JavaScript</a></li>
        </ol>
이런 식으로 버튼을 누를 때마다 배경화면이 변경되고 버튼 이름도 변경된다.
⭐ 반복과 배열
    <body>
        <h1>Loop & Array</h1>
        <script>
            var coworkers = ['egoing', 'leezche', 'duru'];
        </script>
        <h2>Co workers</h2>
        <ul>
            <script>
                var i = 0;
                while(i<coworkers.length) {
                    document.write('<li>' + coworkers[i]+'</li>');
                    i+=1;
                }
            </script>
        </ul>
    </body>
write안에 태그가 사용되어진 문법에 대해 알아두자
활용해보자면
        <input id="night_day" type="button" value="night" onclick="
        var target = document.querySelector('body');
        if(this.value == 'night') {
            target.style.backgroundColor = 'black';
            target.style.color = 'white';
            this.value = 'day';

            var alist = document.querySelectorAll('a');
            var i = 0;
            while(i<alist.length) {
                alist[i].style.color = 'powderblue';
                i += 1;
            }
        }
        else {
            target.style.backgroundColor = 'white';
            target.style.color = 'black';
            this.value = 'night';

            var alist = document.querySelectorAll('a');
            var i = 0;
            while(i<alist.length) {
                alist[i].style.color = 'blue';
                i += 1;
            }
        }
        ">
a태그들의 목록을 담고 있는 배열을 alist에 저장한다.
그리고 a태그 목록들의 색상을 변경해주는 코드이다.