🏷 다양한 의존관계 주입 방법
의존관계 주입에는 크게 4가지 방법이 있다
- 생성자 주입
- 수정자 주입(setter 주입)
- 필드 주입
- 일반 메서드 주입
1️⃣ 생성자 주입
- 생성자를 통해 의존관계를 주입
- 지금까지 우리가 진행했던 방법!
- 생성자 호출 시점에 딱 1번만 호출되는 것이 보장
(= 이 말인 즉슨, 그 때 값을 세팅하고 그 다음부터는 세팅을 건들지 못하게 막을 수 있음) - 불변, 필수 의존관계에서 사용
- 생성자 호출 시점에 딱 1번만 호출되는 것이 보장
💡생성자가 딱 1개만 있으면 @Autowired를 생략해도 자동 주입 된다! 물론 스프링 빈에만 해당!
2️⃣ setter 주입
setter라 불리는 필드의 값을 변경하는 수정자 메서드를 통해서 의존관계를 주입- 선택, 변경 가능성이 있는 의존관계에 사용
- 자바빈 프로퍼티 규약의 수정자 메서드 방식을 사용하는 방법이다.
- 선택, 변경 가능성이 있는 의존관계에 사용
@Component
    public class OrderServiceImpl implements OrderService {
    	// final을 잠시 뺌
        private MemberRepository memberRepository;
        private DiscountPolicy discountPolicy;
        @Autowired
        // set
        public void setMemberRepository(MemberRepository memberRepository) {
            this.memberRepository = memberRepository;
        }
        @Autowired
        // set
        public void setDiscountPolicy(DiscountPolicy discountPolicy) {
            this.discountPolicy = discountPolicy;
        }
📌 참고 :
@Autowired의 기본 동작은 주입할 대상이 없으면 오류가 발생한다. 주입할 대상이 없어도 동작하게 하려면@Autowired(required = false)로 지정
3️⃣ 필드 주입
- 필드에 바로 주입하는 방법이다.
- 코드가 간결해서 많은 개발자들을 유혹하지만 외부에서 변경이 불가능해서 테스트 하기 힘들다는 치명적인 단점이 존재
- DI 프레임워크가 없으면 아무것도 할 수 없다.
- 가능한 사용하지 말자!
- 코드가 간결해서 많은 개발자들을 유혹하지만 외부에서 변경이 불가능해서 테스트 하기 힘들다는 치명적인 단점이 존재
@Component
    public class OrderServiceImpl implements OrderService {
    	// 여기에 @Autowired만 붙이면 된다. 매우 간-단
        @Autowired
        private MemberRepository memberRepository;
        @Autowired
        private DiscountPolicy discountPolicy;
}
4️⃣ 일반 메서드 주입
- 일반 메서드를 통해서 주입 받을 수 있다.
- 한번에 여러 필드를 주입 받을 수 있다.
- 일반적으로 잘 사용하지 않는다.
 @Component
    public class OrderServiceImpl implements OrderService {
        private MemberRepository memberRepository;
        private DiscountPolicy discountPolicy;
@Autowired
        public void init(MemberRepository memberRepository, DiscountPolicy
    discountPolicy) {
            this.memberRepository = memberRepository;
            this.discountPolicy = discountPolicy;
        }
}
🏷 옵션 처리
개발하다 보면 주입할 스프링 빈이 없어도 동작해야 할 때가 있다 🤔
그런데 @Autowired 만 사용하면 required 옵션의 기본값이 true로 되어 있어서 자동 주입 대상이 없으면 오류가 발생한다!
자동 주입 대상을 옵션으로 처리하는 방법을 알아보자❗️
@Autowired(required=false): 자동 주입할 대상이 없으면 수정자 메서드 자체가 호출 안됨org.springframework.lang.@Nullable: 자동 주입할 대상이 없으면 null이 입력된다.Optional<>: 자동 주입할 대상이 없으면 Optional.empty 가 입력된다.
✔️ test/../autowired/AutowiredTest.java 생성
package hello.core.autowired;

import hello.core.member.Member;
import org.junit.jupiter.api.Test;
import org.springframework.beans.factory.annotation.Autowired;
import org.springframework.context.ApplicationContext;
import org.springframework.context.annotation.AnnotationConfigApplicationContext;
import org.springframework.lang.Nullable;

import java.util.Optional;

public class AutowiredTest {

    @Test
    void AutowiredOption() {
        ApplicationContext ac = new AnnotationConfigApplicationContext(TestBean.class);

    }

    static class TestBean {
        // 1. 호출 안됨
        @Autowired(required = false)
        // 여기서 Member는 스프링 빈에 관련된 멤버가 아님
        // 즉 관련된 게 없다는 의미(없는 걸 아무거나 집어넣은 것)
        public void setNoBean1(Member noBean1) {
            System.out.println("setNoBean1 = " + noBean1);
        }

        // 2. null 호출
        @Autowired
        public void setNoBean2(@Nullable Member noBean2) {
            System.out.println("setNoBean2 = " + noBean2);
        }

        // 3. Optional.empty 호출
        @Autowired(required = false)
        public void setNoBean3(Optional<Member> noBean3) {
            System.out.println("setNoBean3 = " + noBean3);
        }
    }
}
⬆️ 실행결과
- noBean1은 호출 자체가 되지 않았음! 의존관계가 없기 때문에 메서드 자체가 호출되지 않음
🏷 생성자 주입을 선택해라!
과거에는 수정자 주입과 필드 주입을 많이 사용했지만, 최근에는 스프링을 포함한 DI 프레임워크 대부분이 생성자 주입을 권장한다. 그 이유는 뭘까❓
1️⃣ 불변
- 대부분의 의존관계 주입은 한번 일어나면, 애플리케이션 종료시점까지 의존관계를 변경할 일이 없다.
오히려 대부분의 의존관계는 애플리케이션 종료 전까지 변하면 안된다!!(=불변) - 만약 수정자 주입을 사용하면, setXxx 메서드를 public으로 열어두어야 한다.
- 이렇게 되면 누군가 실수로 변경할 수도 있기 때문에 변경하면 안되는 메서드를 열어두는 것은 좋은 설계 방법이 아니다
- 💡 생성자 주입은 객체를 생성할 때 딱 1번만 호출되므로 이후에 호출되는 일이 없다. 따라서 불변하게 설계할 수 있다!
2️⃣ 누락
- 프레임없이 순수 자바 코드로 단위 테스트를 진행하는 경우가 생각보다 많다.
예를들어, 내가 OrderServiceImpl 만 순수하게 테스트 하고 싶다!
(여기서 수정자 의존관계(setter)를 사용한다고 가정하자)
테스트 코드를 짤 내가 아무리 OrderServiceImpl 만 테스트 하고 싶다 해도
memberReposity, discountPolicy 의 값이 세팅되어있지 않아 NPE 오류가 난다!
➡️ 수정자 입장에선 의존관계가 어떻게 되어있는지 눈에 보이지 않는다. 코드를 까봐야 안다!
그렇담, 이것을 생성자 주입을 사용해서 다시 테스트 코드를 짜보자❗️
 ⬆️ 이렇게 바로 컴파일 오류를 통해 문제점이 보인다 !!
3️⃣ final
생성자 주입을 사용하면 필드에 final 키워드를 사용할 수 있다.
그래서 생성자에서 혹시라도 값이 설정되지 않는 오류를 컴파일 시점에 막아준다🤭
@Component
public class OrderServiceImpl implements OrderService {
    // final 사용
    private final MemberRepository memberRepository;
    private final DiscountPolicy discountPolicy;

    @Autowired
    public OrderServiceImpl(MemberRepository memberRepository, DiscountPolicy discountPolicy) {
        this.memberRepository = memberRepository;
        this.discountPolicy = discountPolicy;
    }
    .
    .
💡 컴파일 오류는 세상에서 가장 빠르고 좋은 오류이다!
📌 참고 : 수정자 주입을 포함한 나머지 주입 방식은 모두 생성자 이후에 호출되므로, 필드에 final 키워드를 사용할 수 없다.
오직 생성자 주입 방식만 final 키워드를 사용할 수 있다.
정리 ❗️
- 생성자 주입 방식을 선택하는 이유는 여러가지가 있지만, 프레임워크에 의존하지 않고, 순수한 자바 언어의 특징을 잘 살리는 방법이기도 하다.
- 기본으로 생성자 주입을 사용하고, 필수 값이 아닌 경우에는 수정자 주입 방식을 옵션으로 부여하면 된다.
(생성자 주입과 수정자 주입을 동시에 사용할 수 있다) - 항상 생성자 주입을 선택해라! 그리고 가끔 옵션이 필요하면 수정자 주입을 선택!
🏷 롬북과 최신 트랜드
✔️ 기본 코드
@Component
  public class OrderServiceImpl implements OrderService {
      private final MemberRepository memberRepository;
      private final DiscountPolicy discountPolicy;
@Autowired	// 생성자가 딱 한개이므로 생략해도 ㄱㅊ
      public OrderServiceImpl(MemberRepository memberRepository, DiscountPolicy
  discountPolicy) {
          this.memberRepository = memberRepository;
          this.discountPolicy = discountPolicy;
      }
}
막상 개발을 해보면, 대부분이 다 불변이고, 그래서 위와 같이 생성자에 final 키워드를 사용하게 된다.
그런데 생성자도 만들어야 하고, 주입 받은 값을 대입하는 코드도 만들어야 하고... 필드 주입처럼 좀 편리하게 사용하는 방법은 없는 걸까🤔?
위의 코드를 최적화해보자❗️
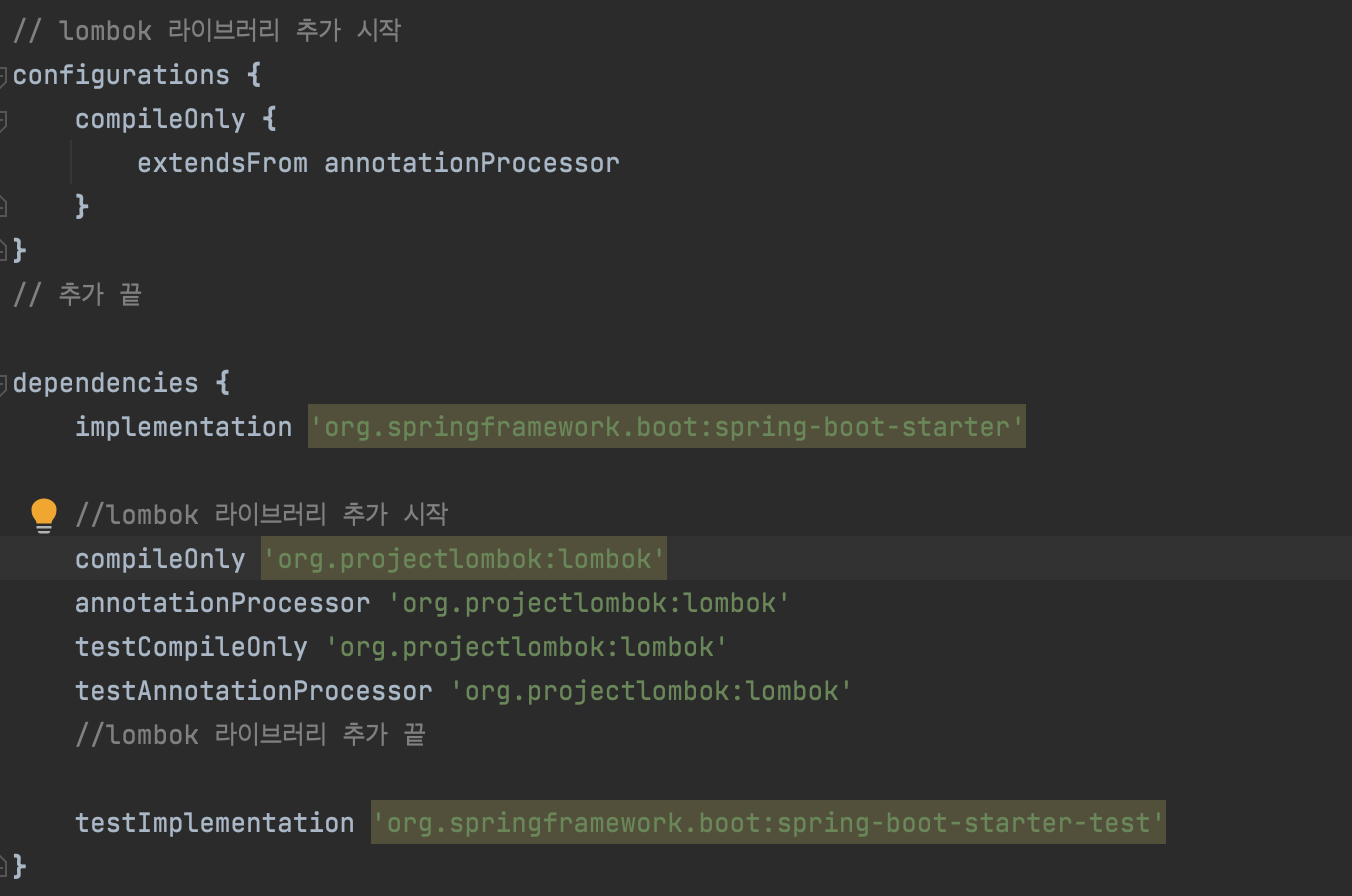
✔️ 롬북 세팅하기
build.gradle 수정
⬆️ preference 에서 꼭 이와 같이 설정해줘야 롬북을 사용할 수 있음!!
그래서 롬북이 대체 뭔데🤷🏻♀️❓
gettersetter메서드를 자동으로 만들어줌
(원래는 직접 작성해야하지만 롬북에서는@Getter@Setter어노테이션만 있으면 편하게 사용 가능)- 생성자 관련한 부분도 편리하게 사용 가능
실무에서 정말 많이 쓰니 한번 찾아서 공부해보도록 !
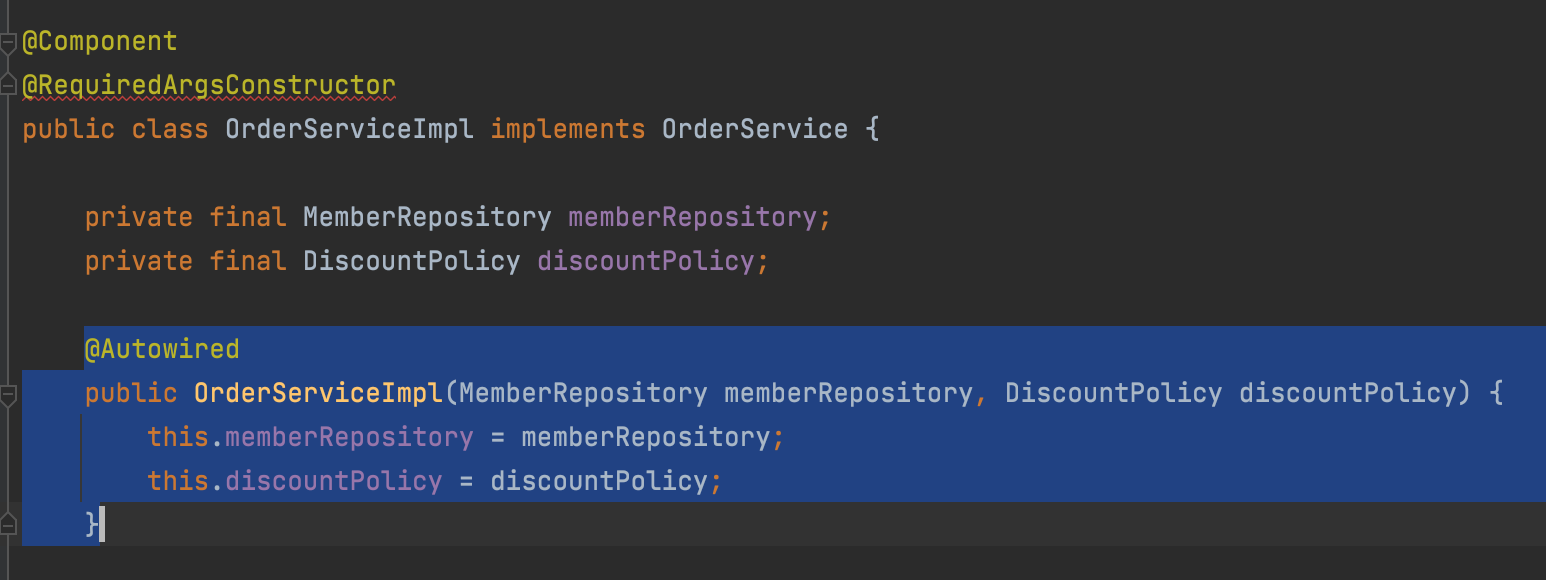
 ⬆️ 위와 같이
 @RequiredArgsConstructor을 이용해 롬북 라이브러리를 사용한다!
근데 빨간줄이.....? 왜.....?
저 애노테이션을 사용하면 파란 박스 부분이 필요가 없어진다! 알아서 만들어주기 때문!! WooooooooW👍🏻
💡 롬복 라이브러리가 제공하는
@RequiredArgsConstructor기능을 사용하면 final이 붙은 필드를 모아서 생성자를 자동으로 만들어준다❗️

롬북 : 편안하게....쓰세요........^^_
