지난 시간에 이어서 이번에는 직접 자바 코드를 작성해 메시지를 보내보도록 하겠다!
슬랙 설치 및 환경설정은 지난시간에 다뤘으므로 그냥 넘어가도록 하겠다.
👩🏻💻 코드작성
import java.util.HashMap;
import java.util.Map;

import org.springframework.http.HttpEntity;
import org.springframework.http.HttpMethod;
import org.springframework.web.bind.annotation.GetMapping;
import org.springframework.web.bind.annotation.RestController;
import org.springframework.web.client.RestTemplate;

@RestController
public class RestMainController {

    @GetMapping("/send")
    public void send(){
        RestTemplate restTemplate = new RestTemplate();

        Map<String,Object> request = new HashMap<String,Object>();
        request.put("username", "찹쌀눈나");
        request.put("text", "Hi! I Love you.");

        HttpEntity<Map<String,Object>> entity = new HttpEntity<Map<String,Object>>(request);
	// Webhook URL
        String url = "https://hooks.slack.com/services/----슬랙 주소----";

        restTemplate.exchange(url, HttpMethod.POST, entity, String.class);

    }
}username과 text 부분에 보내고싶은 메시지를 알맞게 적어준다.
이 예제에서는 단순히 하기 위해 텍스트로 보냈지만 메시지는 다양한 템플릿으로 전송할 수 있다!
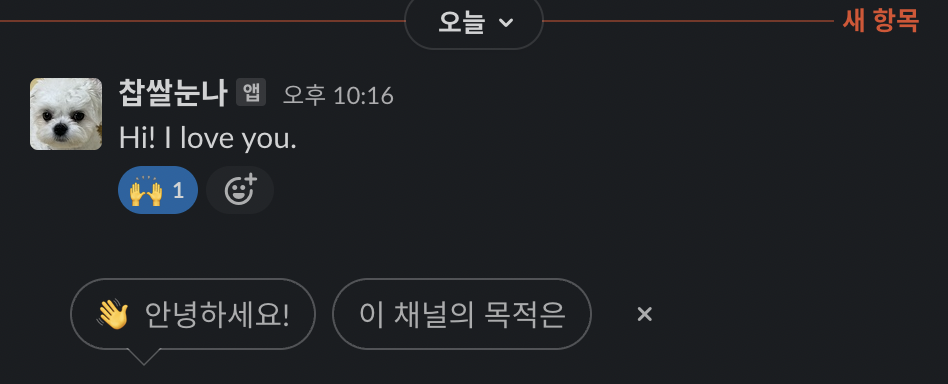
😎 메시지 확인
 짜라란~~~🌟
개인적으로 API를 사용하는 방법이 훨씬 간편한 거 같다 ㅎㅂㅎ
다음 시간부터는 본격적으로 슬랙봇 만들기 프로젝트 를 시작해보겠다!!
📌 참고자료
