Thymeleaf의 레이아웃
- JSP의 include와 같이 특정 부분을 외부 혹은 내부에서 가져와서 포함하는 형태
- 특정한 부분을 파라미터로 전달해서 내용에 포함하는 형태
include 방식의 처리
Thymeleaf의 기능 중에는 특정한 부분을 다른 내용으로 변경할 수 있는 th:insert나 th:replace라는 기능이 있다.
th:replace: 기존의 내용을 완전히 대체하는 방식th:insert: 기존 내용의 바깥쪽 태그는 그대로 유지하면서 추가되는 방식
실습을 통해 각 방식의 처리를 알아보자. 우선 실습을 위한 메서드를 준비한다.
@GetMapping("/exLayout1")
public void exLayout1() {
	log.info("exLayout............");
}
이제 exLayout.html을 구성할 건데, 이 파일은 내부적으로 다른 파일에 있는 일부분을 조각처럼 가져와서 구성할 것이다. 우선 조각이 될 fragments 파일들을 작성해보자.
<!-- fragment1.html -->
<!DOCTYPE html>
<html lang="en" xmlns:th="http://www.thymeleaf.org">
  <head>
    <meta charset="UTF-8">
    <title>Title</title>
  </head>
  <body>
    <div th:fragment="part1">
      <h2>Part 1</h2>
    </div>
    <div th:fragment="part2">
      <h2>Part 2</h2>
    </div>
    <div th:fragment="part3">
      <h2>Part 3</h2>
    </div>
  </body>
</html>
위 코드에서 th:fragment로 작성된 부분이 작성할 exLayout1.html에 가져다 쓰기 위한 부분이다. 이제 해당 파일을 만들어보자.
<!-- exLayout1.html -->
<!DOCTYPE html>
<html lang="en" xmlns:th="http://www.thymeleaf.org">
  <head>
    <meta charset="UTF-8">
    <title>Title</title>
  </head>
  <body>
    <h1>Fragement Test</h1>
    <h1>Layout 1 - 1</h1>
    <div th:replace="~{/fragments/fragment1 :: part1}"></div>

    <h1>Layout 1 - 2</h1>
    <div th:insert="~{/fragments/fragment2 :: part2}"></div>

    <h1>Layout 1 - 3</h1>
    <th:block th:replace="~{/fragments/fragment2 :: part3}"></th:block>
  </body>
</html>
작성된 코드를 보면 <div> 혹은 <th:block>을 이용해 fragmnet1 파일에 있는 조각들을 사용하는 것을 볼 수 있다.
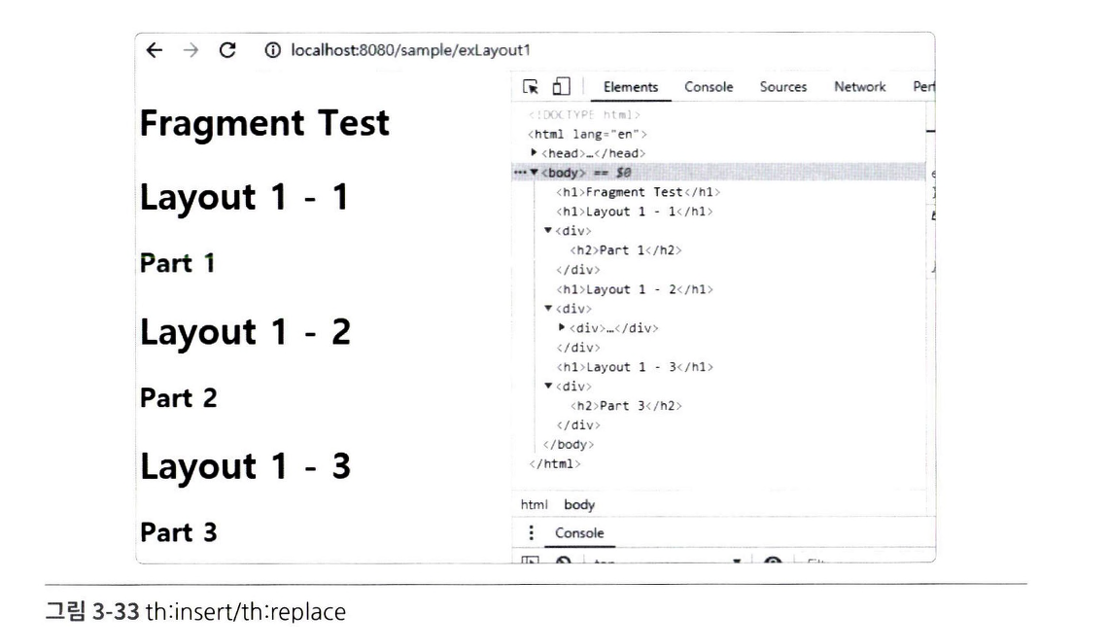
th:insert를 이용하는 경우에는<div>태그 내에 다시<div태그가 생성된다.th:replace를 이용할 때::뒤에는 fragment의 이름을 지정하거나 CSS의 선택자를 이용할 수 있다.::이하를 생략하면 해당 파일의 전체 내용을 가져올 수도 있다.
파라미터 방식의 처리
기존 JSP와 달리 Thymeleaf를 이용하면 특정한 태그를 파라미터처럼 전달해서 다른 th:fragment에서 사용할 수 있다. 실습을 위해 지난 실습에 사용한 메서드를 살짝 수정해보자. 수정 내용은 다음과 같다.
@GetMapping({"/exLayout1", "/exLayout2"})
public void exLayout1() {
	log.info("exLayout...............");
}
이제 fragment를 새롭게 작성해보자.
<!-- fragment3.html -->
<!DOCTYPE html>
<html lang="en" xmlns:th="http://www.thymeleaf.org">
 <head>
   <meta charset="UTF-8">
   <title>Title</title>
  </head>
  <body>
    <div th:fragment="target(first, second)">
      <style>
        .c1 {
          background-color: red;
        }
        .c2 {
          background-color: blue;
        }
      </style>
      <div class="c1">
        <th:block th:replace = "${first}"></th:block>
      </div>
      <div class="c2">
        <th:block th:replace = "${second}"></th:block>
      </div>
    </div>
  </body>
</html>
선언된 target 부분에는 first와 second라는 파라미터를 받을 수 있도록 구성한 것을 알 수 있다. 또한, 내부적으로 th:block을 사용해 이를 표현하고 있다. 실제 target을 사용하는 작업은 exLayout2.html로 진행한다. 이제 작성해보자.
<!-- exLayout2.html -->
<!DOCTYPE html>
 <html lang="en" xmlns:th="http://www.thymeleaf.org">
 <th:block th:replace="~{/fragments/fragment3:: target(~{this:: #ulFirst}, ~{this::#ulSecond} )}">
   <ul id="ulFirst">
     <li>AAA</li>
     <li>BBB</li>
     <li>CCC</li>
   </ul>
   <ul id="ulSecond">
     <li>111</li>
     <li>222</li>
     <li>333</li>
   </ul>
</th:block>- 상단에 target을 사용할 때 파라미터를 두 개 사용한다.
this: #ulFirst - this는 현재 페이지를 의미할 때 사용하는데, 생략이 가능하다.#ulFirst는 CSS의 선택자를 의미한다.

차곡 차곡 기록 쌓기