➡️ 분산 시스템을 위한 외부 구성 관리를 제공하는 프로젝트
게이트웨이나 Discovery Server를 변경할 일이 생기면?
개별 MS의 yml을 모두 고쳐야할까?
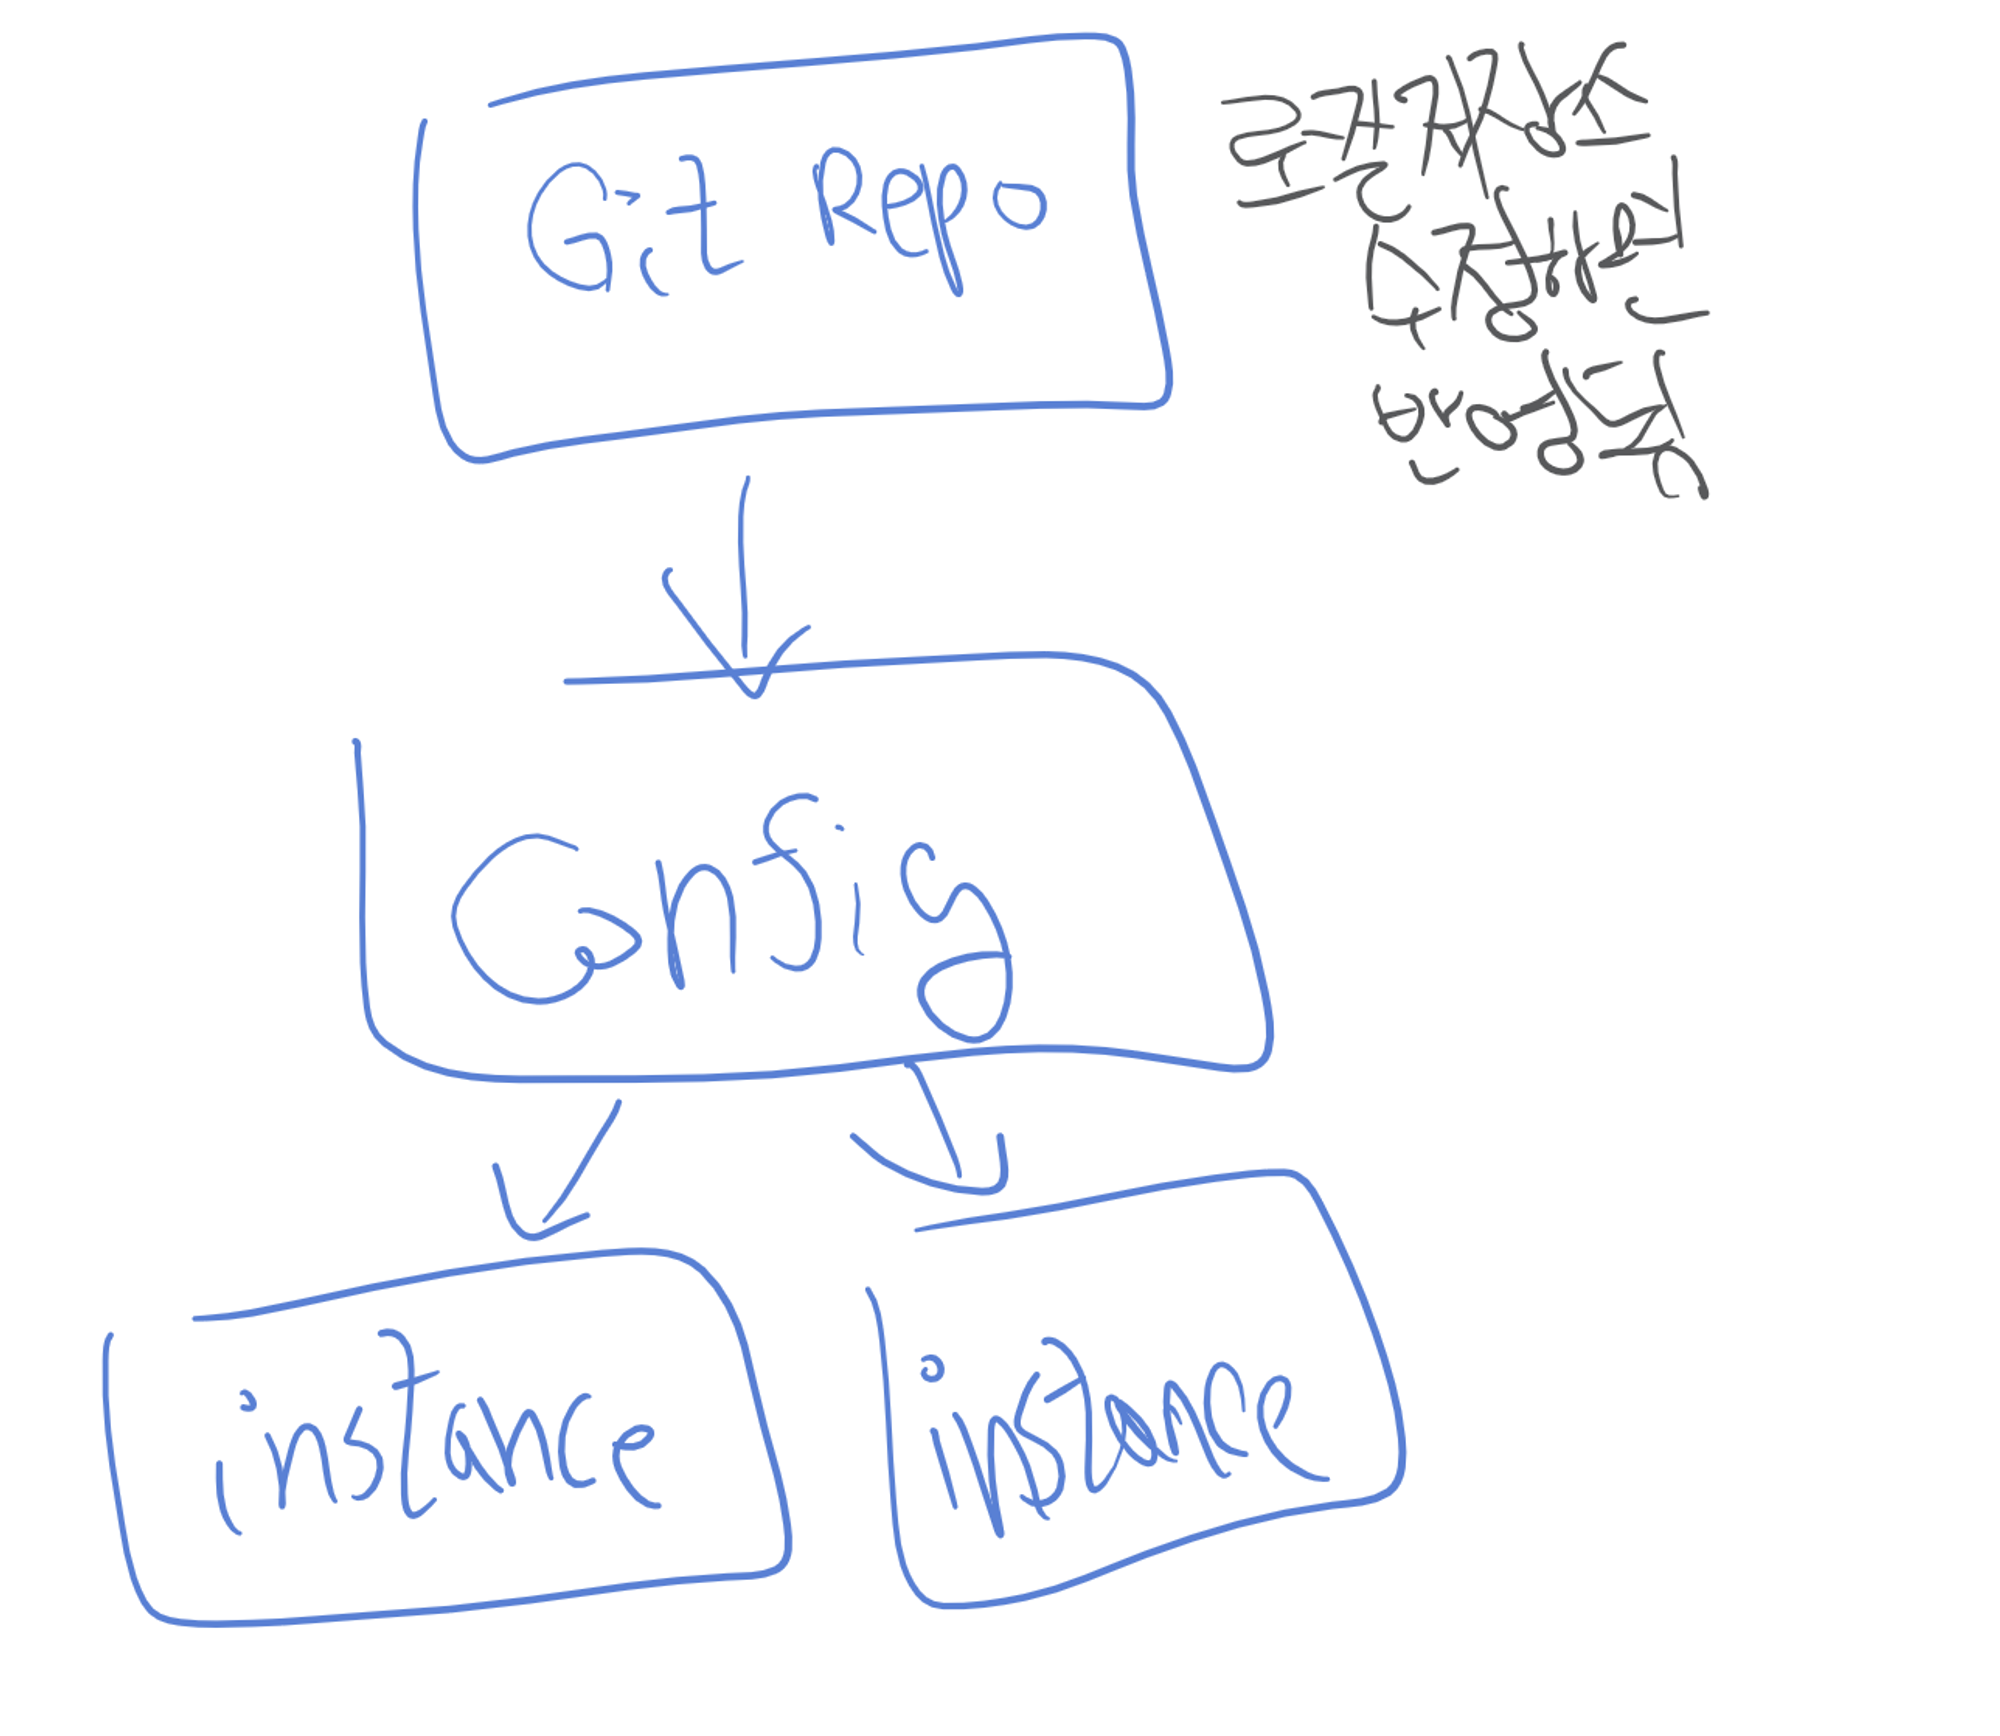
→ Config 서버를 두고 거기에서 접속 정보를 제공받기
주요 특징과 작동 방식
특징
-
중앙 집중화된 설정 저장소
- 애플리케이션의 설정파일을 저장하고 관리하는 중앙 집중화된 저장소
- Git SVN 등의 버전 관리 시스템을 사용할 수 있음
-
외부 구성 소스 지원
-
Spring Cloud Config는 다양한 외부 구성 소스를 지원합니다.
→ 주로 Git이 사용되지만, 다른 소스도 사용 가능합니다.
-
-
다양한 환경에 대한 설정 제공
- 각각의 환경(개발 테스트 운영 등)에 대한 설정을 구성할 수 있음.
- 각각의 환경(개발 테스트 운영 등)에 대한 설정을 구성할 수 있음.
-
서비스 간의 설정 공유
-
다수의 서비스가 있을 때, 각 서비스는 이 서버에서 설정을 가져와 사용 가능
→ 서비스 간에 일관된 구성 유지 가능
-
-
동적으로 설정 변경 감지
-
Spring Cloud Config 클라이언트는 정기적으로 Config 서버에 설정을 요청
→ 변경 사항이 있을 경우, 다시 로드
→ 동적으로 설정 업데이트 가능
-
-
보안 및 암호화
- 보안 기능을 제공하여 설정을 안전하게 관리 ( 민감한 정보 암호화 가능 )
- 보안 기능을 제공하여 설정을 안전하게 관리 ( 민감한 정보 암호화 가능 )
-
프로파일 지원
- Spring Profiles를 사용하여 각 환경 및 상황에 따라 다른 설정 제공 가능
- Spring Profiles를 사용하여 각 환경 및 상황에 따라 다른 설정 제공 가능
작동방식
- Config 서버 설정
bootstrap.yml또는bootstrap.properties파일을 사용하여 Config 서버를 설정합니다.
→ 이 파일은 애플리케이션이 시작될 때 가장 먼저 읽힙니다.
- 외부 구성 소스 연결
- Config 서버가 사용할 외부 구성 소스(Git, SVN 등)를 설정합니다.
- Config 서버가 사용할 외부 구성 소스(Git, SVN 등)를 설정합니다.
- Config 클라이언트 설정
- 각 서비스에서 Config 클라이언트를 설정하고,
어떤 애플리케이션의 어떤 설정을 가져올지 정의합니다.
- 각 서비스에서 Config 클라이언트를 설정하고,
- 애플리케이션 코드에서 설정 사용
실습
Config 서버 설정
-
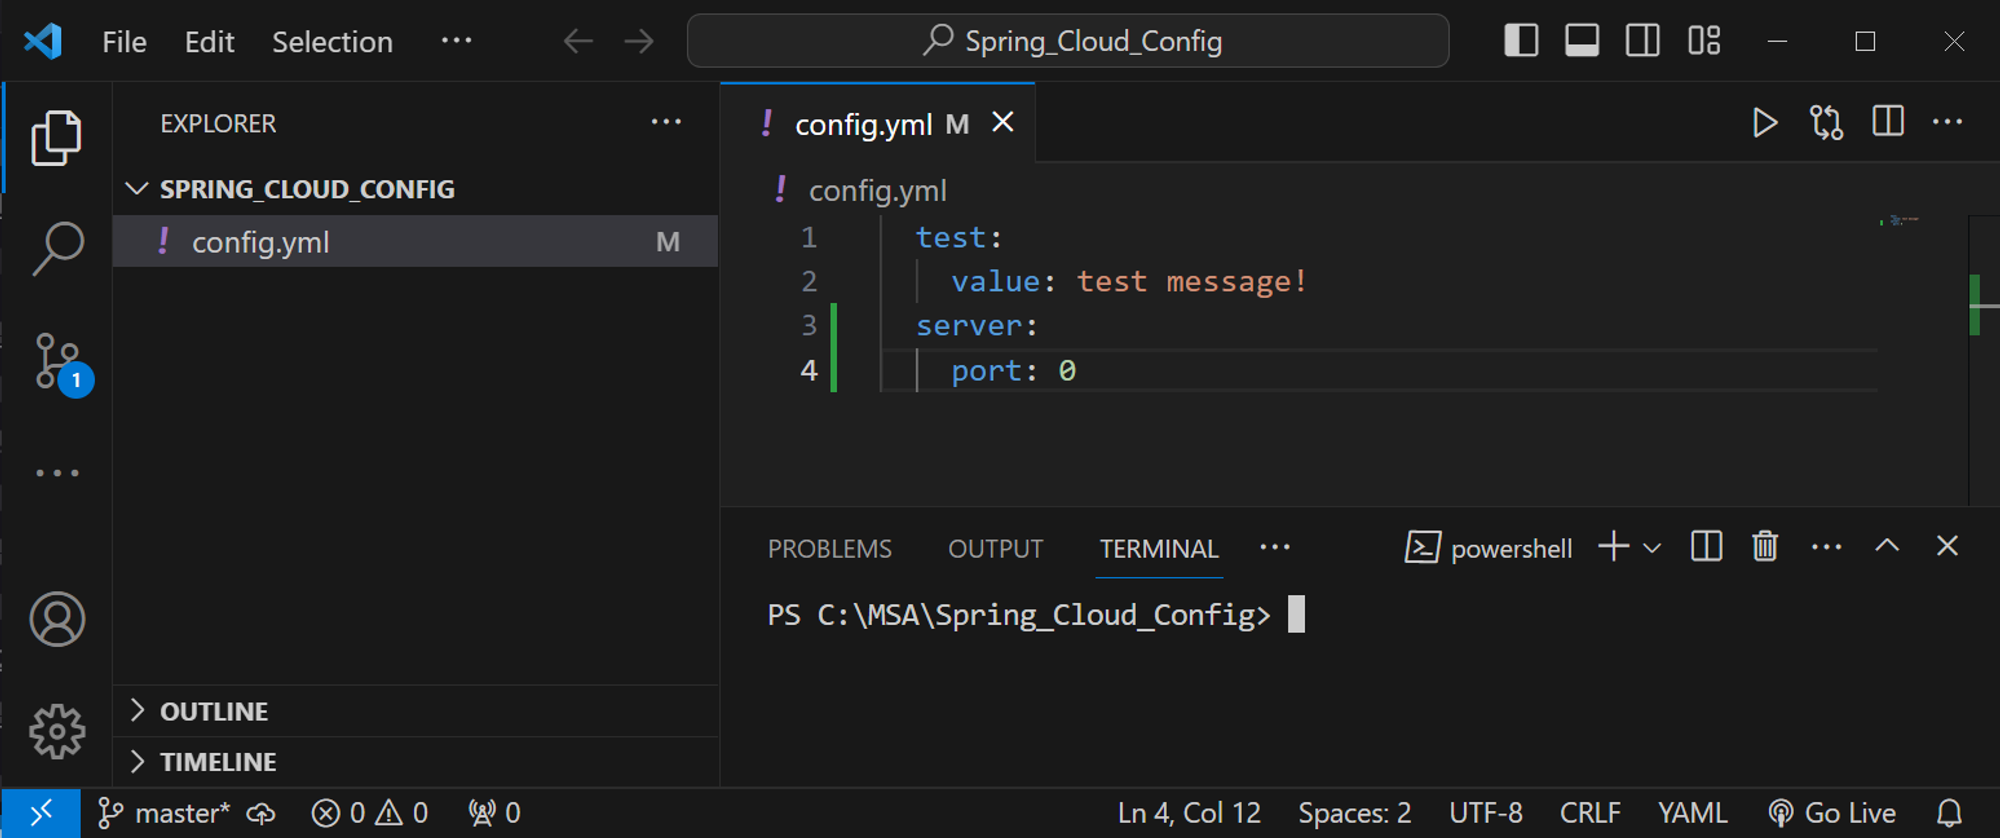
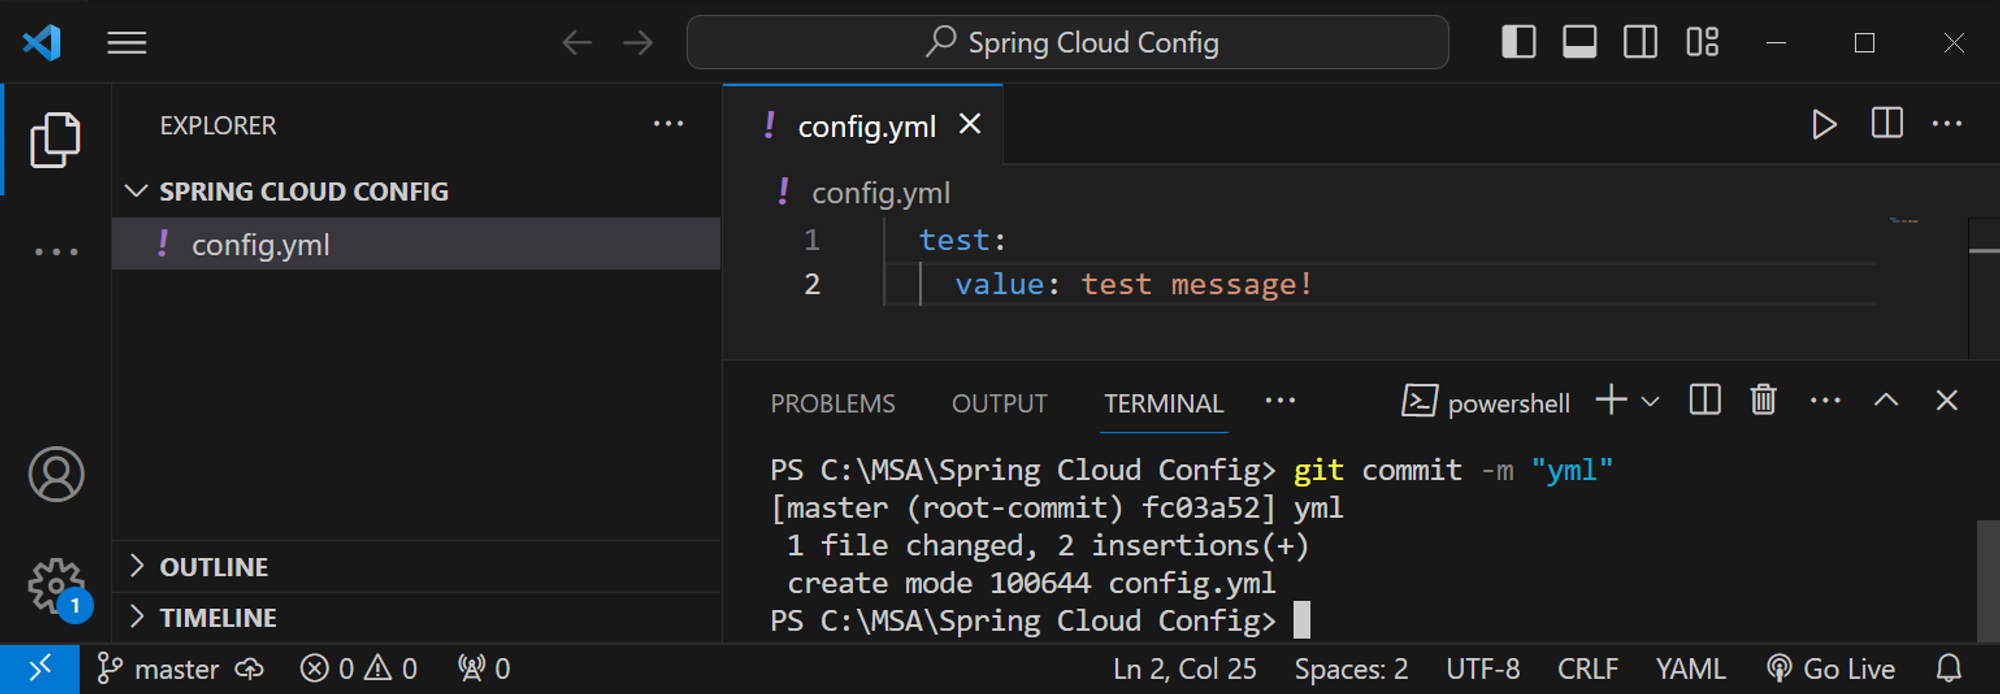
빈 폴더에 yml파일 만들기 ( 민감 정보 작성 )
-
해당 파일이 있는 폴더를 git으로 관리, 커밋까지만 수행
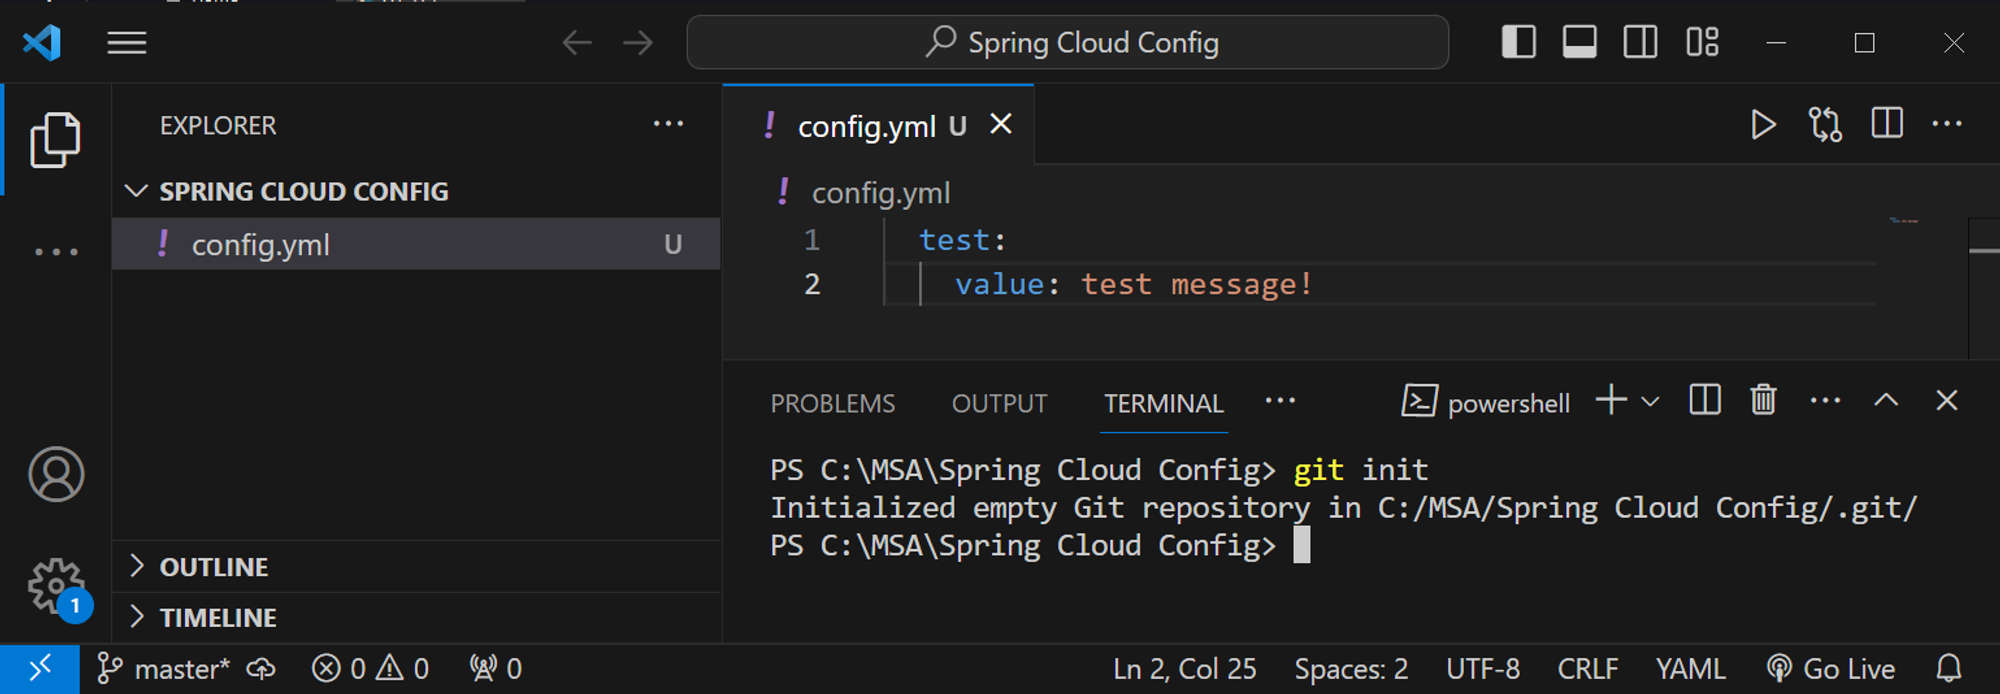
예를 들어 VS환경에서 yml파일을 만들고 git에 등록
-
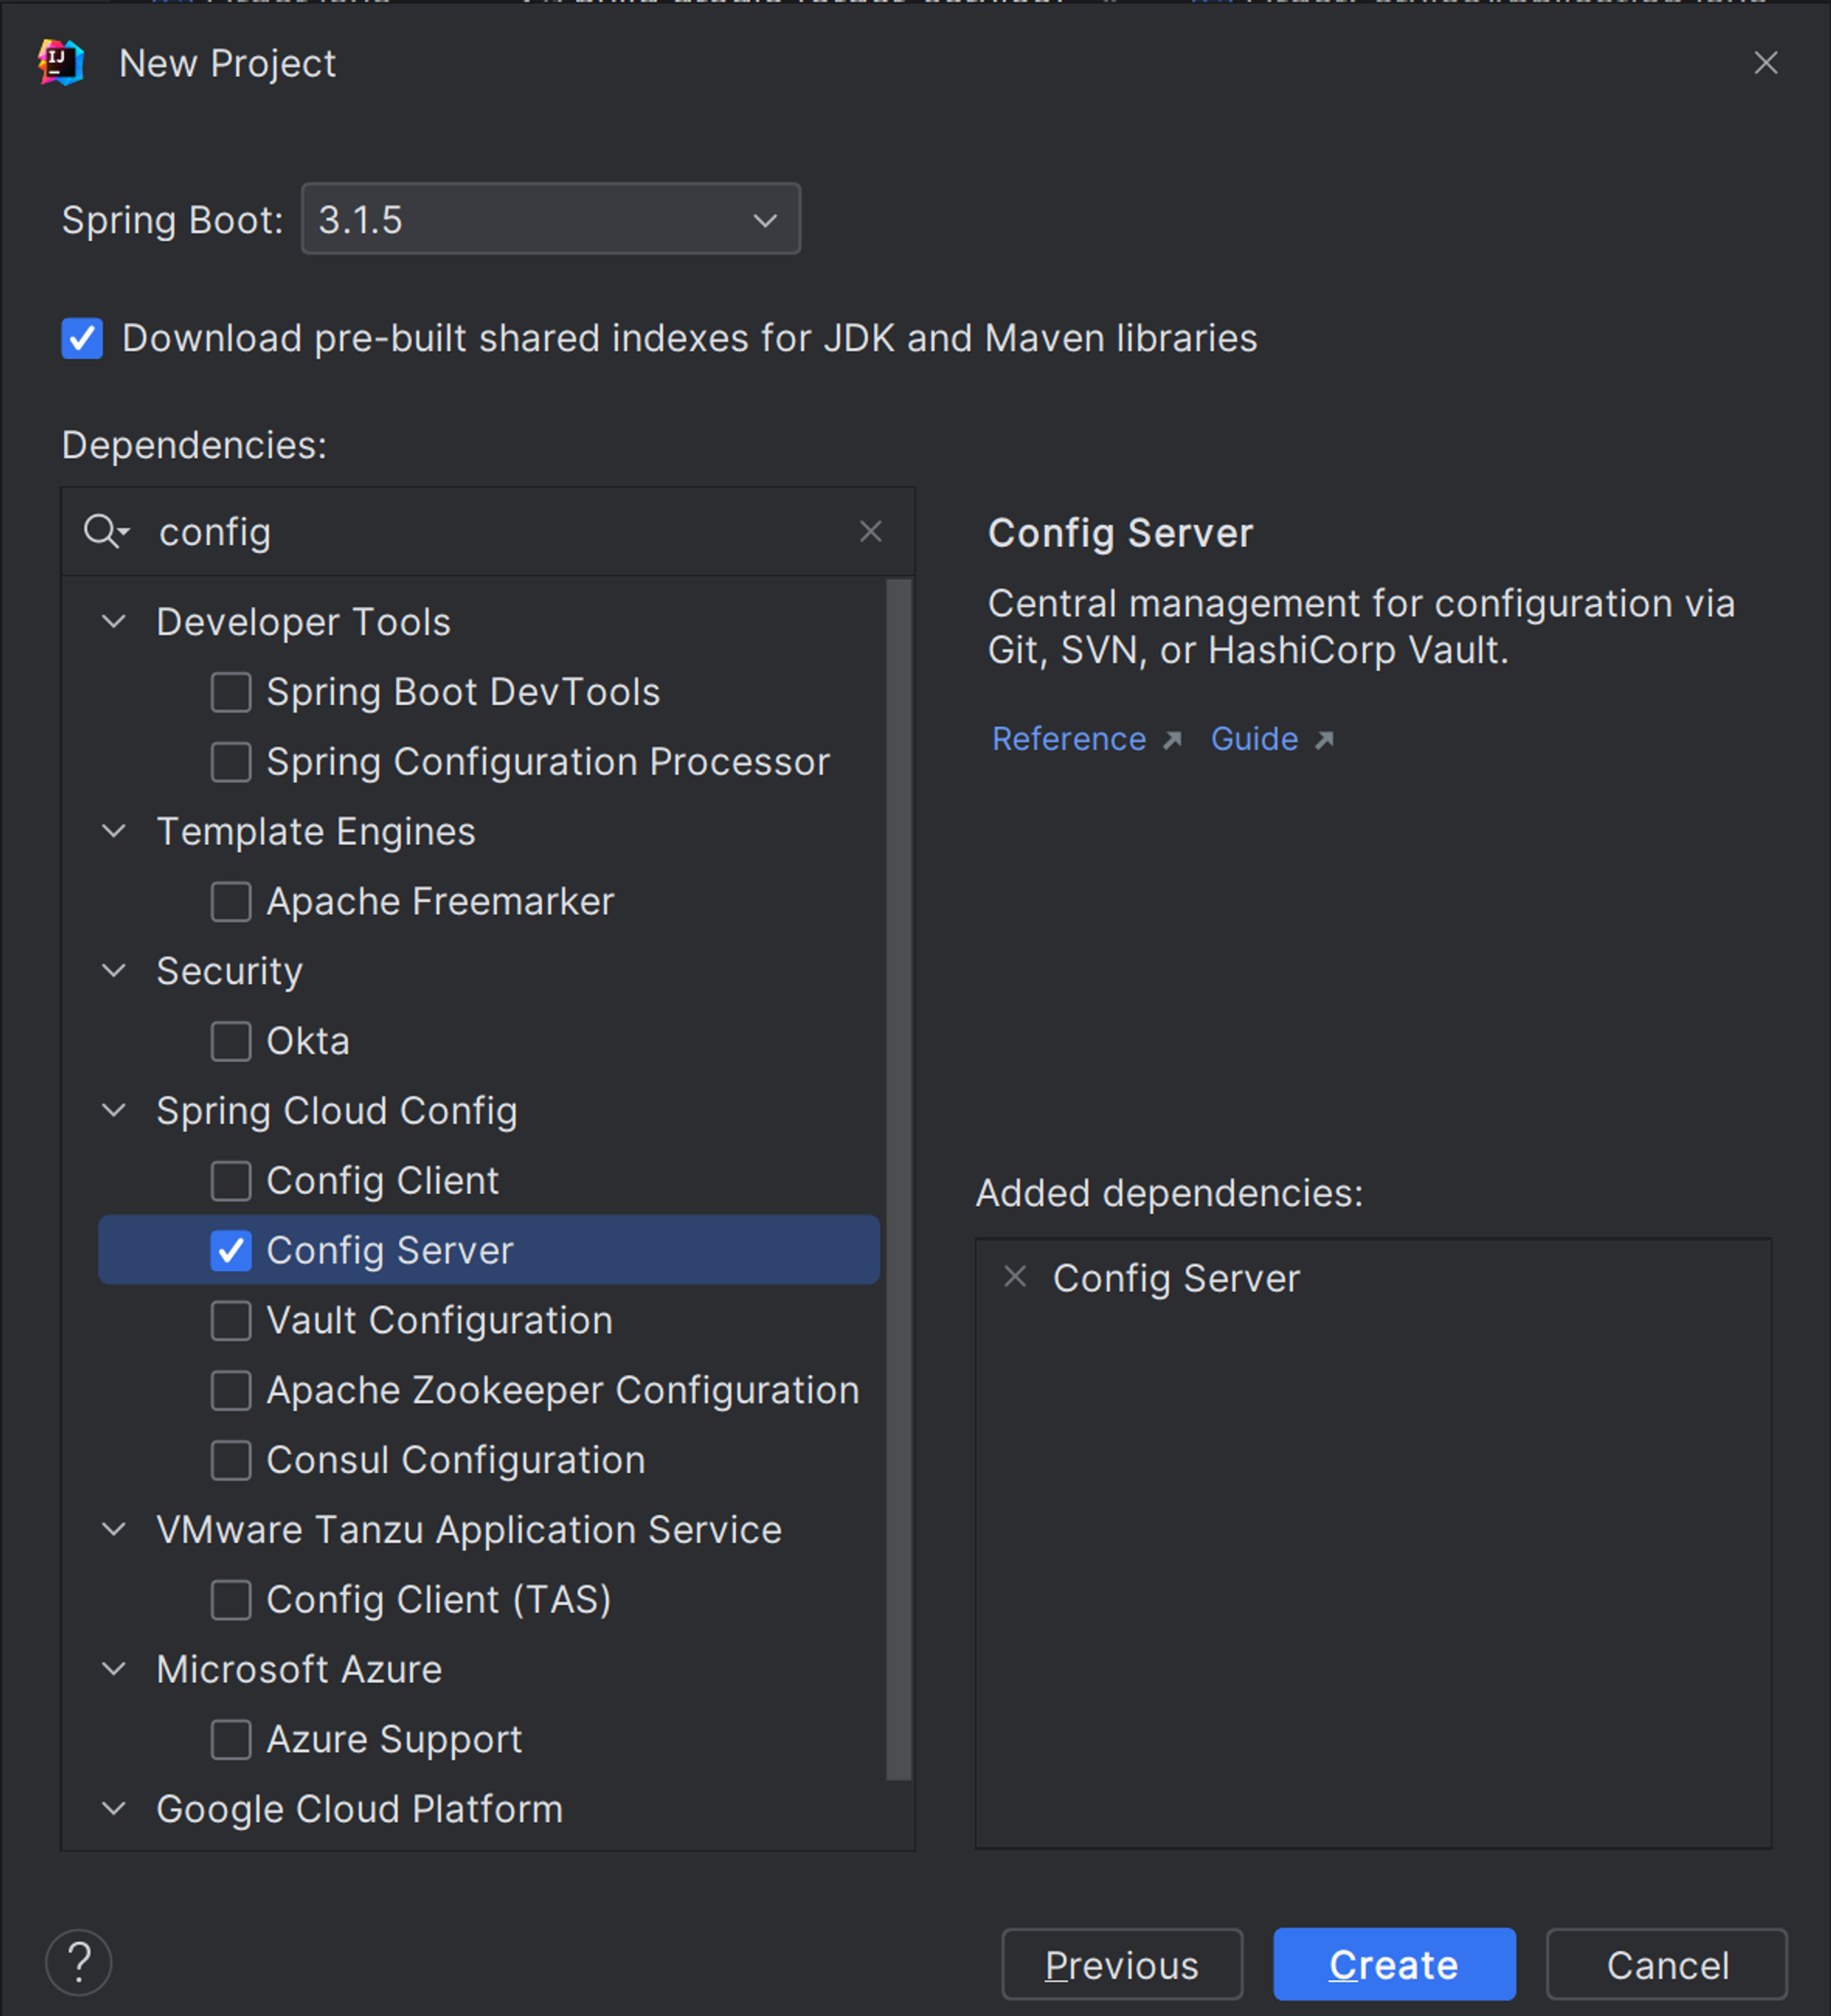
프로젝트 생성 ( 의존성은 Config Server만 추가 )
-
main에 @EnableConfigServer
@SpringBootApplication @EnableConfigServer public class ConfigServerApplication { public static void main(String[] args) { SpringApplication.run(ConfigServerApplication.class, args); } } -
application.yml에 해당 config서버의 정보를 담은 파일 경로를 적음
spring:
  cloud:
    config:
      server:
        git:
          uri: file:///경로
# ex) file://C:\MSA\Spring_Cloud_Config
server:
  port: 8888
- 웹 브라우저에 localhost:포트번호/yml파일명/default 라고 입력해서 해당 파일이 조회되면 성공
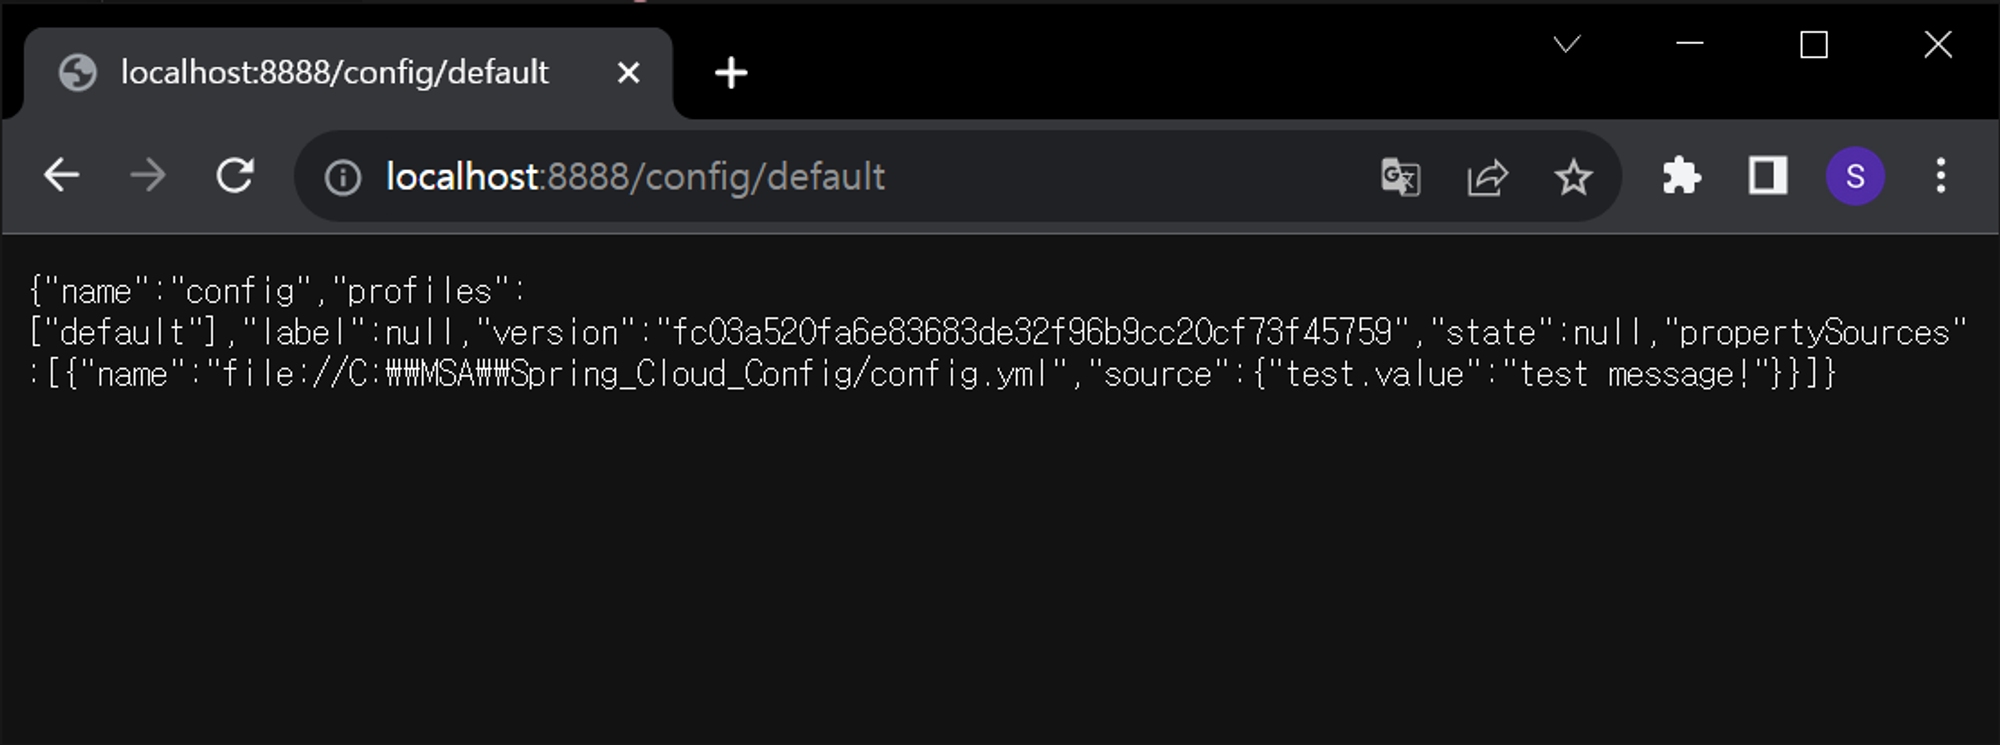
- 예를 들어 yml파일을 test.yml, test-something.yml으로 보관하고 있을 때,
test-something에 연결하려면http://localhost:8888/test/something으로 연결.
Clinet 서버 설정
< 해당 Config 정보를 제공받을 서버> 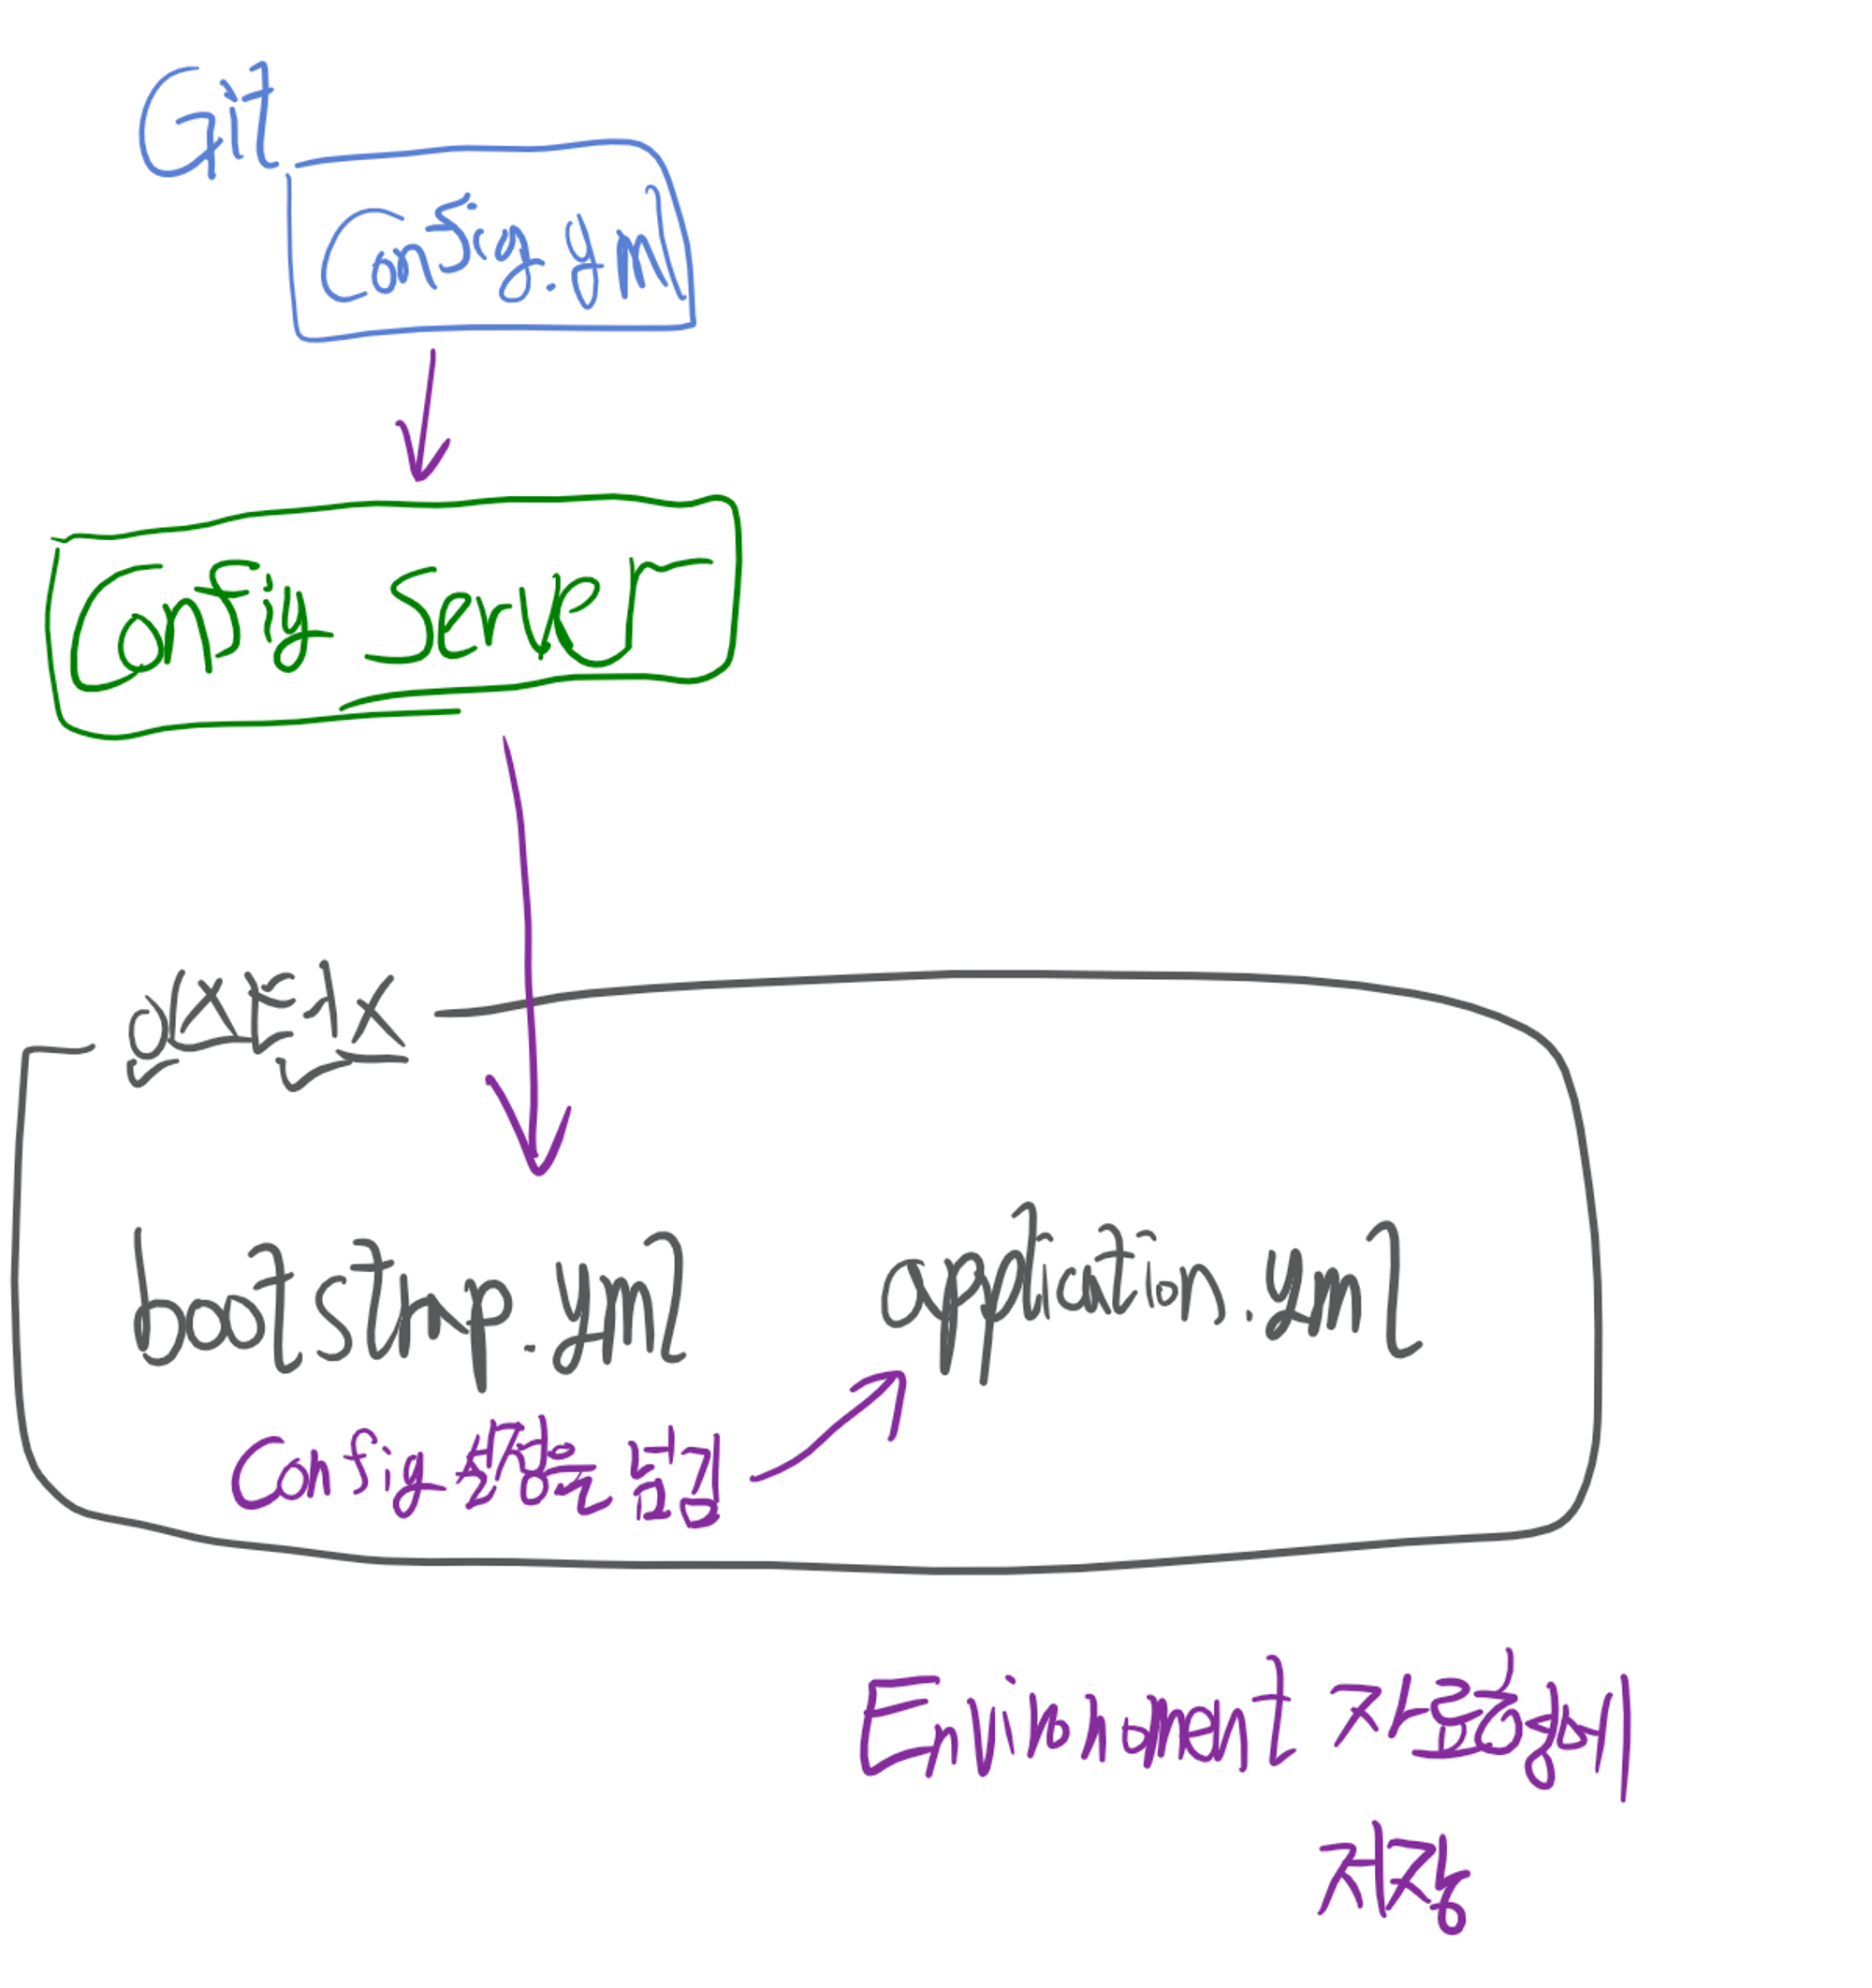
-
Config, Bootstrap 의존성 추가
// Spring Cloud Config Client 의존성
    implementation 'org.springframework.cloud:spring-cloud-starter-config'
    implementation 'org.springframework.cloud:spring-cloud-starter-bootstrap'
-
bootstrap.yml을 추가
# bootstrap.yml spring: cloud: config: uri: http://localhost:config서버포트번호 # http://localhost:8888 name: yml파일명 # config -
Environment 파일을 이용해 해당 프로퍼티를 얻어올 수 있는지 확인
@RestController
@RequestMapping("/first-service")
@RequiredArgsConstructor
public class FirstserviceController {
    private final Environment env;
    @RequestMapping(value="/port-check", method = RequestMethod.GET)
    public String portCheck(){
        return env.getProperty("local.server.port") + "/" + env.getProperty("test.value");
            // server.port로 쓰면 port번호가 0으로 나타난다.
    }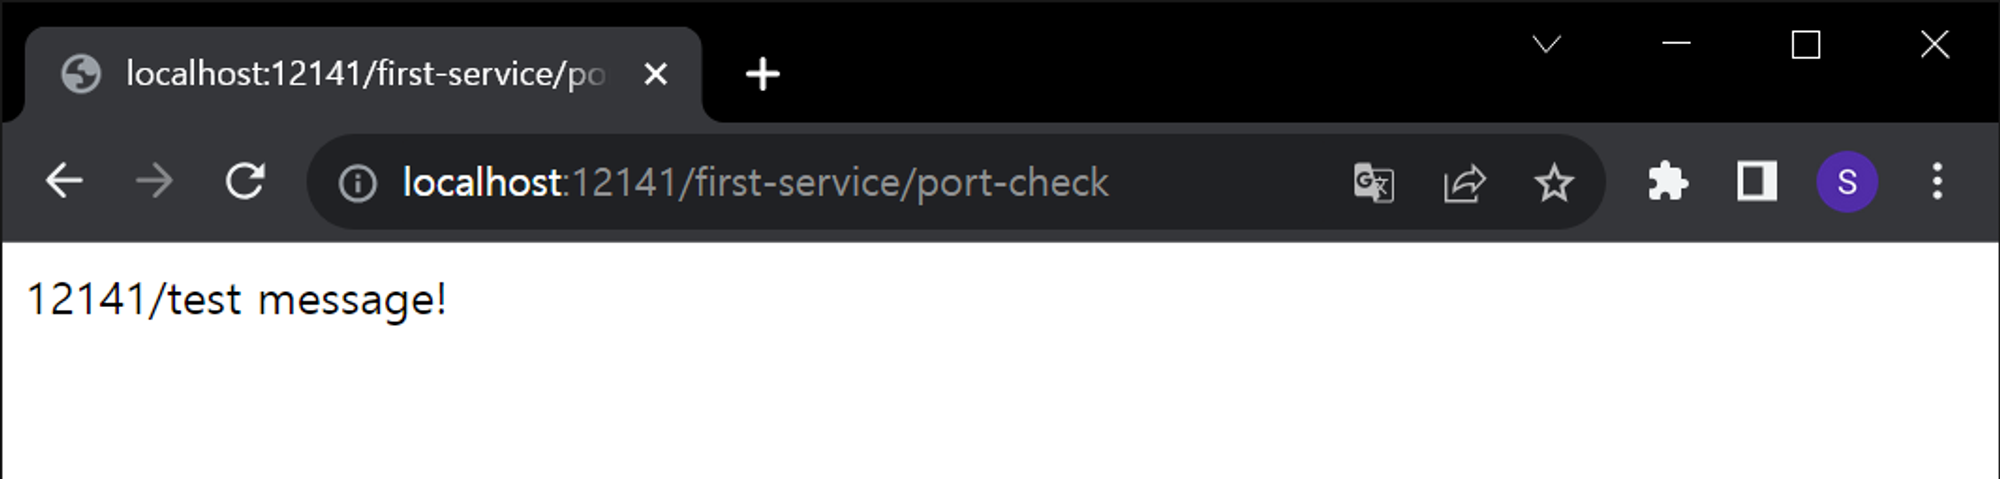
config.yml의 정보를 first-service 인스턴스가 기가맥히게 받아 왔다
원격 레포에 올린 파일을 이용한 처리
  github에 레포지토리 만들어서 등록 후 연결,
Config Server의 application.yml에 레포지 주소 연동spring:
cloud:
config:
server:
git:
uri: # 레포지토리 주소
username:
password:
#퍼블릭에서는 불필요깎고 깎은 Config Server
-
원격으로 연결된 Git Repo 주소에 yml 파일들 생성
# db.yml
server:
  port: 0

spring:
  application:
    name: ${userName}
  datasource:
    url: ${dbUrl}
    username: root
    password: 1234
	# ${userName}과 ${dbUrl}은 개별 MS에서 사용하는 정보
# db-mysql.yml spring: datasource: driver-class-name: com.mysql.cj.jdbc.Driver# eureka.yml eureka: client: fetch-registry: true register-with-eureka: true service-url: defaultZone: http://127.0.0.1:8761/eureka instance: instance-id: ${spring.application.name}:${spring.application.instance_id:${random.value}} # 위 ${spring.application.name} 등은 로컬에서 받아올 예정 -
개별 MS 서버 설정
# application.yml
spring:
  profiles:
    active: mysql, userConfig
	# git repo에 저장한 db-mysql과 로컬의 application-userConfig 불러오기
  jpa:
    hibernate:
      ddl-auto: create
    properties:
      hibernate:
        format_sql: true
    show-sql: true
	# JPA는 데이터베이스와의 상호 작용 및 데이터 관리를 시작하기 위해 필요하며,
	#    영속성을 관리해야하기 때문에 런타임 시작 시에 초기화할 필요가 있다.
* 영속성 관리 : 데이터베이스와 상호 작용하고 데이터를 영구적으로 보존하는 프로세스# application-userConfig.yml userName: User-Service dbUrl: jdbc:mysql://localhost:3306/msa_db # config server에 있는 db.yml의 내용 집어넣는 설정 파일# bootstrap.yml spring: cloud: config: uri: http://127.0.0.1:8888 name: db,eureka # config server의 db와 eureka yml파일 받을 것
이를 원본과 비교하면
server:
  port: 0

spring:
  profiles:
    active: db
  application:
    name: Order-Service
  datasource:
    url: ${dbUrl}
    username: ${dbName}
    password: ${dbPassword}
    driver-class-name: ${driver-class-name}
  jpa:
    hibernate:
      ddl-auto: create
    properties:
      hibernate:
        format_sql: true
    show-sql: true

eureka:
  client:
    fetch-registry: true
    register-with-eureka: true
    service-url:
      defaultZone: http://localhost:8761/eureka
  instance:
    instance-id: ${spring.application.name}:${spring.application.instance_id:${random.value}}
수정할 부분이 최소화된 것이 보인다
기가맥힌다
진행하면서 체크할 부분
- Visual Code로 yml 수정 이후 저장하고 commit/push하는거 까먹지 말기
- Config Server main에 @EnableConfigServer 붙이기
- Config Server가 사용하는 포트번호로 접근해서 yml 넘어가는지 확인하기
VisualStudio Code의 Git Status 표시
- git init → 파일이 U = untracked 상태 ( 깃이 추적하지 못하는 상태, 등록 안됐으니까)
- git add . → 파일이 A = Stage에 올라온 상태
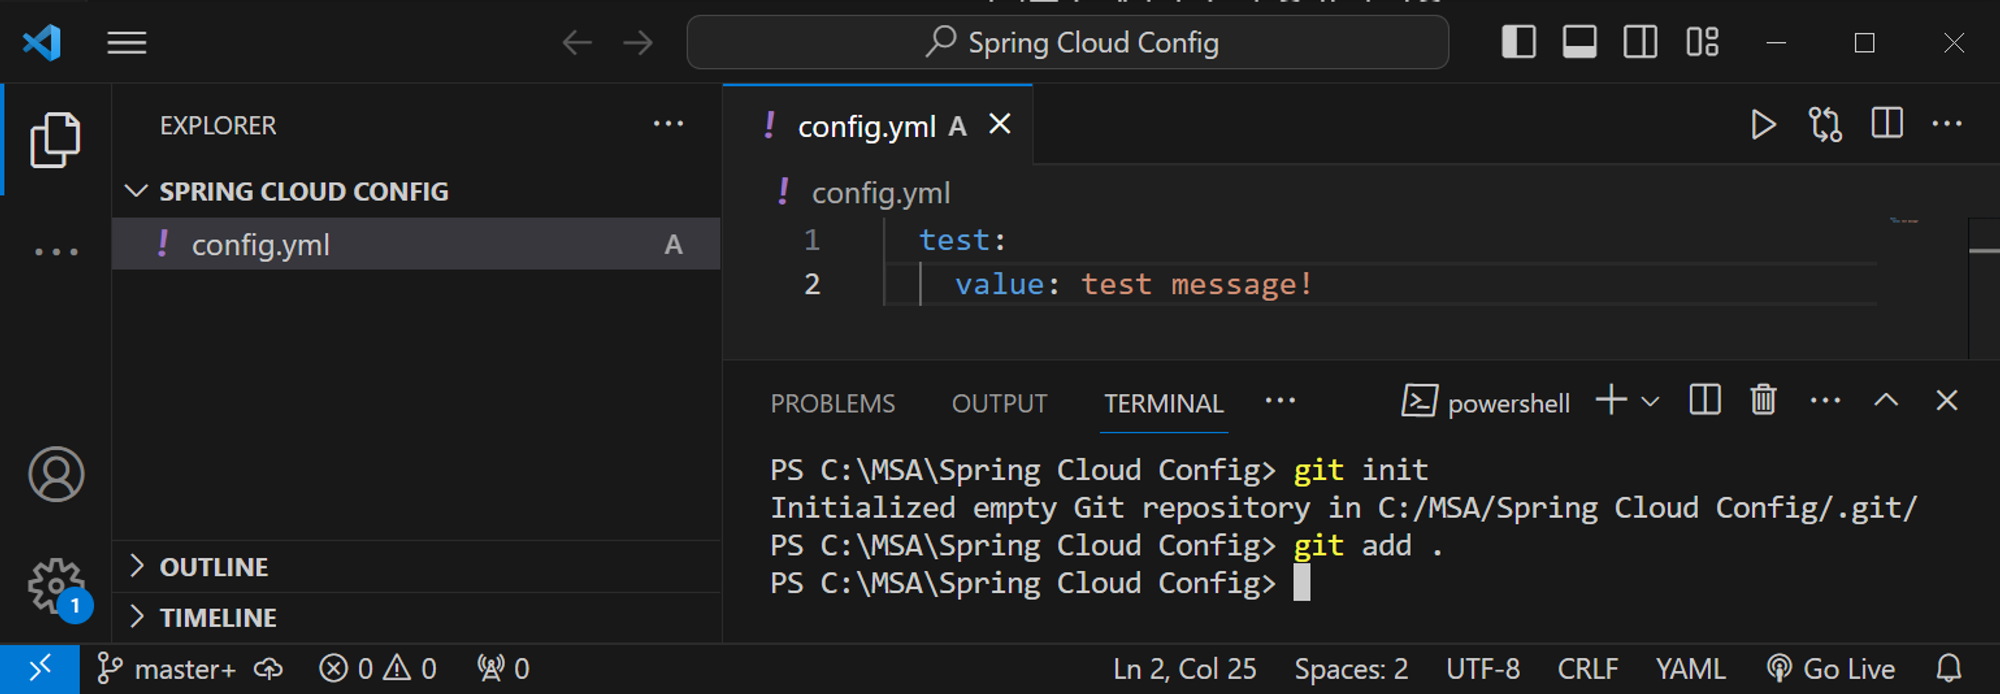
- git commit → Git이 추적 가능한 상태가 돼 아무 표시 X (Tracked상태)
-
수정하면 M으로 표시됨 (Tracked 상태니까)