프로젝트를 깃허브에 올리기 위해서는 당연하게 깃허브 계정이 필요하다.
계정이 생성되었으면 레퍼지토리를 생성하러 가보자.
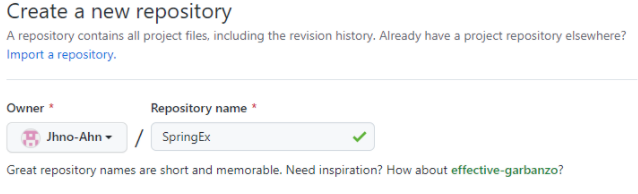
1. 레퍼지토리 생성
- Repositories를 클릭하고
- 우측의 초록색 ‘New’ 버튼을 클릭

- Repository name에 저장소 이름을 작성
- 중단에 Add a README file을 클릭 후
- 하단의 ‘Create repository’ 클릭하여 생성
2. Git 다운로드 및 name, email 설정
- 링크를 통해 깃을 다운로드 한다.
- 설치가 완료되면 Git Bash를 오픈
- user.name과 user.email을 설정해주어야 한다.
- 아래의 명령어를 입력하여 설정해주자
- git config —global user.name “username”
- git config —global user.email “useremail”

- 입력이 완료되면 “git config —list” 명령어를 통해 설정한 이름과 이메일을 확인한다.
3. 이클립스 프로젝트를 GitHub에 올리기
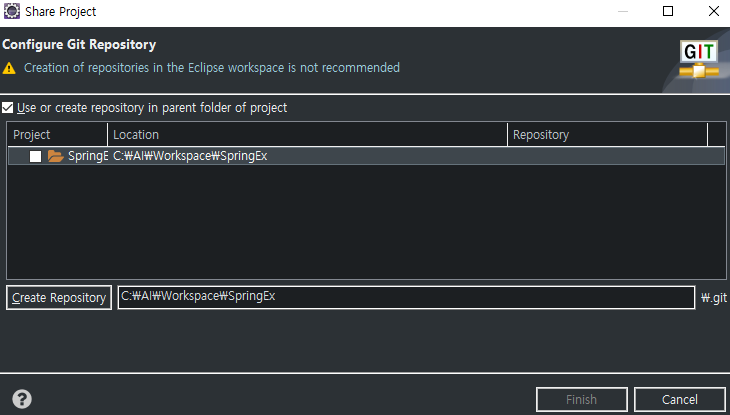
Share Project
- GitHub에 올릴 프로젝트 우클릭 → Team → Share Project 클릭
- 좌측 상단의 Use or create repository in parent folder of project 클릭
- 좌측 하단의 Create Repository 클릭 후 Finish 클릭
- 다시 한번, 프로젝트 우클릭 → Team → Commit 클릭
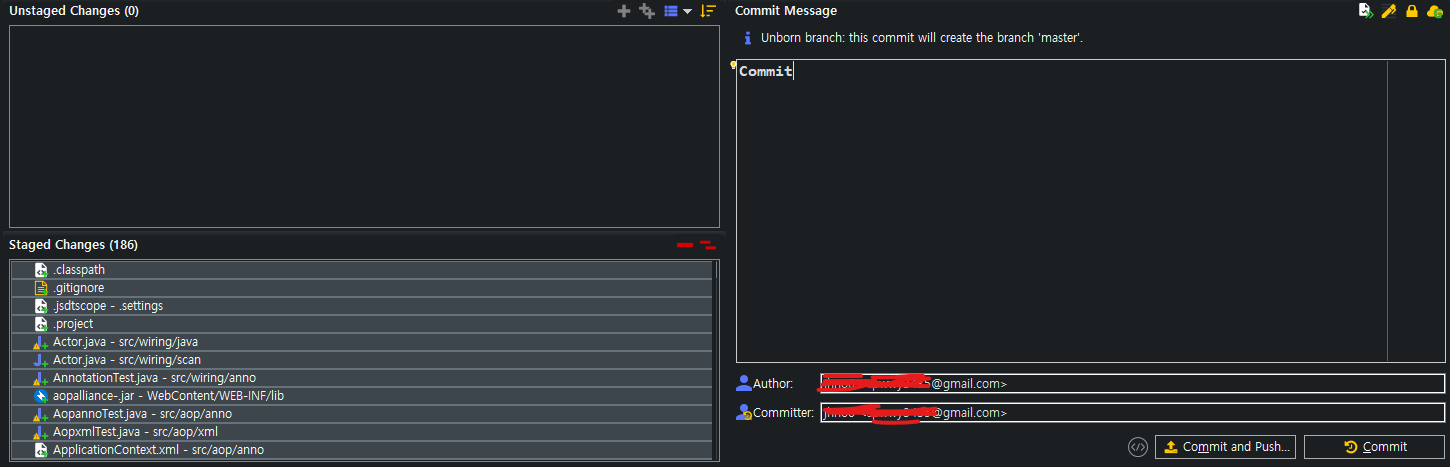
커밋(Commit)
- 위의 Share Project가 완료되면 Git Staging 상태창이 뜬다.
- Unstaged Chages 우측의 Add To Index 버튼을 클릭하게 되면
- Staged Changes로 파일이 옮겨지게 된다.
- 우측 Commit Message에 커밋 메시지를 작성하고
- Commit and Push를 클릭
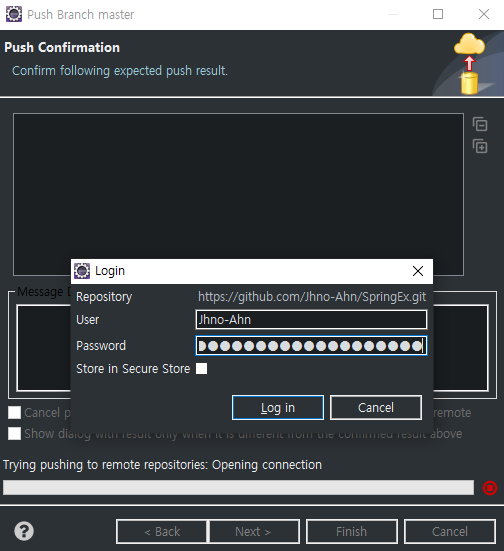
푸쉬(Push)
- URI에 본인이 생성한 Repository 주소를 복사 붙여넣기
- 하단의 User와 Password의 본인 깃허브 정보 입력
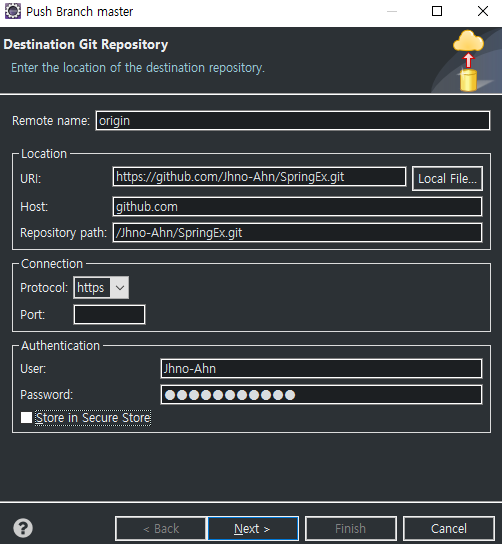
- Next를 두번 누르게 되면 다시한번 로그인 창이 뜨는데
- User에는 본인 깃허브 아이디, Password에는 토큰값을 입력해주어야 하는데 아래 링크 참조 이클립스 깃허브(github) 갑자기 로그인 안됨 해결 (can't connect to any repository, not authorized, git-receive-pack not permitted on)
- 링크를 통해 Token값을 얻었으면, Password창에 토큰값 입력후 Log In버튼 클릭
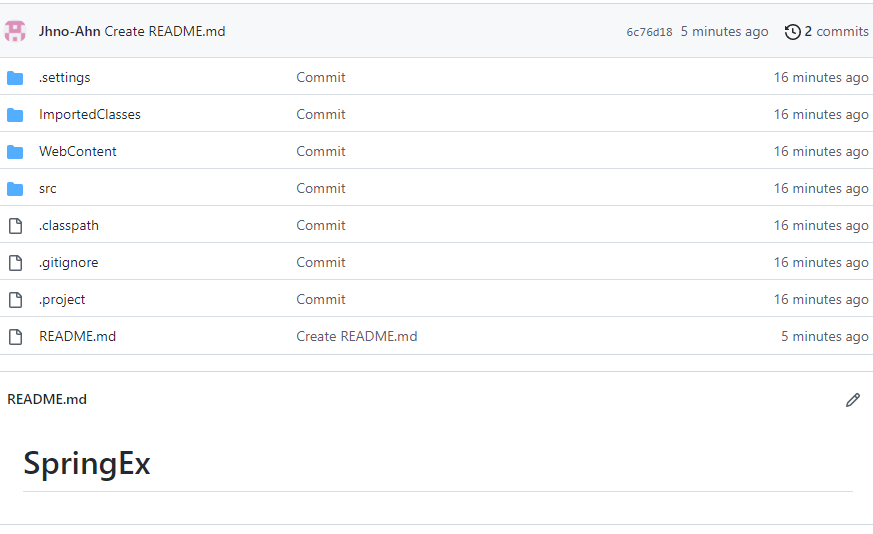
4. 레포지토리 확인
- 1, 2, 3번의 작업이 모두 완료되면 아래의 사진처럼
- 본인의 레포지토리에 프로젝트가 올라간 것을 확인할 수 있다.

걍이렇게돼브렀다리