
목차
1. 채널기초
2. 채널 파이프라인
1. 채널 기초
코루틴에서 Channel은 인터페이스이다. 그리고 이 인터페이스는 'SendChannel'과 'ReceiveChannel'이라는 인터페이스를 상속받고 있다. 아래와 같은 형식으로 말이다.
 interface Channel<E> : SendChannel<E>, ReceiveChannel<E>

public interface SendChannel<in E> {
    public suspend fun send(element: E)
    public fun close(cause: Throwable? = null): Boolean
    // ...
}

public interface ReceiveChannel<out E> {
    public suspend fun receive(): E
    public fun cancel(cause: CancellationException? = null)
    // ...
}
그러기에 Channel을 사용하면 'SendChannel'과 ReceiveChannel'에 정의된 메소드를 사용할 수 있다.(send, receive) 그리고 직관적으로 알 수 있듯이, 'SendChannel'은 '메시지 송신'의 기능을 가지고 있는 요소이며 'ReceiveChannel'은 '메시지 수신'의 기능을 가지고 있다. 실습하면 아래와 같다
fun main() {
    runBlocking {
        val channel = Channel<Int>()
        launch {
            repeat(3) { index ->
                delay(1000)
                Log.i("channelTest", "Send index")
                channel.send(index)
            }
        }
        launch {
            repeat(3) {
                val received = channel.receive()
                Log.i("channelTest", "received $received")
            }
        }
    }
}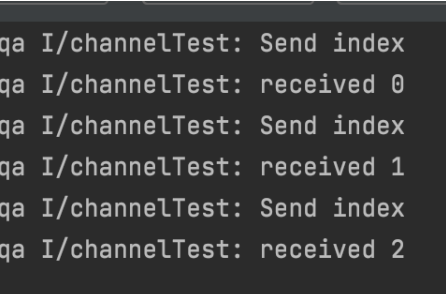
흐름도
1. 채널을 만든다. ( val channel = Channel() )
2. 그 채널에 메시지를 송신한다. ( channel.send(index) )
3. 그 채널 객체를 이용하여 메시지를 수신한다.( channel.receive() )
하지만 이런 채널을 핸들링할 때, 채널을 특정 시기에 맞춰서 꼭 닫아줘야 하는 경우가 있을 수 있다. 이유는 메시지를 송신해주는 코루틴 쪽에서 채널을닫아주지 않으면 수신부 쪽에선 데이터를 계속 수신하기 때문이다. 만약 올바른 시기에 채널을 닫아주지 않고, 데이터를 다시 송신하려 하면 에러가 발생할 것이다. 아래 코드처럼 말이다.
fun main() {
    runBlocking {
        val channel = Channel<Int>()
        launch {
            repeat(5) { idx ->
                Log.i("channelTest", "Send idx first")
                delay(1000)
                channel.send(idx)
            }
            channel.close()
            repeat(5) { idx ->
                Log.i("channelTest", "Send idx second")
                delay(1000)
                channel.send(idx)
            }
        }
        launch {
            for (element in channel) {
                Log.i("channelTest", "received $element")
            }
        }
    }
}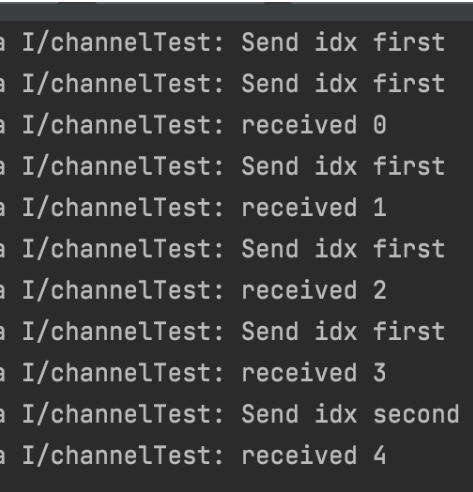

위 로그의 마지막을 보면 'Send idx second'는 한개막 찍혀있다.
마지막 로그, 'received 4'는 'Send idx First'코루틴임을 강조해둔다. 즉, 'Send idx Second'코루틴은 데이터를 송신하지 못했단 뜻이다.
그리고 앱은 비정상 종료가 된다. 채널이 이미 closed되었기 때문이다.
하지만, Channel을 적절히 Close해주지 않았을 경우, 위처럼 비정상 종료의 문제가 있다. 사람은 누구나 실수를 할 수 있다는 것. 그래서 채널을 깜빡하고 닫아주지 못할 수도 있다. 그러므로, 특정 상황에서 채널을 꼭 닫아줘야만 하는 상황에선 'produce'라는 메소드를 사용하면 아주 좋다.
public fun <E> CoroutineScope.produce(
    context: CoroutineContext = EmptyCoroutineContext,
    capacity: Int = 0,
    block: suspend ProducerScope<E>.() -> Unit
): ReceiveChannel<E>
위 메소드는 아래의 코드를 대체할 수 있다.
val channel = Channel()
channel.send(...)
즉, 'produce'스코프 빌더를 사용하여 특정 코루틴에 데이터를 송신할 준비를 마칠 수 있다는 뜻이다.
또한 'produce'메소드를 보면 'ReceiveChannel'을 반환받도록 되어 있다. 그래서 아래와 같은 구현을 통해 또 다른 코루틴에 데이터를 수신받을 수 있는 것이다. (자동 close는 덤)
fun main() {
    runBlocking {

        val channel = produce {
            repeat(5) { idx ->
                Log.i("channelTest", "Send idx first")
                delay(1000)
                send(idx)
            }
        }
        for (element in channel) {
            Log.i("channelTest", "received $element")
        }
    }
}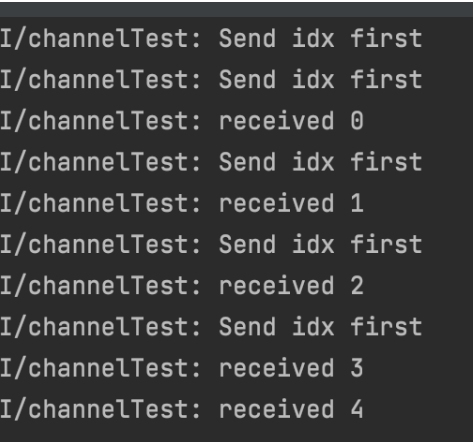
정리하자면, ReceivedChannel을 리턴하는 'channel' 변수만 관리하면 되기에, 채널을 닫는데 있어 관리포인트를 줄일 수 있다는 장점이 있다.
2. 채널 파이프라인
파이프라인이란 '통로'라는 뜻을 가지고 있다. 이를 코루틴의 채널의 개념으로 살짝 옮겨보면 다음과 같이 이해할 수도 있다.
데이터를 보유한 하나의 Channel이 다른 Channel로 데이터를 송신한다. 그리고 송신받은 코루틴 쪽에서 데이터를 가공하여 또 다시 데이터를 송신하는 패턴을 의미한다.
소스코드는 다음과 같다
fun CoroutineScope.numbers(): ReceiveChannel<Int> = produce {
    repeat(3) { num ->
        send(num + 1)
    }
}
fun CoroutineScope.square(numbers: ReceiveChannel<Int>) = produce {
    for (number in numbers) {
        send(number * number)
    }
}
fun main() {
    runBlocking {
        val numbers = numbers()
        val squared = square(numbers)
        for (num in squared) {
            Log.i("channelPipeLineTest", "num $num")
        }
    }
}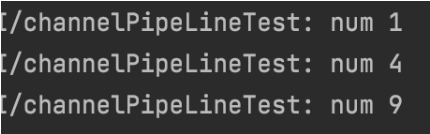
순서
1. numbers()를 사용하여 ReceiveChannel을 반환받는다.
2. ReceiveChannel객체를 또 square()로 넘겨주게 된다.
3. square()내부에선 데이터를 가공한 후, 또 다시 데이터를 송신한다.
이와 같은 패턴을 바로 파이프라인패턴이라고 한다.
3. 채널 팬아웃, 팬인
아~주 간단하게 그림으로 설명해볼까 한다.
Fan-Out과 Fan-In의 공통점
결국 하나의 채널로 데이터를 송수신 한다.
[ 팬 아웃 ]
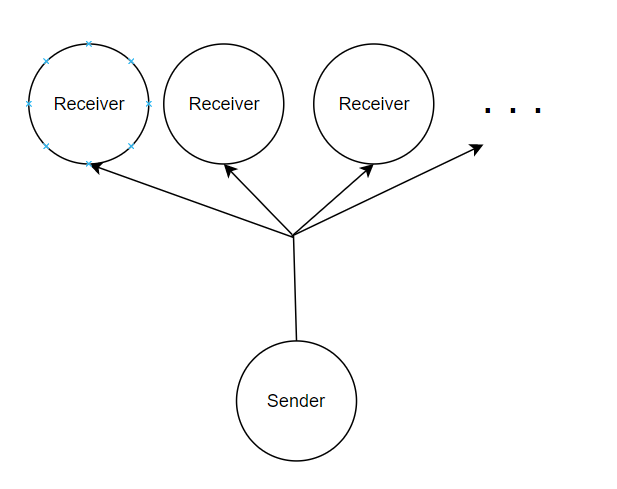
간단히 말해, 하나의 코루틴에서 전송한 메시지를 하나의 채널을 사용하여 여러개의 코루틴에서 수신받겠다는 의미이다.
[소스코드]
fun CoroutineScope.produceNumbers() = produce<Int> {
var x = 1
while (true) {
send(x++)
delay(100L)
}
}
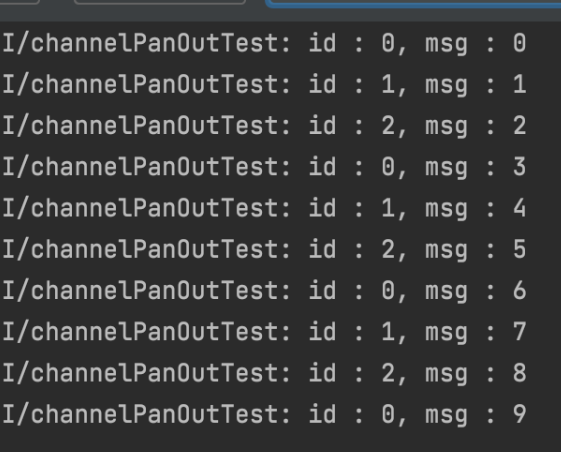
fun CoroutineScope.processNumber(id: Int, channel: ReceiveChannel<Int>) = launch {
channel.consumeEach {
println("Processor #${id} received ${it}")
}
}
fun main() = runBlocking<Unit> {
val producer = produceNumbers()
repeat (5) {
processNumber(it, producer)
}
delay(1000L)
producer.cancel()
}소스코드를 보면 알겠지만, produceNumbers()에서 하나의 코루틴을 생성하고 있다. 그리고 processNumber를 통하여 여러개의 코루틴을 생성하고 있다. 이 둘은 하나의 Channel(=ReceiveChannel)을 통하여 통신한다.
[ 팬 인 ]
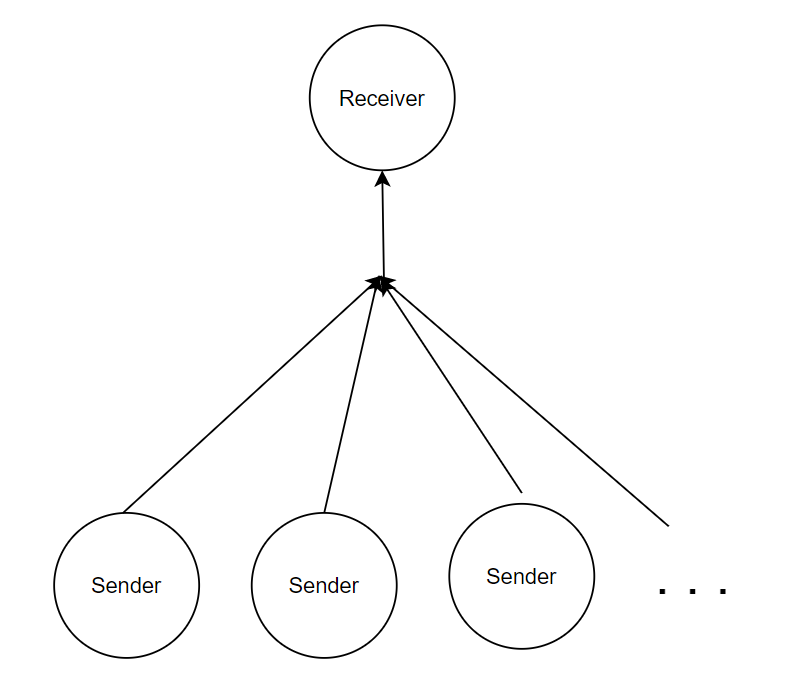
Fan-In의 반대로써, 여러개의 코루틴에서 메시지를 송신한다. 그리고 하나의 Channel을 통해 하나의 코루틴에서 해당 메시지를 모두 받겠다는 의미이다.
[ 소스코드 ]
suspend fun produceNumbers(channel: SendChannel<Int>, from: Int, interval: Long) {
    var x = from
    while (true) {
        channel.send(x)
        x += 2
        delay(interval)
    }
}

fun CoroutineScope.processNumber(channel: ReceiveChannel<Int>) = launch {
    channel.consumeEach {
        println("received ${it}")
    }
}


fun main() = runBlocking<Unit> {
    val channel = Channel<Int>()
    launch {
        produceNumbers(channel, 1, 100L)
    }
    launch {
        produceNumbers(channel, 2, 150L)
    }
    processNumber(channel)
    delay(1000L)
    coroutineContext.cancelChildren()
}
팬 아웃의 반대대로, processNuber()을 통하여 하나의 코루틴에서 데이터를 송신하고 있다. 그리고 produceNumbers()를 통해 여러개의 코루틴에서 데이터를 수신받고 있음을 알 수 있다. 물론 하나의 Channel로 말이다.
팬 아웃과 팬 인의 공통점
다시 한 번 강조하자면 결국 두 패턴 모두 하나의 Channel을 통하여 데이터를 공유한다는 뜻이다. 1 -> N이냐 N -> 1이냐에 따라 각각 팬 아웃이냐 팬 인이냐로 나뉘는 것이다.