
📌GIT을 설치해야 GITHUB repository와 연동이 가능!
1) Github에 회원가입
2) 프로젝트를 업로드 할 Repository 생성

3) Github으로 업로드 하는 방법
	1. Visual Studio 에서  workspace 생성 ➡ file 생성
    2. terminal 오픈
📌Visual Studio 화면 창
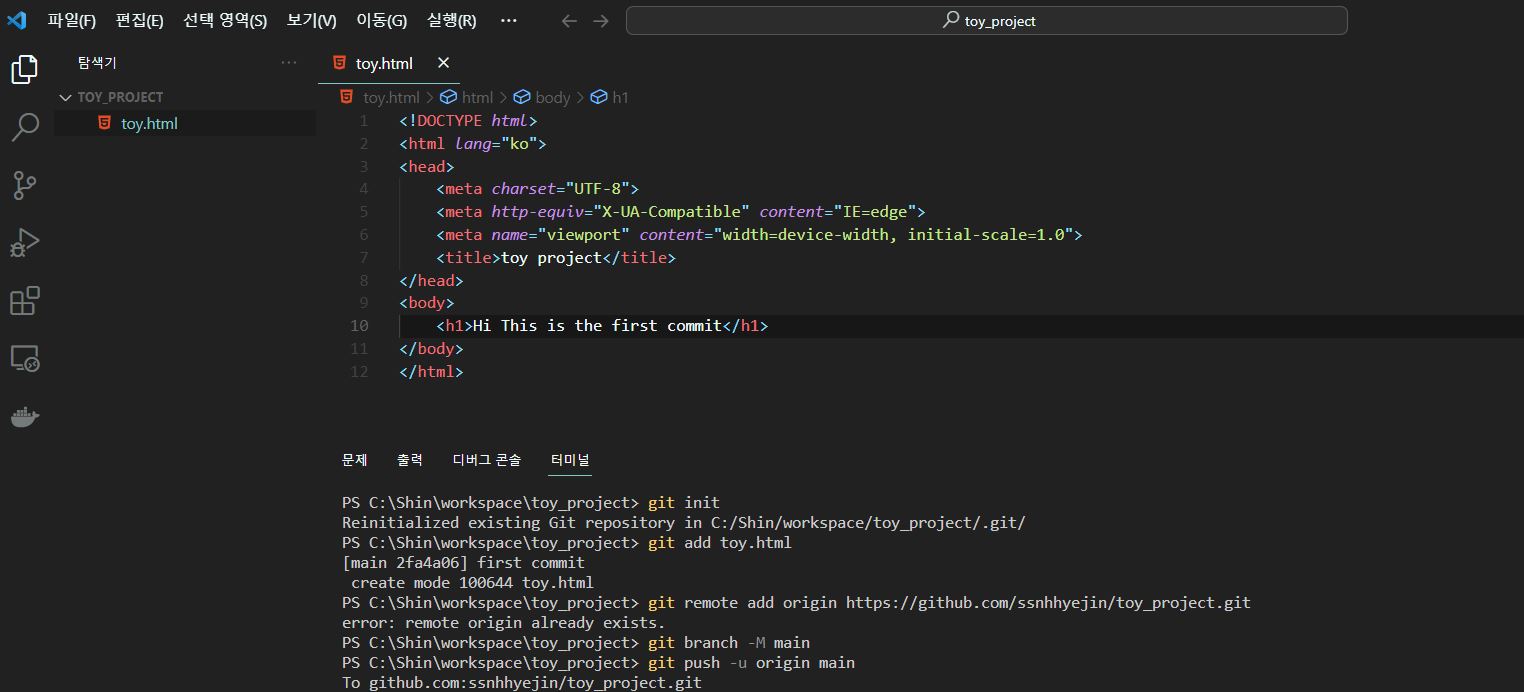
👇 처음 repository를 생성 후 아무것도 push 하지 않으면 github에서는 push 방법을 알려준다!
👇사진 안 명령어를 그대로 사용하면 된다!
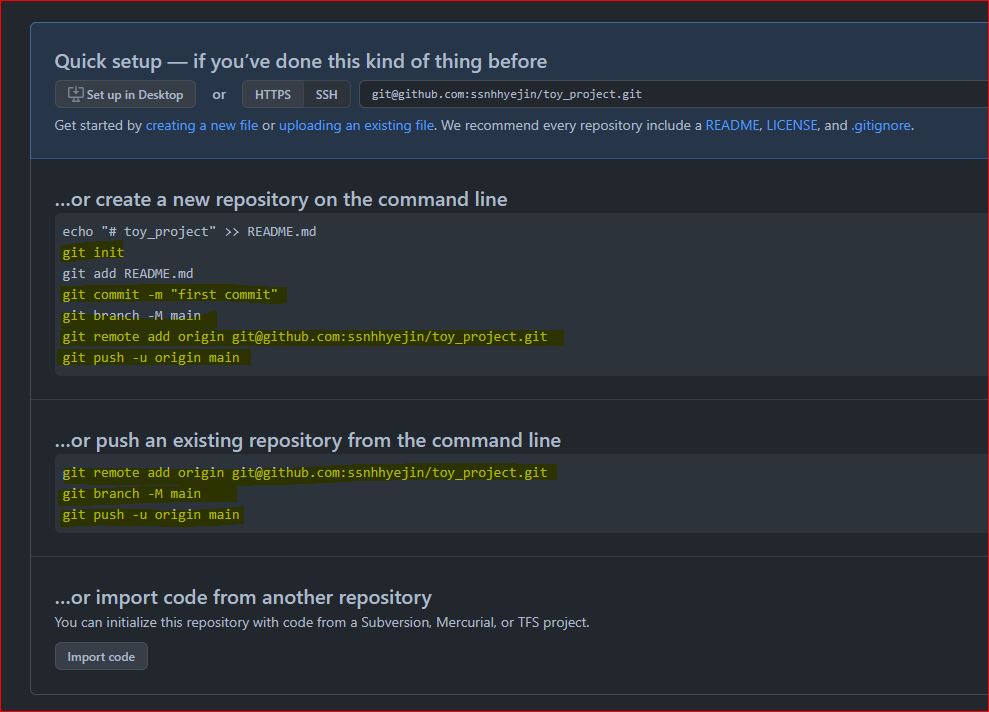
1️⃣ git init.
2️⃣ git add . or git add "파일명" (. 은 모든 파일을 의미)
3️⃣ git commit -m "커밋 할 때 쓸 메시지"
✔ commit을 완료 했으면 업로드 할 로컬 저장소와 업로드 될 repository를 연결 시켜줘야 한다!!
4️⃣ git remote add origin "본인의 repository 주소"
 ✔ repository Https 주소를 그대로 복사해서 붙여넣기 하면 된다
5️⃣ git branch -M main :이제는 github 기본 branch명이 master에서 main으로 바뀜!
그래서 push 전에 branch명을 적어줘야 한다.
6️⃣git push -u origin main (origin은 나의 로컬저장소를 의미, main은 내 repository 가장 기본 branch 명
-> 만약 회사라면 최종 상품이 만들어지는, 팀원들의 소스코드가 합쳐지는 최종 소스코드 합본이라고 생각하면 쉽다.)
✅터미널에서 실행✅
PS C:\Shin\workspace\toy_project> git init
Reinitialized existing Git repository in C:/Shin/workspace/toy_project/.git/
PS C:\Shin\workspace\toy_project> git add toy.html
[main 2fa4a06] first commit
 create mode 100644 toy.html
PS C:\Shin\workspace\toy_project> git remote add origin https://github.com/ssnhhyejin/toy_project.git
error: remote origin already exists.
PS C:\Shin\workspace\toy_project> git branch -M main
PS C:\Shin\workspace\toy_project> git push origin main
Enumerating objects: 7, done.
Counting objects: 100% (7/7), done.
Delta compression using up to 8 threads
Compressing objects: 100% (4/4), done.
Writing objects: 100% (5/5), 730 bytes | 365.00 KiB/s, done.
Total 5 (delta 0), reused 0 (delta 0), pack-reused 0
To github.com:ssnhhyejin/toy_project.git
   52eb2ea..f4d3b62  main -> main
👉 git push 할 때, 최초의 push 인 경우 -u라는 옵션을 써준다
(내건 이미 directory를 remote 시켜놔서 already exists라고 뜸)
👉 push 해주면 알아서 github에 업로드 된다!
📌Github에서 확인
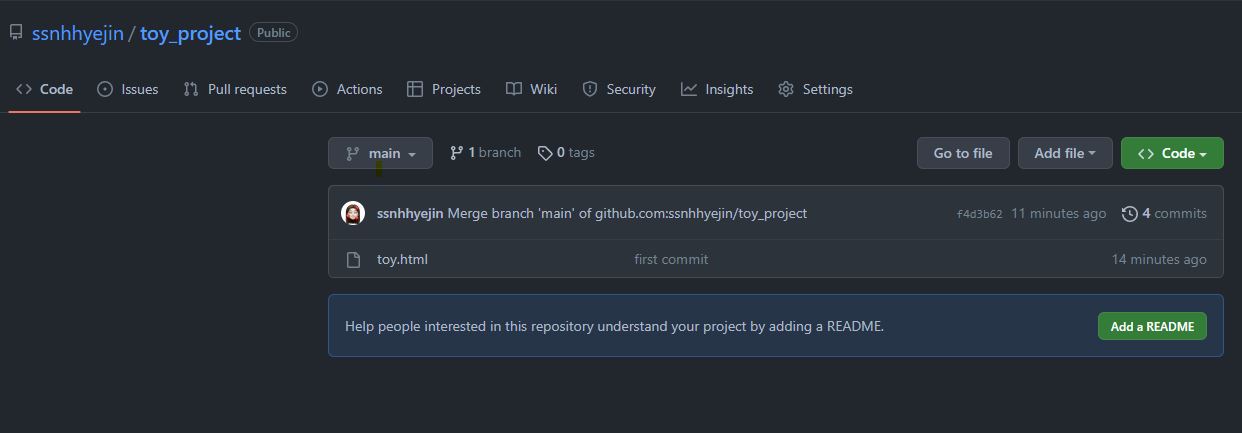
1️⃣ main 브랜치명 확인하기! ➡ 내가 push한 branch명 확인 가능
2️⃣ 숫자+commits : 이 부분을 클릭하면 commit log를 확인할 수 있다!
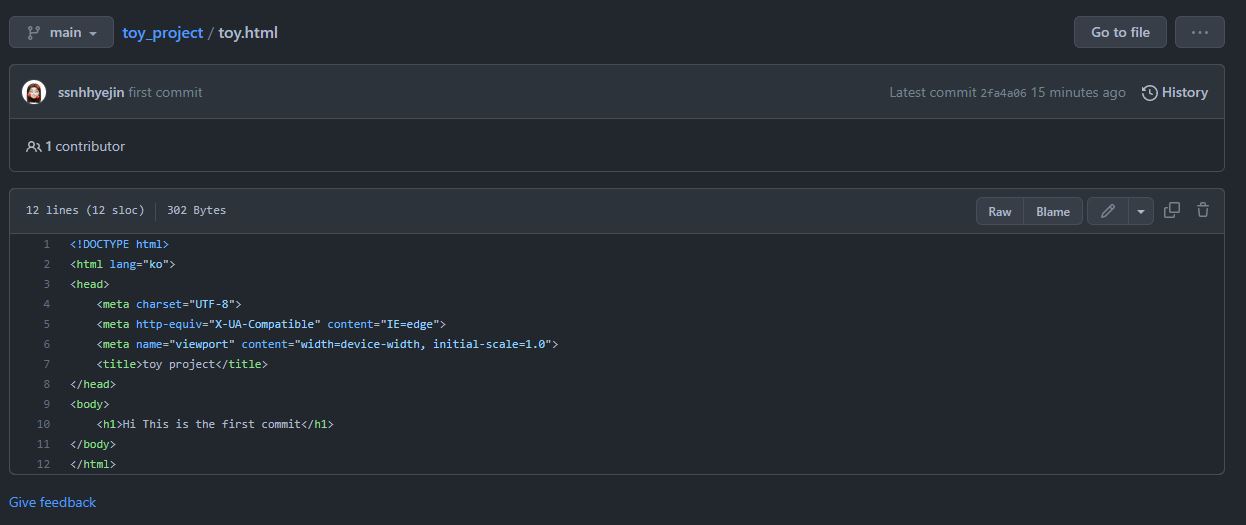
터미널 창에서 ($ git log command line으로도 확인 가능)📌Repository에 잘 올라간 것을 확인하면 끝‼👏👏