jQuery effect 문제
- 다음을 애니메이션 효과를 주자.
go 버튼을 누르면 "내용1"이 오른 쪽으로 일정간격 이동하게.
back 버튼을 누르면 "내용1"이 왼 쪽으로 일정간격 이동하게.
<!DOCTYPE html>
<html lang="ko">

<head>
  <meta charset="UTF-8">
  <title> 효과와 애니메이션 </title>
  <script src="js/jquery.js"></script>
  <script>
    $(function () {
      var move = 0;
      $(".btnWrap").on("click", ".backBtn", function () {
        move -= 20;
        $(".txt1").animate({ marginLeft: move }, "slow");
      });
      $(".btnWrap").on("click", ".goBtn", function () {
        move += 20;
        $(".txt1").animate({ marginLeft: move }, "slow");
      });
    });
  </script>
  <style>
    * {
      margin: 0;
      padding: 0;
    }

    body {
      padding: 20px;
    }

    .btnWrap {
      margin-bottom: 10px;
    }

    .wrap {
      max-width: 600px;
      border: 1px solid #000;
    }

    .txt1 {
      width: 10%;
      text-align: center;
      background-color: aqua;
    }
  </style>
</head>

<body>
  <p class="btnWrap">
    <button class="backBtn">Back</button>
    <button class="goBtn">Go</button>
  </p>
  <div class="wrap">
    <p class="txt1">내용1</p>
  </div>
</body>

</html>
- 버튼을 눌렀을 때 효과(Effect) 메서드를 이용하여 h1이 점점 투명해지면서 사라지도록 만들어 보세요. 단, 사라지는 속도는 1초로 설정하세요.
(jquery_effect_test1_a.html)
<!DOCTYPE html>
<html lang="ko">
<head>
<meta charset="UTF-8">
<title> 효과와 애니메이션 </title>
<script src="js/jquery.js"></script>
<script>
$(function() {
  $("#btn").on("click",function(){
    $("h1").fadeOut(1000);
  });
});
</script>
</head>
<body>
 <button id="btn">버튼</button>
 <h1>내용</h1>
</body>
</html>- 버튼을 누를 때마다 애니메이션 메서드를 이용하여 p 태그가 50px 단위로 오른쪽으로 이동되도록 만들어 보세요. 단, 이동 속도는 0.5초로 설정하세요.
<!DOCTYPE html
  PUBLIC "-//W3C//DTD XHTML 1.0 Transitional//EN" "http://www.w3.org/TR/xhtml1/DTD/xhtml1-transitional.dtd">
<html xmlns="http://www.w3.org/1999/xhtml" lang="ko" xml:lang="ko">

<head>
  <meta http-equiv="content-type" content="text/html; charset=utf-8" />
  <title> new document </title>
  <script type="text/javascript" src="js/jquery.js"></script>
  <script type="text/javascript">

    $(function () {
      $("#btn").on("click", function () {
        $("#ctx").animate({ marginLeft : "+=50px" }, 500); // 0.5초 동안 50px 오른쪽으로 이동
      });
    });

  </script>
  <style type="text/css">
    * {
      margin: 0;
      padding: 0;
    }

    #ctx {
      width: 50px;
      height: 50px;
      background: yellow;
    }
  </style>

<body>
  <button id="btn">버튼</button>
  <p id="ctx">내용</p>
</body>

</html>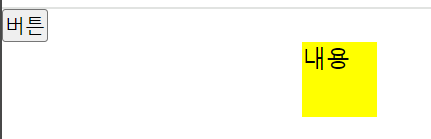
- 클래스가 btn2인 것을 감춘다.
클래스가 btn1인 것을 클릭하면 다음과 같은 내용을 실행한다.
( 클래스가 box인 것을 1초에 걸쳐서 일정하게 위로 올려서 안보이네 한다.
위에 행위가 끝나면 콜백함수가 다음에 내용을 실행한다.
클래스가 btn1인 것을 감춘다.
클래스가 btn2인 것을 보이게 한다.)
클래스가 btn2인 것을 클릭하면 다음과 같은 내용을 실행한다.
( 클래스가 box인 것을 1초에 걸쳐서 처음과 끝은 느리게, 중간은 빠르게 가속도를 줘서 보이게 합니다. 보이는 게 끝나면 클래스 btn2는 숨기고 btn1은 보이게 합니다.)
클래스 btn3를 클릭 했을 때 클래스 box를 토글로 1초에 걸쳐서 위로 올라가면서 안보이게, 내려 오면서 보이게 합니다. 가속도는 일정한 속도로 줍니다.
클래스 btn4를 클릭했을 때 클래스 box를 빠르게 0.3의 불투명도로 보이게 합니다.
클래스 btn5를 클릭했을 때 클래스 box를 빠르게 1의 불투명도로 보이게 합니다.
<!DOCTYPE html>
<html lang="ko">

<head>
  <meta charset="UTF-8">
  <title> 효과와 애니메이션 </title>
  <script src="js/jquery.js"></script>
  <script>
    $(function () {
      $(".btn2").hide();

      $(".btn1").on("click", function () {
        $(".box").slideUp(1000, "linear",
          function () {
            $(".btn1").hide();
            $(".btn2").show();
          });
      });

      $(".btn2").on("click", function () {
        $(".box").fadeIn(1000, "swing",
          function () {
            $(".btn2").hide();
            $(".btn1").show();
          });
      });

      $(".btn3").on("click", function () {
        $(".box").slideToggle(1000, "linear");
      });

      $(".btn4").on("click", function () {
        $(".box").fadeTo("fast", 0.3);
      });

      $(".btn5").on("click", function () {
        $(".box").fadeTo("fast", 1);
      });

    });
  </script>
  <style>
    .content {
      width: 400px;
      background-color: #eee;
    }
  </style>
</head>

<body>
  <p>
    <button class="btn1">slideUp</button>
    <button class="btn2">fadeIn</button>
  </p>
  <p>
    <button class="btn3">toggleSide</button>
  </p>
  <p>
    <button class="btn4">fadeTo(0.3)</button>
    <button class="btn5">fadeTo(1)</button>
  </p>
  <div class="box">
    <div class="content">
      Lorem ipsum dolor sit amet, consectetur adipiscing elit. Maecenas feugiat consectetur nibh, ut luctus urna
      placerat non. Phasellus consectetur nunc nec mi feugiat egestas. Pellentesque et consectetur mauris, sed rutrum
      est. Etiam odio nunc, ornare quis urna sed, fermentum fermentum augue. Nam imperdiet vestibulum ipsum quis
      feugiat. Nunc non pellentesque diam, nec tempor nibh. Ut consequat sem sit amet ullamcorper sodales.
    </div>
  </div>
</body>

</html>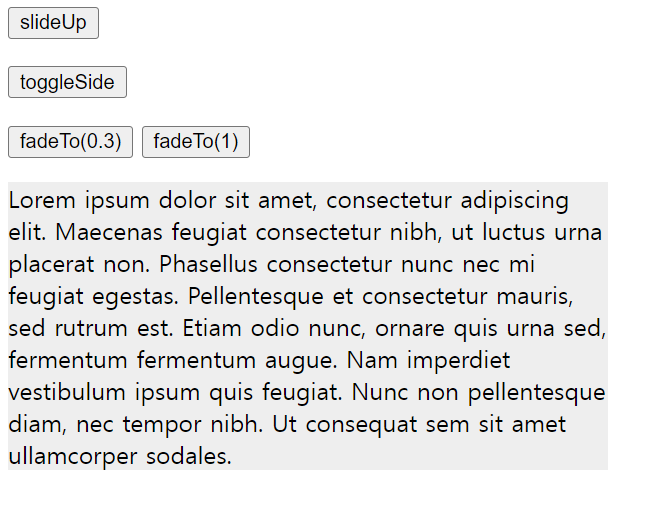
- 클래스 btn1을 클릭했을 때 클래스 txt1인 것에 왼쪽 마진을 500px을 주고 글자크기를 30px을 주는데, 2초에 걸쳐서 일정한 속도로.
애니메이션 효과가 끝나면, 경고창으로 "모션 완료!"라고 출력하자.(애니메이션효과)
클래스 btn2를 클릭했을 때 클래스 txt2인 것에 1초에 걸쳐서 외쪽 마진을 50씩 추가하자.(애니메이션효과)
<!DOCTYPE html>
<html lang="ko">
<head>
<meta charset="UTF-8">
<title> 효과와 애니메이션 </title>
<script src="js/jquery.js"></script>
<script>
$(function(){
    $(".btn1").on("click", function( ) {
        $(".txt1").animate({
            marginLeft:"500px",
            fontSize:"30px"
        },
        2000, "linear", function( ) {
            alert("모션 완료!");
        });
    });

    $(".btn2").on("click", function( ) {
        $(".txt2").animate({
            marginLeft:"+=50px"
        },1000);
    });
});
</script>
<style>
    .txt1{background-color: aqua;}
    .txt2{background-color: pink;}
</style>
</head>
<body>
    <p><button class="btn1">버튼1</button></p>
    <span class="txt1">"500px" 이동</span>
    <p><button class="btn2">버튼2</button></p>
    <span class="txt2">"50px"씩 이동</span>
</body>
</html>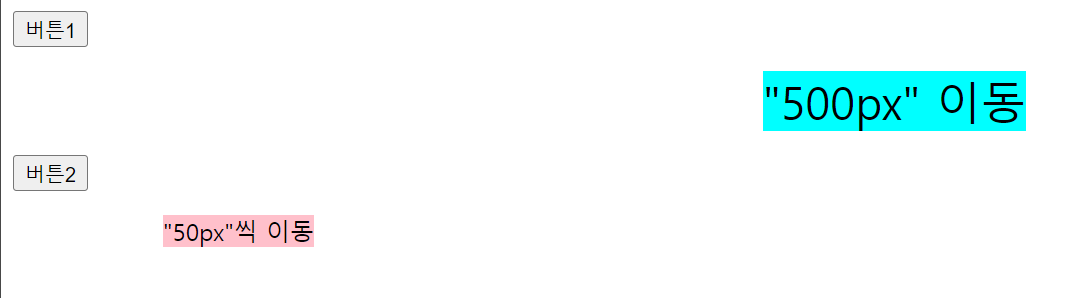
- 다음을 애니메이션 효과를 줘서 구현하자.
클래스 txt1을 1초에 걸쳐서 왼쪽 마진을 300을 주자
클래스 txt2를 딜레이를 3초를 주자. 그리고 왼쪽 마진을 300을 1초에 걸쳐서 주자.
btn1을 클릭 했을 때
(① 클래스 txt3에 왼쪽 마진을 0.8초에 걸쳐서 50씩 추가하자.
② 클래스 txt4에 왼쪽 마진을 0.8초에 걸쳐서 50씩 추가하자. 애니메이션을 정지시키자.
③ 클래스 txt5에 왼쪽 마진을 0.8초에 걸쳐서 50씩 추가하자. 대기 중인 애니메이션을 모두 제거하고,
진행 중인 애니메이션을 강제 종료합니다.)
<!DOCTYPE html>
<html lang="ko">
<head>
<meta charset="UTF-8">
<title> 효과와 애니메이션 </title>
<script src="js/jquery.js"></script>
<script>
$(function(){
    $(".txt1")
    .animate({marginLeft:"300px"},1000);

    $(".txt2").delay(3000)
    .animate({marginLeft:"300px"},1000);

    $(".btn1").on("click", moveElement);

    function moveElement( ) {
        $(".txt3")
        .animate({marginLeft:"+=50px"},800);
/*
[버튼1]을 누를 때마다 class 값이 "txt3"인 요소가 0.8초간
50px씩 이동합니다.
*/
        $(".txt4")
        .animate({marginLeft:"+=50px"},800);
        $(".txt4").stop()
/*
stop()이 실행되면 [버튼1]을 눌러도 애니메이션이 동작하지
않습니다.
*/
        $(".txt5")
        .animate({marginLeft:"+=50px"},800);
        $(".txt5").stop(true, true)
/*
stop(true, true)가 실행되면 [버튼1]을 눌러도 애니메이션이
바로 종료 시점으로 이동합니다. 그래서 애니메이션 없이
css() 메서드를 적용한 것처럼 50px씩 이동합니다.
*/
    }
});
</script>
<style>
    p{width: 110px;text-align: center;}
    .txt1{background-color: aqua;}
    .txt2{background-color: pink;}
    .txt3{background-color: orange;}
    .txt4{background-color: green;}
    .txt5{background-color: gold;}
</style>
</head>
<body>
    <p class="txt1">효과1</p>
    <p class="txt2">효과2<br> delay(3000)</p>

    <p><button class="btn1">50px 전진</button></p>
    <p class="txt3">효과3</p>
    <p class="txt4">효과4<br>stop( )</p>
    <p class="txt5">효과5<br>stop(true, true)</p>
</body>
</html>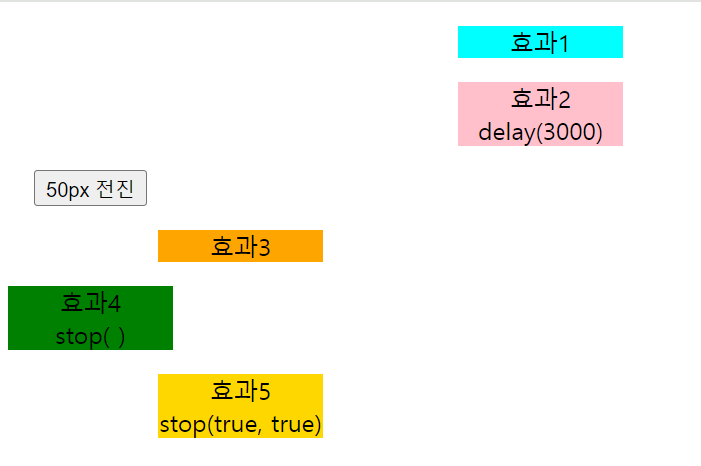
- 다음을 애니메이션 효과를 줘서 구현하자.
클래스가 txt1인 요소에
왼쪽 마진을 200px을 1초에 걸쳐서 준다.
위쪽 마진을 200px을 1초에 걸쳐서 준다.
queue에 콜백함수로 배경색을 빨강색을 주고 dequeue를 호출한다.(한번은 호출해 보고, 한번은 호출을 안해보자)
왼쪽 마진을 1초에 걸쳐서 0으로 준다.
위쪽 마진을 1초에 걸쳐서 0으로 준다.
<!DOCTYPE html>
<html lang="ko">
<head>
<meta charset="UTF-8">
<title> 효과와 애니메이션 </title>
<script src="js/jquery.js"></script>
<script>
$(function(){
    $(".txt1")
    .animate({marginLeft:"200px"},1000)//1초 동안 오른쪽으로 200px이동
    .animate({marginTop:"200px"},1000)//1초 동안 아래로 200px 이동
    .queue(function() { //이동 후에 css적용
            $(this).css({background:"red"});
            $(this).dequeue();//queue()에 애니메이션 취소를 막고
    })
    .animate({marginLeft:0},1000) //왼쪽으로 1초동안 이동
    .animate({marginTop:0},1000); //위쪽으로 1초동안 이동
});
</script>
<style>
    *{margin:0;}
    .txt1{width:50px;text-align:
    center;background-color: aqua;}
</style>
</head>
<body>
    <p class="txt1">내용1</p>
</body>
</html> 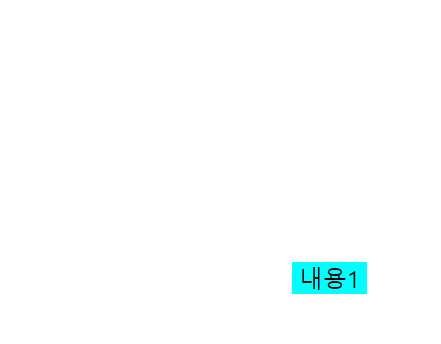
- 클래스 txt1에
왼쪽 마진을 1초에 걸쳐서 100px 준다.
왼쪽 마진을 1초에 걸쳐서 300px 준다.
왼쪽 마진을 1초에 걸쳐서 400px 준다.
클래스 txt2에
왼쪽 마진을 1초에 걸쳐서 100px 준다.
왼쪽 마진을 1초에 걸쳐서 300px 준다.
왼쪽 마진을 1초에 걸쳐서 400px 준다.
진행 중인 애니메이션을 제외하고 큐에서 대기하는 모든 애니메이션 함수를 제거한다.
<!DOCTYPE html>
<html lang="ko">
<head>
<meta charset="UTF-8">
<title> 효과와 애니메이션 </title>
<script src="js/jquery.js"></script>
<script>
$(function() {
    $(".txt1")
    .animate({marginLeft:"100px"},1000)
    .animate({marginLeft:"300px"},1000)
    .animate({marginLeft:"400px"},1000);

    $(".txt2")
    .animate({marginLeft:"100px"},1000)
    .animate({marginLeft:"300px"},1000)
    .animate({marginLeft:"400px"},1000);
    $(".txt2").clearQueue();
/*
clearQueue()를 실행하면 현재 진행 중인 애니메이션을 제외하고 대기 중인 애니메이션은 모두 제거됩니다.
*/
});
</script>
<style>
    .txt1, .txt2{width:50px; text-align:
    center; background-color: aqua;}
    .txt2{background-color:orange;}
</style>
</head>
<body>
    <p class="txt1">내용1</p>
    <p class="txt2">내용2</p>
</body>
</html>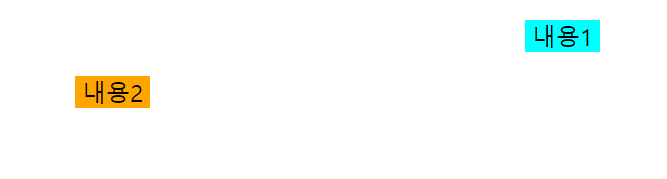
문제 2
- Move Up 버튼을 누르면 "Meke Me Do Stuff!가 위에서 50 위치에 있게 하자.
Move Down 버튼을 누르면 "Make Me Do Stuff!가 위에서 500 위치에 있게 하자.
Add Color 버튼을 누르면 "Make Me Do Stuff!가 글자 색상이 purple 이 되게 하자.
Disappear / Re-appear 버튼을 눌렀을 때 글자가 사라지게 하자. 다시 누르면 글자가 나타나게 하자.
<!DOCTYPE html>
<html lang="ko">

<head>
  <meta charset="UTF-8">
  <meta name="viewport" content="width=device-width, initial-scale=1.0">
  <title>Document</title>
  <script src="js/jquery.js"></script>
  <style>
    h3 {
      text-align: center;
      top: 50px;
      position: relative;
    }

    .hidden {
      display: none;
    }
  </style>
  <script>
    $(function () {
      $("#up").on("click", function () {
        $('h3').css({ top: "50px" });
      });

      $("#down").on("click", function () {
        $("h3").css({ top: "500px" });
      });

      $("#color").on("click", function () {
        $("#word").css("color", "purple");
      });

      $("#view").on("click", function () {
        $("#word").toggleClass("hidden");
      });
    });
  </script>
</head>

<body>
  <div id="container">
    <button id="up">Move Up</button>
    <button id="down">Move Down</button>
    <button id="color">Add Color</button>
    <button id="view">Disappear / Re-appear</button>
  </div>
  <h3 id="word">Make Me Do Stuff!</h3>
</body>

</html>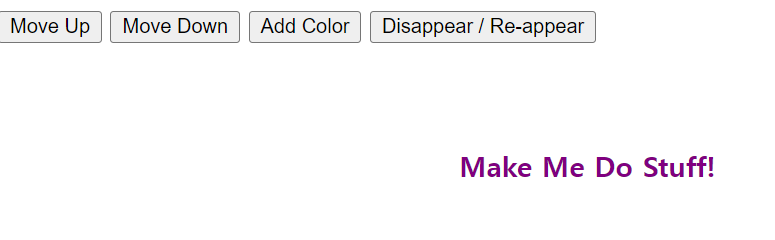
선생님 풀이
<!DOCTYPE html>
<html lang="ko">
<head>
    <meta charset="UTF-8">
    <meta name="viewport" content="width=device-width, initial-scale=1.0">
    <title>Document</title>
    <style>
        #changeMe{
            position : absolute;
            top : 100px;
            left : 400px;
            font : 24px arial;
        }

        #moveUp, #moveDown, #color, #disappear{
            padding : 5px;
        }
    </style>
</head>
<body>
    <button id="moveUp">Move Up</button>
    <button id="moveDown">Move Down</button>
    <button id="color">Add Color</button>
    <button id="disappear">Disappear / Re-appear</button>
    <div id="changeMe">Make Me Do Stuff!</div>
    <script src="https://code.jquery.com/jquery-3.7.1.min.js" integrity="sha256-/JqT3SQfawRcv/BIHPThkBvs0OEvtFFmqPF/lYI/Cxo=" crossorigin="anonymous"></script>
    <script>
        $(document).ready(function(){
            $("#moveUp").on("click", ()=>{
                $("#changeMe").animate({top:"30"}, 200);
            });
            $("#moveDown").on("click", ()=>{
                $("#changeMe").animate({top:"500"}, 2000);
            });
            $("#color").on("click", ()=>{
                $("#changeMe").css("color", "purple");
            });
            $("#disappear").on("click", ()=>{
                $("#changeMe").toggle("slow");
            });
        });
    </script>
</body>
</html>

<!--
  jQuery 함수(와 단축표기)를 소개합니다.
  $는 jQuery의 단축표기입니다. 단축표기를 사용하면 매번 jQuery()라고 쓰지 않아도 됩니다.
  jQuery함수를 jQuery래퍼라고 부르는 사람도 있습니다.

  jQuery() -> jQuery 함수입니다. 괄호 안에 넣은 요소를 선택하는 역할을 합니다.
  $() -> jQuery 단축표기입니다. jQuery라고 여섯 글자를 쓰는 대신 딱 한 글자만 쓰면 됩니다.
-->

<!--
  jQuery 함수에는 세 가지를 넣을 수 있습니다.
  CSS Selector - CSS 선택자를 넣으면 jQuery 함수는 그 선택자에 맞는 요소를 반환합니다.
  HTML - HTML 문자열을 넣으면 브라우저 상의 페이지에 바로 요소를 추가할 수 있습니다.
  JavaScript Object
-->- Show me the Furry Friend of the Day를 클릭하면 개 이미지가 밑으로 슬라이드 되면서 나오게 하자.
다시 클릭하면 위로 슬라이드 되면서 사라지게 하자.
<!DOCTYPE html>
<html lang="ko">

<head>
  <meta charset="UTF-8">
  <meta name="viewport" content="width=device-width, initial-scale=1.0">
  <title>Document</title>
  <script src="js/jquery.js"></script>
  <style>
    body {
      display: flex;
      flex-direction: column;
      position: absolute;
    }

    #furry-friend-button {
      position: relative;
      padding: 20px 20px;
      font-size: 1rem;
      color: #000;
      background-color: #cfaa66;
      border: 2px solid #000000;
      cursor: pointer;
    }

    img {
      border: 2px solid black;
      border-top: none;
      background-color: #cfaa66;

    }
  </style>
  <script>
    $(function () {
      $("#furry-friend-button").on("click", function () {
        $("#dogImage").slideToggle();
      })
    })
  </script>
</head>

<body>
  <button id="furry-friend-button">Show me the Furry Friend <br> of the Day</button>
  <img id="images/dogImage" src="furry_friend.jpg" style="padding : 20px 20px">
</body>

</html>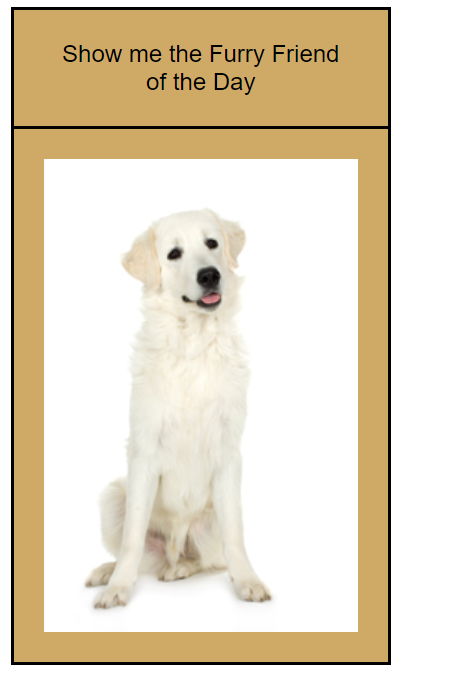
선생님 풀이
<!DOCTYPE html>
<html>
<head>
  <title>Furry Friends Campaign</title>
  <style>
    #clickMe {
      background: #D8B36E;
      padding: 20px;
      text-align: center;
      width: 205px;
      display: block;
      border: 2px solid #000;
    }

    #picframe {
      background: #D8B36E;
      padding: 20px;
      width: 205px;
      display: none;
      border: 2px solid #000;
    }
  </style>
</head>

<body>
  <div id="clickMe">Show me the the Furry Friend of the Day</div>
  <div id="picframe">
    <img src="images/furry_friend.jpg">
  </div>
  <script src="js/jquery.js"></script>
  <script>
    $(function () {
      $("#clickMe").on("click", () => {
        $("#picframe").slideToggle("slow");
      });
    });
  </script>
</body>

</html>- Remove 버튼을 클릭하면 li 요소들을 삭제하자.
<!DOCTYPE html>
<html lang="ko">

<head>
  <meta charset="UTF-8">
  <meta name="viewport" content="width=device-width, initial-scale=1.0">
  <title>Document</title>
  <script src="js/jquery.js"></script>
  <style>
    ul {
      list-style: none;
    }
  </style>
  <script>
    $(function () {
      $("#remove").on("click", function () {
        $("li").remove();
      })
    })
  </script>
</head>

<body>
  <p>할 일 목록</p>
  <ul>
    <li>1. jQuery를 배운다.</li>
    <li>2. 사장에게 임금 인상을 요구한다.</li>
    <li>3. 임금 인상에 대해 다툰다.</li>
  </ul>
  <button id="remove">remove</button>
</body>

</html>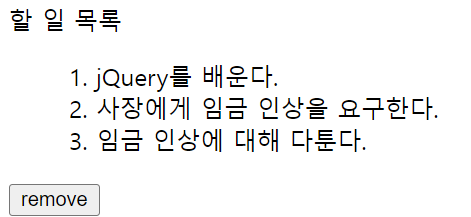
- 4-1.png처럼 ui를 구성하고 버튼을 클릭면 새로운 내용 삽입
<!DOCTYPE html>
<html lang="ko">

<head>
  <meta charset="UTF-8">
  <meta name="viewport" content="width=device-width, initial-scale=1.0">
  <title>Document</title>
  <script src="js/jquery.js"></script>
  <style>

  </style>
  <script>
    $(function () {
      $("#btn").on("click", function () {
        $("p").append("<strong>예를 들면 저 처럼요.</strong>");
      })
    })
  </script>
</head>

<body>
  <button id="btn">clickMe</button>
  <p>Query는 기존 내용을 다시 로드하지 않고도 웹 페이지에 새로운 내용을 삽입할 수 있게 합니다.</p>
</body>

</html>
- 페이지에는 섹션이 네 개 있어야 하고 각 세션마다 'jump for joy' 이미지가 하나씩 있어야 한다.
각 섹션을 클릭할 수 있어야 한다.
'~% 할인 받으셨습니다.' 라는 메시지가 필요한데 할인율은 5% ~ 10% 사이에서 랜덤하게 정해진다.
사용자가 섹션을 클릭하면 그 섹션의 이미지 아래에 할인율 이미지가 나타나야 한다.
사용자가 다시 클릭하면 마지막 메시지를 없애고 새 메시지를 표시한다.
<!DOCTYPE html>
<html>

<head>
  <title>Jump for Joy</title>
  <style>
    div {
      float: left;
      border: solid #000 3px;
      text-align: left;
    }

    .guess_box {
      height: 245px;
    }

    #header {
      width: 100%;
      border: 0px;
      height: 50px;
    }

    #main {
      background-color: gray;
      height: 500px;
    }
  </style>
  <script src="js/jquery.js">
  </script>
</head>

<body>
  <div id="header">
    <h2>Jump for Joy Sale</h2>
  </div>
  <div id="main">
    <div class="guess_box"><img src="images/jump1.jpg" /></div>
    <div class="guess_box"><img src="images/jump2.jpg" /></div>
    <div class="guess_box"><img src="images/jump3.jpg" /></div>
    <div class="guess_box"><img src="images/jump4.jpg" /></div>
  </div>

  <script>
    $(function () {
      $(".guess_box").on("click", function () {
        $(".guess_box p").remove();
        var discount = Math.floor((Math.random() * 6) + 5);
        var discount_msg = "<p>Your Discount is " + discount + "%</p>";
        $(this).append(discount_msg);
      });
    });
  </script>
</body>

</html>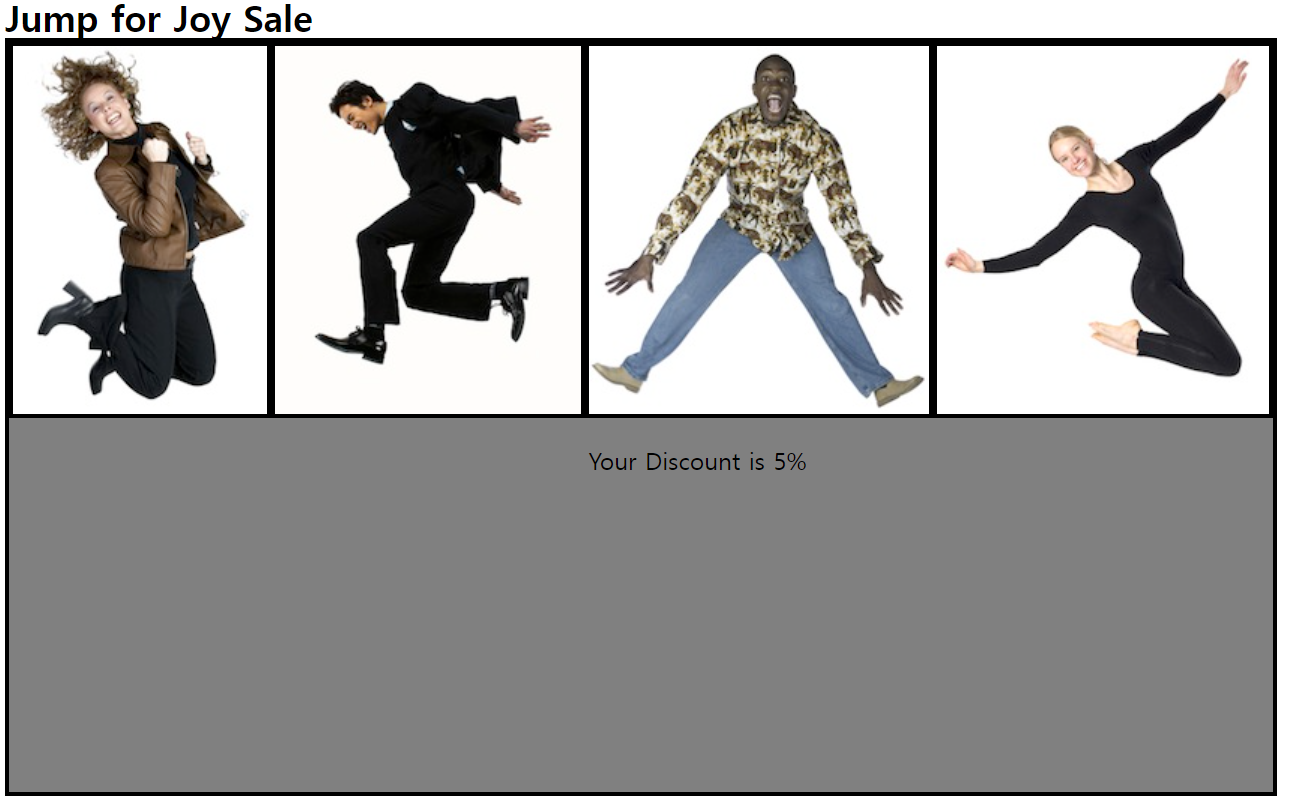
문제 3
-
할인 메시지는 이미지 박스 넷 중 하나에만 들어 있어야 하고, 어느 이미지인지는 페이지를 불러 올때마다 달라야 한다.
-
방문자는 페이지를 불러왔을 때 할인 메시지를 찾을 기회가 단 한 번만 있다. 더 높은 할인율을 찾기 위해 이리저리 눌러보지 않게 해야 한다.
-
마우스를 이미지 위에 올렸을 때 이미지의 보더를 파란색으로 표시하자. 마우스가 빠져나오면 파란색 보더를 없애자.
-
방문자가 맞는 이미지 박스를 클릭했을 때는
"Your Code:CODE45"라는 텍스트를 보여주자.(코드는 0부터 99사이의 랜덤한 숫자이다.)
틀린 이미지를 클릭했을 때는
"Sorry, no discount this time" 이라는 텍스트를 보여주자.
맞는 이미지 박스에는 그린색 보더를 틀린 이미지에는 빨간색보더로 보여주자. -
할인율은 랜덤이 아니라 20%로 고정되어 있다. 따라서 %가 아니라 할인 코드를 표시한다.
(1.png, 2.png, 3.png 참고)
내 풀이
<!DOCTYPE html>
<html>

<head>
  <meta charset="UTF-8">
  <meta name="viewport" content="width=device-width, initial-scale=1.0">
  <title>Jump for Joy</title>
  <link rel="icon" href="http://example.com/favicon.ico" type="image/x-icon">
  <script src="js/jquery.js"></script>
  <style>
    div {
      float: left;
      border: solid #000 3px;
      text-align: left;
    }

    .guess_box {
      height: 245px;
    }

    #header {
      width: 100%;
      border: 0px;
      height: 50px;
    }

    #main {
      background-color: gray;
      height: 500px;
    }

    .correct {
      border-color: green !important;
    }

    .incorrect {
      border-color: red !important;
    }
  </style>

</head>

<body>
  <div id="header">
    <h2>Jump for Joy Sale</h2>
  </div>
  <div id="main">
    <div class="guess_box" code="0"><img src="images/jump1.jpg" /></div>
    <div class="guess_box" code="1"><img src="images/jump2.jpg" /></div>
    <div class="guess_box" code="2"><img src="images/jump3.jpg" /></div>
    <div class="guess_box" code="3"><img src="images/jump4.jpg" /></div>
  </div>

  <script>
    $(function () {
      var clicked = false;
      var discountCode = Math.floor(Math.random() * 100);
      var correctImage = Math.floor(Math.random() * 4);

      $(".guess_box").on("click", function () {
        if (!clicked) {
          $(".guess_box p").remove();
          var codeMsg = "<p>Your Code: CODE" + discountCode + "</p>";

          var clickedCode = $(this).index();
          console.log(clickedCode);//디버깅 용
          console.log(correctImage);//디버깅 용
          if (correctImage === clickedCode) {
            $(this).addClass("correct");
            $(this).append(codeMsg);
          } else {
            $(this).addClass("incorrect");
            var incorrectMsg = "<p>Sorry, no discount this time</p>";
            $(this).append(incorrectMsg);
          }

          clicked = true;
          $(this).off('click'); // 클릭 이벤트 핸들러 제거
        }
      });

      $(".guess_box").on("mouseenter", function () {
        $(this).css("border-color", "blue");
      });

      $(".guess_box").on("mouseleave", function () {
        $(this).css("border-color", "#000");
      });
    });
  </script>
</body>

</html>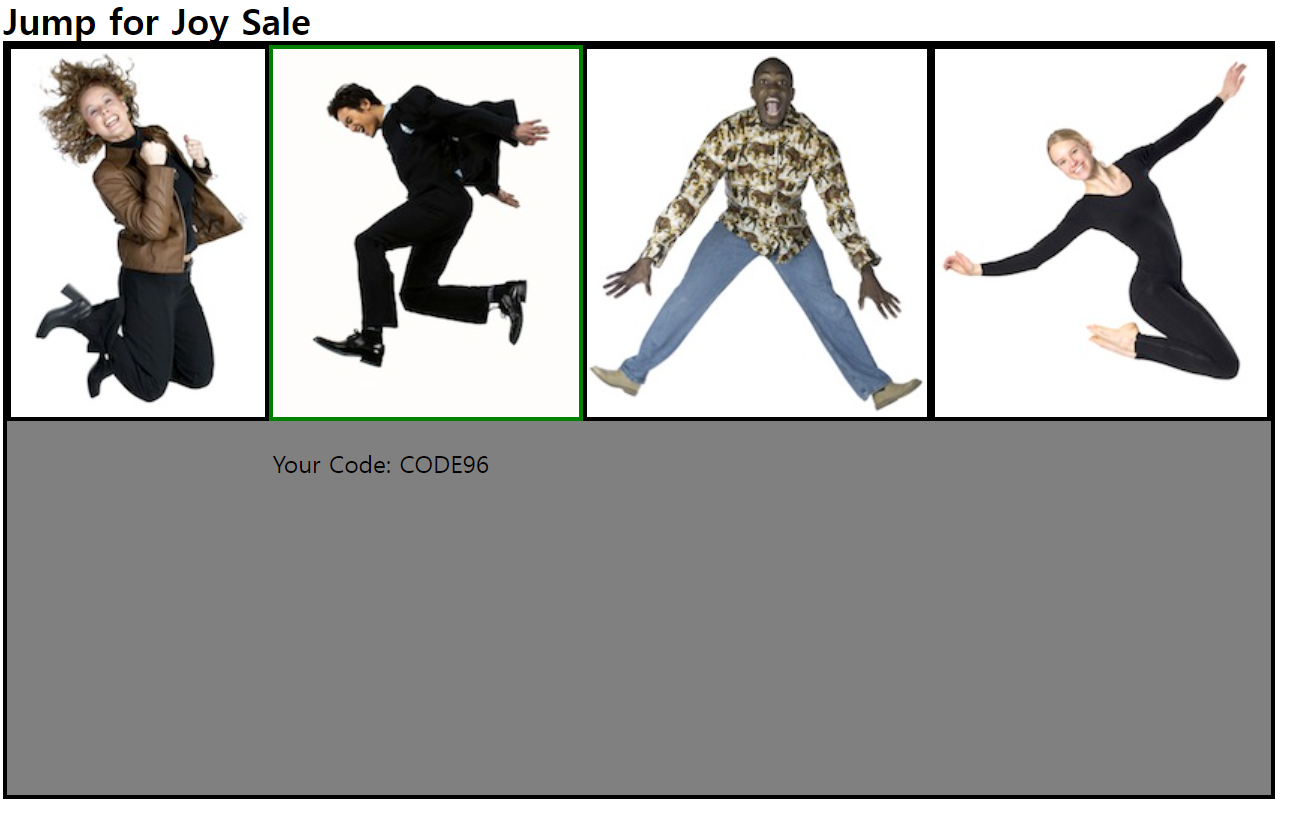
- title아래에 link를 보면fivicon.ico가 있는데 이는 웹사이트의 아이콘으로, 탭에 표시되는 작은 이미지이다. 사용자가 여러 탭을 열어놓았을 때 해당 웹사이트를 쉽게 식별할 수 있도록 도와준다. 이 링크를 걸어주지않으면, 경고를 발생한다.(탭창의 아이콘 설정하지 않았을 때 대체할 아이콘 표시)😊
선생님 풀이
<!DOCTYPE html>
<html>

<head>
  <meta charset="UTF-8">
  <meta name="viewport" content="width=device-width, initial-scale=1.0">
  <link rel="icon" href="http://example.com/favicon.ico" type="image/x-icon">
  <title>Jump for Joy</title>
  <style>
    div {
      float: left;
      border: solid #000 3px;
      text-align: left;
    }

    .guess_box {
      height: 245px;
    }

    #header {
      width: 100%;
      border: 0px;
      height: 50px;
    }

    #main {
      background-color: gray;
      height: 500px;
    }

    .my_hover {
      border: solid #00f 3px;
    }

    .discount {
      border: solid #0f0 3px;
    }

    .no_discount {
      border: solid #f00 3px;
    }
  </style>
</head>

<body>
  <div id="header">
    <h2>Jump for Joy Sale</h2>
  </div>
  <div id="main">
    <div class="guess_box"><img src="images/jump1.jpg" /></div>
    <div class="guess_box"><img src="images/jump2.jpg" /></div>
    <div class="guess_box"><img src="images/jump3.jpg" /></div>
    <div class="guess_box"><img src="images/jump4.jpg" /></div>
    <span id="result"></span>
  </div>
  <script src="js/jquery.js"></script>
  <script>
    $(function () {

      $(".guess_box").on("click", checkForCode);

      function getRandom(num) {
        var my_num = Math.floor(Math.random() * num);
        return my_num;
      }

      var hideCode = function () {
        var numRand = getRandom(4);
        $(".guess_box").each(function (index, value) {
          if (numRand == index) {
            $(this).append("<span id='has_discount'></span>");
            return false;
          }
        });
      }

      hideCode();

      function checkForCode() {
        var discount;
        if ($.contains(this, document.getElementById("has_discount"))) {
          var my_num = getRandom(100);
          discount = "<p>Your Code: CODE" + my_num + "</p>";
        } else {
          discount = "<hr>Sorry, no discount this time!";
        }
        $(".guess_box").each(function () {
          if ($.contains(this, document.getElementById("has_discount"))) {
            $(this).addClass("discount");
          } else {
            $(this).addClass("no_discount");
          }
          $(this).off();
        });
        $("#result").append(discount);
      } // End checkForCode function

      $(".guess_box").on("mouseenter", function () {
        $(this).addClass("my_hover");
      })
        .on("mouseleave", function () {
          $(this).removeClass("my_hover");
        });

    });


  </script>
</body>

</html>
js와 jQuery 개념 및 장점 등등
Q: script 태그를 페이지 마지막 태그 바로 앞에 쓴 이유가 뭐죠?
- <script> 태그는 <head>태그와 </head>태그 사이에 있어야 하는 줄 알았어요.
A: 네.<script>태그는 <head> 태그와 </head>태그 사이에 쓰는 게 제일 좋다고들 했었어요(일부는 지금도 그렇게 말해요). 하지만 <script> 태그는 다른 파일을 동시에 내려받지 못하게 차단하는 문제가 있습니다. 원래 이미지 파일을 서로 다른 서버에서 받을 때는 동시에 내려받을 수 있는데, <script> 태그가 있으면 동시에 받을 수 없게 됩니다. <script> 태그를 페이지 맨 아래에 두면 페이지를 좀 더 빨리 내려받을 수 있습니다.
$(this)는 문맥에 따라 다르다는 것을 잘 기억하세요. 즉 $(this)를 언제, 어디에 쓰느냐에 따라 $(this)의 의미가 달라집니다. jQuery 메서드를 호출했을 때 실행되는 함수가 $(this)를 쓰기에 가장 적당한 장소 중 하나입니다.
-
this와$(this) -
자바스크립테에서 this는 현재 다루고 있는 요소를 가리킵니다. this에
$()를 추가해서$(this)를 만들면 현재 다루고 있는 요소에 jQuery 메서드를 적용할 수 있게 됩니다.
jQuery 코드를 다른 파일로 분리하면 좋은 장점
-
다른 페이지에서도 쓸 수 있습니다.(코드 재활용)
-
페이지를 더 빨리 불러옵니다.
-
HTML 파일이 더 깔끔해지고 읽기 편해집니다.
Q : jQuery 코드를 분리하면 페이지를 불러오는 속도가 왜 빨라지죠?
A : js파일을 여러 HTML 파일에서 재활용하면 브라우저는 해당 파일을 단 한번만 요청합니다. .js파일이 브라우저 캐시에 저장되므로 해당 파일을 사용하는 다른 HTML 페이지를 부를 때 서버에 요청하지 않고 캐시에 있는 파일을 사용하기 때문입니다.
Q : 함수 선언과 함수 표현식의 차이는 뭐죠?
A : 제일 큰 차이는 타이밍입니다. 두 방식의 결과는 마찬가지지만 함수 표현식은 자바스크립트 해석기가 해당 표현식을 만나기 전까지는 쓸 수 없습니다. 반면에 함수 선언을 사용하면 페이지에서 아무 때나, 심지어 페이지를 불러오자마자 쓸 수 있습니다.
-
함수 선언
function hi(){} -
함수 표현식
let hi = function() {}
Q : 함수를 만들 때마다 어떤 값을 반환하는지 명시해야 하나요?
A : 꼭 그렇게 하지 않아도 됩니다. 함수에 반환값을 명시하든 하지 않든 모든 함수는 반환값이 있습니다. 반환값을 명시하지 않으면 undefined라는 값을 반환합니다. 함수를 호출한 코드에서 undefined를 처리할 수 없으면 에러가 납니다. 따라서 반환값을 명시하는 편이 좋은데 애매하면 return false;처럼 써도 됩니다.
Q : 함수에 넘기는 매개변수에 제한이 있나요?
A : 아무 제한도 없습니다. 객체, 요소, 변수, 값 뭐든 넘길 수 있어요. 함수에서 처리할 수 있는 매개변수보다 더 많이 넘겨도 되는데 이렇게 초과된 매개변수는 무시될 거예요. 필요한 매개변수를 넘기지 않으면 모자라는 부분에는 자동으로 undefined가 들어갑니다.
Q : $.contain 메서드는 어떤 일을 하죠?
A : .contain() 메서드는 매개변수를 두 개 받는 정적 메서드입니다. 이 메서드는 첫번째 매개변수의 자식 요소를 모두 확인하면서 그 중에 두 번째 매개변수가 들어 있는지 확인합니다.
예를 들어$.contains(document.body, document.getElementById("header")) 는 true이고, $.contain(document.getElementById("header"),document.body)는 false입니다.
Q : 정적 메서드라뇨?
A : 정적 메서드란 다른 객체에는연결되지않고 jQuery 라이브러리에만 연결된 함수입니다. 정적 메서드를 호출할 때는 선택자를 쓰지 않고 jQuery 또는 $ 기호만 쓰면 됩니다.
Q : each() 메서드에서 index와 value는 무슨 뜻인가요?
A : index는 루프에서 현재 어디에 있는지 나타내는 변수이고 선택자가 반환하는 배열의 첫 번째 요소는 0입니다. value는 현재 요소를 나타내며, .each() 메서드 루프 안에서는 this와 마찬가지입니다.
Q : hideCode 함수의 .each() 메서드 루프에서 return false는 무슨 의미죠?
A : each() 메서드 루프에서 return false는 루프에서 빠져나와 다음 단계로 이동하라는 뜻입니다. 반환값이 false가 아니면 .each() 메서드 루프는 다음 항목으로 넘어가서 루프를 계속 진행합니다. hideCode 함수에서는 이미 할인 코드를 배치했으므로 나머지 요소에서도 루프를 진행할 필요는 없습니다.
문제 4 (66일차 복습), detach()/remove()
- jQuery detach() 메소드와 remove() 메소드의 차이는?
( $("선택자").detach(), $("선택자").remove() )detach(): 선택한 요소를 DOM에서 제거하긴 하지만 제거한 요소를 기억하기 때문에 나중에 다시 삽입할 수 있다. > 잘라내기 같은 느낌remove(): DOM에서 요소를 완전히 제거한다.
traversal 폴더에 index.html 열고, 개발자모드를 실행한 후에 다음 문제를 풀자.(각 문제를 풀고 F5를 눌러 새로 고침하자)(2~5번문제)
<!DOCTYPE html>
<html>

<head>
  <meta http-equiv="Content-Type" content="text/html; charset=utf-8">
  <title>Our Menu</title>

  <style>
    @charset "UTF-8";
    /* CSS Document */


    .menu_wrapper {
      width: 96%;
      border: 1px solid gray;
    }

    .topper {
      padding: 2%;
      width: 96%;
      height: 100px;
      overflow: hidden;
      border-bottom: 1px solid gray;
    }


    .left_col {
      float: left;
      padding: 4%;
      width: 41%;
      height: 1000px;
      border-right: 1px solid gray;

    }

    .right_col {
      float: right;
      padding: 4%;
      width: 41%;
      height: 1000px;
      border-left: 1px solid gray;
    }

    .bottom {
      clear: both;
      padding: 2%;
      width: 96%;
      height: 60px;
      border-top: 1px solid gray;
    }


    .nav {
      text-align: right;
      float: right;
      list-style: none;
      padding-left: 15px;
    }


    .menu_entrees li {
      list-style-type: none;
      padding-left: 10px;
    }


    .menu_list {
      padding-bottom: 15px;
    }

    .menu_list li {
      display: inline;
      list-style-type: none;
      padding-left: 15px;
    }

    .meat {
      background-color: "#000000";
    }

    .hamburger {
      color: "#000000";
    }

    .fish {

      color: "#000000";
    }

    .tofu {
      color: "#00FF00";
    }

    .portobello {
      color: "#00FF00";
    }

    .veg_leaf {
      list-style-image: url('../images/leaf.png');
    }
  </style>
</head>

<body>
  <div class="menu_wrapper">
    <header class="topper">
      <h2>Our Menu</h2>
      <ul>
        <li class="nav"><button id="vegOn">Go Vegetarian</button></li>
        <li class="nav"><button id="restoreMe">Restore Menu</button></li>
      </ul>
    </header>
    <div class="left_col">
      <h4>Dinner Entrees</h4>
      <ul class="menu_entrees">
        <li>Poached Salmon
          <ul class="menu_list">
            <li class="fish">salmon</li>
            <li>white wine</li>
            <li>salt</li>
            <li>black pepper </li>
          </ul>
        </li>
        <li>Roasted Trout
          <ul class="menu_list">
            <li class="fish">grilled trout</li>
            <li>mint</li>
            <li>capers</li>
            <li>olives</li>
            <li>tomato</li>
            <li>lemon</li>
            <li>olive oil</li>
            <li>potatoes </li>
          </ul>
        </li>
        <li>Thai-style Halibut
          <ul class="menu_list">
            <li>coconut milk</li>
            <li class="fish">pan-fried halibut</li>
            <li>lemongrass broth</li>
            <li>early autumn vegetables</li>
            <li>Thai spices </li>
          </ul>
        </li>
        <li>Braised Delight
          <ul class="menu_list">
            <li class="meat">lamb shoulder</li>
            <li>cipolinni onions</li>
            <li>carrots</li>
            <li>baby turnip</li>
            <li>roasted red grapes</li>
            <li>braising jus</li>
          </ul>
        </li>
        <li>House Grilled Panini
          <ul class="menu_list">
            <li class="meat">proscuttio</li>
            <li>provolone</li>
            <li>avocado</li>
            <li>cherry tomatoes</li>
            <li>sourdough roll</li>
            <li>shoestring fries </li>
          </ul>
        </li>
        <li>House Slider
          <ul class="menu_list">
            <li>marinated eggplant</li>
            <li>zucchini</li>
            <li class="hamburger">hamburger</li>
            <li>balsamic vinaigrette</li>
            <li>onion</li>
            <li>carrots</li>
            <li>Multi-grain roll</li>
            <li>goat cheese</li>
          </ul>
        </li>
        <li>Southwest Slider
          <ul class="menu_list">
            <li>whole chiles</li>
            <li class="hamburger">hamburger</li>
            <li>pepperjack cheese</li>
            <li>onion</li>
            <li>carrots</li>
            <li>sliced avocado</li>
            <li>Multi-grain roll</li>
          </ul>
        </li>
        <li>Frittata
          <ul class="menu_list">
            <li class="meat">eggs</li>
            <li>asiago, provolone, and romano cheeses</li>
            <li>potatoes </li>
          </ul>
        </li>
      </ul>
    </div>

    <div class="right_col">
      <h4>Soups and Sides</h4>
      <ul class="menu_entrees">
        <li>Coconut Soup
          <ul class="menu_list">
            <li>coconut milk</li>
            <li class="meat">chicken</li>
            <li>vegetable broth</li>
          </ul>
        </li>
        <li>Soup Du Jour
          <ul class="menu_list">
            <li class="meat">grilled steak</li>
            <li>mushrooms</li>
            <li>seasonal vegetables</li>
            <li>vegetable broth </li>
          </ul>
        </li>
        <li>Hot and Sour Soup
          <ul class="menu_list">
            <li class="meat">roasted pork</li>
            <li>carrots</li>
            <li>Chinese mushrooms</li>
            <li>chili</li>
            <li>vegetable Broth </li>
          </ul>
        </li>
        <li>Stuffed Baked Potato
          <ul class="menu_list">
            <li>potato</li>
            <li class="meat">charbroiled or blackened chicken</li>
            <li>seasonal veggies</li>
            <li>cheddar & jack cheese</li>
            <li>creamy alfredo sauce</li>
          </ul>
        </li>
        <li>Avocado Rolls
          <ul class="menu_list">
            <li> Avocado</li>
            <li>Whole chiles</li>
            <li>Sweet red peppers</li>
            <li>Ginger dipping sauce</li>
          </ul>
        </li>
        <li>Roasted Artichoke Hearts
          <ul class="menu_list">
            <li>Artichoke hearts</li>
            <li>Balsamic vinegar</li>
            <li>Steamed garlic</li>
          </ul>
        </li>
        <li>Garlic Broccoli
          <ul class="menu_list">
            <li>Stir Fried Broccoli</li>
            <li>Carrots</li>
            <li>Onions</li>
            <li>Garlic Sauce </li>
          </ul>
        </li>
        <li>Stir-Fried Garlic Vegetables
          <ul class="menu_list">
            <li>Stir Fried Mixed Vegetables</li>
            <li>Mushrooms</li>
            <li>Carrots</li>
            <li>Onions</li>
            <li>Garlic </li>
          </ul>
        </li>
        <li>Garlic Green Beans with Mushrooms
          <ul class="menu_list">
            <li>Stir Fried Green Beans</li>
            <li>Carrots</li>
            <li>Onions</li>
            <li>Mushrooms </li>
          </ul>
        </li>
      </ul>
    </div>
    <footer class="bottom">
      <h5>Address</h5>
    </footer>
  </div>
  <script src="js/jquery.js"></script>

  <script>
   $(function () {

      var v = false;
      var $f, $m;

      $("button#vegOn").click(function () {
        if (v == false) {

          $f = $(".fish").parent().parent().detach();


          $(".hamburger").replaceWith("<li class='portobello'><em>Portobello Mushroom</em></li>");
          $(".portobello").parent().parent().addClass("veg_leaf");

          $(".meat").after("<li class='tofu'><em>Tofu</em></li>");
          $m = $(".meat").detach();
          $(".tofu").parent().parent().addClass("veg_leaf");

          v = true;
        }// end if
      });//end veg button

      $("button#restoreMe").click(function () {

        if (v == true) {
          $(".portobello").parent().parent().removeClass("veg_leaf");
          $(".portobello").replaceWith("<li class='hamburger'>Hamburger</li>");

          $(".menu_entrees li").first().before($f);

          $(".tofu").parent().parent().removeClass("veg_leaf");
          $(".tofu").each(function (i) {
            $(this).after($m[i]);
          });//end each
          $(".tofu").remove();
          v = false;
        }//end if
      });//end restoreMe button
    });//end doc ready
  </script>

</body>

</html>-
클래스 menu_entrees에 자식들을 떼어내자.
$(".menu_entrees").children().detach() -
클래스 menu_list의 자식들을 떼어내자.
$(".menu_list").children().detach() -
클래스 fish의 부모를 떼어내자.
$(".fish").parent().detach() -
클래스 fish의 부모의 부모를 떼어내자.
$(".fish").parent().parent().detach()
다음 문제에 해당하는 jQuery 코드를 작성하자
-
h2 요소 모두를 "
My Menu
로 바꿀려면?
$("h2").replaceWith("<h1>My Menu</h1>"); -
클래스 menu_list의 자식들 중에 첫번째 요소를 선택할려면?
$(".menu_list").children().first(); -
클래스 menu_list의 자식들 중에 마지막 요소를 선택할려면?
$(".menu_list").children().last(); -
클래스 menu_list의 자식들 중에 인덱스 0번째 요소를 선택할려면?
$(".menu_list").children().eq(0); -
클래스 menu_list의 자식들 중에 인덱스 1번째 요소를 선택할려면?
$(".menu_list").children().eq(1); -
클래스 menu_list의 자식들 중에 인덱스 2번째 요소를 선택할려면?
$(".menu_list").children().eq(2); -
클래스 menu_list의 자식들 중에 인덱스가 1, 2인 요소를 선택할려면?
$(".menu_list").children().slice(1, 3); -
클래스 menu_list의 부모들중에 클래스가 organic인 요소를 선택할려면?
$(".menu_list").parents().filter(".organic"); -
ul 태그이면서 클래스 menu_list이면서 클래스 orgnic의 자식들 중에 클래스 local인 아닌 요소를 선택할려면?
$("ul.menu_list.organic").children().not(".local");
문제 5 - 문제 4 응용
'Go Vegetarian' 버튼을 만들어서 그 버튼을 누르면 웹 페이지의 메뉴가 자동으로 채식 옵션으로 바뀌게 한다.
대체 식단은 다음과 같이 바뀌면 된다.
- 채식 옵션에는 생선류가 없어져야 한다.
- 햄버거 대신 포토벨로 버섯이 들어간다.
- 햄버거를 제외한 고기나 계란 요리에는 두부가 대신 들어간다.
- 메뉴를 원래대로 바꾸는 버튼도 필요하다.
- 원래 메뉴 옆에 채식 메뉴를 표시하는 아이콘이 필요하다.
1.png (처음 실행 시켰을 때 화면)
2.png (Go Vegetarian 버튼을 눌렀을 때 화면)
1.png (Restore Menu 버튼을 눌렀을 때 화면)
<!DOCTYPE html>
<html>

<head>
  <title>Our Menu</title>
  <style>
    .menu_wrapper {
      width: 96%;
      border: 1px solid gray;
    }

    .topper {
      padding: 2%;
      width: 96%;
      height: 100px;
      overflow: hidden;
      border-bottom: 1px solid gray;
    }


    .left_col {
      float: left;
      padding: 4%;
      width: 41%;
      height: 1000px;
      border-right: 1px solid gray;

    }

    .right_col {
      float: right;
      padding: 4%;
      width: 41%;
      height: 1000px;
      border-left: 1px solid gray;
    }

    .bottom {
      clear: both;
      padding: 2%;
      width: 96%;
      height: 60px;
      border-top: 1px solid gray;
    }


    .nav {
      text-align: right;
      float: right;
      list-style: none;
      padding-left: 15px;
    }


    .menu_entrees li {
      list-style-type: none;
      padding-left: 10px;
    }


    .menu_list {
      padding-bottom: 15px;
    }

    .menu_list li {
      display: inline;
      list-style-type: none;
      padding-left: 15px;
    }

    .meat {
      background-color: "#000000";
    }

    .hamburger {
      color: "#000000";
    }

    .fish {
      color: "#000000";
    }

    .tofu {
      color: "#00FF00";
    }

    .portobello {
      color: "#00FF00";
    }

    .veg_leaf {
      list-style-image: url('images/leaf.png');
    }
  </style>
</head>

<body>
  <div class="menu_wrapper">
    <header class="topper">
      <h2>Our Menu</h2>
      <nav>
        <button id="vegOn">Go Vegetarian</button>
        <button id="restoreMe">Restore Menu</button>
      </nav>
    </header>
    <div class="left_col">
      <h4>Dinner Entrees</h4>
      <ul class="menu_entrees">
        <li>Poached Salmon
          <ul class="menu_list">
            <li class="fish">salmon</li>
            <li>white wine</li>
            <li>salt</li>
            <li>black pepper </li>
          </ul>
        </li>
        <li>Roasted Trout
          <ul class="menu_list">
            <li class="fish">grilled trout</li>
            <li>mint</li>
            <li>capers</li>
            <li>olives</li>
            <li>tomato</li>
            <li>lemon</li>
            <li>olive oil</li>
            <li>potatoes </li>
          </ul>
        </li>
        <li>Thai-style Halibut
          <ul class="menu_list">
            <li>coconut milk</li>
            <li class="fish">pan-fried halibut</li>
            <li>lemongrass broth</li>
            <li>early autumn vegetables</li>
            <li>Thai spices </li>
          </ul>
        </li>
        <li>Braised Delight
          <ul class="menu_list">
            <li class="meat">lamb shoulder</li>
            <li class="veg_leaf">cipolinni onions</li>
            <li>carrots</li>
            <li>baby turnip</li>
            <li>roasted red grapes</li>
            <li>braising jus</li>
          </ul>
        </li>
        <li>House Grilled Panini
          <ul class="menu_list">
            <li class="meat">proscuttio</li>
            <li>provolone</li>
            <li>avocado</li>
            <li>cherry tomatoes</li>
            <li>sourdough roll</li>
            <li>shoestring fries </li>
          </ul>
        </li>
        <li>House Slider
          <ul class="menu_list">
            <li>marinated eggplant</li>
            <li>zucchini</li>
            <li class="hamburger">hamburger</li>
            <li>balsamic vinaigrette</li>
            <li>onion</li>
            <li>carrots</li>
            <li>Multi-grain roll</li>
            <li>goat cheese</li>
          </ul>
        </li>
        <li>Southwest Slider
          <ul class="menu_list">
            <li>whole chiles</li>
            <li class="hamburger">hamburger</li>
            <li>pepperjack cheese</li>
            <li>onion</li>
            <li>carrots</li>
            <li>sliced avocado</li>
            <li>Multi-grain roll</li>
          </ul>
        </li>
        <li>Frittata
          <ul class="menu_list">
            <li class="meat">eggs</li>
            <li>asiago, provolone, and romano cheeses</li>
            <li>potatoes </li>
          </ul>
        </li>
      </ul>
    </div>

    <div class="right_col">
      <h4>Soups and Sides</h4>
      <ul class="menu_entrees">
        <li>Coconut Soup
          <ul class="menu_list">
            <li>coconut milk</li>
            <li class="meat">chicken</li>
            <li>vegetable broth</li>
          </ul>
        </li>
        <li>Soup Du Jour
          <ul class="menu_list">
            <li class="meat">grilled steak</li>
            <li>mushrooms</li>
            <li>seasonal vegetables</li>
            <li>vegetable broth </li>
          </ul>
        </li>
        <li>Hot and Sour Soup
          <ul class="menu_list">
            <li class="meat">roasted pork</li>
            <li>carrots</li>
            <li>Chinese mushrooms</li>
            <li>chili</li>
            <li>vegetable Broth </li>
          </ul>
        </li>
        <li>Stuffed Baked Potato
          <ul class="menu_list">
            <li>potato</li>
            <li class="meat">charbroiled or blackened chicken</li>
            <li>seasonal veggies</li>
            <li>cheddar & jack cheese</li>
            <li>creamy alfredo sauce</li>
          </ul>
        </li>
        <li>Avocado Rolls
          <ul class="menu_list">
            <li> Avocado</li>
            <li>Whole chiles</li>
            <li>Sweet red peppers</li>
            <li>Ginger dipping sauce</li>
          </ul>
        </li>
        <li>Roasted Artichoke Hearts
          <ul class="menu_list">
            <li>Artichoke hearts</li>
            <li>Balsamic vinegar</li>
            <li>Steamed garlic</li>
          </ul>
        </li>
        <li>Garlic Broccoli
          <ul class="menu_list">
            <li>Stir Fried Broccoli</li>
            <li>Carrots</li>
            <li>Onions</li>
            <li>Garlic Sauce </li>
          </ul>
        </li>
        <li>Stir-Fried Garlic Vegetables
          <ul class="menu_list">
            <li>Stir Fried Mixed Vegetables</li>
            <li>Mushrooms</li>
            <li>Carrots</li>
            <li>Onions</li>
            <li>Garlic </li>
          </ul>
        </li>
        <li>Garlic Green Beans with Mushrooms
          <ul class="menu_list">
            <li>Stir Fried Green Beans</li>
            <li>Carrots</li>
            <li>Onions</li>
            <li>Mushrooms </li>
          </ul>
        </li>
      </ul>
    </div>
    <footer class="bottom">
      <h5>Address</h5>
    </footer>
  </div>
  <script src="js/jquery.js"></script>
  <script>
    $(function () {
      var $fish, $meat; //문법적이 아닌, 의미적으로 $를 사용 jquery변수와 보통 변수를 구분하기 위함
      var v = false;

      $("#vegOn").on("click", function () {
        if (v == false) {
          $fish = $(".fish").parent().parent().detach();

          //햄버거 자리에 포토벨로 버섯 추가
          $(".hamburger").replaceWith("<li class='portobello'><em>Portobello Mushroom</em></li>");
          $(".portobello").parent().parent().addClass("veg_leaf");

          //고기, 계란 요리에 두부
          $(".meat").after("<li class ='tofu'><em>Tofu</em></li>");
          $meat = $(".meat").detach();
          $(".tofu").parent().parent().addClass("veg_leaf");
          v = true;
        }
      });

      $("#restoreMe").on("click", function () {
        if (v == true) {
          $(".portobello").parent().parent().removeClass("veg_leaf");
          $(".portobello").replaceWith("<li class='hamburger'>Hamburger</li>");//다른 텍스트로 교체

          $(".menu_entrees li").first().before($fish);

          $(".tofu").parent().parent().removeClass("veg_leaf");
          $(".tofu").each(function(i){$(this).after($meat[i])});
          $(".tofu").remove();
          v = false;
        }
      });
    });


  </script>
</body>

</html>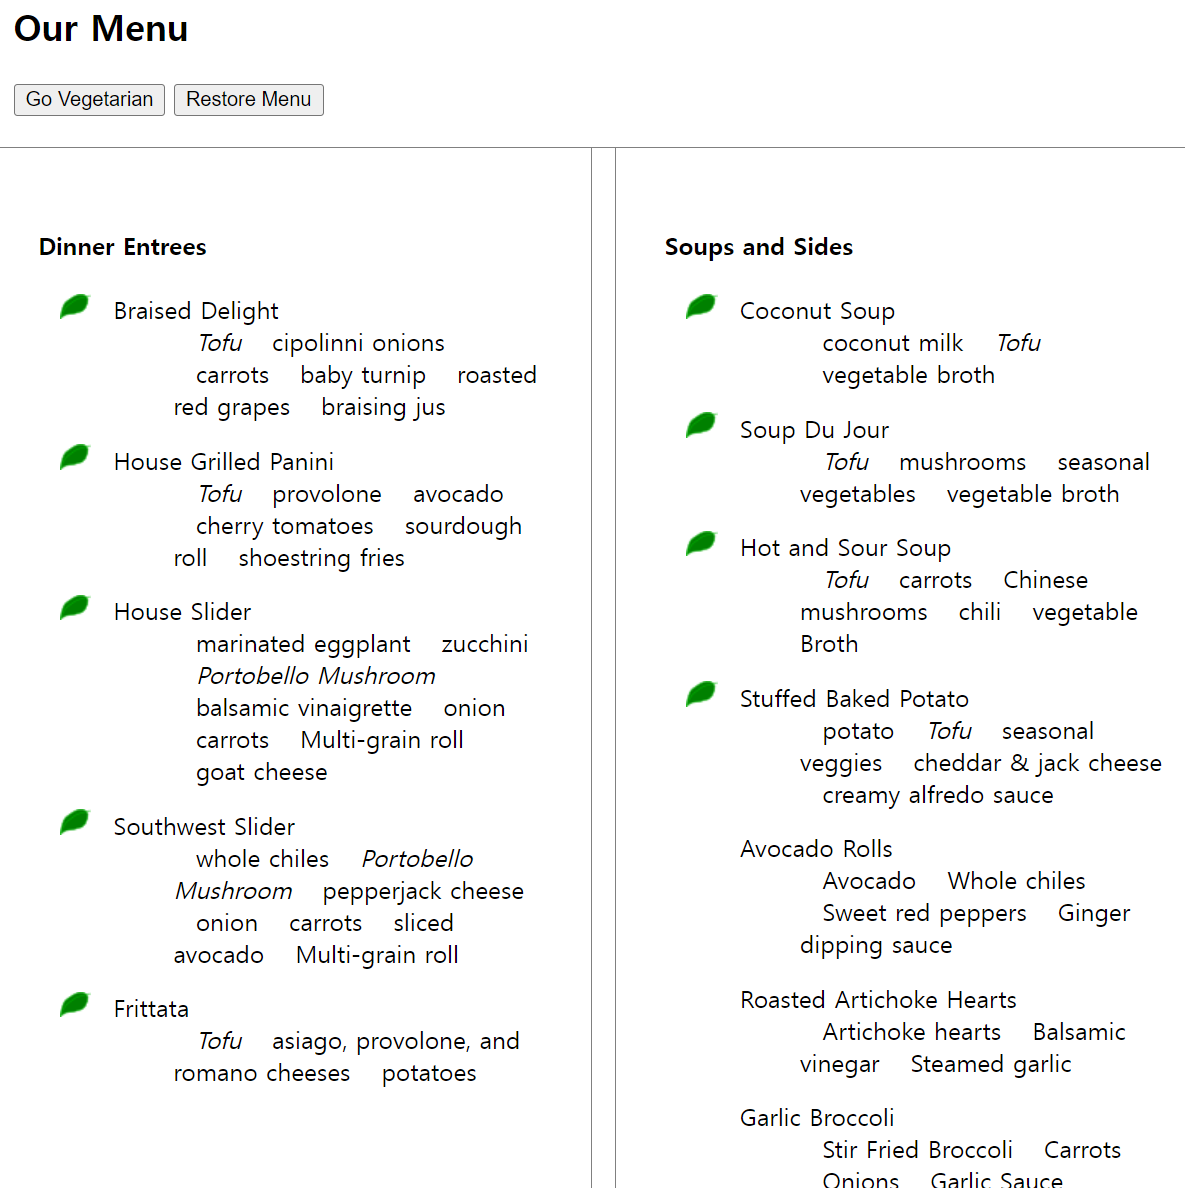
- 오타 때문에 클래스가 제대로 추가 안되서 힘들었따..찾아내느라...
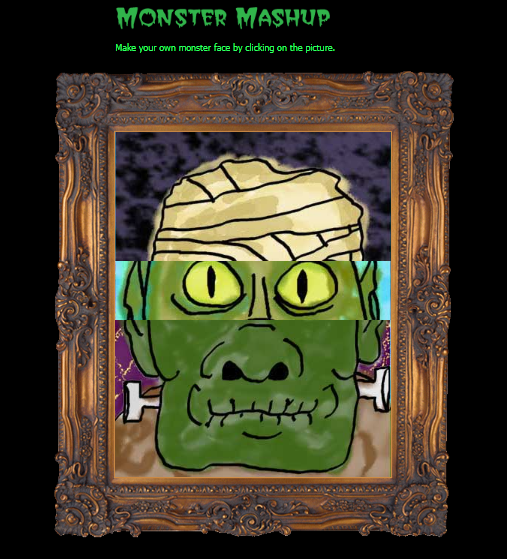
문제 6 : 뒤에 배경(시간초), 얼굴 퍼즐 맞추기
<!DOCTYPE html>
<html>

<head>
  <title>Monster Mash</title>
  <style>
    body {
      background-color: #000000;
    }

    p {
      color: #33FF66;
      font-family: Tahoma, Verdana, Arial, Helvetica, sans-serif;
      font-size: 12px;
    }

    #text_top {
      position: relative;
      z-index: 4;
    }

    #top {
      position: absolute;
      left: 191px;
      top: 15px;
      z-index: 4;
    }

    #container {
      position: absolute;
      left: 0px;
      top: 0px;
      z-index: 0;
    }

    .lightning {
      display: none;
      position: absolute;
      left: 0px;
      top: 0px;
      z-index: 0;
    }

    #frame {
      position: absolute;
      left: 100px;
      top: 100px;
      width: 545px;
      height: 629px;
      background-image: url(../images/frame.png);
      z-index: 3;
      overflow: hidden;
    }

    #pic_box {
      position: relative;
      left: 91px;
      top: 84px;
      width: 367px;
      height: 460px;
      z-index: 2;
      overflow: hidden;
    }

    .face {
      position: relative;
      left: 0px;
      top: 0px;
      z-index: 1;
    }

    #head {
      height: 172px;
    }

    #eyes {
      height: 79px;
    }

    #nose {
      height: 86px;
    }

    #mouth {
      height: 117px;
    }
  </style>
</head>

<body>
  <header id="top">
    <img id="text_top" src="images/Monster_Mashup.png" />
    <p>Make your own monster face by clicking on the picture.</p>
  </header>

  <div id="container">
    <img class="lightning" id="lightning1" src='images/lightning-01.jpg' />
    <img class="lightning" id="lightning2" src='images/lightning-02.jpg' />
    <img class="lightning" id="lightning3" src='images/lightning-03.jpg' />
    <div id="frame">
      <div id="pic_box">
        <div id="head" class="face"><img src="images/headsstrip.jpg"></div>
        <div id="eyes" class="face"><img src="images/eyesstrip.jpg"></div>
        <div id="nose" class="face"><img src="images/nosesstrip.jpg"></div>
        <div id="mouth" class="face"><img src="images/mouthsstrip.jpg"></div>
      </div>
    </div>
  </div>
  <script src="js/jquery.js"></script>
  <script>
    $(function () {
      var headclix = 0, eyeclix = 0, noseclix = 0, mouthclix = 0;

      lightning_one();
      lightning_two();
      lightning_three(); //한번씩만 호출하면 setTimeout을 통해 계속 반복적으로 호출

      $("#head").on("click", function () {
        if (headclix < 9) {//보일 사진이 9장이니까
          $("#head").animate({ left: "-=367px" }, 500);//0.5초에 걸쳐 이동
          headclix += 1;
        }
        else {//마지막 사진을 넘어서면 다시 0px인 처음으로 되돌
          $("#head").animate({ left: "0px" }, 500);
          headclix = 0;
        }
      });

      $("#eyes").on("click", function () {
        if (eyeclix < 9) {
          $("#eyes").animate({ left: "-=367px" }, 500);
          eyeclix += 1;
        }
        else {
          $("#eyes").animate({ left: "0px" }, 500);
          eyeclix = 0;
        }
      });

      $("#nose").on("click", function () {
        if (noseclix < 9) {
          $("#nose").animate({ left: "-=367px" }, 500);
          noseclix += 1;
        }
        else {
          $("#nose").animate({ left: "0px" }, 500);
          noseclix = 0;
        }
      });//end click

      $("#mouth").on("click", function () {
        if (mouthclix < 9) {
          $("#mouth").animate({ left: "-=367px" }, 500);
          mouthclix += 1;
        }
        else {
          $("#mouth").animate({ left: "0px" }, 500);
          mouthclix = 0;
        }
      });
    });

    function lightning_one() {//4초마다 자기 자신을 계속 호출
      $("#lightning1").fadeIn(250).fadeOut(250);//2.5초간격으로 나타났다가 사라졌다가
      setTimeout(function () { lightning_one() }, 4000);
    };

    function lightning_two() {//5초마다 자기 자신을 호
      $("#lightning2").fadeIn("fast").fadeOut("fast");//빨리 보이게 하고 빨리 사라지게 하
      setTimeout(function () { lightning_two() }, 5000);
    };

    function lightning_three() {
      $("#lightning3").fadeIn("fast").fadeOut("fast");
      setTimeout(function () { lightning_three() }, 7000);
    };
  </script>
</body>

</html>