[EDA] Web Data 분석하기 (Beautiful Soup)
[Beautiful Soup (공식 문서)]
HTML 문법
<!DOCTYPE html>
<html>
    <head>
        <title>Very Simple HTML Code by SY</title>
    </head>
    <body>
        <div>
            <p clases = "inner-text first-item" id="first">
                Happy Zerobase.
                <a href="http://www.pinkwink.kr" id="pw-link">PinkWink</a>
            </p>
            <p class="inner-text second-item">
                Happy Data Science.
                <a href="https://www.python.org" target="_blink" id="py-link">Python</a>
            </p>
        </div>
        <p class="outer-text first-item" id="second">
            <b>Data Science is funny.</b>
        </p>
        <p class="outer-text">
            <i>All I need is love.</i>
        </p>
    </body>
</html>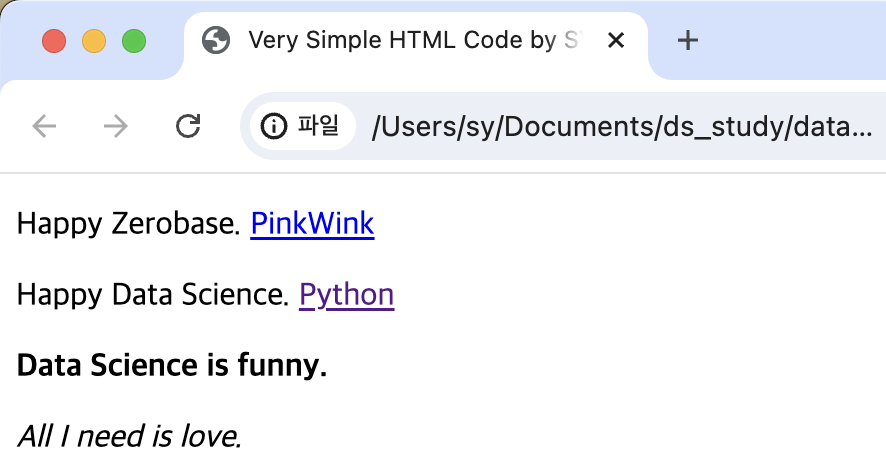
- <태그>를 열었으면 </태그>로 꼭 닫아줘야 함.
<head>: 상단 창바의 이름<body>: 실제 창 구성<a href="링크" id="id값">텍스트명</a>: 하이퍼링크 생성target="_blink": 클릭해서 창을 열 때 새로운 창으로 열림
<b></b>: 볼드체<i></i>: 기울임체
BeautifulSoup 설치하기
- conda install -c anaconda beautifulsoup4
- pip install beautifulsoup4
Python에서 BeautifulSoup 사용해 HTML 읽기
1) from bs4 import BeautifulSoup
2) html 오픈해서 BeaufitulSoup으로 읽기
page = open("../data/03. zerobase.html", "r").read()
soup = BeautifulSoup(page, "html.parser")
#page에 있는 내용을 BeautifulSoup으로 읽기
#Parser: https://www.crummy.com/software/BeautifulSoup/bs4/doc/ (어떤 엔진을 사용할지)
print(soup.prettify()) # html을 들여쓰기해서 좀 더 보기 편하게 만들기
BeautifulSoup 태그 읽는 법
1) 간단한 방법
- soup.head
- soup.body
- soup.div
- soup.p
2) soup.find()
- 가장 먼저 찾은 1개만 반환
soup.find("p")soup.find("p", class_="inner-text second-item")- class_: Python 예약어와 구분짓기 위해 '_' 사용
soup.find("p", {"class":"outer-text first-item"})- dic형으로 불러올 p태그 지정
soup.find("p", {"class":"outer-text first-item"}).text.strip()- text만 불러오기. 이때 strip()으로 공백 지워주기.
soup.find("p", {"class":"inner-text first-item", "id": "first"})- 다중 조건 적용 가능
3) soup.find_all()
- 여러 개의 태그를 리스트 타입으로 반환
soup.find_all("p"): 모든 p태그 반환soup.find_all(class_="outer-text"): 해당하는 2개의 p태그 불러옴soup.find_all(id="pw-link")[0].text: 리스트이기 때문에 [0]와 같이 인덱스 지정 필요
4) p태그 리스트에서 텍스트 속성만 출력하기
.text/.get_text()
# print와 함께 사용하면 예쁘게 출력됨
print(soup.find_all("p")[1].text)
print(soup.find_all("p")[1].get_text())
print(soup.find_all("p")[1].string)- for문으로 출력하기
for each_tag in soup.find_all("p"):
    print("="*50)
    print(each_tag.text)
...
==================================================

                Happy Zerobase.
                PinkWink

==================================================

                Happy Data Science.
                Python

==================================================

Data Science is funny.

==================================================

All I need is love.
5) a 태그에서 href 속성값에 있는 링크 추출
soup.find_all("a")[0].get("href")soup.find_all("a")[0]["href"]
links = soup.find_all("a")
links[0].get("href"), links[1]["href"]
...
('http://www.pinkwink.kr', 'https://www.python.org')


for each in links:
    href = each.get("href") #혹은: each["href"]
    text = each.get_text()
    print(text+" -> "+href)
1. 네이버 금융 예제
방법1) urlopen import하여 네이버 금융 페이지의 html 읽기
from urllib.request import urlopen
from bs4 import BeautifulSoup

url = "https://finance.naver.com/marketindex/"
response = urlopen(url)
soup = BeautifulSoup(response, "html.parser")
print(soup.prettify())-response.status: URL 읽어주는 Request에 대한 HTTP 상태 코드
방법2) requests 사용하기
1) 터미널에서 requests 설치
pip install requests
pip list | grep requests: requests 설치되었는지, 버전과 함께 확인
2) VS Code에서 import
import requests # from urllib.request.Request 와 유사 => 편한 것 사용
from bs4 import BeautifulSoup
3) 페이지 url 불러오기
url = "https://finance.naver.com/marketindex/"
response = requests.get(url) #requests.post() 방식도 있음.response.text/response.content: html 전체 출력response: request status 확인- <Response [200]>로 성공 status가 출력됨
- 들여쓰기 해서 예쁘게 보는 방법
soup = BeautifulSoup(response.text, "html.parser")
print(soup.prettify())
네이버 금융 페이지의 환율과 국가 등 여러 정보 가져오기
- 하나만 선택: find, select_one
- 여러 개 선택: select, find_all
=> select가 class와 id를 아래와 같이 간단하게 불러올 수 있어서 편리함- select에서 class는 앞에 '.', id는 앞에 '#' 사용
exchangeList = soup.select("#exchangeList > li")
# 즉, exchangeList라는 id를 가진 태그 중에서 하위에 li 태그 불러오기

title = exchangeList[0].select_one(".h_lst").text
exchange = exchangeList[0].select_one(".value").text
change = exchangeList[0].select_one(".change").text
updown = exchangeList[0].select_one("div.head_info.point_up > .blind").text
# class="head_info point_up"와 같이 띄어쓰기 있을 때는 class가 2개인 것으로 인식함 -> select에서 불러올 때는 사이에 '.'을 붙여줌
# '>'의 의미: 바로 하위에 있는 클래스의 값을 가져오는 것

baseUrl = "https://finance.naver.com"
link = baseUrl + exchangeList[0].select_one("a").get("href")

title, exchange, change, updown, link

...
('미국 USD', '1,377.00', '3.50', '상승', 'https://finance.naver.com/marketindex/exchangeDetail.naver?marketindexCd=FX_USDKRW')
2. 위키백과 문서 불러오기 예제
URL 인코딩/디코딩하여 불러오는 방법
from urllib.request import urlopen, Request
import urllib

html = "https://ko.wikipedia.org/wiki/{search_words}"
#https://ko.wikipedia.org/wiki/여명의_눈동자
req = Request(html.format(search_words=urllib.parse.quote("여명의_눈동자")))
#글자를 URL로 인코딩  -> 한글을 encoding/decoding해주는 사이트 사용하여 입력해도 됨.
response = urlopen(req)
soup = BeautifulSoup(response, "html.parser")
print(soup.prettify())

# 출력하려는 텍스트값이 몇번째 줄에 존재하는지 확인하는 용도 (ul이 너무 많음!)
n=0
for each in soup.find_all("ul"):
    print("=>" + str(n) + "=========")
    print(each.get_text())
    n += 1
soup.find_all("ul")[35].text.strip().replace("\xa0", "").replace("\n","")
3. 시카고 맛집 예제
- Request 시, 403 에러: 웹페이지를 볼 수 있는 권한이 없어서 사이트에서 거절한 것!
=> user agent를 헤더에 넣는다- 1) 정석: 크롬 > 개발자도구 > 네트워크 > 헤더 > user-agent 확인
req = Request(url, headers={"user-agent": "Mozilla/5.0 (Macintosh; Intel Mac OS X 10_15_7) AppleWebKit/537.36 (KHTML, like Gecko) Chrome/126.0.0.0 Safari/537.36"}) - 2) 간단한 방법: Chrome 넣는다
req = Request(url, headers={"User-Agent": "Chrome"}) - 3) fake user agent 사용
- 1) 정석: 크롬 > 개발자도구 > 네트워크 > 헤더 > user-agent 확인
from fake_useragent import UserAgent
ua = UserAgent()
ua.ie  #Fake인 User Agent를 랜덤하게 반환함.
req = Request(url, headers={"user-agent": ua.ie})
#Fake로 받아온 user-agent를 입력해도 됨.- urljoin(절대주소, 상대주소) : 상대주소와 절대주소를 대응해줌.
- 상대 주소에 절대주소가 이미 포함되어 있으면 상대주소만 반환되고, 없으면 절대주소가 붙어서 반환됨.
from urllib.parse import urljoin
url_add.append(urljoin(url_base, item.select_one("a").get("href")))
- type(tmp_one)와 같이 BeautifulSoup의 type을 확인할 수 있음
- bs4.element.Tag
- Regular Expression (정규표현식) (공식 문서)
- 점프투파이썬 링크
import re- re.split("기준문자열", split할 텍스트) -> 리스트형으로 split
- re.search("$\d+.(\d+)?", price_address_tmp).group() -> 정규표현식으로 찾은 값을 반환
- tqpm 라이브러리
- 터미널에서 설치: conda install -c conda-forge tqdm
- 파이썬에서 반복 작업의 진행 상황을 시각적으로 보여주는 툴. tqdm을 사용하면 진행 상황을 실시간으로 확인할 수 있습니다. (출처: https://zephyrus1111.tistory.com/305)
(참고)
df.to_excel("./03. naverfinance.xlsx", encoding="utf-8")했을 때,
to_excel() got an unexpected keyword argument 'encoding'에러 발생- pandas.DataFrame.to_excel(공식문서)에서 encoding 옵션을 더이상 지원하지 않음.