Github 사용하는 방법 총 정리
0. git config 설정
터미널에서 아래 실행
$ git config --global user.name <username>
$ git config --global user.email <email>
$ git config --global core.autocrlf input

# 설정 완료된 것 확인하기
git config --list
credential.helper=osxkeychain
init.defaultbranch=main
user.name=<username>
user.email=<email>
core.autocrlf=input
core.editor=vim

# 하나씩 쳐서 확인도 가능
$ git config user.name
1. Git 기본 용어
Repository
- 소스코드가 저장되어 있는 여러 개의 Branch가 모여있는 디스크상의 물리적 공간
- Local Repository와 Remote Repository로 구분
=> Repository가 서버에도 있고 로컬에도 있기 때문
Checkout
- 특정 시점이나 Branch의 소스 코드로 이동하는 것을 의미
- Checkout 대상 - Branch, Commit, Tag
- Checkout을 통해 과거 여러 시점의 코드로 이동 가능
Stage
- 작업할 내용이 올라가는 임시 저장 영역
- window에 파일 올라가면 working directory에 있는 건데, 여기서 어떤 파일을 선택해서 git에서 관리하겠다고 등록한다면 이제 stage에 올라가게 되는 것. 수정해서 버전을 매기는 행위를 하면 head 영역으로 올라가게 됨.
- 이 영역을 이용해 작업한 내용 중 commit에 반영할 파일만 선별하여 commit을 수행할 수 있음
Commit
- 작업할 내용을 Local Repository에 저장하는 과정 = 버전을 매기는 행위
- 각각의 commit은 의미있는 변경 단위이고, 변경에 대한 설명을 commit log로 남김
- 권장: commit은 아끼지 마라. 의미있는 단위로 변경할 때마다 commit을 남겨라.
- 참고: commit 단위나 commit log format을 정해놓은 회사나 팀도 있음(빌드 서버 사용하는 경우)
Tag
- 임의의 commit 위치에 쉽게 찾아갈 수 있도록 붙여놓은 이정표
- Tag가 붙은 commit은 commit id(version) 대신 tag name으로 쉽게 checkout 가능
- 예를 들어, 3.0 version이 드디어 나왔다면 tag로 3.0을 달아서 2년 뒤에도 쉽게 돌아갈 수 있도록 함.
Push
- Local Repository 내용 중 Remote Repository에 반영되지 않은 commit을 Remote Repository로 보내는 과정
- 권장: Push하는 순간 Remote로 올라가는 것이라 다른 개발자들도 코드를 가져와서 쓸 수 있음. 이때 실행되지 않는 코드를 올리면 다른 사람의 작업에 방해가 될 수 있기 때문에, 검증되지 않은 코드는 Push하지 않도록 함.
Pull
- Remote Reposity에 있는 내용 중, Local Repository에 반영되지 않은 내용을 가져와서 Local Repository에 저장하는 과정
- 다른 팀원이 변경하고 Push한 내용을 Local Repository에 가져올 수 있음
- (참고) Push 과정에서 Conflict(충돌)이 일어나서 Push가 거절된 경우, Pull을 통해 Remote Repository의 변경 내용을 Local Repository에 반영하여 Conflict를 해결하나 뒤 다시 Push 시도해야 함
Branch
- 특정 시점(commit 단위)에서 분기하여 새로운 commit을 쌓을 수 있는 가지를 만드는 것
- Repository를 처음 생성하면 디폴트로 생성되는 것이 master(혹은 main) branch이며, 이 branch가 개발의 주축이 됨
- 모든 branch는 최종적으로 다시 master branch에 merge(병합)되는 형식으로 진행됨
Merge
- Branch의 반대개념으로 하나의 Branch를 다른 Branch와 합치는 과정
- Merge되는 두 Branch는 주종관계가 성립. e.g. dev branch를 main branch에 merge
- Merge되는 과정에서 Conflict 발생하는 경우 Diff를 수정하여 Conflict 해결한 뒤 Merge 진행할 수 있음
2. Local Repository 구성
1. 실습할 Workspace 생성
% mkdir git_ws
2. Working Directory 생성 및 git init하면 해당 폴더를 Local Repository로서 관리
- Workspace로 이동한 뒤 Working Directory 생성
git init폴더에서 Git을 초기화하는 명령어를 사용하면 해당 폴더를 Git이 관리하기 시작
% cd git_ws
git_ws % mkdir test_project
git_ws % cd test_project
test_project % git init
Initialized empty Git repository in /Users/sy/git_ws/test_project/.git/- .git 폴더 생성
- .git으로 이동해서 살펴보면 Git 관련 파일들이 생성되어 있음
(base) sy@Lees-MacBook-Pro test_project % ls -all
total 0
drwxr-xr-x  3 sy  staff   96  9  7 14:34 .
drwxr-xr-x  4 sy  staff  128  9  7 14:33 ..
drwxr-xr-x  9 sy  staff  288  9  7 14:34 .git
(base) sy@Lees-MacBook-Pro test_project % cd .git
(base) sy@Lees-MacBook-Pro .git % ls -all
total 24
drwxr-xr-x   9 sy  staff  288  9  7 14:34 .
drwxr-xr-x   3 sy  staff   96  9  7 14:34 ..
-rw-r--r--   1 sy  staff   21  9  7 14:34 HEAD
-rw-r--r--   1 sy  staff  137  9  7 14:34 config
-rw-r--r--   1 sy  staff   73  9  7 14:34 description
drwxr-xr-x  15 sy  staff  480  9  7 14:34 hooks
drwxr-xr-x   3 sy  staff   96  9  7 14:34 info
drwxr-xr-x   4 sy  staff  128  9  7 14:34 objects
drwxr-xr-x 4 sy staff 128 9 7 14:34 refs- Working Directory에 파일을 생성
touch {파일명}: 비어있는 파일 하나를 생성해주는 명령어
(base) sy@Lees-MacBook-Pro test_project % touch test.txt
(base) sy@Lees-MacBook-Pro test_project % ls
test.txt
git statusgit에 존재하는 파일 확인 -> 자주 확인하는 습관을 들이기 ⭐️
(base) sy@Lees-MacBook-Pro test_project % git status
On branch main  # 현재 main branch에 있다

No commits yet  # 아직 commit한 건 없다

Untracked files:  # working directory에는 있는데 stage에는 존재하지 않는 파일이 있다
  (use "git add <file>..." to include in what will be committed)
	test.txt
git add <filename>⭐️
- Working Directory에서 변경된 파일을 Stage(Index)에 추가
(base) sy@Lees-MacBook-Pro test_project % git add test.txt
(base) sy@Lees-MacBook-Pro test_project % git status
On branch main

No commits yet

Changes to be committed:
  (use "git rm --cached <file>..." to unstage)
	new file:   test.txt
git commit -m "commit 변경사항에 대한 설명" <filename>⭐️⭐️
- Stage(Index)에 추가된 변경사항을 HEAD에 반영(확정)
(base) sy@Lees-MacBook-Pro test_project % git commit -m "테스트임" test.txt
[main (root-commit) 4b24e0e] 테스트임
 1 file changed, 0 insertions(+), 0 deletions(-)
 create mode 100644 test.txt
(base) sy@Lees-MacBook-Pro test_project % git status
On branch main
nothing to commit, working tree clean
*참고) Mac에서 command+shit+. 하면 숨김파일 볼 수 있음
3. Remote Repository 생성 및 등록
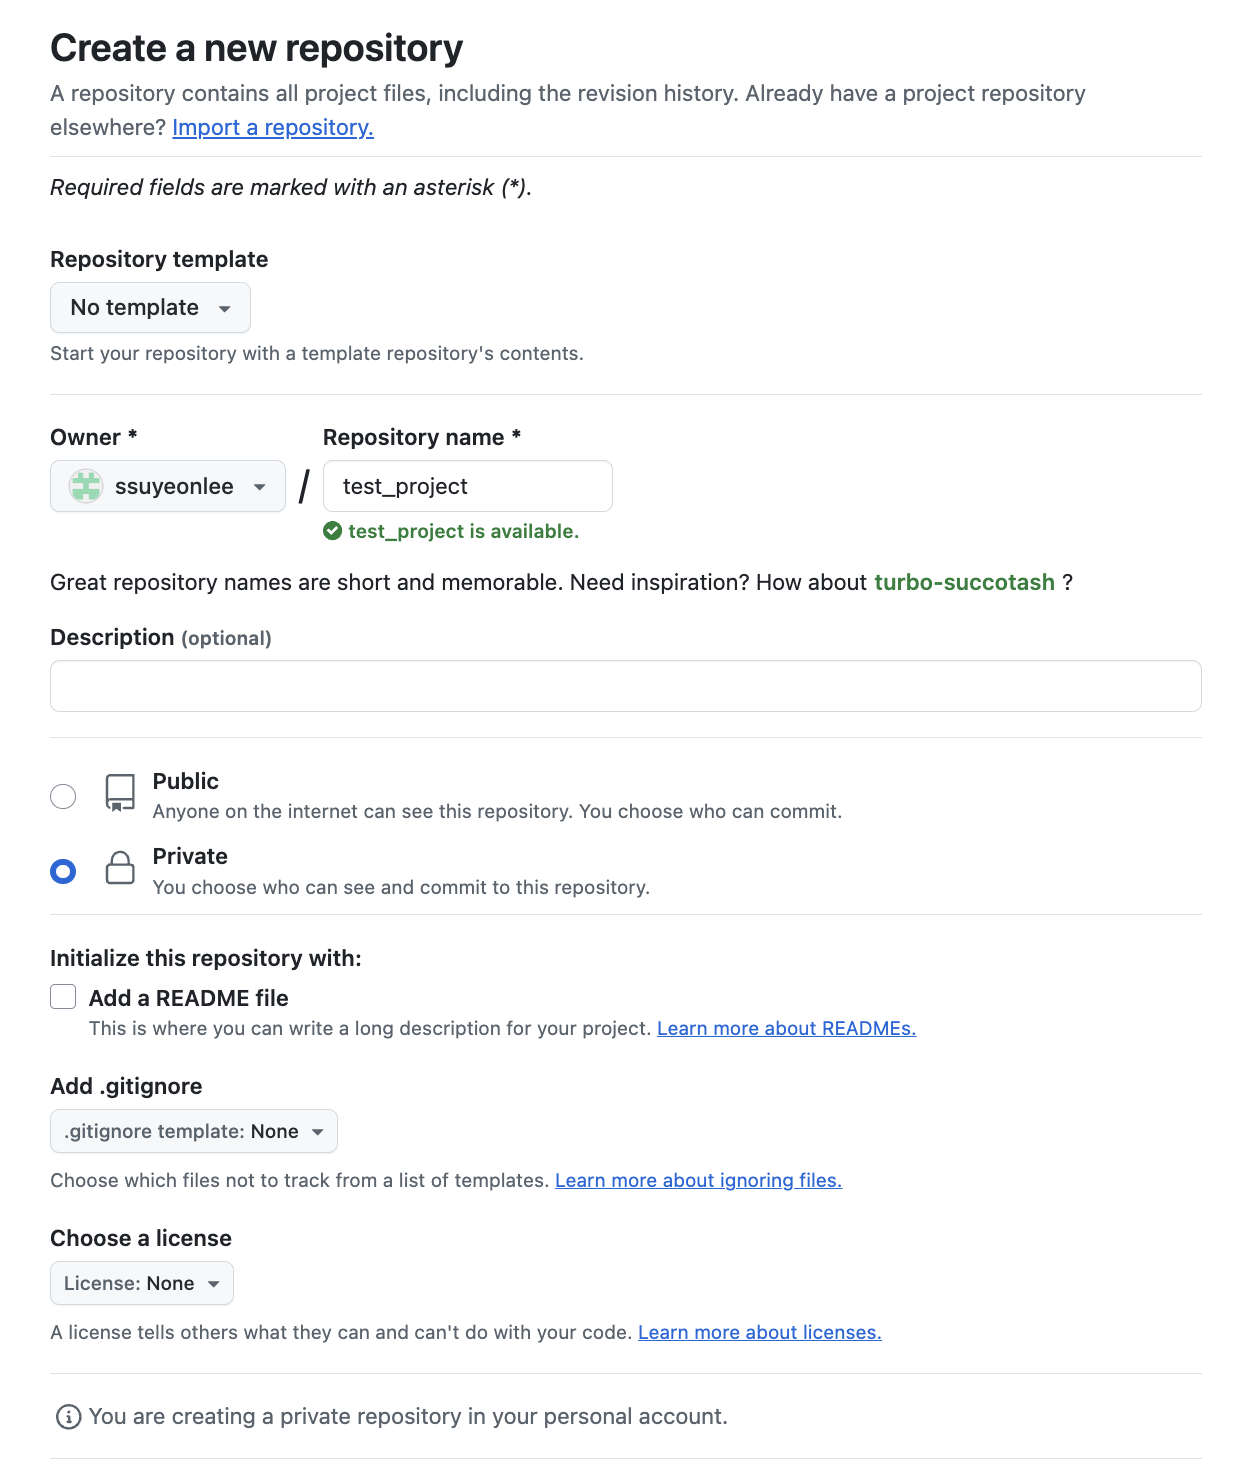
- 일단 깃헙에서 Private Repository 생성하기
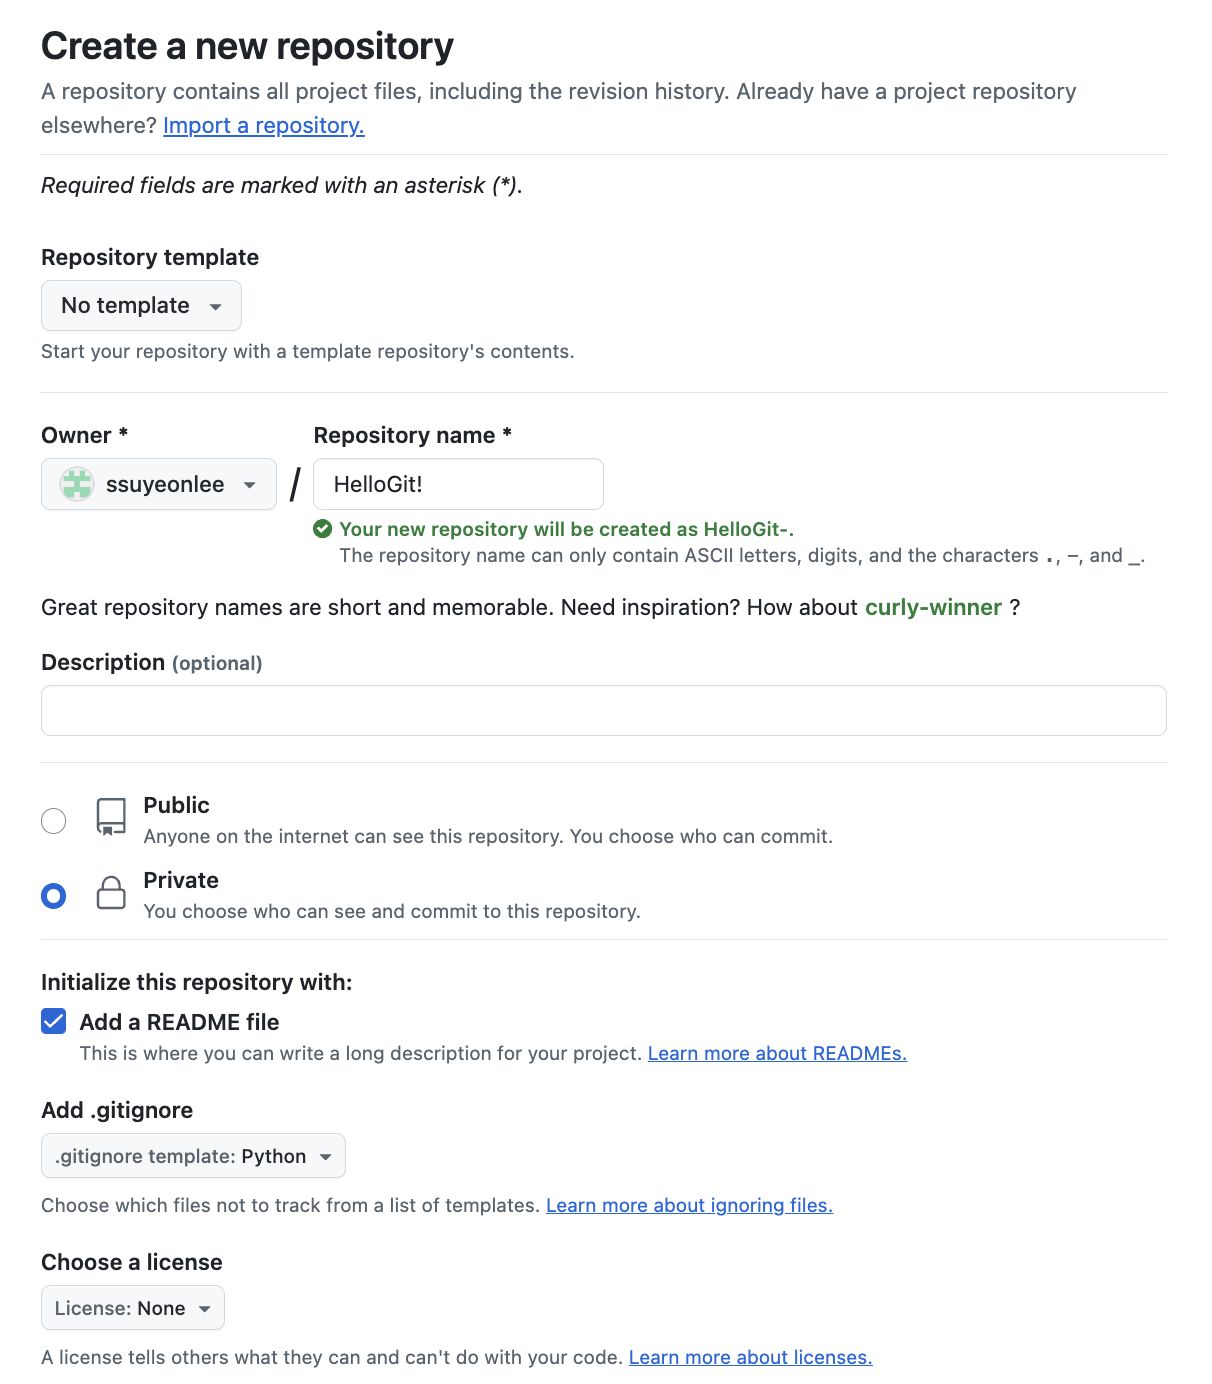
- README file
- 프로젝트에 대한 설명, 사용방법, 라이센스, 설치방법 등에 대한 내용을 기술하는 파일
- 나, 직장동료, 프로그램 사용자(테스터)를 위해 존재
- .gitignore
- Git 버전 관리에서 제외할 파일 목록을 지정하는 파일 (모든 파일을 한번에 올릴 때 여기에 있는 파일들은 제외시켜줌)
- 사용자가 원하지 않는 파일들을 자동으로 commit 대상에서 제외시켜 줌
- VS code에서 회색 처리됨
- github token 생성 (보안상 Remote Repository 접속 시 비밀번호 대신 token 사용)
- Settings > Developer settings > Personal access tokens > classic
- 여기에서 token 생성하고 나면 다시 확인할 수 없으니까 잘 저장해두기!
- Local Repository에 연동할 Remote Repository 등록 (token 사용)
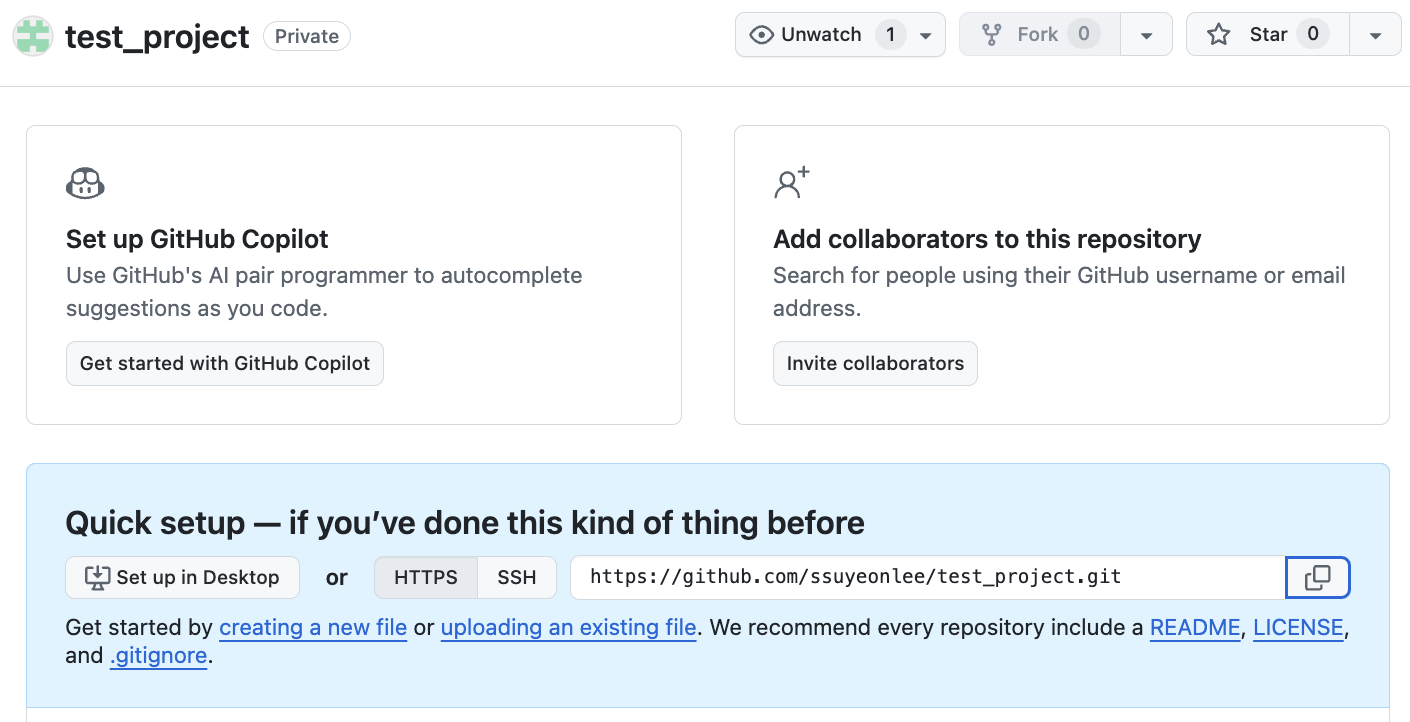
- Remote Repository에서 HTTPS의 주소를 복사
git remote add origin https://<username>:<token>@github.com/<repository>.git- 여기에서
<username>:<token>을 함께 입력해주면 remote repository에 push, pull할 때 username과 token을 물어보지 않고 자동으로 입력해서 편리함.
- 여기에서
git remote -v로 remote repository 연결 여부 확인
4. Remote Repository에 변경 내용 Push하고, Pull 해오기 ⭐️⭐️
git push origin master
- 오류 뜨면
git push origin main(예전에는 master 썼는데 요즘에는 main으로 바뀜) - git에 push할 건데 현재 연결된 Remote Repository인 origin의 master Branch에 할 것이다 라는 의미
- commit 했던 변경 내용을 master branch에 push
- Remote Repository에서 Push된 파일 확인
git pull origin <branchname: main 등>
- (Github에서 ReadMe 파일 추가했었음) -> Readme 파일을 Local Repository로 Pull
ls했을 때, README.md test.txt 로 추가된 것 확인할 수 있음.- (참고)
cat exam.txt와 같이 입력하면 파일을 읽어옴
5. Remote Repository 복제하기 (git clone) ⭐️⭐️⭐️
-
Local Repository 생성하지 않은 상태에서 git clone 명령으로 Remote Repository을 local에 복제하기
-
git clone https://<username>:<token>@github.com/<repository>.git- 위 명령어로 폴더 생성 -> git init(해당 폴더 초기화) -> Remote Repository 등록 -> Remote Repository 내용을 pull 과정을 모두 할 수 있음.
- git clone 이후, Remote Repository 이름의 폴더가 생성되고, REAME.md나 .gitignore 파일이 가져와진 것을 확인할 수 있음
~/git_ws $ git clone https://ssuyeonlee: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@github.com/ssuyeonlee/HelloGit.git
Cloning into 'HelloGit'...
remote: Enumerating objects: 4, done.
remote: Counting objects: 100% (4/4), done.
remote: Compressing objects: 100% (3/3), done.
remote: Total 4 (delta 0), reused 0 (delta 0), pack-reused 0 (from 0)
Receiving objects: 100% (4/4), done.

~/git_ws $ cd HelloGit

~/git_ws/HelloGit $ ls -all
total 16
drwxr-xr-x   5 sy  staff   160  9  7 16:33 .
drwxr-xr-x   6 sy  staff   192  9  7 16:33 ..
drwxr-xr-x  12 sy  staff   384  9  7 16:33 .git
-rw-r--r--   1 sy  staff  3139  9  7 16:33 .gitignore
-rw-r--r--   1 sy  staff    10  9  7 16:33 README.md
6. Branch
Branch 조회
git branchLocal에 있는 branch 조회git branch -rRemote에 있는 branch 조회git branch -aLocal+Remote에 있는 branch 모두 조회q로 빠져나오기
$ git branch -a
* main   # *: 현재 위치한 branch가 어디인지 나타냄
  remotes/origin/HEAD -> origin/main
  remotes/origin/main
Branch 생성
git branch <branchname>
- 이렇게 하면 branchname의 branch가 하나 더 생성됨
- 이때 생성한 branch는 현재 위치한 branch인 main과 동일한 파일들로 구성됨. 복제가 된다는 뜻.
Branch 이동
git checkout <branchname>
Branch 생성과 이동을 동시에 하는 방법 ⭐️
git checkout -b <branchname>
- -b : branch
- branchname이 없어야만 오류가 뜨지 않음.
생성한 Branch를 Remote Repository에 올리기
git push origin <branchname>
Branch 삭제(Local)
git branch -d <branchname>
- -d: delete
Branch 삭제(Remote)
git push origin --delete <branchname>
7. Git Log and Diff
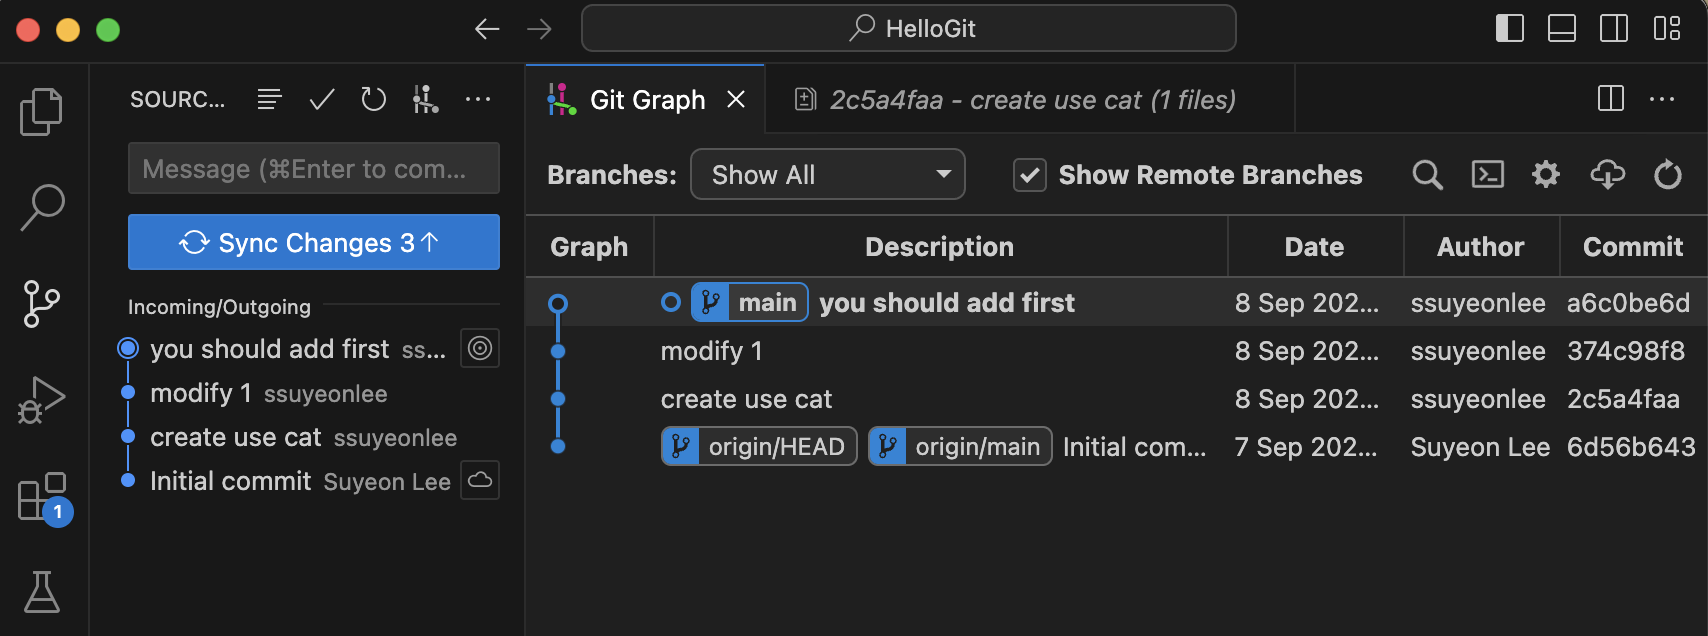
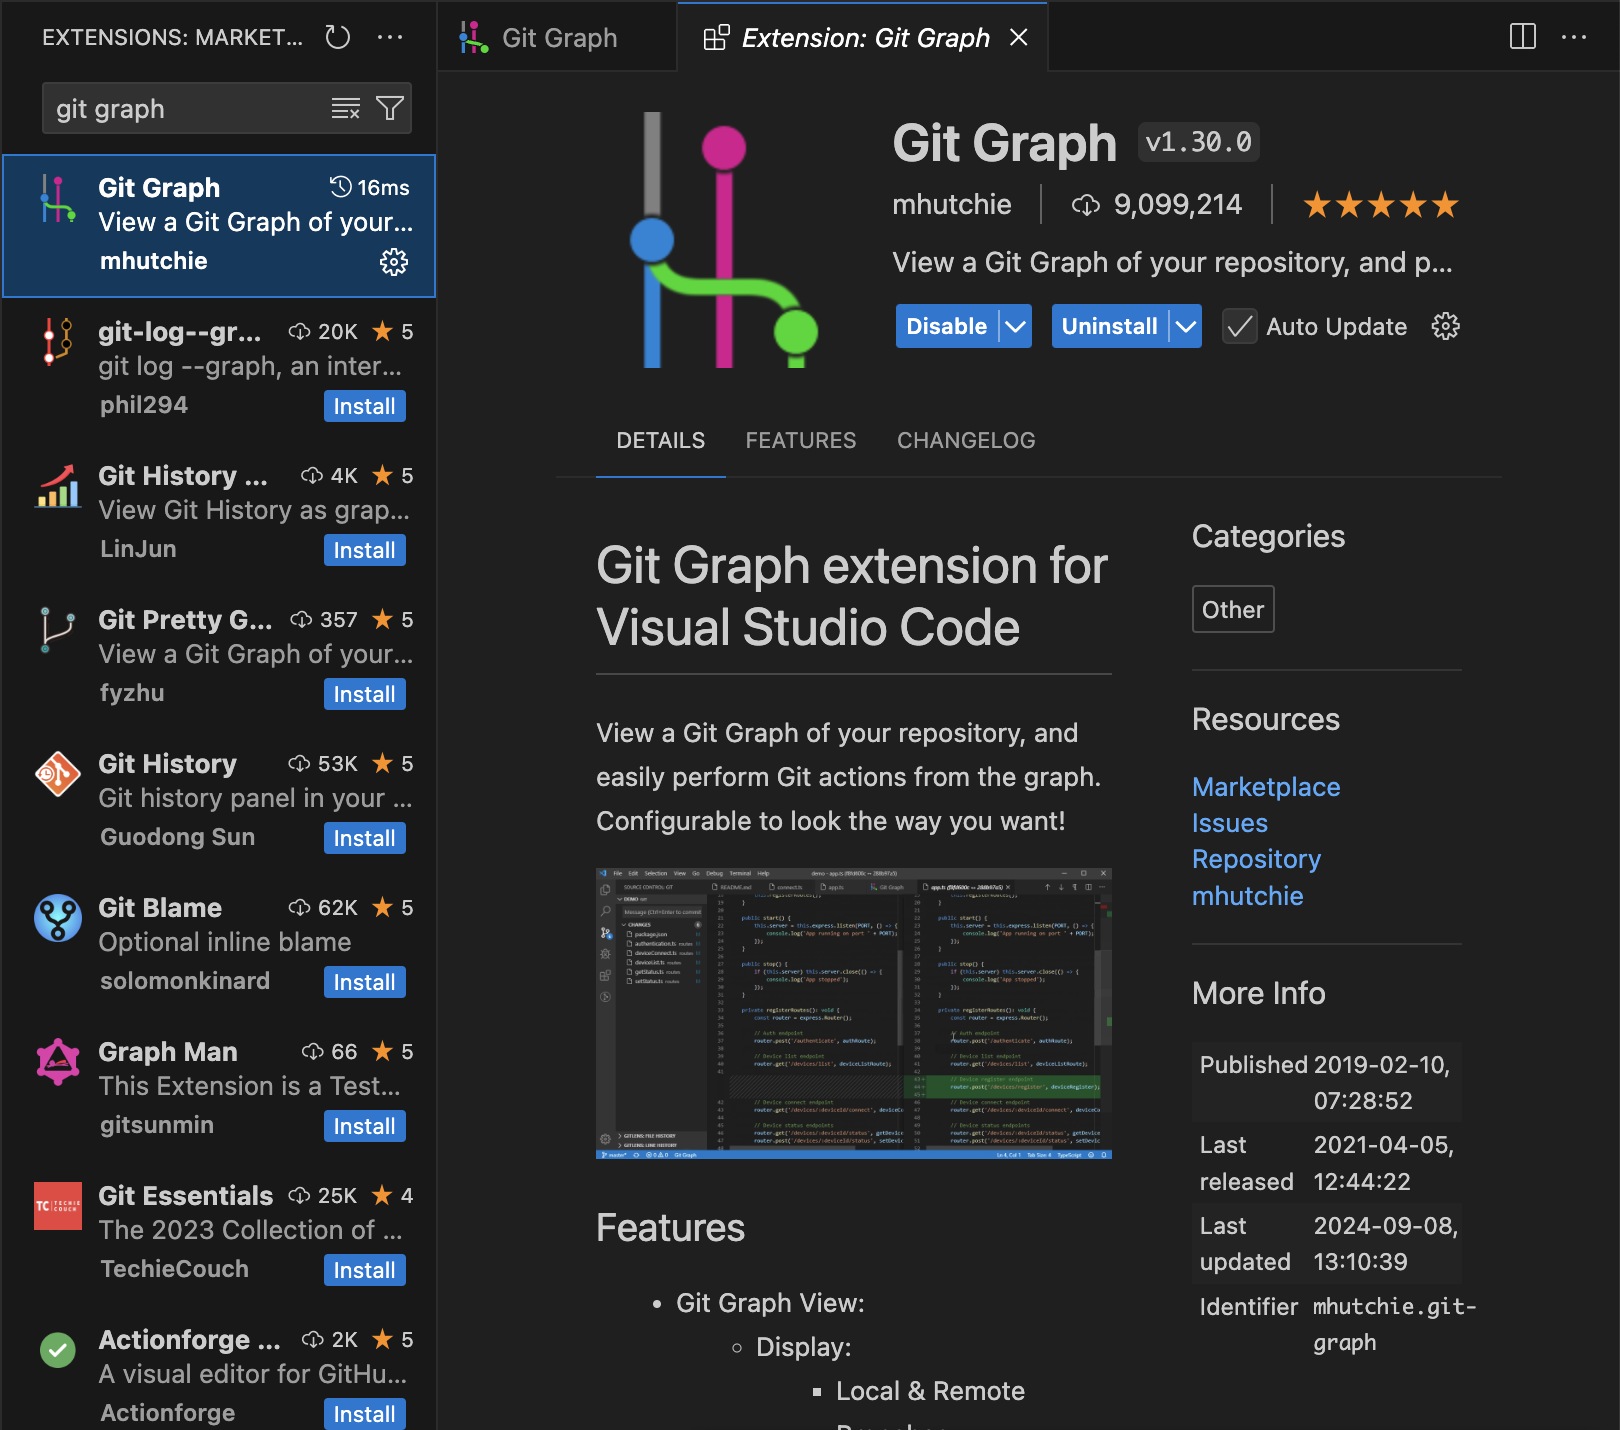
VS Code의 git graph extension
-
git graph extension 설치하기
-
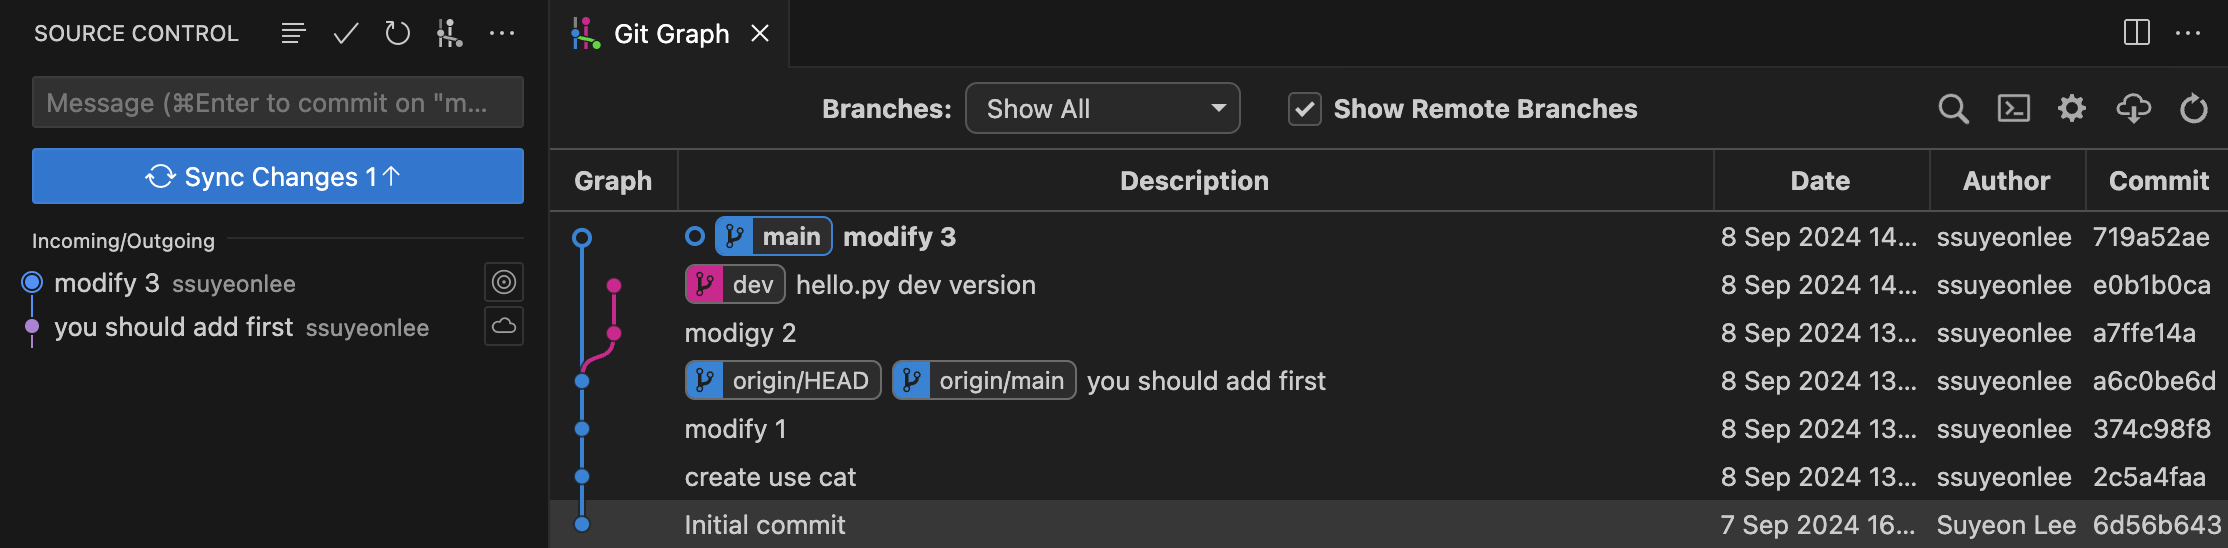
사용 중인 git에서 로그들을 시각화하여 확인할 수 있음.
-
좌측 3번째 메뉴 클릭 > SOURCE CONTROL 우측 4번째 branch같은 아이콘 클릭
-
사실 터미널에서
git log로 해당 git에서 있었던 로그들도 확인 가능 (나갈 때는q입력)
Git Editor 설정
git config --global core.editor <editorname> --wait
- global 설정으로 기본 Git editor를 설정할 수 있음
-- editor로는 vim, VS Code 설정 가능 - --wait 옵션은 command line으로 VS Code를 실행시켰을 경우, VS Code 인스턴스를 닫을 때까지 command를 대기하는 것. 그게 싫으면 제외해서 설정하면 됨.
Git Diff Tool 설정
git config --global -e
- editor를 VS Code로 했으면, 파일이 VS Code로 열림
[core]
	autocrlf = input
	editor = code --wait

[diff]
	tool = vscode
[difftool "vscode"]
cmd = "code --wait --diff $LOCAL $REMOTE"- [core]에서 code(=vs code)가 wait 옵션과 함께 설정되어 있음.
- [diff], [difftool "vscode"] 추가
Git Diff - Local Branch 간 비교
git diff <branch1> <branch2>
- diff: vim을 사용해서 branch 간에 비교
git difftool <branch1> <branch2> - difftool 하면, 기본 editor인 VS Code 실행하여 확인할지 여부 확인
-> Launch 'vscode' [Y/n]? 에서 Y 입력 - VS Code에서 두 Branch 간의 차이를 아래와 같이 시각화 된 결과로 비교할 수 있음

Git Diff - Commit 간 비교
git difftool <commithash> <commithash>
- 그 전에, Commit Hashcode는
git log에서 각 commit별 뒤의 문자열
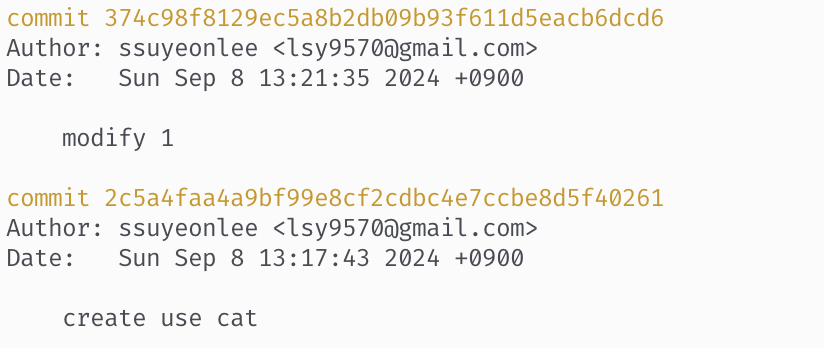
-> 위와 같이 commit 뒤의 문자열 복사
->git difftool 2c5a4faa4a9bf99e8cf2cdbc4e7ccbe8d5f40261 374c98f8129ec5a8b2db09b93f611d5eacb6dcd6실행
-> VS Code에서 변경사항 비교

Git Diff - 마지막 Commit과 이전 Commit 비교
git difftool HEAD HEAD^ (여기까지 잘 확인하지는 않긴 함)
- HEAD^: 마지막 바로 직전 commit
Git Diff - 마지막 Commit과 현재 수정사항 확인
git difftool HEAD
- 최근 수정하여 올린 commit과 아직 commit하기 이전인 현재의 수정 사항 간의 차이점 비교
Git Diff - Local과 Remote 간 비교
git diff <branch> origin/<branch2>
origin/<branch2>: Remote Repository를 의미하는 origin에서의 어떤 branch와 비교할지를 입력하는 부분
8. Merge and Conflict
Merge Tool 설정
git config --global -e 실행하여 아래 내용을 최하단에 추가
[merge]
	tool = vscode
[mergetool "vscode"]
	cmd = "code --wait $MERGED"
Git Merge
git merge <branchname>
- 현재 위치한 Branch에 다른 Branch를 병합
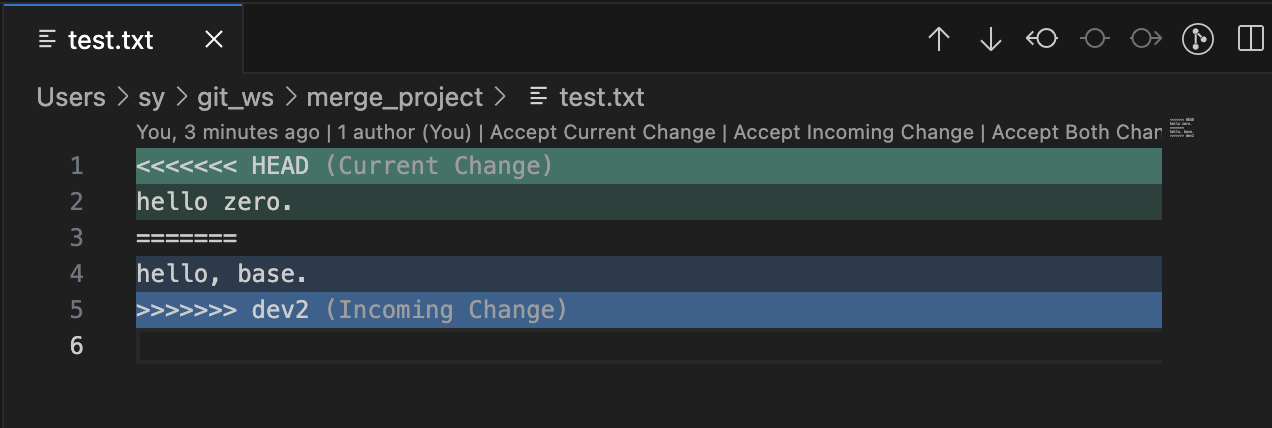
Merge Conflict
- Branch Merge 과정에서 발생하는 충돌. Push, pull할 때도 충돌 일어날 수 있음.
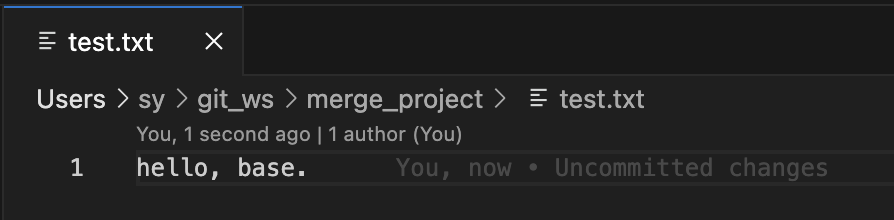
- main의 test.txt 내용과 dev2의 test.txt 내용이 다를 때, main에서 git merge dev를 하게 되면? 아래와 같이 CONFLICT 발생
$ git merge dev2
Auto-merging test.txt
CONFLICT (content): Merge conflict in test.txt
Automatic merge failed; fix conflicts and then commit the result.
git mergetool을 사용하여 해결해보자!- 충돌이 발생한 파일이 순차적으로 나옴
- 둘 중에 어떤 내용으로 merge할지를 선택하고, 그 내용만 파일에 남겨둔다.
- 저장 후 VS Code 종료
- 충돌이 발생한 파일이 순차적으로 나옴
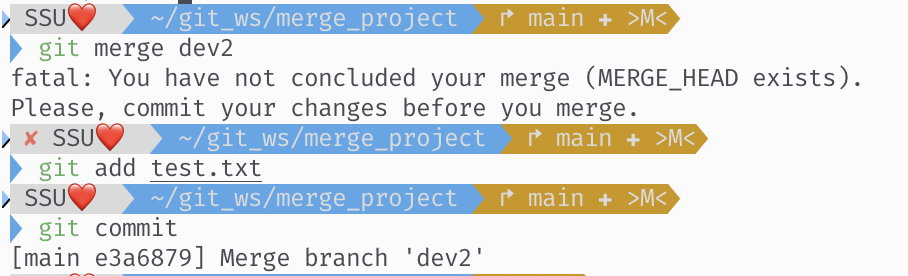
- 파일만 수정이 된 상태라 다시 merge 시도하면 여전히 CONFLICT 상태임
git merge dev2
fatal: You have not concluded your merge (MERGE_HEAD exists).
Please, commit your changes before you merge.- Conflict 해제
- git add + git commit

- VS Code가 열리면 저장하고 닫기
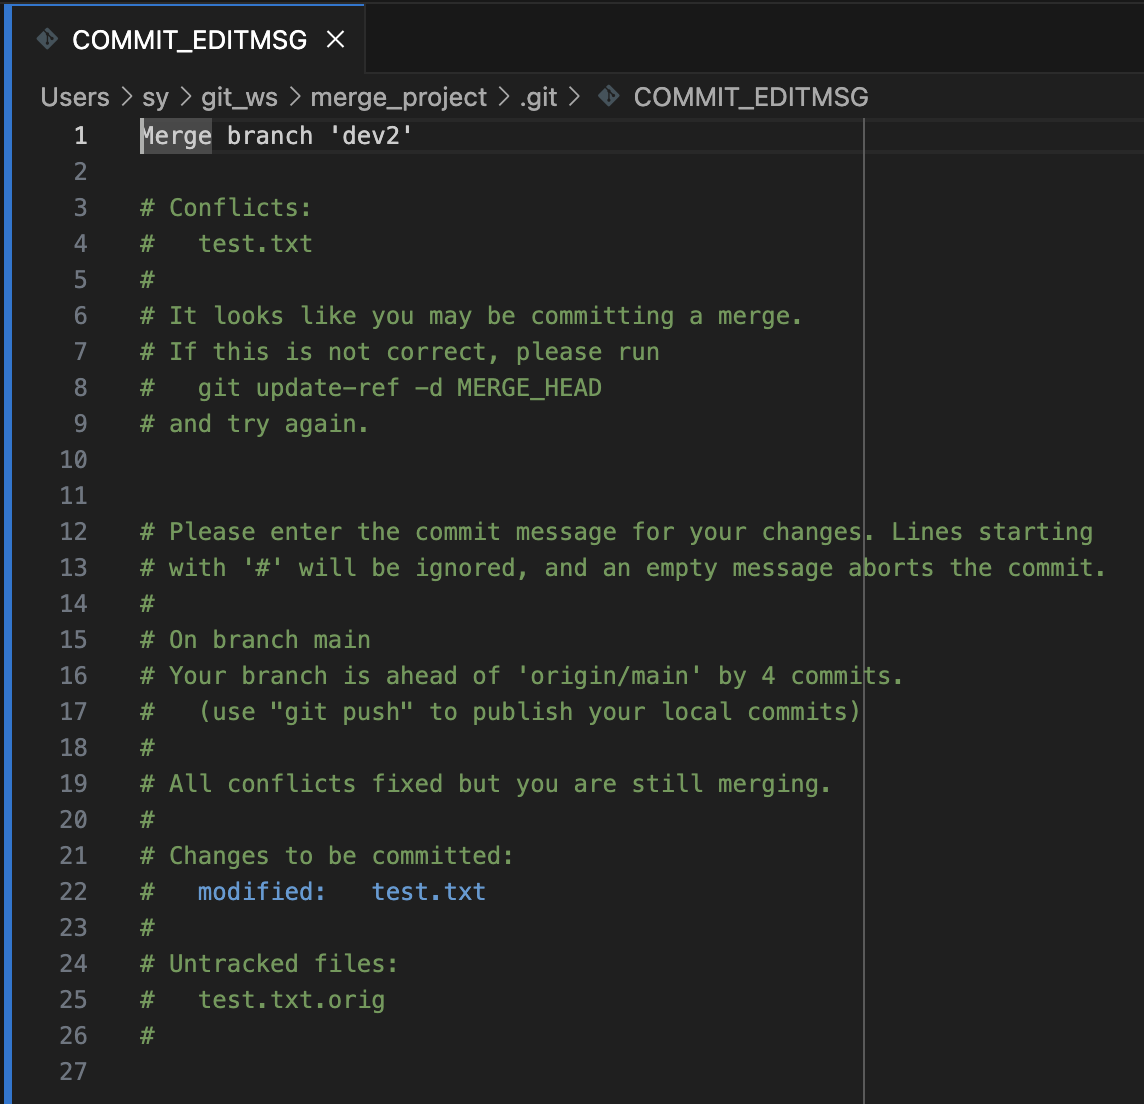
- 터미널에서 Merge된 것을 확인할 수 있음
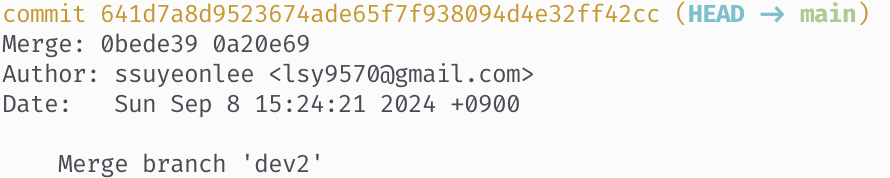
- git log로 확인
9. Git Tag
- Tag: 특정 버전(commit)에 Tag를 달아놓을 필요가 있을 때 사용(e.g. 버전 릴리즈, 큰 변경사항이 있을 때)
git tag <tagname>: Local에서 마지막 버전(commit)에 tag 달기

git tag <tagname> <commithash>: Local에서 특정 버전(commit)에 tag 달기 -> commit 2에 tag 달림
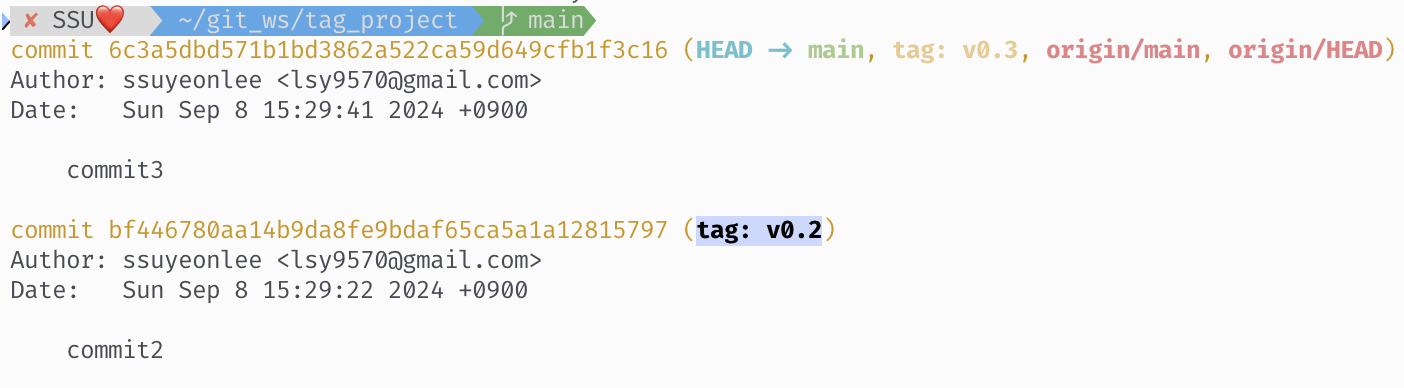
git push origin <tagname>: Local에서 위와 같이 달았던 Tag를 Remote에도 반영해야 할 때 Tag를 push해줌.- github 가보면 Tag 달려있음
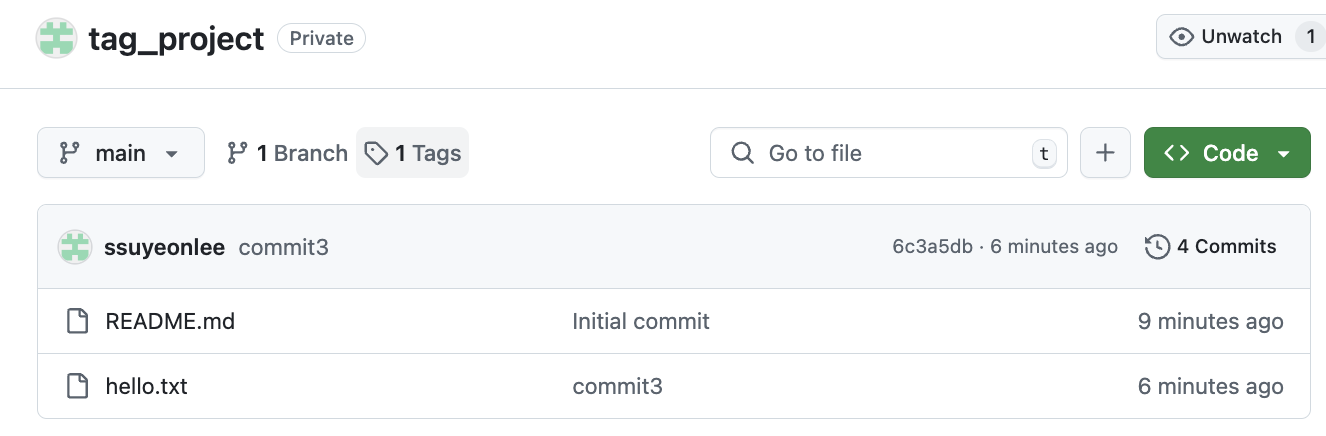
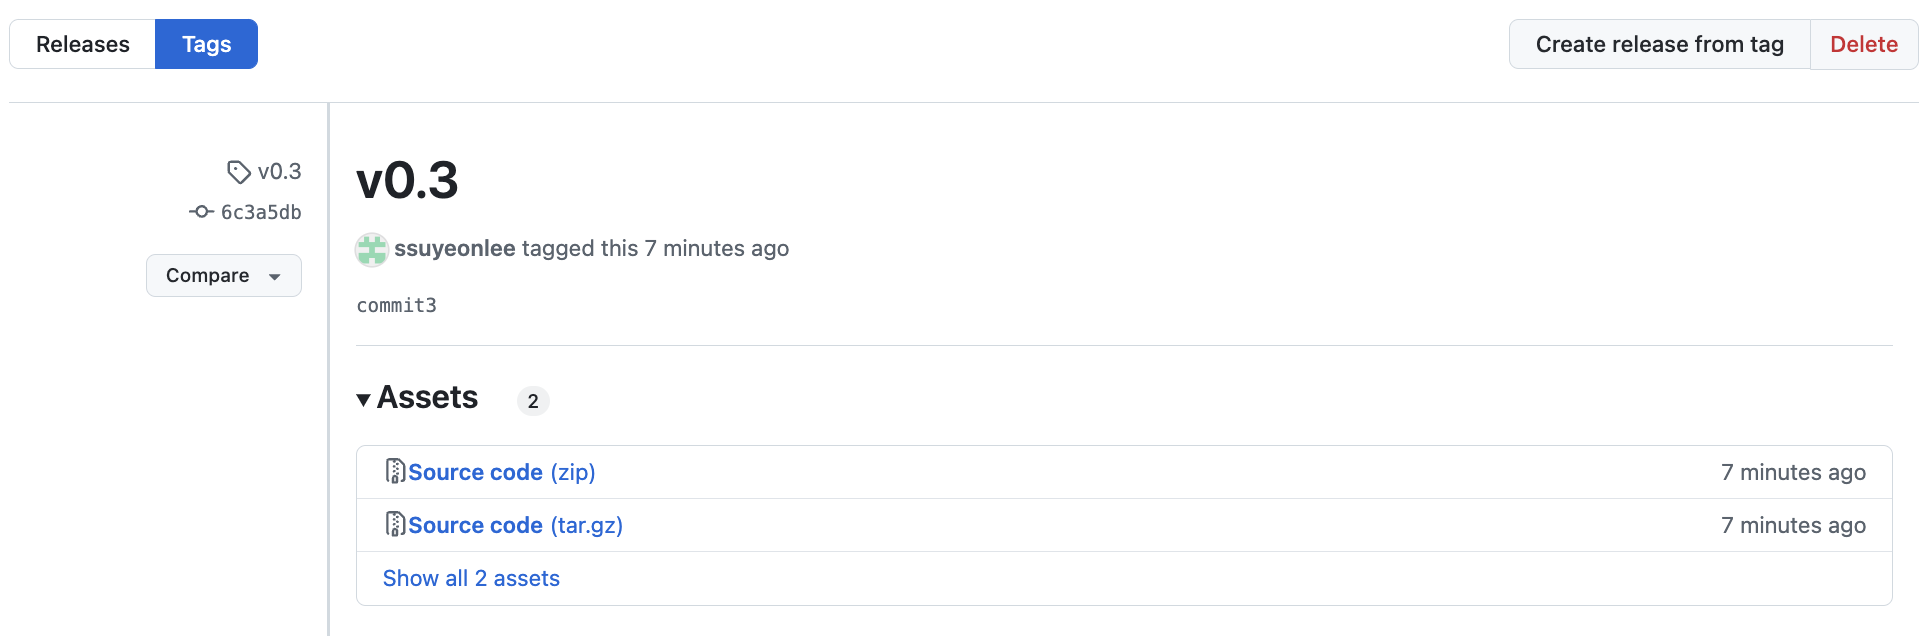
- github 가보면 Tag 달려있음
git tag: 현재까지 Local에서 설정한 tag 목록 보기git show <tagname>: tag의 상세 정보 확인하기git tag --delete <tagname>: Local의 tag 삭제git push --delete origin <tagname>: Remote의 tag 삭제 (Remote에서만 삭제하고 Local에서는 삭제하지 않을 때도 이것만 실행하면 됨)
참고
-
cat 파일명: 파일을 읽어옴 -
cat > 파일명: 파일이 존재하면 파일의 내용을 입력하는 값으로 덮어씌움. 파일이 존재하지 않는다면 입력하는 값으로 파일을 생성함. 내용 입력 후 엔터. 모두 다 입력했으면 control+d로 완료하기. -
cat >> 파일명: >>를 쓰면 덮어씌우지 않고 밑줄에 이어서 내용이 추가됨. -
code .현재 위치에서 VSCode 열기