이번엔 Character를 C++ 코드로 생성해보고 Enhanced Input을 적용해보자.
Pawn은 플레이어가 빙의해서 입출력을 처리할 수 있도록 되어있고 Character는 Pawn을 상속받고 추가적으로 CapsuleComponent, SkeletalMeshComponent, CharacterMovementComponent를 가지고 있다.
Character 생성
AABCharacterBase::AABCharacterBase()
{
// Pawn
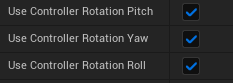
bUseControllerRotationPitch = false;
bUseControllerRotationRoll = false;
bUseControllerRotationYaw = false;
// Capsule
GetCapsuleComponent()->InitCapsuleSize(42.f, 96.0f);
GetCapsuleComponent()->SetCollisionProfileName(TEXT("Pawn"));
// Movement
GetCharacterMovement()->bOrientRotationToMovement = true;
GetCharacterMovement()->RotationRate = FRotator(0.0f, 500.0f, 0.0f);
GetCharacterMovement()->JumpZVelocity = 700.0f;
GetCharacterMovement()->AirControl = 0.35f;
GetCharacterMovement()->MaxWalkSpeed = 500.0f;
GetCharacterMovement()->MinAnalogWalkSpeed = 20.0f;
GetCharacterMovement()->BrakingDecelerationWalking = 2000.0f;
// Mesh
GetMesh()->SetRelativeLocationAndRotation(FVector(0.0f, 0.0f, -100.0f), FRotator(0.0f, -90.0f, 0.0f));
GetMesh()->SetAnimationMode(EAnimationMode::AnimationBlueprint);
GetMesh()->SetCollisionProfileName(TEXT("CharacterMesh"));
static ConstructorHelpers::FObjectFinder<USkeletalMesh> CharacterMeshRef(TEXT("/Script/Engine.SkeletalMesh'/Game/Characters/Mannequins/Meshes/SKM_Quinn_Simple.SKM_Quinn_Simple'"));
if (CharacterMeshRef.Object)
{
GetMesh()->SetSkeletalMesh(CharacterMeshRef.Object);
}
static ConstructorHelpers::FClassFinder<UAnimInstance> AnimInstanceMeshRef(TEXT("/Game/Characters/Mannequins/Animations/ABP_Quinn.ABP_Quinn_C"));
if (AnimInstanceMeshRef.Class)
{
GetMesh()->SetAnimInstanceClass(AnimInstanceMeshRef.Class);
}
}캐릭터를 이루는 CapsuleComponent, SkeletalMeshComponent, CharacterMovementComponent 세가지를 설정해준것을 볼 수 있다.
bUseControllerRotationPitch/Yaw/Roll: 컨트롤러의 방향으로 캐릭터의 방향에 바로 적용할 것인가를 결정한다.
Movement Mode: 땅위에 있으면 Waliking, 땅위에 없으면 Falling, 이동을 제한하려면 None
MaxWalkSpeed: 이동속도의 최댓값
JumpZVelocity: 점프 수치
이렇게만 설정하게되면 에디터에서 플레이 시 캐릭터가 보이지 않게되는데 이는 카메라를 부착하지 않았기 때문이다.
카메라 부착
우리가 조종할 CharacterPlayer클래스에 가서
	UPROPERTY(VisibleAnywhere,BlueprintReadOnly, Category = Camera, Meta = (AllowPrivateAccess = "true"))
	TObjectPtr<class USpringArmComponent> CameraBoom;

	UPROPERTY(VisibleAnywhere, BlueprintReadOnly, Category = Camera, Meta = (AllowPrivateAccess = "true"))
	TObjectPtr<class UCameraComponent> FollowCamera;
컴포넌트 변수들을 넣어주고
	CameraBoom = CreateDefaultSubobject<USpringArmComponent>(TEXT("CameraBoom"));
	CameraBoom->SetupAttachment(RootComponent);
	CameraBoom->TargetArmLength = 400.0f;
	CameraBoom->bUsePawnControlRotation = true;

	FollowCamera = CreateDefaultSubobject<UCameraComponent>(TEXT("FollowCamera"));
	FollowCamera->SetupAttachment(CameraBoom, USpringArmComponent::SocketName);
	FollowCamera->bUsePawnControlRotation = false;
다음과 같이 UCameraComponent와 USpringArmComponent를 컴포넌트에 등록시켜주면
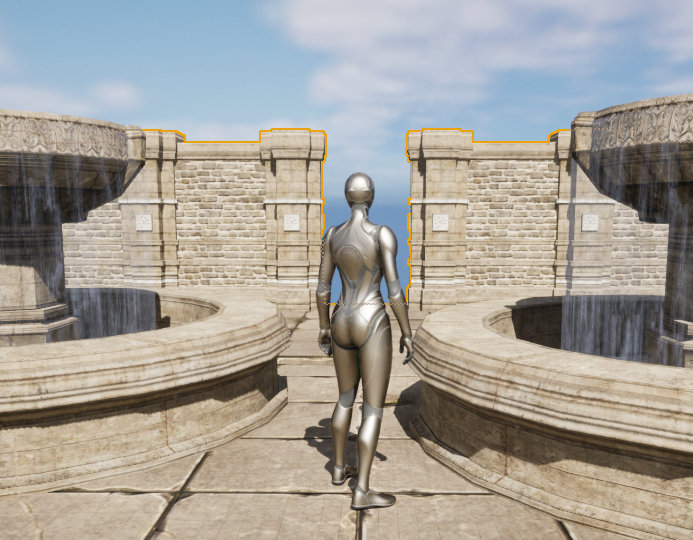
캐릭터가 잘 보이는것을 볼 수 있다.
위에서 설정한 UseControllerRotationPitch/Yaw/Roll 을 체크하게되면 Controller의 방향 그대로 캐릭터 방향에 적용된다.
즉, 위를 바라보면 사진처럼 캐릭터의 전방 방향이 위를 향하게 되므로 이상해진다.
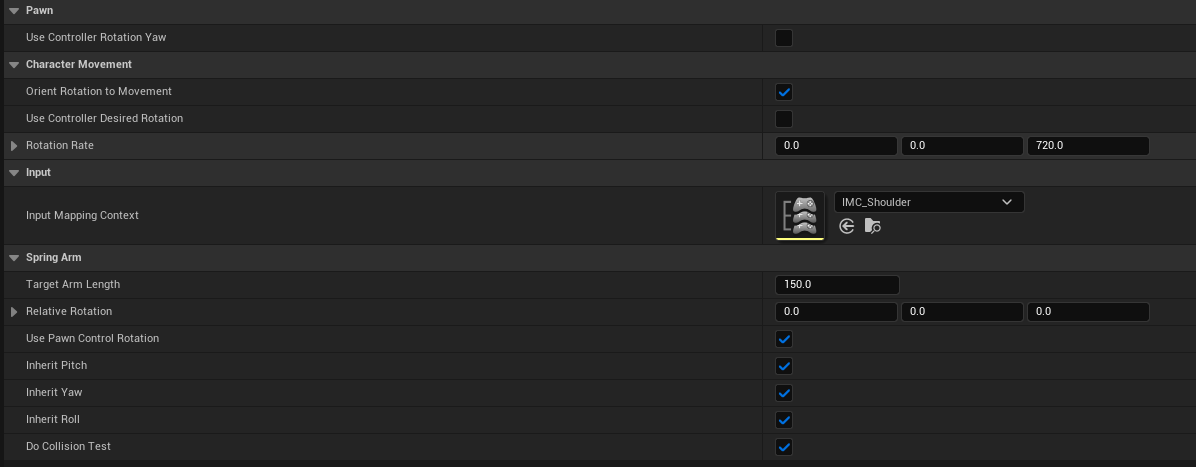
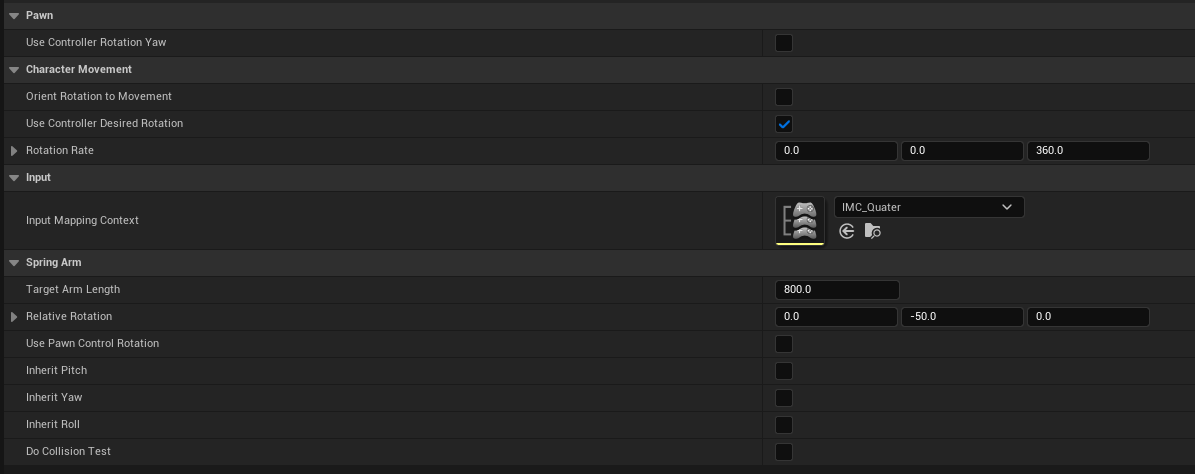
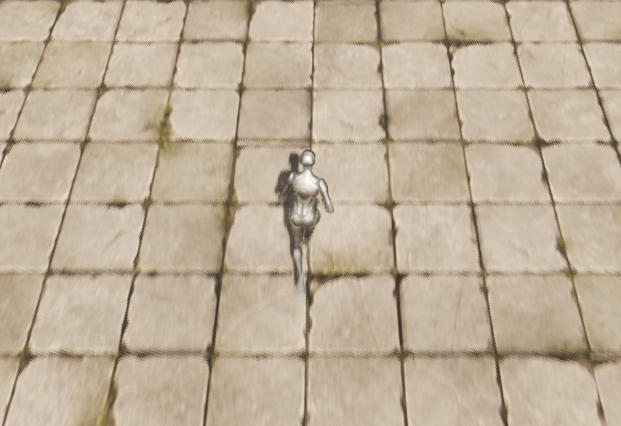
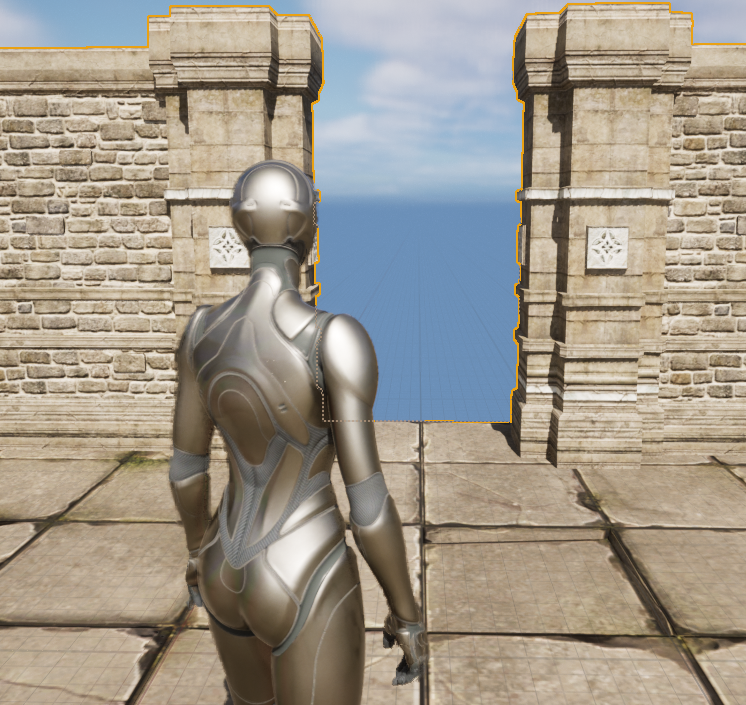
Data Asset으로 두가지 시점 만들기
디아블로 같은 하늘에서 바라보는 시점과 TPS 게임 같은 캐릭터 뒤에서 바라보는 시점을 만들어볼 것이다.
두 시점은 SpringArm의 길이나 RelativeRotation 등 다른 값들을 갖는데 이를 편하게 관리하기 위해서 DataAsset을 이용한다.

Primary Asset을 상속받아서 지정할 몇몇 값들을 관리할 수 있도록 한다.
	UPROPERTY(EditAnywhere, Category = Pawn)
	uint32 bUseControllerRotationYaw : 1;

	UPROPERTY(EditAnywhere, Category = CharacterMovement)
	uint32 bOrientRotationToMovement : 1;

	UPROPERTY(EditAnywhere, Category = CharacterMovement)
	uint32 bUseControllerDesiredRotation : 1;

	UPROPERTY(EditAnywhere, Category = CharacterMovement)
	FRotator RotationRate;

	UPROPERTY(EditAnywhere, BlueprintReadOnly, Category = Input)
	TObjectPtr<class UInputMappingContext> InputMappingContext;

	UPROPERTY(EditAnywhere, Category = SpringArm)
	float TargetArmLength;

	UPROPERTY(EditAnywhere, Category = SpringArm)
	FRotator RelativeRotation;

	UPROPERTY(EditAnywhere, Category = SpringArm)
	uint32 bUsePawnControlRotation : 1;

	UPROPERTY(EditAnywhere, Category = SpringArm)
	uint32 bInheritPitch : 1;

	UPROPERTY(EditAnywhere, Category = SpringArm)
	uint32 bInheritYaw : 1;

	UPROPERTY(EditAnywhere, Category = SpringArm)
	uint32 bInheritRoll : 1;

	UPROPERTY(EditAnywhere, Category = SpringArm)
	uint32 bDoCollisionTest : 1;
위와 같은 변수들을 갖는 C++ 클래스를 상속받는 DataAsset을 두개 생성해서 각각 Quater와 Shoulder의 View가 되도록 값을 수정해준다.
그리고 이 둘을 분류할 Enum클래스와 관리하기 위한 TMap을 만들어준다.
UENUM()
enum class ECharacterControlType : uint8
{
	Shoulder,
	Quater
};

...중략...

UPROPERTY(EditAnywhere, Category = CharacterControl, Meta = (AllowPrivateAccess = "true"))
TMap<ECharacterControlType, class UABCharacterControlData*> CharacterControlManager;
그리고 시점을 변환해줄 함수들을 정의해준다.
void AABCharacterPlayer::ChangeCharacterControl()
{
	if (CurrentCharacterControlType == ECharacterControlType::Quater)
	{
		SetCharacterControl(ECharacterControlType::Shoulder);
	}
	else if (CurrentCharacterControlType == ECharacterControlType::Shoulder)
	{
		SetCharacterControl(ECharacterControlType::Quater);
	}
}

void AABCharacterPlayer::SetCharacterControl(ECharacterControlType NewCharacterControlType)
{
	UABCharacterControlData* NewCharacterControl = CharacterControlManager[NewCharacterControlType];
	check(NewCharacterControl);

	SetCharacterControlData(NewCharacterControl);

	CurrentCharacterControlType = NewCharacterControlType;
}

void AABCharacterPlayer::SetCharacterControlData(const UABCharacterControlData* CharacterControlData)
{
	Super::SetCharacterControlData(CharacterControlData);


	CameraBoom->TargetArmLength = CharacterControlData->TargetArmLength;
	CameraBoom->SetRelativeRotation(CharacterControlData->RelativeRotation);
	CameraBoom->bUsePawnControlRotation = CharacterControlData->bUsePawnControlRotation;
	CameraBoom->bInheritPitch = CharacterControlData->bInheritPitch;
	CameraBoom->bInheritYaw = CharacterControlData->bInheritYaw;
	CameraBoom->bInheritRoll = CharacterControlData->bInheritRoll;
	CameraBoom->bDoCollisionTest = CharacterControlData->bDoCollisionTest;


}
Enhanced Input 적용
InputMappingContext와InputAction이 있는데InputMappingContext는 사용자의 입력을InputAction과 연결해주고InputAction은 들어온 입력값을 변조해서 사용자가 연결시킨 함수를 실행시킨다.
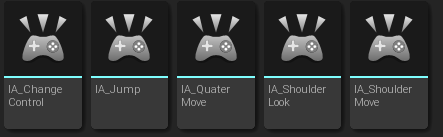
InputAction들을 생성


Move, Look, Jump와 ChangeControl 순으로 설정해준다.
Move와 Look은 상하좌우의 움직임 값을 받는 Vector2D, Jump와 ChangeControl은 눌림을 확인할 bool을 값으로 받는다. Move에 Swizzle이 있는 이유는 우리가 원하는 방향이 엔진상에서 y방향이기 때문에 xy에 들어갈 값의 순서를 yx로 바꿔주기 위함이다.

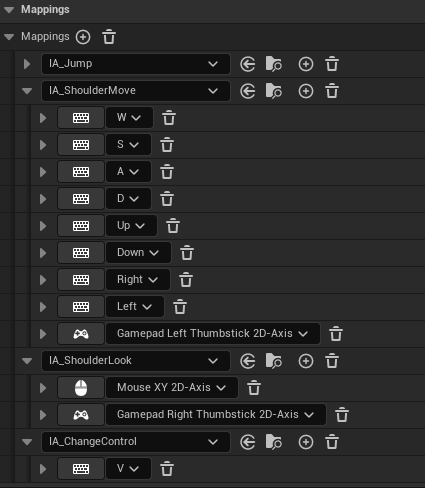
InputMappingContext를 설정한 후, C++로 넘어가 BindAction을 해줘야한다.
UPROPERTY(EditAnywhere, BlueprintReadOnly, Category = Input, Meta = (AllowPrivateAccess = "true"))
	TObjectPtr<class UInputAction> JumpAction;

UPROPERTY(EditAnywhere, BlueprintReadOnly, Category = Input, Meta = (AllowPrivateAccess = "true"))
	TObjectPtr<class UInputAction> ChangeControlAction;

UPROPERTY(EditAnywhere, BlueprintReadOnly, Category = Input, Meta = (AllowPrivateAccess = "true"))
	TObjectPtr<class UInputAction> ShoulderMoveAction;

UPROPERTY(EditAnywhere, BlueprintReadOnly, Category = Input, Meta = (AllowPrivateAccess = "true"))
	TObjectPtr<class UInputAction> QuaterMoveAction;

UPROPERTY(EditAnywhere, BlueprintReadOnly, Category = Input, Meta = (AllowPrivateAccess = "true"))
	TObjectPtr<class UInputAction> ShoulderLookAction;

void ShoulderMove(const FInputActionValue& Value);
void ShoulderLook(const FInputActionValue& Value);
void QuaterMove(const FInputActionValue& Value);InputAction을 받아올 변수들과 InputAction과 연결시킬 함수들을 선언한다.
void AABCharacterPlayer::SetupPlayerInputComponent(UInputComponent* PlayerInputComponent)
{
	Super::SetupPlayerInputComponent(PlayerInputComponent);
	UEnhancedInputComponent* EnhancedInputComponent = CastChecked<UEnhancedInputComponent>(PlayerInputComponent);

	EnhancedInputComponent->BindAction(JumpAction, ETriggerEvent::Triggered, this, &ACharacter::Jump);
	EnhancedInputComponent->BindAction(JumpAction, ETriggerEvent::Completed, this, &ACharacter::StopJumping);
	EnhancedInputComponent->BindAction(ChangeControlAction, ETriggerEvent::Triggered, this, &AABCharacterPlayer::ChangeCharacterControl);
	EnhancedInputComponent->BindAction(ShoulderMoveAction, ETriggerEvent::Triggered, this, &AABCharacterPlayer::ShoulderMove);
	EnhancedInputComponent->BindAction(ShoulderLookAction, ETriggerEvent::Triggered, this, &AABCharacterPlayer::ShoulderLook);
	EnhancedInputComponent->BindAction(QuaterMoveAction, ETriggerEvent::Triggered, this, &AABCharacterPlayer::QuaterMove);
}
함수 BindAction을 통해 함수와 InputAction을 연결한다.
if (UEnhancedInputLocalPlayerSubsystem* Subsystem = ULocalPlayer::GetSubsystem<UEnhancedInputLocalPlayerSubsystem>(PlayerController->GetLocalPlayer()))
	{
		Subsystem->ClearAllMappings();
		UInputMappingContext* NewMappingContext = NewCharacterControl->InputMappingContext;
		if (NewMappingContext)
		{
			Subsystem->AddMappingContext(NewMappingContext, 0);
		}
}InputMappingContext도 등록해야 하는데 위에서 두개의 시점에 따라 각각의 InputMappingContext를 만들었기 때문에 v키에 전환하는 SetCharacterControl에 등록하는 내용을 넣어준다.
void AABCharacterPlayer::ChangeCharacterControl()
{
if (CurrentCharacterControlType == ECharacterControlType::Quater)
{
SetCharacterControl(ECharacterControlType::Shoulder);
}
else if (CurrentCharacterControlType == ECharacterControlType::Shoulder)
{
SetCharacterControl(ECharacterControlType::Quater);
}
}
void AABCharacterPlayer::ShoulderMove(const FInputActionValue& Value)
{
FVector2D MovementVector = Value.Get<FVector2D>();
const FRotator Rotation = Controller->GetControlRotation();
const FRotator YawRotation(0, Rotation.Yaw, 0);
const FVector ForwardDirection = FRotationMatrix(YawRotation).GetUnitAxis(EAxis::X);
const FVector RightDirection = FRotationMatrix(YawRotation).GetUnitAxis(EAxis::Y);
AddMovementInput(ForwardDirection, MovementVector.X);
AddMovementInput(RightDirection, MovementVector.Y);
}
void AABCharacterPlayer::ShoulderLook(const FInputActionValue& Value)
{
FVector2D LookAxisVector = Value.Get<FVector2D>();
AddControllerYawInput(LookAxisVector.X);
AddControllerPitchInput(LookAxisVector.Y);
}
void AABCharacterPlayer::QuaterMove(const FInputActionValue& Value)
{
FVector2D MovementVector = Value.Get<FVector2D>();
float InputSizeSquared = MovementVector.SquaredLength();
float MovementVectorSize = 1.0f;
float MovementVectorSizeSquared = MovementVector.SquaredLength();
if (MovementVectorSizeSquared > 1.0f)
{
MovementVector.Normalize();
MovementVectorSizeSquared = 1.0f;
}
else
{
MovementVectorSize = FMath::Sqrt(MovementVectorSizeSquared);
}
FVector MoveDirection = FVector(MovementVector.X, MovementVector.Y, 0.0f);
GetController()->SetControlRotation(FRotationMatrix::MakeFromX(MoveDirection).Rotator());
AddMovementInput(MoveDirection, MovementVectorSize);
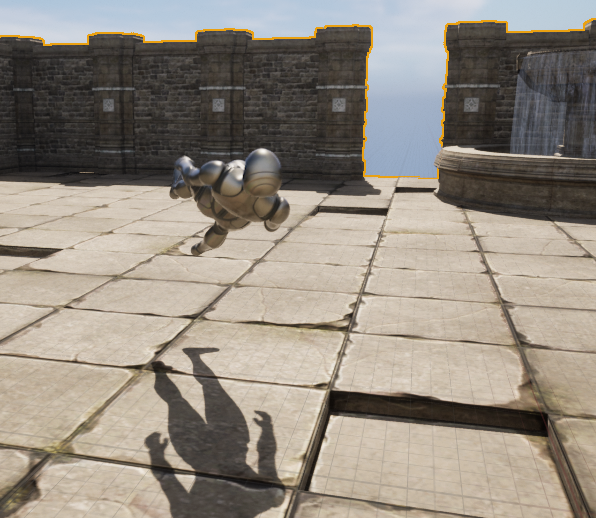
}Jump는 ACharacter에 정의된 내용을 쓰고 나머지는 직접 정의한다.
다음과 같이 잘 되는 것을 확인할 수 있다.
선형보간을 통한 화면전환
다만 시점전환이 툭툭 끊겨서 부드럽게 전환할 수 있도록 해보았다.
// CameraBoom->TargetArmLength = CharacterControlData->TargetArmLength;
// CameraBoom->SetRelativeRotation(CharacterControlData->RelativeRotation);
DestArmLength = CharacterControlData->TargetArmLength;
DestRelativeRotation = CharacterControlData->RelativeRotation;
기존 코드에서 TargetArmLength와 RelativeRotation에 값을 대입하는 대신 변경하기 희망하는 값을 넣고
void AABCharacterPlayer::Tick(float DeltaTime)
{
	Super::Tick(DeltaTime);
	if (DestArmLength != CameraBoom->TargetArmLength)
	{
		CameraBoom->TargetArmLength = FMath::FInterpTo(CameraBoom->TargetArmLength, DestArmLength, DeltaTime, ArmLengthSpeed);
	}

	CameraBoom->SetRelativeRotation(FMath::RInterpTo(CameraBoom->GetRelativeRotation(), DestRelativeRotation, DeltaTime, RotationSpeed));
}
Tick() 함수를 override해서 현재 값이 희망하는 값과 다를 경우 InterpTo() 함수를 통해 값을 변화시키도록 했다. SetRelativeRotation()의 경우 함수 내부에 값을 비교하는 부분이 있어 따로 넣지 않았다.
글에 적당한 영상넣는 법을 몰라서 영상첨부는 따로 하지 못한다...
다만 TPS에서 Quater로 전환은 문제없이 되는데 그 반대는 끊김이 발생한다.
InheritPitch 를 체크 제거하면 문제가 해결되는데 그러면 TPS에서 pitch회전이 안된다..
해결방법이 있는지 더 찾아봐야 할듯하다.