
백엔드 개발자를 준비하면서 생긴 궁금증을 정리한 포스트입니다.
들어가기 전
우리가 흔히 사용하는 HTTP는 클라이언트가 요청을 보내야 서버가 응답하는 구조입니다.
하지만 채팅, 실시간 알림, 주식 시세처럼 연결을 유지한 채 즉시 데이터를 주고받아야 하는 기능도 있습니다.
이번 포스트에서는 이런 상황에서 자주 사용되는WebSocket에 대해 정리해보겠습니다.
WebSocket이란?
WebSocket은 클라이언트와 서버가 하나의 연결을 유지한 상태로 양방향 통신을 할 수 있도록 도와주는 프로토콜입니다.
HTTP처럼 요청과 응답이 한 번 오가고 끝나는 방식과 달리,
WebSocket은 한 번 연결이 성립되면 서버와 클라이언트가 계속해서 데이터를 주고받을 수 있습니다.
그래서 다음과 같은 실시간 서비스에서 자주 사용됩니다.
- 채팅
- 실시간 알림
- 게임
- 실시간 주식/시세 데이터
- 협업 서비스
왜 필요할까?
1. 실시간 양방향 통신
WebSocket은 연결이 한 번 성립되면
클라이언트와 서버가 서로 자유롭게 데이터를 주고받을 수 있습니다.
즉, 사용자의 요청이 없어도 서버가 먼저 메시지를 보낼 수 있기 때문에
실시간성이 중요한 기능에 잘 어울립니다.
2. 지속적인 연결 유지
HTTP는 일반적으로 요청과 응답이 끝나면 연결이 종료됩니다.
반면 WebSocket은 연결을 유지한 상태에서 계속 통신할 수 있습니다.
그래서 서버가 새로운 정보를 감지했을 때
즉시 클라이언트에게 데이터를 전달할 수 있습니다.
3. 비교적 낮은 오버헤드
WebSocket은 처음 연결할 때 핸드셰이크 과정을 거친 뒤,
이후에는 같은 연결을 계속 사용하면서 메시지를 주고받습니다.
즉, 매 요청마다 새 연결을 만들거나 반복적으로 요청을 보내는 방식보다
불필요한 네트워크 비용을 줄이는 데 유리합니다.
4. 효율적인 실시간 처리
Polling 방식은 주기적으로 서버에 계속 요청을 보내야 하기 때문에
변화가 없어도 불필요한 통신이 반복될 수 있습니다.
반면 WebSocket은 실제로 보낼 데이터가 있을 때만 전달할 수 있어
실시간 기능을 더 효율적으로 구현할 수 있습니다.
WebSocket vs HTTP vs Polling
| 항목 | WebSocket | HTTP | Polling |
|---|---|---|---|
| 통신 방식 | 양방향 | 요청-응답 중심 | 요청-응답 중심 |
| 연결 유지 | O | X | X |
| 실시간성 | 매우 높음 | 낮음 | 중간 |
| 서버 → 클라이언트 즉시 전송 | 가능 | 어려움 | 불가능 |
| 오버헤드 | 비교적 낮음 | 요청마다 발생 | 반복 요청으로 큼 |
| 사용 예 | 채팅, 알림, 실시간 데이터 | 일반 API 요청 | 간단한 주기 조회 |
Kotlin에서 간단한 채팅 서비스 만들기
1. 의존성 추가
Spring Boot에서 WebSocket을 사용하려면 다음 의존성을 추가합니다.
implementation("org.springframework.boot:spring-boot-starter-websocket")2. 메시지 DTO 작성
먼저 클라이언트와 서버가 주고받을 메시지 형식을 정의합니다.
data class ChatMessage(
    val topic: String,
    val sender: String,
    val message: String,
    val time: String? = null
)
위 예제에서는 다음 정보를 함께 주고받도록 구성했습니다.
topic: 어느 채팅방인지 구분하는 값sender: 보낸 사람message: 실제 메시지 내용time: 보낸 시간
3. 채팅방 Entity 작성
채팅방 자체를 저장하고 싶다면 다음처럼 주제를 기준으로 엔티티를 만들 수 있습니다.
@Entity
class Chat(
    @Id
    @GeneratedValue(strategy = GenerationType.IDENTITY)
    val roomId: Long = 0,

    @Column(nullable = false, unique = true)
    val topic: String
)
이 예제에서는 topic 값을 채팅방 이름처럼 사용합니다.
4. WebSocket 설정
Spring Boot에서 STOMP 기반 WebSocket을 사용하려면 다음과 같이 설정할 수 있습니다.
@Configuration
@EnableWebSocketMessageBroker
class WebSocketConfig : WebSocketMessageBrokerConfigurer {

    override fun registerStompEndpoints(registry: StompEndpointRegistry) {
        registry.addEndpoint("/chat")
            .setAllowedOriginPatterns("*")
            .withSockJS()
    }

    override fun configureMessageBroker(registry: MessageBrokerRegistry) {
        // 클라이언트 -> 서버
        registry.setApplicationDestinationPrefixes("/pub")

        // 서버 -> 클라이언트
        registry.enableSimpleBroker("/sub")
    }
}
위 설정의 의미는 다음과 같습니다.
/chat: WebSocket 연결을 시작하는 엔드포인트/pub: 클라이언트가 서버로 메시지를 보낼 때 사용하는 prefix/sub: 클라이언트가 서버 메시지를 구독할 때 사용하는 prefix
즉, 클라이언트가 /pub/...으로 메시지를 보내면
서버가 이를 받아 처리하고,
필요한 결과를 /sub/... 구독자에게 전달하는 구조입니다.
5. Controller 작성
이제 실제로 채팅방을 만들고, 메시지를 전달하는 컨트롤러를 작성해보겠습니다.
@RestController
class ChatController(
    private val chatRepository: ChatRepository,
    private val template: SimpMessagingTemplate
) {

    @GetMapping("/")
    fun index(): String {
        return "index"
    }

    @PostMapping("/create/topic")
    fun createChatRoom(@RequestBody topic: String): String {
        val savedChat = chatRepository.save(Chat(topic = topic))
        return "Chat room created with topic: ${savedChat.topic}"
    }

    @MessageMapping("/chat/message")
    fun sendMessage(message: ChatMessage) {
        template.convertAndSend("/sub/${message.topic}", message)
    }
}
여기서 핵심은 @MessageMapping("/chat/message")입니다.
클라이언트가 /pub/chat/message로 메시지를 보내면
이 메서드가 해당 메시지를 받아 처리합니다.
그리고 SimpMessagingTemplate을 사용해
/sub/{topic}을 구독 중인 사용자들에게 메시지를 전달합니다.
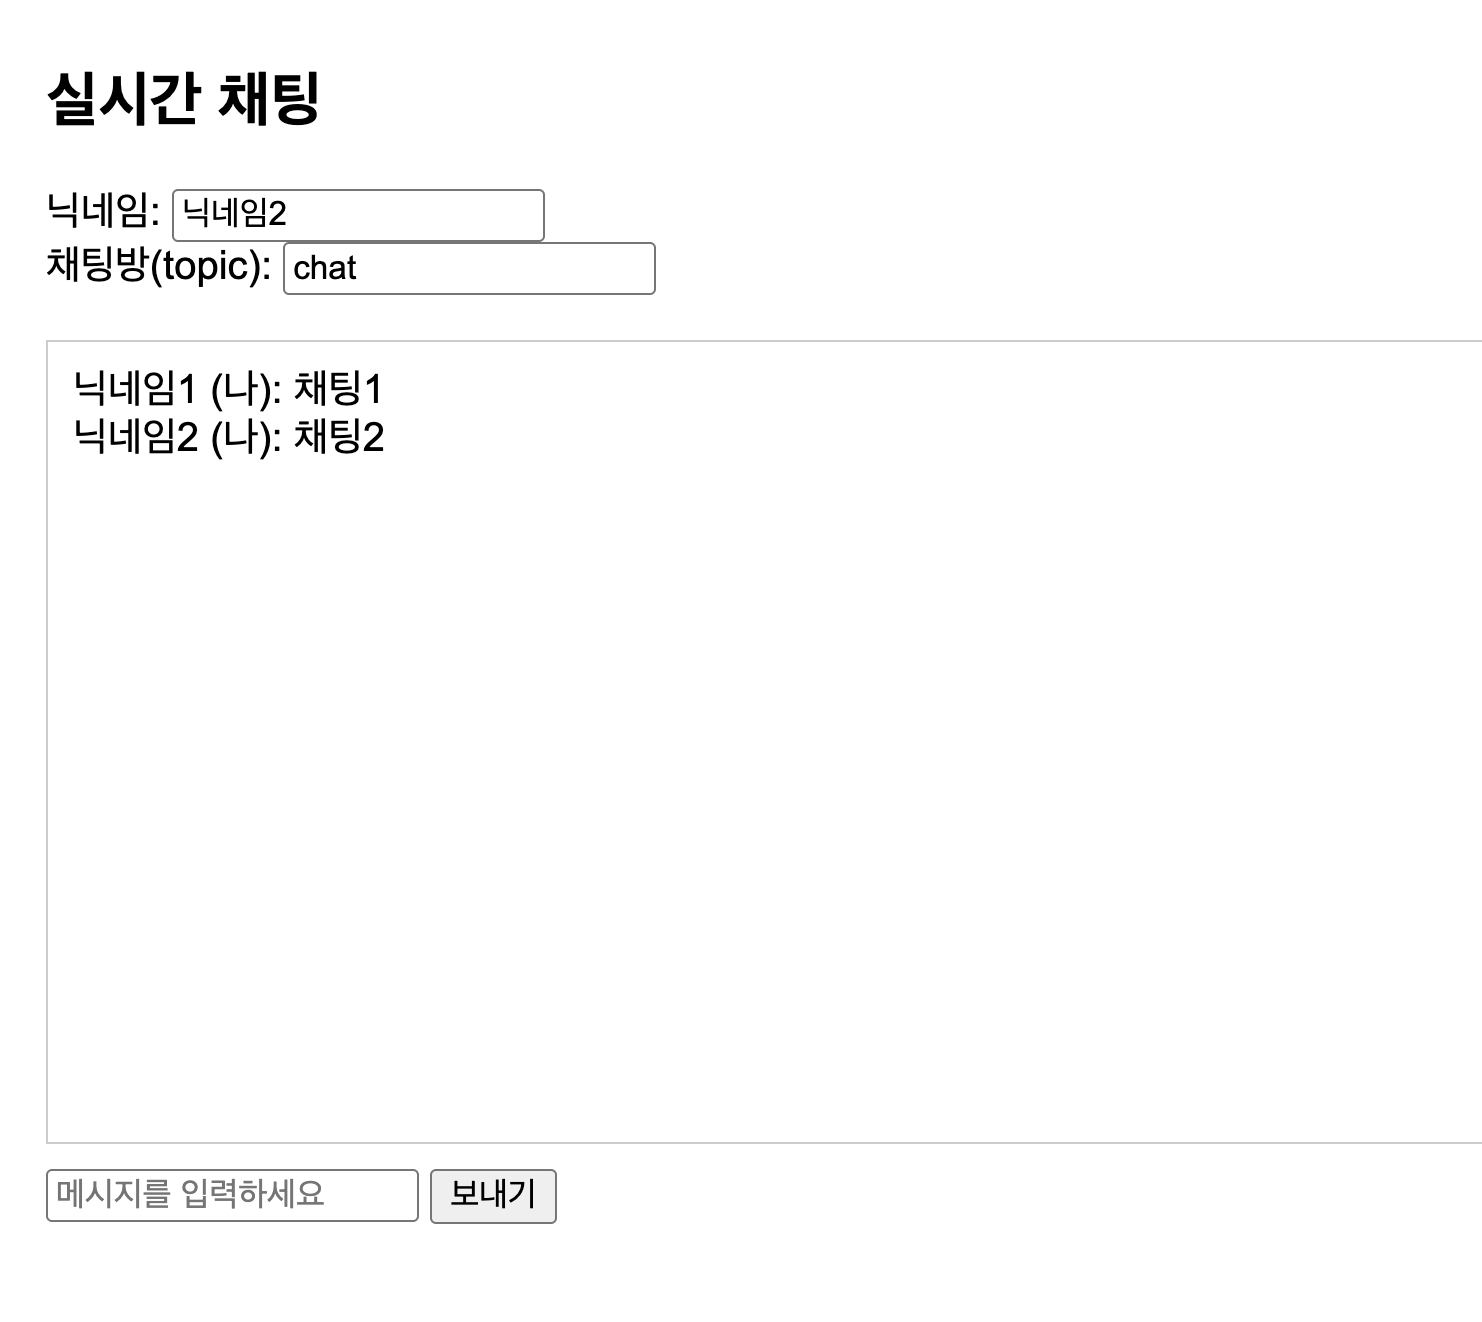
6. 예제 HTML
아래는 아주 간단한 테스트용 HTML입니다.
<!DOCTYPE html>
<html lang="ko">
<head>
    <meta charset="UTF-8">
    <title>Simple Chat</title>
    <script src="https://cdn.jsdelivr.net/npm/sockjs-client@1.6.1/dist/sockjs.min.js"></script>
    <script src="https://cdn.jsdelivr.net/npm/stompjs@2.3.3/lib/stomp.min.js"></script>
    <style>
        body { font-family: Arial, sans-serif; padding: 20px; }
        #chat-box {
            border: 1px solid #ccc;
            height: 300px;
            overflow-y: auto;
            margin-bottom: 10px;
            padding: 10px;
        }
    </style>
</head>
<body>
<h2>실시간 채팅</h2>

<label>닉네임: <input type="text" id="sender" /></label><br/>
<label>채팅방(topic): <input type="text" id="topic" value="chat" /></label><br/><br/>

<button onclick="connectTopic()">채팅방 연결</button>
<div id="chat-box"></div>

<input type="text" id="message" placeholder="메시지를 입력하세요" />
<button onclick="sendMessage()">보내기</button>

<script>
    const socket = new SockJS("/chat");
    const stompClient = Stomp.over(socket);

    let currentSubscription = null;

    stompClient.connect({}, function () {
        console.log("WebSocket connected");
    });

    function connectTopic() {
        const topic = document.getElementById("topic").value.trim();

        if (!topic) {
            alert("채팅방(topic)을 입력해주세요!");
            return;
        }

        if (currentSubscription) {
            currentSubscription.unsubscribe();
        }

        currentSubscription = stompClient.subscribe(`/sub/${topic}`, function (msg) {
            const message = JSON.parse(msg.body);
            const messageBox = document.createElement("div");
            messageBox.textContent = `${message.sender}: ${message.message}`;
            document.getElementById("chat-box").appendChild(messageBox);
        });

        alert(`${topic} 채팅방에 연결되었습니다.`);
    }

    function sendMessage() {
        const sender = document.getElementById("sender").value.trim();
        const topic = document.getElementById("topic").value.trim();
        const text = document.getElementById("message").value.trim();

        if (!sender || !topic || !text) {
            alert("닉네임, 채팅방, 메시지를 모두 입력해주세요!");
            return;
        }

        stompClient.send("/pub/chat/message", {}, JSON.stringify({
            sender: sender,
            topic: topic,
            message: text
        }));

        document.getElementById("message").value = "";
    }
</script>
</body>
</html>
이 예제의 동작 순서는 다음과 같습니다.
- 브라우저가
/chat엔드포인트로 WebSocket 연결을 생성합니다. - 사용자가 채팅방(topic)을 입력하고 연결 버튼을 누르면
/sub/{topic}을 구독합니다. - 메시지를 보내면
/pub/chat/message로 데이터가 전송됩니다. - 서버는 메시지를 받아
/sub/{topic}구독자들에게 다시 전달합니다.
Spring Boot에서 WebSocket 구성 요소와 역할
| 구성 요소 | 어노테이션 / 클래스 | 사용 목적 |
|---|---|---|
| WebSocket 설정 | @EnableWebSocketMessageBroker | STOMP 기반 메시지 브로커 기능 활성화 |
| 설정 클래스 | WebSocketMessageBrokerConfigurer | 엔드포인트와 메시지 브로커 경로 설정 |
| 엔드포인트 등록 | registry.addEndpoint("/chat") | 클라이언트가 최초 연결할 URL 지정 |
| 송신 prefix | setApplicationDestinationPrefixes("/pub") | 클라이언트가 서버로 메시지를 보낼 경로 |
| 구독 prefix | enableSimpleBroker("/sub") | 서버가 클라이언트에게 메시지를 전달할 경로 |
| 메시지 수신 | @MessageMapping("/chat/message") | 클라이언트가 보낸 메시지 처리 |
| 메시지 전송 | SimpMessagingTemplate | 특정 구독 경로로 메시지 전송 |
| DTO | ChatMessage | 주고받을 메시지 형식 정의 |
📌 결론
실시간으로 데이터를 주고받아야 하는 기능이 필요하다면, Spring Boot에서 WebSocket을 활용해 구현할 수 있습니다.
HTTP는 일반적인 요청-응답 처리에 적합하지만,
채팅이나 실시간 알림처럼 즉각적인 반응이 필요한 기능에서는 WebSocket이 더 적합합니다.
특히 Spring Boot에서는 STOMP와 WebSocket 설정을 함께 사용하면
실시간 메시지 기능을 비교적 쉽게 구성할 수 있습니다.