개요
자바스크립트 표기법
- dash-case(kebab-case)
the-quick-brown-fox-jumps-over-the-lazy-dog - snake_case
the_quick_brown_fox_jumps_over_the_lazy_dog - camelCase ✔️ 대부분의 경우
theQuickBrownFoxJumpsOverTheLazyDog - PascalCase
TheQuickBrownFoxJumpsOverTheLazyDog
Zero-based Numbering
0기반 번호 매기기. 특수한 경우를 제외하고 0부터 숫자 시작
주석 comments
// 한줄메모
/* 한줄메모*/
/**
* 여러줄
* 메모1
* 메모2
*/
; 세미 콜론 semi colon
맨 뒤에 세미콜론을 붙이지 않아도 자바스크립트 엔진이 자동으로 뒤에 세미콜론을 붙여서 해석하게 된다.
강의이므로 항상; 붙여서 하는 것
데이터 종류
String
let myName = "one button"; // 변수에 문자열 할당
let email = "thismail@gmail.com";
let hello = `Hello ${myName}?!`

console.log(myName); // one button
console.log(email); // thismail@gmail.com
console.log(hello); // Hello one button
Number
let number = 123;	// 정수
let opacity = 1.57; // 부동 소수점 숫자

console.log(number);  //123
console.log(opacity); //1.57
Boolean
소문자로 시작하는 true, false
let checked = true;
let isShow = false;

console.log(checked); // true
console.log(isShow);  // false
Undefined
let undef; // 할당이 안된 상태
let obj = { abc: 123 }; // 객체 = {속성:데이터}

console.log(undef) 		// undefined
console.log(obj.abc)	// 123
cpnsole.log(obj.xyz)	// undefined
Null
의도적으로 비어있는 값
let empty = null

console.log(empty) // null
Object
객체 데이터. 여러데이터를 { Key:Value }; 형태로 저장
let user = {
  name: 'one_button',
  age: 85,
  isValid: true
};

console.log(user.name);		// one_button
console.log(user.age);		// 85
console.log(user.isValid);	// true
Array
배열 데이터. 여러 데이터를 순차적으로 저장 []
let fruits = ['Apple', 'Banana','Cherry'];

console.log(fruits[0]); // 'Apple'
변수, 예약어
변수 variable
데이터를 저장하고 참조(사용)하는 데이터의 이름
var(권장 안함!), let, const
- let
- 선언 이후 값 재할당 가능
- const
- 선언 이후 값 재할당 불가
예약어 Reserved Word
특별한 의미를 가지고 잆어 변수나 함수 이름등으로 사용할 수 없는 단어
- this
- if
- break
함수 function
특정 동작(기능)을 수행하는 일부 코드의 집합(부분)
function helloFunc() { // 함수선언
  console.log(1234);   // 실행코드
}

HelloFunc(); // 함수 호출(실행) 1234

function returnFunc() {
  return 123;
}

let a = returnFunc();
console.log(a); // 123

function sum(a,b) { // a,b는 매개변수 parameters
 return a+b
}

let b = sum (7, 12) // 1,12 는 인수 arguments

console.log(b) // 19

// 이름이 없이 데이터로 활용되는 함수: 익명함수.
let world = function () {
  console.log('World');
}

world(); // World

// 속성부분에 함수가 할당 되어 있을 때 : 메소드method
const one_button = {
  name: 'one_button',
  age: 85;
  getName: function () { // 메소드
    return this.name;
  }

const itsName = one_button.getName();
console.log(itsName); //one_button
조건문
조건의 결과에 따라 다른 코드를 실행하는 구문. if, else
let isShow = true;
let checked= false;

if (isShow) {
  console.log('Show!'); // Show!
}
if (isShow) {
  console.log('Show!');
  //true 가 아니므로 출력 안됨
} else {
  console.log('Hide!'); // Hide!
}
DOM API
Document Object Model, Application Programming Interface
자바스크립트로 html을 제어할 때 사용.
< script >
html에서 script 태그는 body끝나기 전에 위치시킨다.
html의 요소를 미리 읽어야 찾을 수 있기 때문이다.
하지만 자바스크립트를 연결하는 script는 정보이기 때문에 head안에 있는 것이 좋음! 그래서..
script를 헤드 안으로 옮기고, defer라는 속성을 추가해서 html을 다 읽은 후에 스크립트를 읽을 수 있도록 한다
활용법
// HTML 요소(Element) 1개 검색/찾기
const boxEl = document.querySelector('.box');

// Getter, 값을 얻는 용도
console.log(boxEl.textContent); // Box!

// Setter, 값을 지정하는 용도
boxEl.textContent = 'OneButton';
console.log(boxEl.textContent) // OneButton

// HTML 요소에 적용할 수 있는 메소드
boxEl.addEventListener();

// 인수 (Arguments) 추가 가능
boxEl.addEventListener(1,2);

// 1 - 이벤트(Event, 상황)
boxEl.addEventListener('click',2);

// 2 - 핸들러(Handler. 실행할 함수)
boxEl.addEventListener('click', function() {console.log('Click!');} );

// 요소의 클래스 정보 객체 활용
boxEl.classList.add('active'); // active라는 class 추가
let isContains = boxEl.classList.contains('active');
console.log(isContains); // true

boxEl.classList.remove('active');
isContains = boxEl.classList.contains('active');
console.log(isContains); // false

// HTML 요소 모두 검색/찾기
const boxEls = document.querySelectorAll('.box');

// 찾은 요소들 반복해서 함수실행. 익명함수를 인수로 추가
boxEls.forEach(function(){});

// 첫번째 매개변수 boxEl : 반복 중인 요소
// 두번째 매개변수 index : 반복 중인 번호
boxEls.forEach(function(boxEl,index) {});

// 출력
boxEls.forEach(function (boxEl, index) {
  boxEl.classList.add(`order-${index + 1}`);
  console.log(index, boxEl);
});
메소드 체이닝 Method Chaining
const a = 'Hello';
const b = a.split('').reverse().join('');
// 메소드 체이닝
// split: 문자 하나하나 쪼개서 배열로 밴환
// reverse: 배열을 뒤집는다
// join: 배열을 인수기준으로 문자로 병합후 반환

console.log(a); // Hello
console.log(b); // olleH
질의응답
개발환경 셋팅: node.js
node.js
Chrome V8 JavaScript engine(자바스크립트를 해석하고 동작시켜준다)으로 빌드된 JavaScript runtime(프로그래밍 언어가 동작하는 환경)
node.js가 설치된 컴퓨터 환경 + 브라우저에서 동작하는 js
=> frontend
node.js의 도움을 받아 웹페이지를 만든다
node.js의 도움
브라우저에서는 HTML, CSS, JS 만 동작함
개발을 도와주는 모듈들 : stylus, Sass, less, EJS, Pug, Babel
모듈들의 도움을 받아서 개발하고 node.js를 이용해서 css, javascript로 변환을 시켜 주어야 한다
node.js 다운로드
-nodejs.org
- LTS Long Term Supported
장기적으로 안정되고 신뢰도가 높은 지원보장. 유지/보수와 보안에 초점을 맞춰 대부분의 사용자에게 추천되는 버전이다. 짝수버전. 최신버전은 아님
nvm: node version manager
nvm github 페이지에서 설명서대로 다운로드.
nvm --version으로 버전체크
nvm에서 node 다운로드
- nvm install 버전번호
- nvm ls
컴퓨터에 설치된 버전이 나온다 - nvm use 버전번호
- nvm uninstall 버전번호
안 쓸 버전 삭제
이제 노드 명령어를 쓸 수 있게 된다!
- node --version 현재 설치된 노드 버전
npm: node package manager
전 세계의 개발자들이 만든 다양한 기능(패키지,모듈)등을 관리
-
trade-off 패키지이용 상충관계
- 학습난도 증가하고 구성이 복잡해진다
- 관리 효율이 증가하고 손쉽게 기능을 고도화 할 수 있다.
-
폴더 만들기
-
npm init -y
- package.json 파일이 생성된다
-
npm install parcel-bundler -D
- node_modules 폴더 생성
- 파셀 번들러 외에 패키지들도 다운로드 되는데 dependency 연결되어 있는 패키지 들임
- package-lock.json 파일생성
- 패키지들을 내부적으로 관리해준다.
- package.json 파일에 다음 속성 추가됨
- node_modules 폴더를 지우더라도 이 속성은 지워지지 않으며 npm i 로 다시 다운로드 할 수 있다
- node_modules 폴더 생성
      "devDependencies": {
          "parcel-bundler": "^1.12.5"
}- package-lock.json, package.json 절대 삭제금지!
- npm install lodash
- package.json 파일에 다음 속성 추가됨
      "dependencies": {
          "lodash": "^4.17.21"
}- npm install -D,--save-dev XXX
개발용 의존성 패키지 설치- 개발할 때만 필요하고 웹브라우저에서 동작할 때는 필요하지 않다
- "devDependencies"로 설치 됨
- npm install XXX
일반 의존성 설치- 웹브라우저에서 동작할 때 필요
- "dependencies"로 설치됨
개발 서버 실행과 빌드
-
이제 open with LiveServer로 브라우저를 열지 않음
-
index.html, main.js 파일을 만들어서 연결해주기
-
package.json 수정
- 원래는
"scripts": {
"test": "echo \"Error: no test specified\" && exit 1"
}, - 이걸로 바꾸기
"scripts": {
"dev": "parcel index.html"
},
- 원래는
-
% npm run dev 개발서버를 만든다
Server running at http://localhost:1234- command 누르면서 링크를 누르면 브라우저가 열린다.
✨ Built in 347ms.
- command 누르면서 링크를 누르면 브라우저가 열린다.
-
main.js에 추가
- import _ from 'lodash'
-
테스트 해보기
- console.log(_.camelCase('hello world')
-
parcel bundler가 변경사항을 업데이트해준다
- helloWorld가 출력 된다.
-
package.json "script" 에 추가하기
-
"build": "parcel build index.html"
> test@1.0.0 build
> parcel build index.html✨ Built in 10.49s.
dist/main.7b65f3a6.js.map 715.81 KB 84ms
dist/main.7b65f3a6.js 92.8 KB 8.29s
dist/index.html 280 B 1.96s -
dist 폴더가 생성된다.
dist 폴더에는 들여쓰기등 가독성을 위한 띄어쓰기를 없애고 html, js, css 파일들을 압축시키고 파일이름을 난독화 한다. -> Bundle 번들 -
.cache라는 폴더가 생성된다
-
유의적 버전(SemVer)
% node --version
v18.14.1
- 18 major
기존 버전과 호환되지 않는 새로운 버전 - 14 minor
기존 버전과 호환되는 새로운 기능이 추가된 버전 - 1 patch
기존 버전과 호환되는 버그 및 오타 등이 수정된 버전 - ^18.14.1
^이 붙어 있으면 major 버전 안에서 가장 최신버전으로 업데이트 가능- npm update XXX 최신 버전으로 업데이트하기
NPM 프로젝트의 버전 관리 (.gitignore)
npm install, npm run build 명령어를 써서 패키지폴더를 언제든지 다시 다운로드 할 수 있기때문에 따로 버전관리를 하지 않아도 충분하다.
특히 node_modules는 용량이큼. 따라서 버전관리를 하지 않는 것이 효율적이다. -> .gitignore 파일 만들기
- .gitignore 파일에 한줄씩 폴더 이름을 적는다
  .cache/
  dist/
node_modules/- % git init
Initialized empty Git repository in .../test/.git/- git status 로 포함되지 않은 것을 확인할 수 있다
  Untracked files:
    (use "git add <file>..." to include in what will be committed)
          .gitignore
          index.html
          main.js
          package-lock.json
          package.json
github에 저장하기
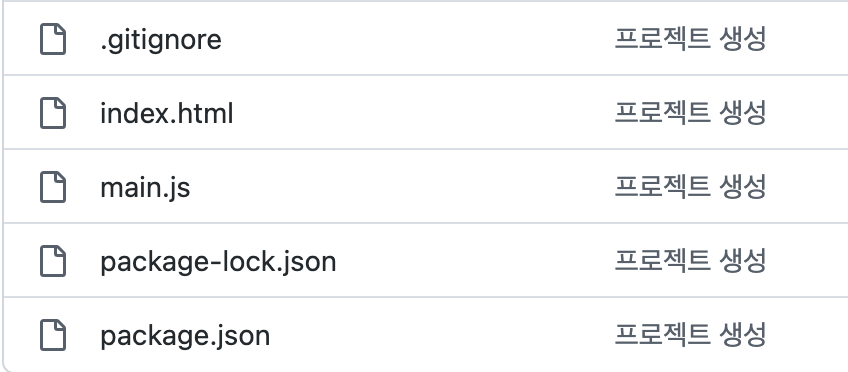
- git init 때 포함되지 않은파일들을 git add . 로 포함시켜 준다
- git status 로 확인하면 포함된 것을 확인할 수 있다 - git commit -m '프로젝트 생성' 명령어로 버전을 생성한다
- git log로 버전을 확인한다 - 깃헙에 repository 를 만들어준다
- 직접 붙여넣기하거나 아래와 같이 터미널에 명령어를 실행해준다
  …or push an existing repository from the command line
  git remote add origin https://github.com/.../test.git
  git branch -M main
git push -u origin main-
코드가 업데이트 되어있는 것을 확인할 수 있다
- .gitignore 에 포함된 .cache, node_modules, dist가 빠져있다.
-
이런식으로 버전관리가 불필요한 파일들을 제외시킬 수 있다
JS 시작하기
자바스크립트를 코딩할 때는 되도록 ;를 붙이지 않도록!
문제가 있을 순 있지만 에러로 확인 가능
데이터 타입 확인
- typeof 을 통해서 타입을 확인할 수 있음
- 하지만 정확히는 나오지 않음
  console.log(typeof 'hello' == 'string') // true
  console.log(typeof 123) // number
  console.log(typeof true) // boolean
  console.log(typeof undefined) //undefined
  console.log(typeof null) // object❗️
  console.log(typeof {}) // object
console.log(typeof []) // object❗️- 직접 메소드를 만들어야 함
	function getType(data) {
      return Object.prototype.toString.call(data).slice(8,-1)
    } // [Object XXX] 로 출력 되기 때문에 XXX부분만 나오도록 자르기

  console.log(getType(123)) // Number
  console.log(getType(true)) // Boolean
  console.log(getType(undefined)) // Undefined
  console.log(getType(null)) // Null⭕️
  console.log(getType({})) // Object
console.log(getType([])) // Array⭕️- 메소드를 다른 자바스크립트파일에서 사용하려면
- 새 자바스크립트 파일을 만들어서 export default를 붙여서 GetType() 메소드를 저장한다
  export default function getType(data) {
    return Object.prototype.toString.call(data).slice(8,-1)
}- main.js 파일에 import 해준다
import getType from './getType' // .js 생략가능연산자
- 연산자 앞, 뒤로 띄워주기
산술 연산자 arithmetic operator
- *, /, -, +
할당 연산자 assignment operator
- +=, -=, /=, *=
비교 연산자 comparision operator
- ===, !==, <, >, >=, <=
논리 연산자 logical operator
- &&, ||, !,
삼항 연산자 ternary operator
- 1 ? 2 : 3
const a = 1 < 2
console.log(a? '참' : '거짓')
동등연산자
- ==
반복문
For statement
const ulEl = document.querySelector('ul')

for (let i=0 ; i< 3 ; i +=1 ) {
  const li = document.createElement('li')
  li.textContent = `list-${i+1}`
  if (i % 2 === 0) {li.addEventListener('click',function() {
    console.log(li.textContent)
  })}
  ulEl.appendChild(li);
}
변수 유효범위 variable scope
var 함수레벨
function scope() {
  console.log(a) // undefined
  if (true) {
    var a = 123
  }
}
var 로 선언된 a 는 함수 scope()이내에서 어디든지 쓰일 수 있다
-> 의도하지 않은 범위에서 사용되고 개발자가 확인하지 못하는 메모리 누수 발생
--> let, const 등 블록레벨 유효범위에서 동작하는 변수를 사용한다
형 변환 Type conversion
const a = 1
const b = '1'

console.log(a === b) //false
console.log(a == b) // true
동등연산자 == 는 형변환을 하게된다. b 값이 a로 형변환을 하게 됨
-> 의도하지 않은 같다 라는 결과를 낸다
Truthy 참 같은 값
true, {}, [], 1, 2, 'false', -12, '3,14'
Falsy 거짓 같은 값
false, '', null, undefined, 0, -0, Nan(Not a number)
JS 함수
함수 복습
function sum(x 매개변수, y 매개변수) {
console.log(x+y)
}
sum(1 인수, 3 인수)
arguments
인수가 많아서 매개변수 이름을 일일히 지정하기 어려운 경우.
많이 사용되지는 않고 이름을 지정해주는게 더 좋다.
function sum() {
  console.log(arguments) // 10
  return arguments[0] + arguments[1]
}
console.log(sum(7,3))
화살표 함수
const double = function (x) {
  return x * 2
}
console.log('double : ', double(7)) // 14

const doubleArrow = (x, y) =>  x * 2 + y
console.log('doubleArrow : ', doubleArrow(7,1)) // 14
화살표함수
- 축약형 로직 사용가능
- 매개변수가 한개일 경우 괄호도 생략 가능
- x => x * 2
- {} 중괄호를 사용해도 객체로 인식되지 않고 화살표함수 블록으로 인식된다
- 객체 데이터를 반환할 때는 소괄호() 로 감싸주면 해결!
즉시 실행함수 IIFE
Immediately-Invoked Function Expression
익명의 함수를 만들고 즉시 실행하는 함수
1. (x)() 이중 작성
  (function () {
    console.log(a * 2)
})();- (x()) 내부 작성
  (function () {
    console.log(a * 2)
  }());
호이스팅 Hoisting
함수의 선언부가 유효범위 최상단으로 끌어올려지는 현상
an act of raising or lifting something
호출을 먼저 해놓을 수 있어서 복잡한 코드를 하단부분에 작성할 수 있다.
const a = 7

double() // 에러없이 실행됨!

function double () {
  console.log( a * 2 )
}
타이머 함수
setTimeout(함수, 시간)
일정시간 후 함수 실행
clearTimeout(Timeout 함수)
설정된 Timeout 함수를 종료
일정 시간 후 함수 실행
const timer = setTimeout(() => {
  console.log('one button'
}, 3000) // 3 초후 함수 실행

const h1El = document.querySelector('h1')
h1El.addEventListener('click', () => {
  ckearTimeout(timer)
}) // h1 부분을 설정된 시간 전에 클릭하면 효과 취소
setInterval(함수, 시간)
시간 간격마다 함수 실행
clearInterval(Interval 함수)
설정된 Interval 함수를 종료
call back
함수의 인수로 사용되는 함수. 실행위치를 보장할 수 있다
function timeout(cb) {
  setTimeout(() => {
    console.log('one button')
    cb()
  }, 3000) // 3 초 마다 실행
}

timeout(() => {
  console.log('Done!')
}) // call back!
3초뒤에 one button 출력되고 바로 Done! 출력
JS 클래스
생성자 함수 prototype
const js = {
  firstName: 'Java',
  lastName: 'Script',
  getFullName: function () {
    return `${this.firstName} ${this.lastName}`
  }
}
console.log(js.getFullName()) // Java Script
-> 대량의 객체를 생성하게 될경우 효율이 떨어진다
function user(first, last) {
  this.firstName = first
  this.lastName = last
}
user.prototype.getFullName = function () {
  return `${this.firstName} ${this.lastName}`
}

const js = new user('Java', 'Script') // 인스턴스 = new 생성자 함수
const apple = new user('Apple', 'Red')
const banana = new user('Banana', 'Yellow')

console.log(js) // 객체 데이터 출력
console.log(js.getFullName) // Java Script
this
- 일반 함수는 호출 위치에 따라 this 정의
- 화살표 함수는 자신이 선언된 함수 범위에서 this 정의
const ob = {
  name: 'one button',
  normal: function () { // 익명함수 할당
    console.log(this.name)
  },
  arrow: () => { // 화살표함수 할당
    console.log(this.name)
  }
}
ob.normal() // one button
ob.arrow() // undefined

const ap = {
  name: 'Apple',
  normal: ob.normal,
  arrow: ob.arrow
}
ap.normal() // one button
ap.arrow() // undefined-
ob.normal()
ob 자체가 this 가 되어 정상 출력 -
ob.arrow()
this가 무엇인지 정확히 알 수 없어 undefined 출력
const timer = {
  name: 'Java',
  timeout: function () {
    setTimeout(function(){
      console.log(this.name)
    },2000)
  }
}
timer.timeout() // undefined

const timer = {
  name: 'Java',
  timeout: function () {
    setTimeout(() => {
      console.log(this.name)
    },2000)
  }
}
timer.timeout() // Java- normal
this -> function () 닿을 수 없음 - arrow
this -> () -> function -> timer 닿을 수 있음
ES6 Classes
class User {
  constructor(first, last) {
    this.firstName = first
    this.lastName = last
  }
  getFullName() {
    return `${this.firstName} ${this.lastName}`
  }
}

const bn = new User('Banana', 'Yellow')
console.log(bn.getFullName()) // Banana Yellow
상속(확장)
class Vehicle {
  constructor(name, wheel) {
    this.name = name
    this.wheel = wheel
  }
}

const myVehicle = new Vehicle('운송수단', 2)
// Vehicle{name: "운송수단" wheel: 2}

class Bicycle extends Vehicle {
  constructor(name,wheel) {
    super(name, wheel)
  }
}

const myVehicle = new Bicycle('삼천리', 2)
// Bicycle{name: "삼천리" wheel: 2}

class Car extends Vehicle {
  constructor(name,wheel, license) {
    super(name, wheel)
    this.license = license // 추가 로직 확장
  }
}

const myCar = new Car('벤츠', 4, true)
// Car{ license: true name: "벤츠" wheel: 4 }