1. 헤로쿠 홈페이지
앱 만들기
-
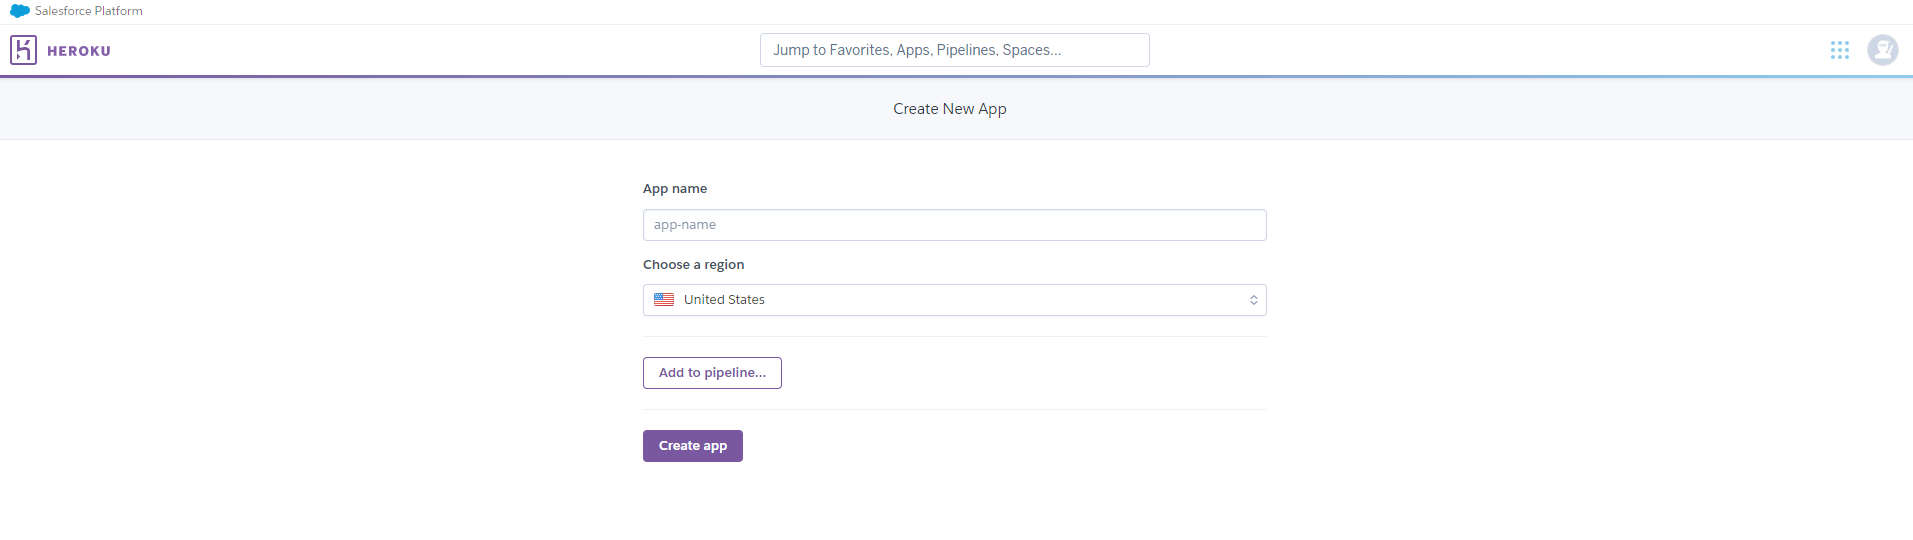
로그인 후 new → Create new app

-
앱 이름 설정 후, 지역은 미국으로 두기! (내가 참고한 블로그에선 미국만 무료라는 설도 있다고 했음…)
2. 프로젝트 터미널에서
Gunicorn, Postgre sql 설치
- 가상환경에서 gunicorn 설치, postgre sql 용 설치
source .project012/Scripts/activate
→source 내가_만든_가상환경_이름/Scripts/activatepip install gunicornpip install psycopg2-binary
배포 브랜치 생성
- 배포를 위한 브랜치 생성
git checkout -b temp-deploy→ 잘 안될까봐 temp-deploy로 ㅎㅎ
Procfile
- 프로젝트 루트에
Procfile만들기. (주의: P는 대문자임!!!!!!!!)
Procfile 내용
web: gunicorn 'backend.app:create_app()' --preload --bind 0.0.0.0:${PORT}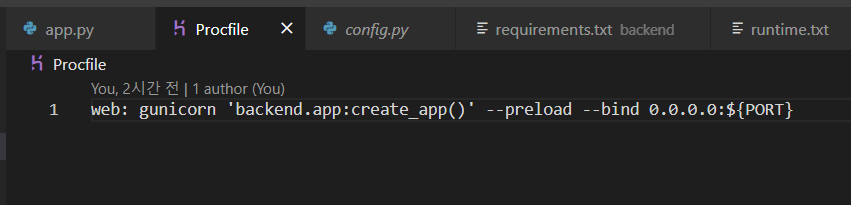
requirements.txt
- 프로젝트 루트에
requirements.txt만들기pip freeze > requirements.txt이렇게 터미널에 치면 만들 수 있음.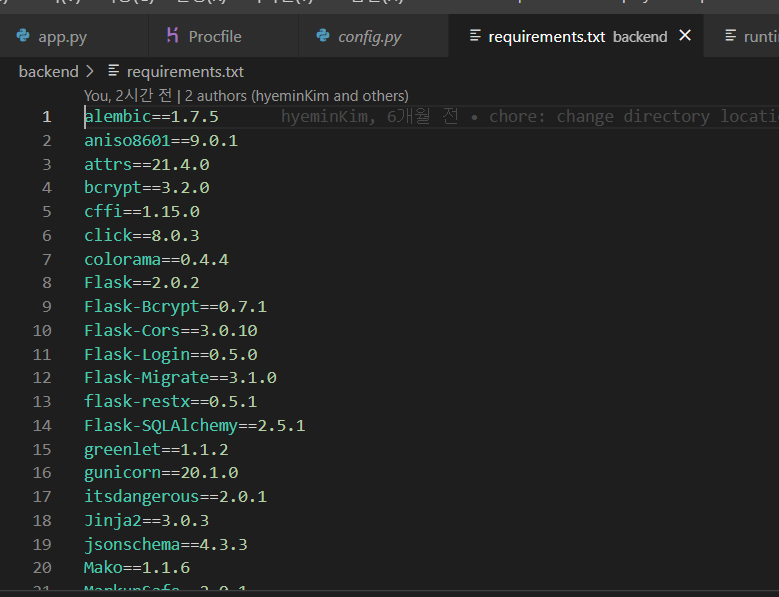
runtime.txt
-
프로젝트 루트에
runtime.txt만들기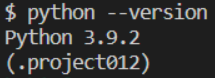
내가 쓰는 가상환경에서 파이썬 버전 확인 후 그대로 입력해준다!
python --version하니Python 3.9.2 라고 나옴
runtime.txt 내용
python-3.9.2
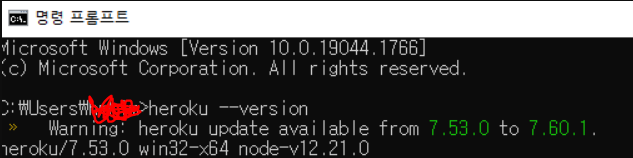
3. cmd 실행 후 (windows)
heroku --version → 헤로쿠 설치됐는지 확인!
heroku login → 명령 입력 후 창이 뜬 헤로쿠 홈페이지에서 로그인 버튼 클릭 후 다시 돌아오기!
cd 배포할_프로젝트_깃_레포지토리_위치 → 예) cd Desktop\Repo
heroku git:remote -a 헤로쿠에서_설정한_앱_이름 → 예) heroku git:remote -a myapp
git add .
git commit -m "first commit"
git push heroku temp-deploy:main → git push heroku 배포할_git_브랜치명:배포할_헤로쿠_브랜치명
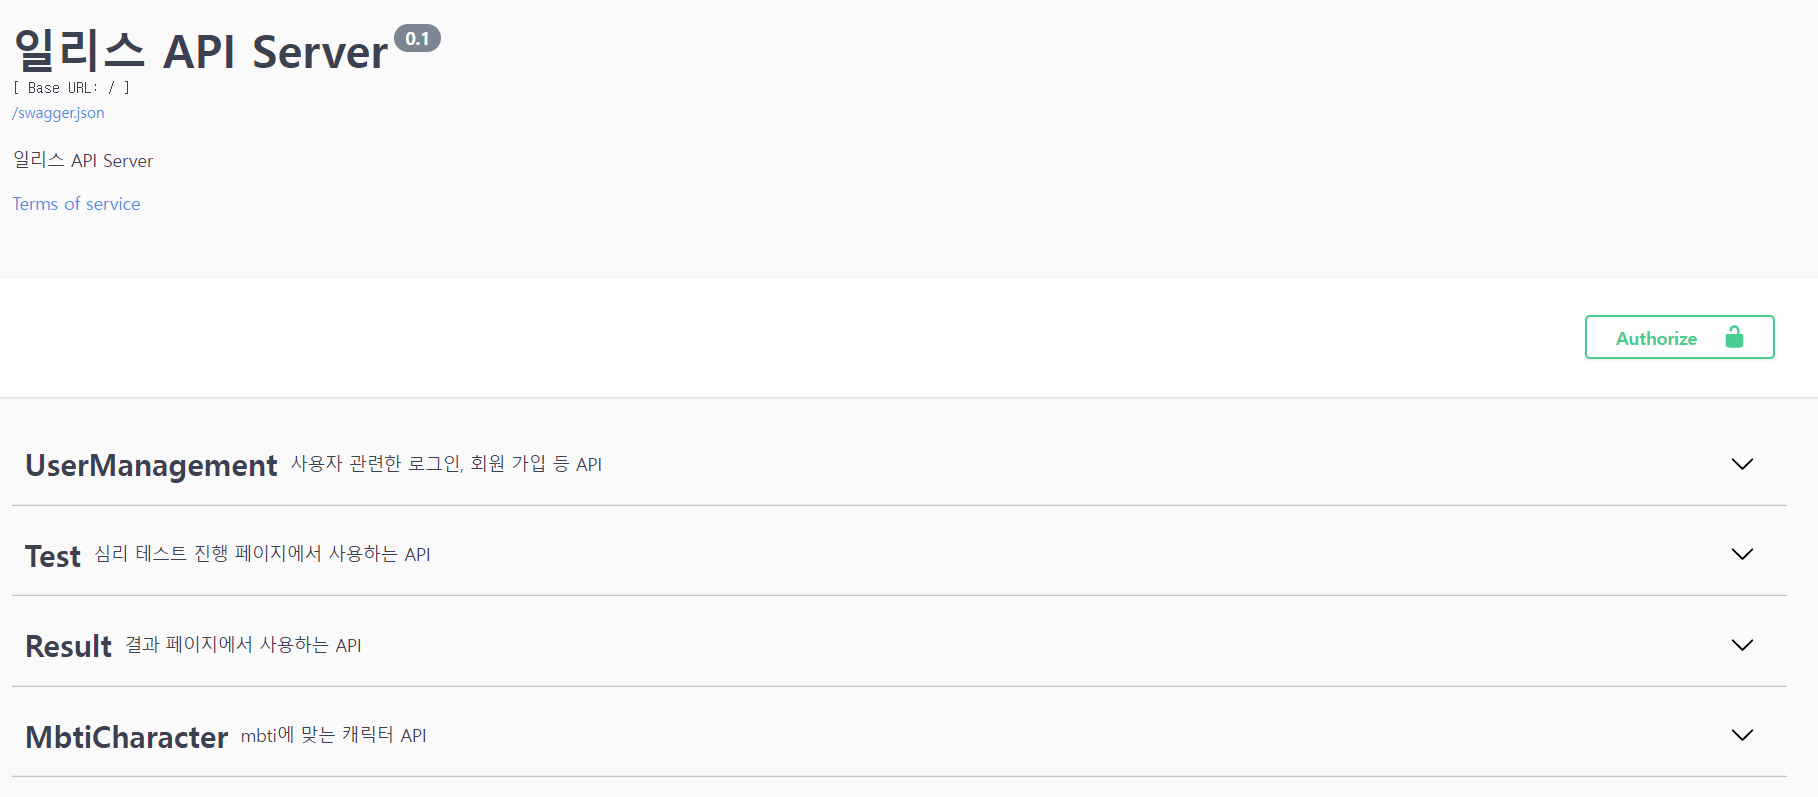
오류 없이 마무리 되면 아래쪽 로그에 배포 주소가 나온다! 접속하면 완료!!!!
나는 백엔드 배포라 주소 접속하면 API 명세가 나온다!