
📦 설치 패키지
ℹ️ 패키지 버전 정보
@notionhq/client: 2.2.15
@notion-render/client: 0.0.2
dotenv: 16.4.5
📂 파일구조
📦src
 ┣ 📂app
 ┃ ┣ 📂config
 ┃ ┃ ┗ 📜index.ts      // 환경변수 저장
 ┃ ┣ 📂product
 ┃ ┃ ┗ 📂[slug]
 ┃ ┃ ┃ ┗ 📜page.tsx    // 상품 페이지 렌더링
 ┃ ┣ 📂utils
 ┃ ┃ ┗ 📜notion.ts     // 노션 API 통해 정보 가져올 수 있는 함수 생성
 ┃ ┣ 📜layout.tsx      // (래퍼 레이아웃)
 ┃ ┗ 📜page.tsx        // 인덱스 페이지
 ┣ 📂components
 ┃ ┣ 📜Footer.tsx
 ┃ ┣ 📜Layout.tsx
 ┃ ┣ 📜List.tsx
 ┃ ┣ 📜Nav.tsx
 ┃ ┗ 📜ProductItem.tsx // 개별 상품정보 렌더링 해주는 컴포넌트
 ┣ 📂lib
 ┃ ┗ 📂types
 ┃ ┃ ┗ 📜product.ts    // 상품 DB 타입 지정
 ┗ 📂styles
	 ┗ 📜globals.css
💻 개발 순서
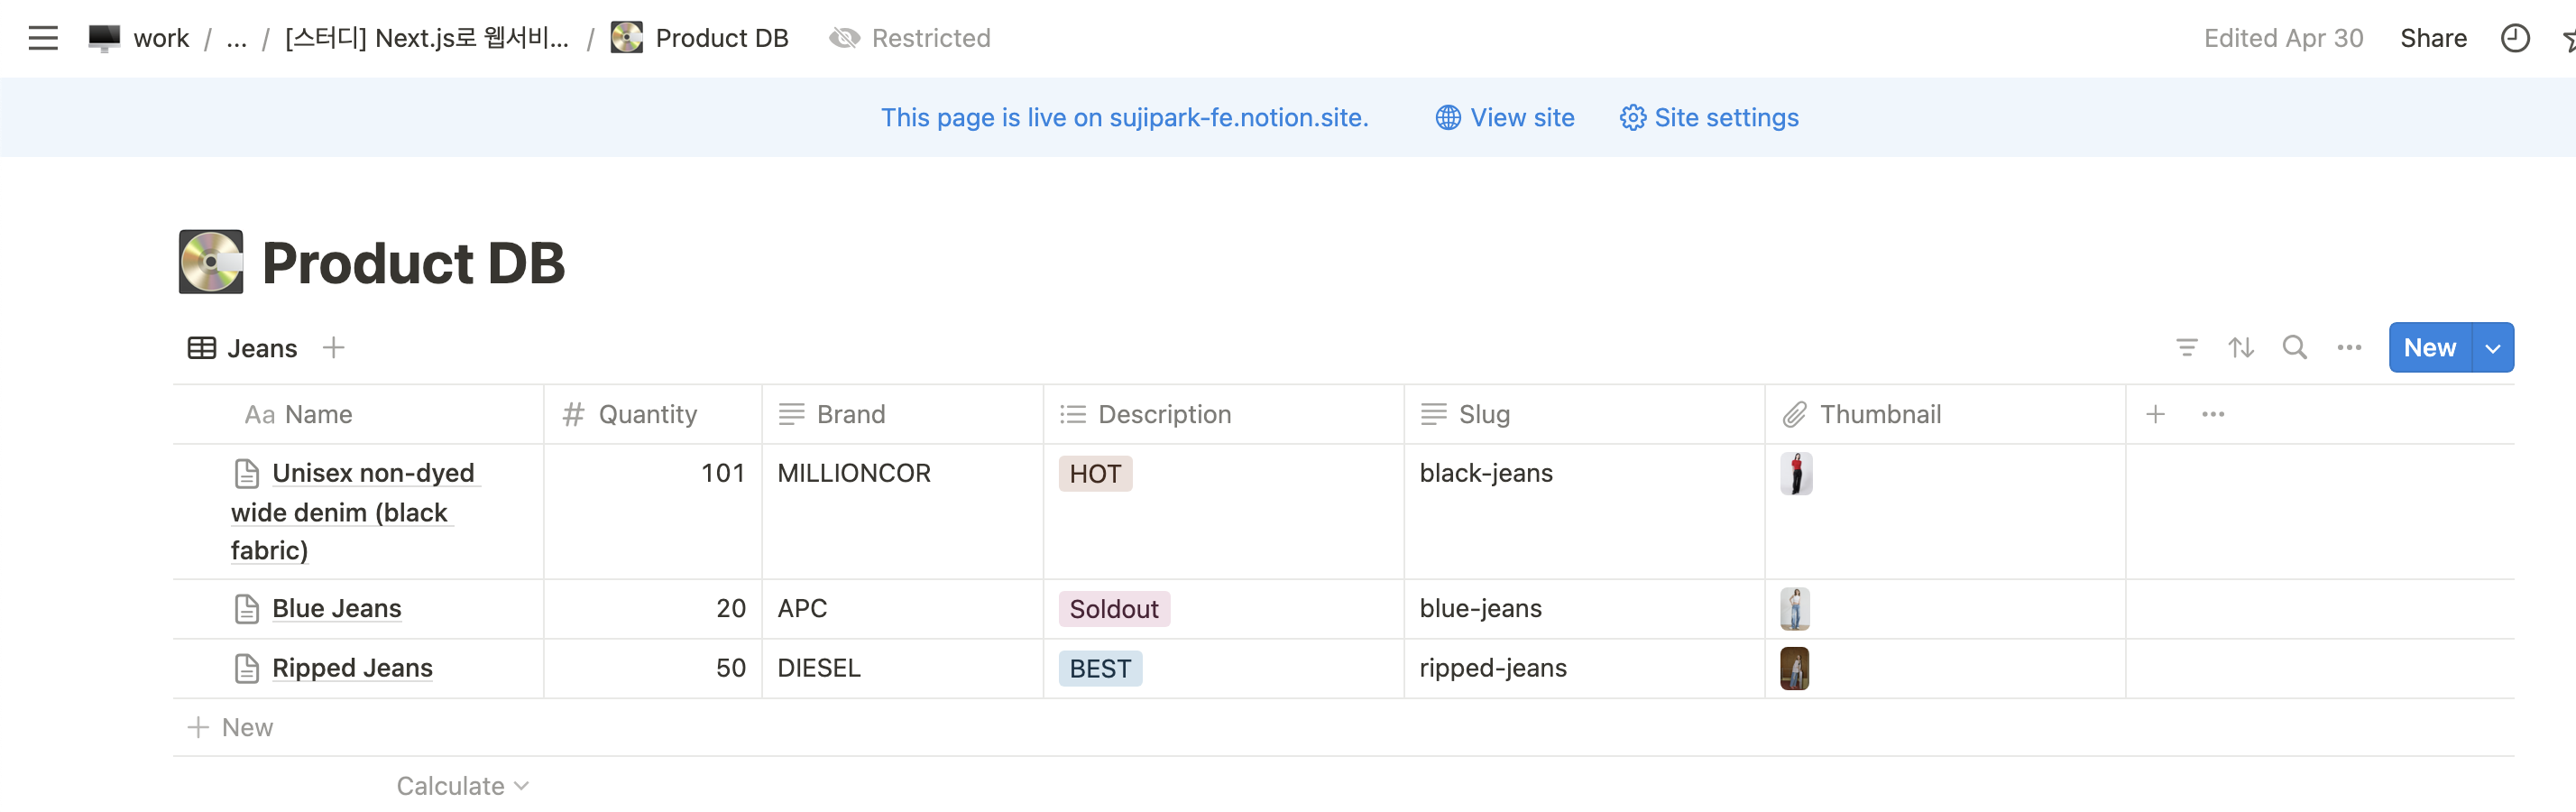
1. Notion DB 페이지 생성
페이지를 만들고 테이블을 추가해 데이터를 입력해 줍니다. (Notion DB 페이지 경로)
저는 Slug 값으로 url을 연동할 것이기 때문에 Slug 라는 컬럼을 만들어 줍니다.
예) http://localhost:3000/product/black-jeans
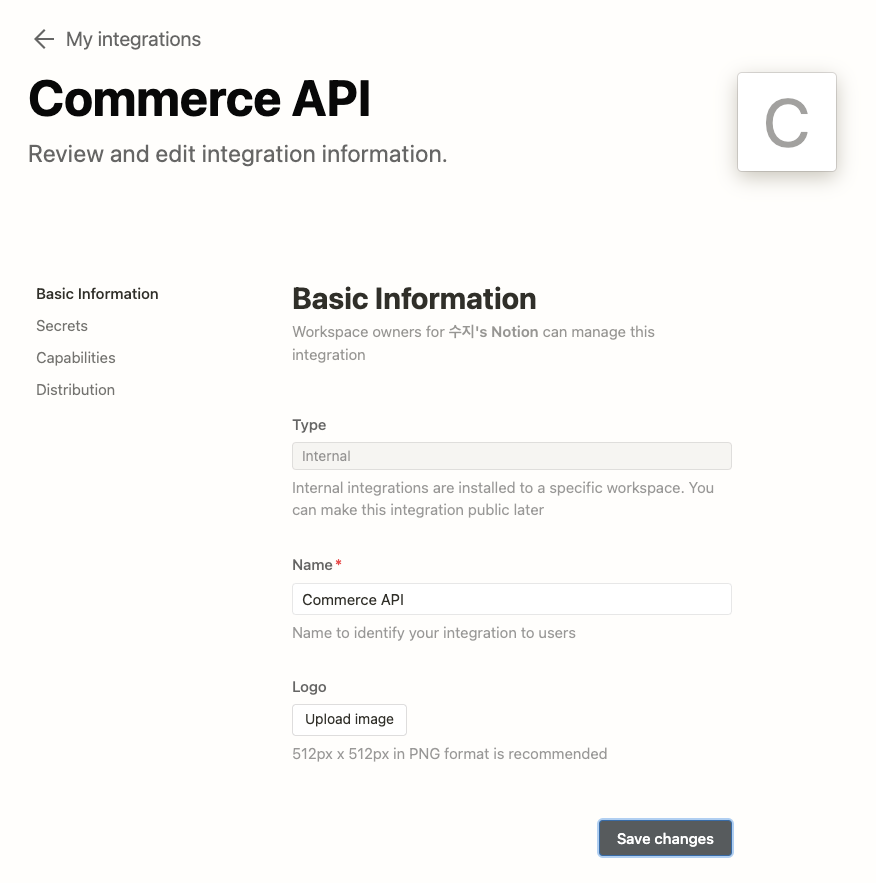
2. Notion Integration 생성 및 연결
- Notion Integration 생성
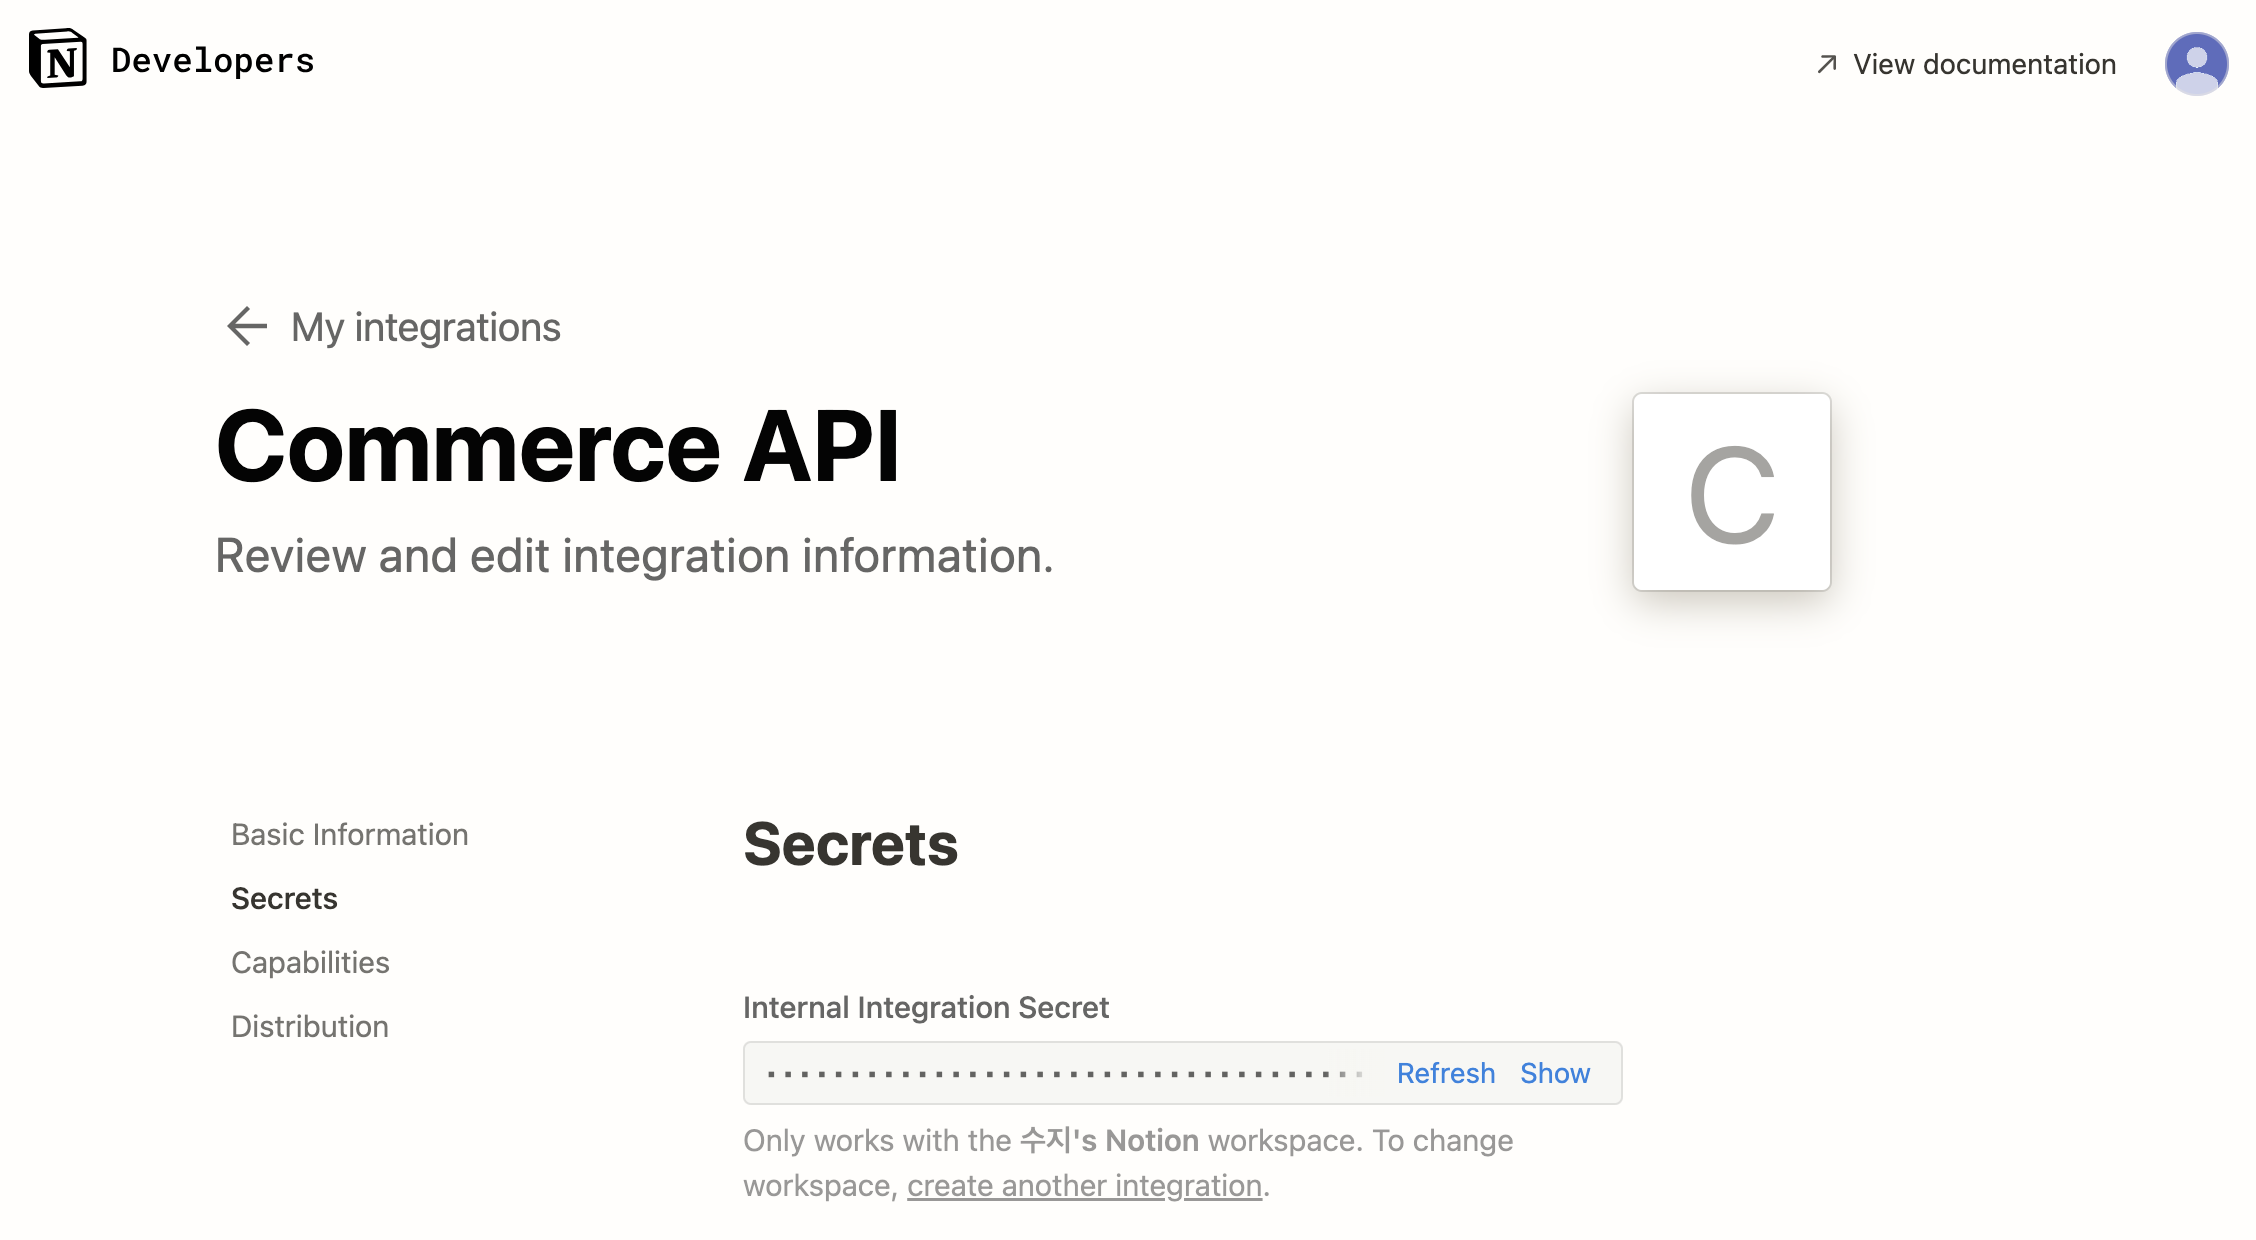
Notion 개발자 사이트의 My Integration 페이지로 이동해 integration을 생성합니다.
기본 정보를 입력하면 Token이 나옵니다.
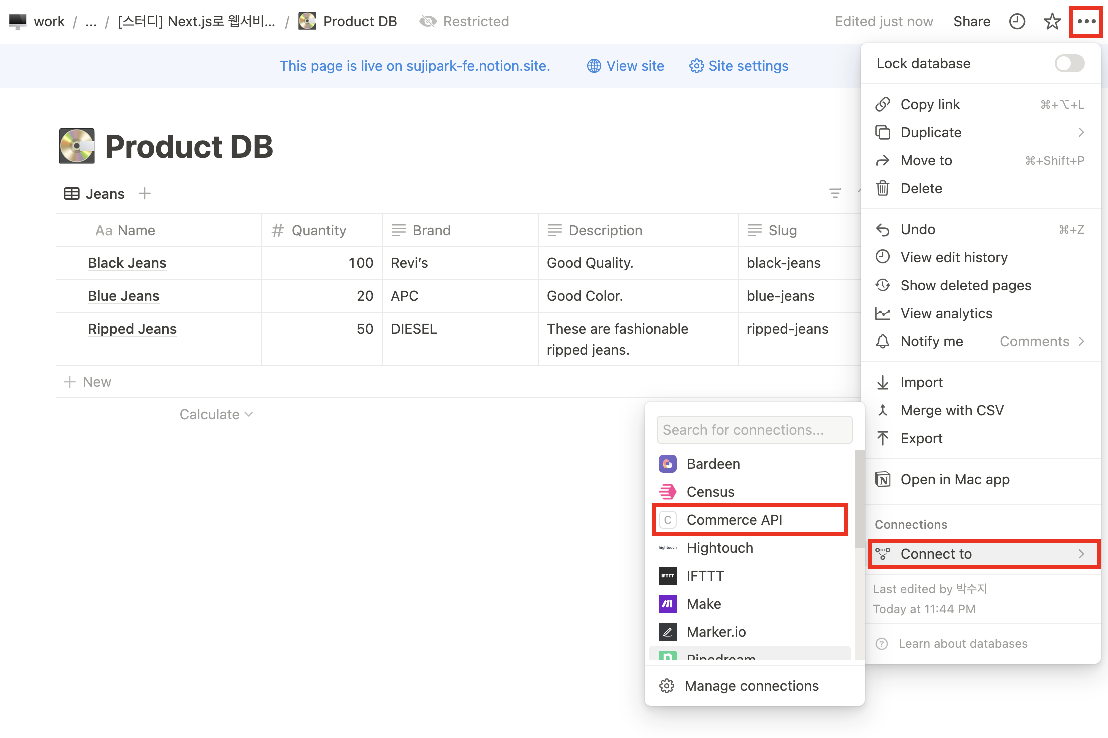
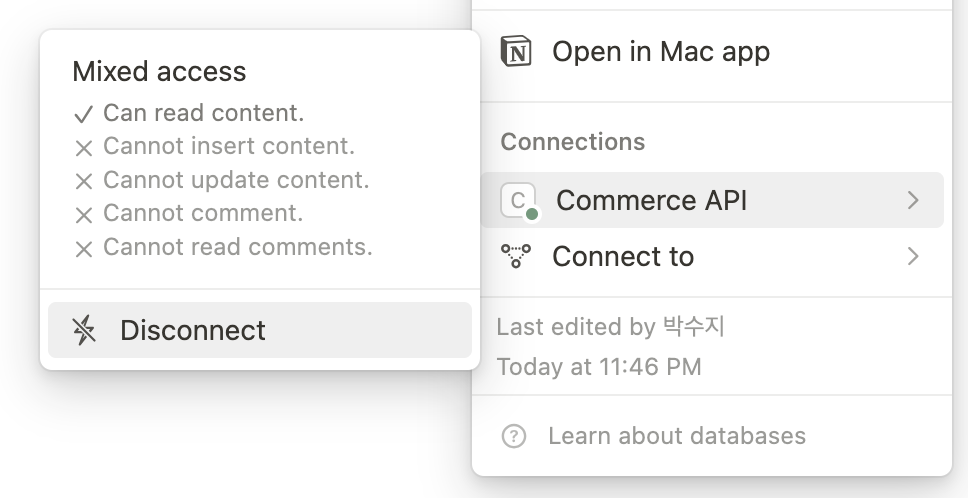
- 노션 DB 페이지에 노션 API 연결
노션 DB 페이지 - 우측 상단 … 메뉴 - Connect to - 연결할 API 이름
3. @notionhq/client 패키지 설치
notion API와 상호작용 하기 위해 notion과 프로젝트를 연결해줄 수 있는 라이브러리를 설치해 줍니다.
npm i @notionhq/client💡 Notion API를 사용하기 위한 서드파티 라이브러리로
notionhq/client와notion-client를 주로 사용합니다. 이들을 사용해 Notion API를 호출하고 데이터를 가져오거나 업데이트하는 등의 작업을 수행할 수 있습니다.notionhq/client는 Notion의 공식 클라이언트 라이브러리로, Notion에서 직접 유지보수하고 지원하기 때문에 선택했습니다.
그리고 프로젝트 루트 위치에 .env 파일을 추가하고, Notion API 키를 저장합니다.
NOTION_TOKEN: My Integration에서 발급받은 개인키DATABASE_ID:데이터베이스를 생성한 노션 페이지의워크스페이스경로/다음부터?v=전까지의 숫자

// .env
NOTION_TOKEN="개인노션토큰키"
NOTION_DATABASE_ID="데이터베이스 페이지 id"
💡 KEY 같이 중요한 정보가 들어있는
.env환경설정 파일은.gitignore에 추가해 git에 저장하지 않고, 로컬에서만 저장되도록 합니다.
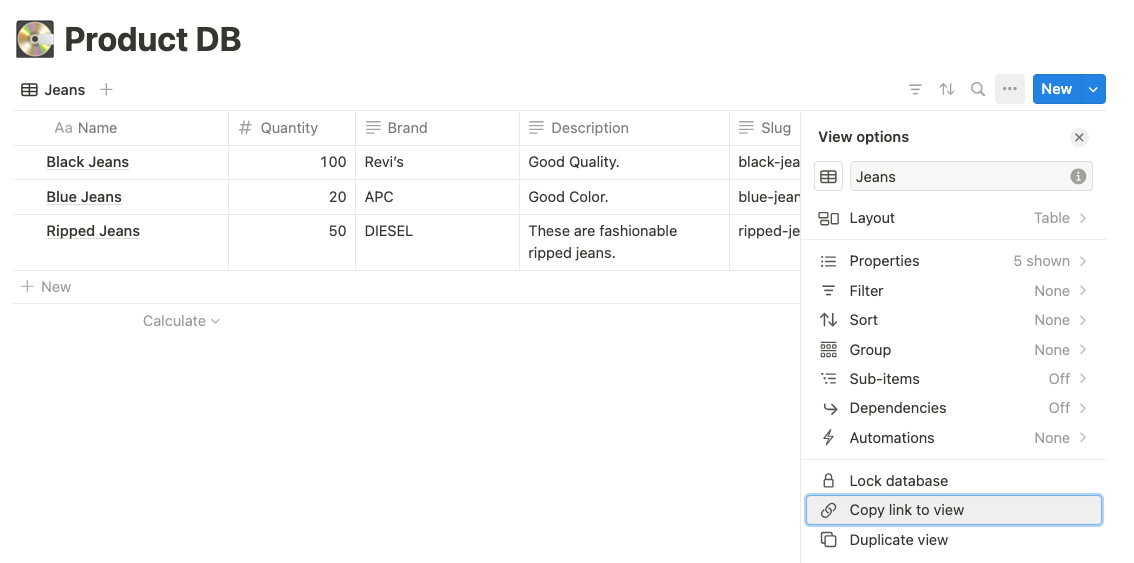
해당 노션 페이지에 table 말고 다른 컨텐츠가 있다면 table - … 메뉴 - Copy link to view로 경로를 입력합니다.
4. Notion API와 통신
Notion API와 통신 할 수 있도록 api/notion.ts 파일을 생성하고 @notionhq/client 패키지를 가져옵니다.
// src/app/utils/notion.ts

import { Client } from "@notionhq/client";
import { BlockObjectResponse, PageObjectResponse } from "@notionhq/client/build/src/api-endpoints";
import { cache } from "react";
import { TOKEN, DATABASE_ID } from "@/app/config";

// 빌드 타임에 호출. 데이터 가져온 다음에 화면에 렌더링
export const notionClient = new Client({
  auth: TOKEN,
});

// 페이지 가져오기 (이번 글에선 사용X)
export const getPages = cache(() => {
  return notionClient.databases.query({
    filter: {
      property: "Status",
      select: {
        equals: "Published",
      },
    },
    database_id: DATABASE_ID!,
  });
});

// 페이지 콘텐츠(block) 가져오기 (이번 글에선 사용X)
export const getPageContent = cache((pageId: string) => {
  return notionClient.blocks.children
    .list({ block_id: pageId })
    .then((res) => res.results as BlockObjectResponse[]);
});

// Slug 값으로 페이지 가져오기(현재 사용할 함수)
export const getPageBySlug = cache((slug: string) => {
  return notionClient.databases
    .query({
      database_id: DATABASE_ID!, // 또는 database_id: process.env.NOTION_DATABASE_ID as string,
      filter: {
        property: "Slug", // property명 일치하는지 확인
        rich_text: {
          equals: slug,
        },
      },
    })
    .then((res) => res.results[0] as PageObjectResponse | undefined);
});
5. 페이지에 불러오기
notion.ts에서 내보내준 getPages() 함수에서 productList라는 변수로 data를 받아옵니다.
// src/app/page.tsx

import Link from 'next/link';
import {TOKEN, DATABASE_ID} from "@/app/config"; // .env 파일에 담긴 환경변수 정보

export default async function Index() {
  // getPages: 페이지 가져오는 notion API 함수로 데이터 받아오기
  const productList = await getPages();
  console.log(productList); // 콘솔로 데이터 출력해보기

  return (
    <div className="text-center">
      {productList.results.map(({product}: any) => {
        const name = product.properties.Name.title[0].plain_text;
        const brand = product.properties.Brand.rich_text[0].plain_text;
        const quantity = product.properties.Quantity.number;
        const description = product.properties.Description.rich_text[0].plain_text;
        const slug = product.properties.Slug.rich_text[0].plain_text;
        return (
          <Link href={`/product/${slug}`} passHref key={name}>
            <div className="mb-10">
              <strong className="p-1">[{brand}] {name}</strong>
              <p>
                quantity: {quantity}
              </p>
              <p>
                {description}
              </p>
            </div>
          </Link>
        );
      })}
    </div>
  );
}
콘솔 출력 화면

나머지 코드
// src/app/product/[slug]/page.tsx

import { getPageContent, getPageBySlug, notionClient } from "@/app/utils/notion";
import { NotionRenderer } from "@notion-render/client";
import { notFound } from "next/navigation";

//Plugins
import { ProductItem } from "@/components/ProductItem";

export default async function Page({ params }: { params: { slug: string } }) {
  console.log("Slug: ", params);
  const productItem = await getPageBySlug(params.slug);

  //Redirect to not found page!
  if (!productItem) notFound();

  const content = await getPageContent(productItem.id);

  const notionRenderer = new NotionRenderer({
    client: notionClient,
  });

  const html = await notionRenderer.render(...content);

  console.log("ProductItem: ", productItem);

  return (
    <ProductItem
      name={(productItem.properties.Name as any).title[0].plain_text}
      brand={(productItem.properties.Brand as any).text[0].rich_text}
      quantity={(productItem.properties.Quantity as any).number}
      description={html}
    />
  );
}
// src/app/components/ProductItem/index.tsx
export function ProductItem(props: ProductProps) {
const { name, quantity, brand, description } = props;
return (
<article>
<h1>{name}</h1>
<div dangerouslySetInnerHTML={{ __html: description }}></div>
<div>{quantity}</div>
<div>{brand}</div>
</article>
);
}// src/lib/types/product.tsx
export interface ProductProps {
name: string;
quantity: number;
brand: string;
description: string;
}