React Native
메인 홈페이지 : https://reactnative.dev/
[ 1 ] node, npm 설치
https://www.digitalocean.com/community/tutorials/how-to-install-node-js-on-ubuntu-22-04
터미널에서 작성하면 됨!
[ 2 ] JDK 설치
https://www.digitalocean.com/community/tutorials/how-to-install-java-with-apt-on-ubuntu-22-04
[ 3 ] Android development environment 설치
https://developer.android.com/studio/index.html 사이트에서 android studio giraff 다운로드,
압축파일 풀어서

해당 파일의 bin/./studio.sh 로 파일 실행
linux 플라밍고 path1 버전 다운로드 링크
안드로이드 스튜디오 다운그레이드 하는 방법 링크(velog)
https://redirector.gvt1.com/edgedl/android/studio/ide-zips/2022.2.1.19/android-studio-2022.2.1.19-linux.tar.gzSDK Manager
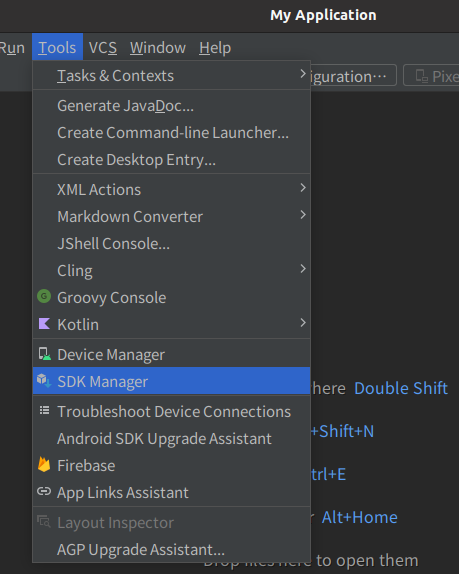
설치 후 실행이 완료되면 Tools > SDK Manager
- SDK Platforms] → Android 13 Tiramisu
- [SDK Tools] → Android SDK Build Tools, Android Emulator, Android SDK Build Platform tools
를 각각 체크해준다.
Device Manager
Tools > Device Manager
[Create Device] 누르고 에뮬레이터 생성,
Pixel시리즈 중 아무거나 선택,
Android버전 13,
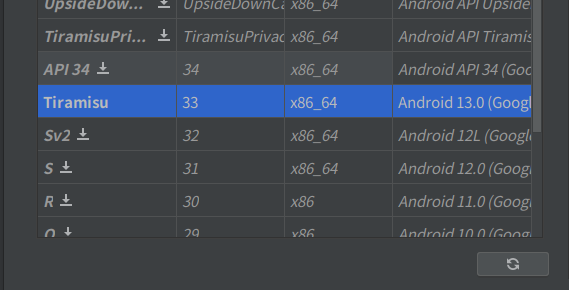
Tiramisu 다운로드후
Tiramisu 선택해서 옵션 수정없이 생성
WatchMan 설치
[ 1 ] 다운로드
https://facebook.github.io/watchman/docs/install/#ubuntu-prebuilt-debs 의 latest release에 걸린 링크에서
해당하는 os의 최신 버전 파일을 다운로드 받는다.
[ 2 ]

sudo dpkg -i watchman_$UBUNTU_RELEASE_$VERSION.deb
watchman$UBUNTU_RELEASE$VERSION.deb 부분은 해당하는 파일명으로 변경시켜주어야한다.
[ 3 ]

sudo apt-get -f install
install하여 끝까지 설치한다.

이후, 설치가 제대로 되었는지 확인하기 위해서는 watchman version 을 입력한다.
프로젝트 작성
[ 1 ] 프로젝트 생성하는 법

npx react-native@latest init 프로젝트명
[ 2 ] 서버 실행
-

npx react-native start로 서버 실행, -

다른 터미널에서
:~/Android/Sdk/emulator$ ./emulator @Pixel_7_API_33 -no-snapshot-load로 휴대폰 화면 띄우는 프로그램(에뮬레이터) 실행 -

해당 프로젝트의 터미널에서npm i로 install 후
다른 터미널에서:~/study/프로젝트명$ npx react-native run-android로 해당하는 프로젝트를 위의 프로그램에서 실행시킬 수 있게 만듦