- react 컴포넌트에서는 input을 props라고 한다
- return은 화면에 보여져야할 react요소가 return 된다
- 컴포넌트를 class나 함수로 만들 수 있다
- 컴포논트는 하나의 최상위 태그로시작
- 컴포넌트 이름은 항상 대문자로 시작하며, 소문자로 시간하면 DOM tag로 설정한다
예제
<component props = 'value' />
- 객체로 만들어서 리터럴로 사용하기
출력 => i like kimchi
- 상수데이터
출력 =>
- img에 alt꼭 입력해야함
propTypes
- props가 array, boolean,true,false,object...등 존재여부를 check 할 수 있다
import PropTypes from 'prop-types';
Food.PropTypes = { name: PropTypes.string.isRequired, picture: PropTypes.string.isRequired, rating: PropTypes.number.isRequired,};
name이 string이 아니면 에러가 남
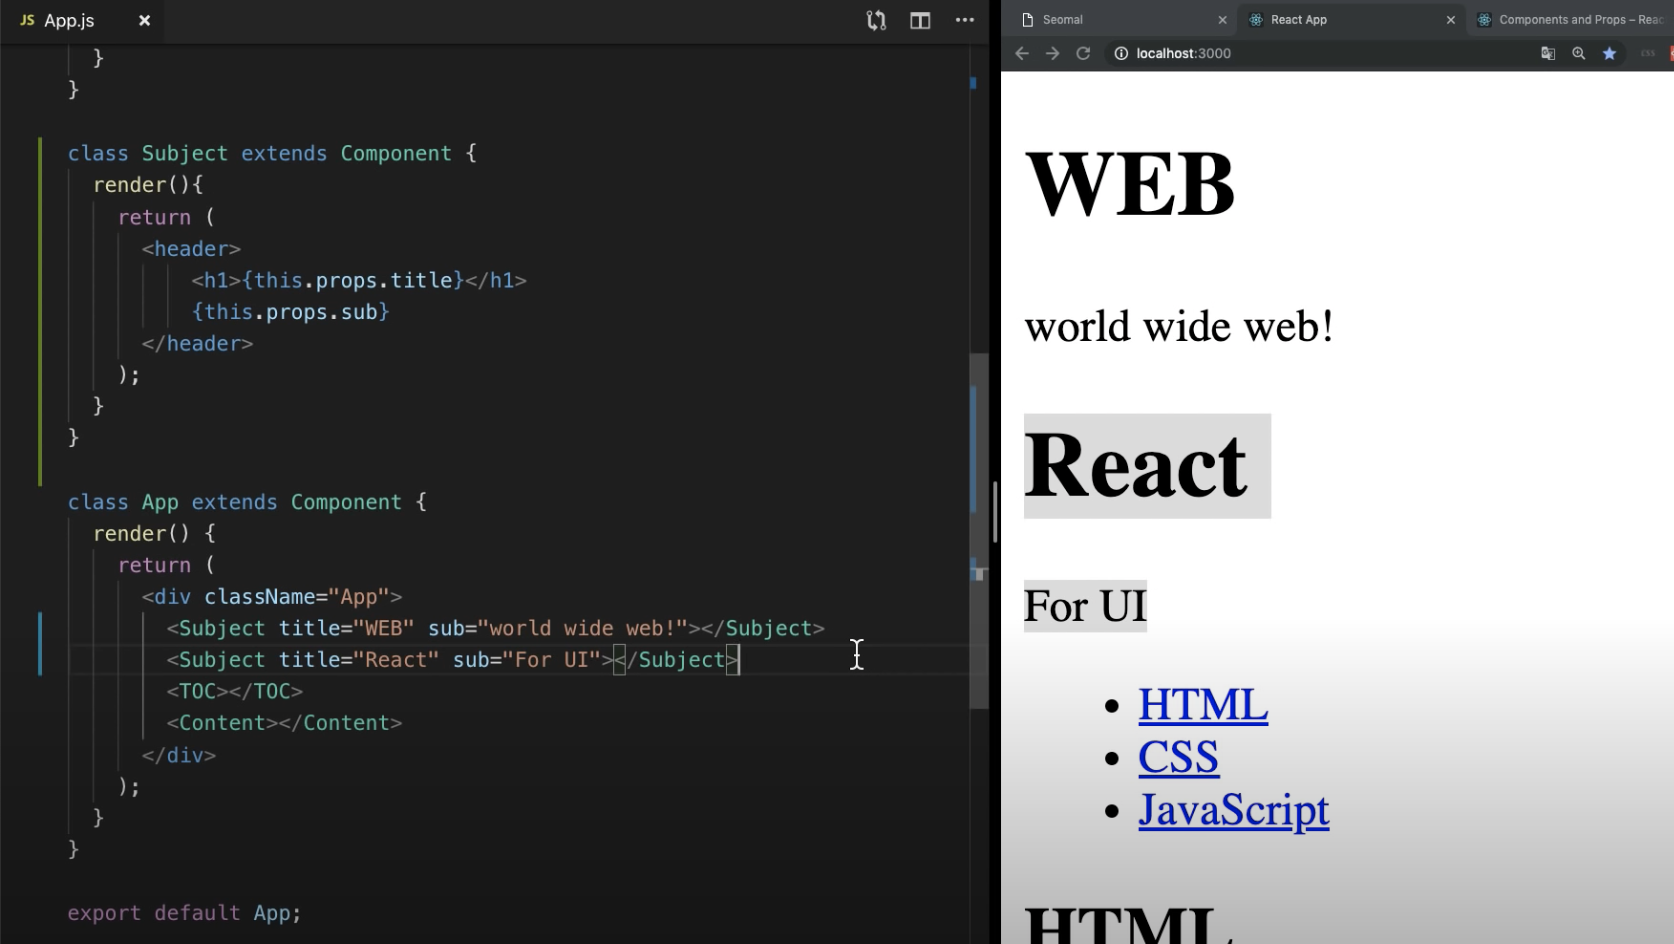
- 함수랑 class형 컴포넌트가 있다
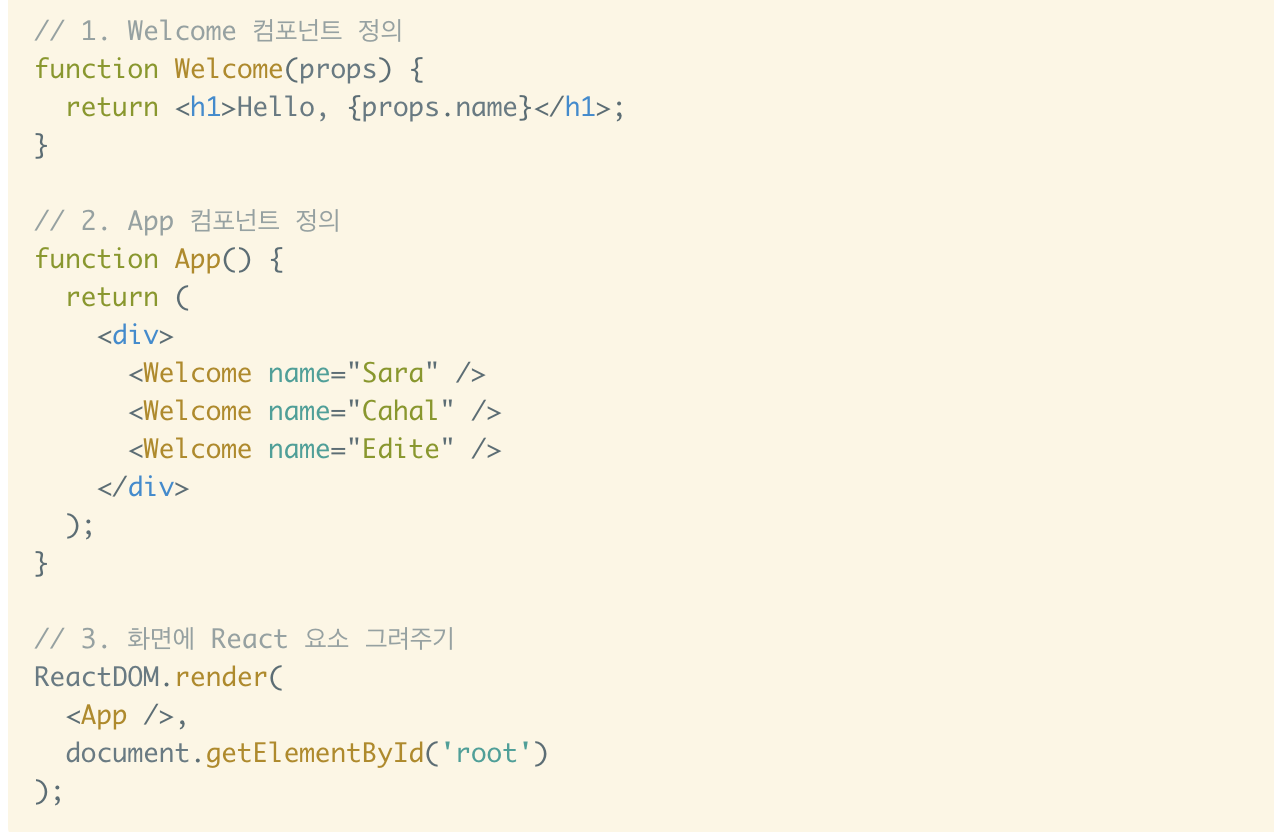
함수로 welcome 컴포넌트 구현하기

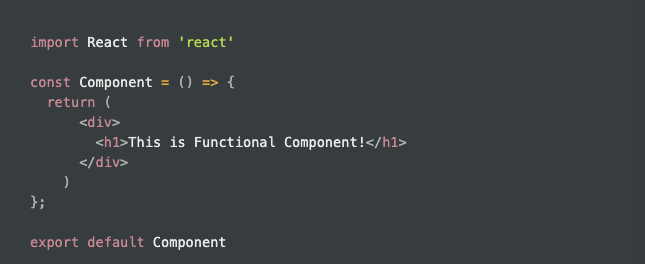
- 함수형 컴포넌트가 보기에는 훨씬 간단하고 작성하기 편리한 장점이 있다
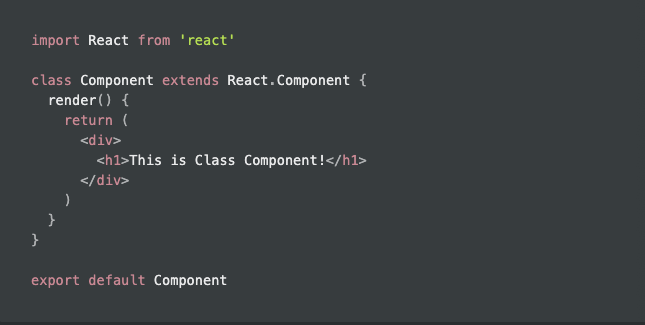
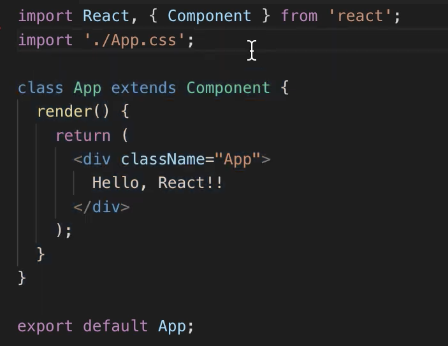
class로 welcome 컴포넌트 구현하기
React.Component를 extend 해서 생성
컴포넌트를 생성할때 render()메서드는 무조건 정의해야하고, return도 해줘야 한다.
render 함수가 꼭 있어야 하며, 그 안에 보여 주어야 할 JSX를 반환한다
- 위 처럼 정의한 컴포넌트는 함수와 class 이름으로 사용할 수 있다
- < Welcome />으로 작성
- props: welcome 컴포넌트(함수)에서 parameter로 해당 attribute를 받아서 사용
.(dot)으로 속성명에 접근, props.속성명 으로 속성값을 가져옴
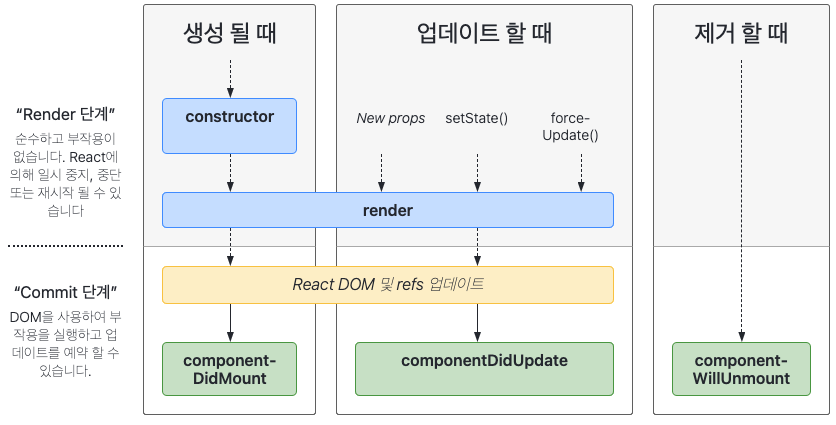
render()
- React.Component의 하위 class에서 반드시 정의해야 하는 메서드 이다
- render가 호출되면 this.props와 this.state의 값을 활용하여 반환해야 한다
console style
- 콘솔창에 콘솔찍히는 글자에 스타일 주기
const classStyle = 'color:red';
console.log('%cclass=> render', classStyle);
=> 콘솔창에 'class=> render'가 red로 출력됨


