File vs Blob
JavaScript에서 File과 Blob 객체는 모두 이진 데이터를 표현하는 데 사용되지만, 서로 다른 목적을 가지고 있으며 몇 가지 뚜렷한 특징이 있습니다.
Blob
Blob은 "큰 바이너리 데이터 덩어리"라고 생각하면 됩니다. 파일, 이미지, 비디오, 또는 기타 원시 데이터를 저장하거나 처리할 때 사용하는 데이터 구조입니다.
데이터 박스: Blob은 큰 박스처럼 데이터를 담아두는 역할을 합니다.
안에 뭐가 들었는지는 신경 쓰지 않고, 그냥 잘 보관하고 전달하는 데 초점을 둡니다.
예를 들어, 사진, 동영상, 또는 음악 파일을 다른 곳으로 보낼 때 Blob으로 묶어서 처리할 수 있습니다.
불변 객체: Blob에 한 번 데이터를 넣으면 수정할 수 없어요. 새로운 Blob을 만들어야 데이터를 바꿀 수 있습니다.
예를 들어, 블록처럼 데이터를 쌓는 방식입니다.
자바스크립트에서 Blob 사용: 웹에서 자바스크립트를 사용할 때, 파일을 업로드하거나 다운로드할 때 Blob을 자주 사용합니다.
이미지 미리보기, 파일 조각화(Chunking), 저장소에 데이터를 넣는 데 유용합니다.
// Blob 생성
const imageData = new Blob(["이미지 데이터"], { type: "image/png" });

// Blob을 URL로 변환하여 브라우저에서 이미지로 표시
const url = URL.createObjectURL(imageData);

const img = document.createElement("img");
img.src = url;
document.body.appendChild(img);
Blob의 7가지 특징
-
불변성:
Blob은 일단 생성되면 수정할 수 없습니다.
→ "Hello"라는 Blob을 만들면 "Hello"는 바뀌지 않아요. 새 Blob을 만들어야 해요. -
데이터 표현: 어떤 종류의 데이터든 Blob에 넣을 수 있는 만능 상자예요.
→ 예: 사진을 Blob에 넣어서 저장하거나, 음악 파일을 Blob으로 전송할 수 있어요. -
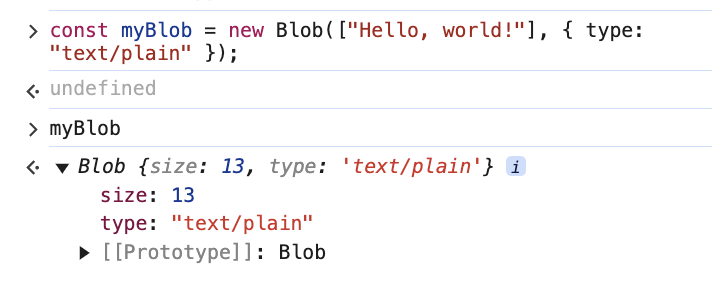
크기 및 유형: Blob에는 두 가지 주요 속성이 있습니다.
- 크기: Blob의 크기를 바이트(byte) 단위로 알려줘요.
- 유형: Blob 안에 어떤 데이터가 들어 있는지 MIME 유형으로 알려줘요. (예: image/png, text/plain)
- API 처리
- 파일 API: 사용자가 업로드한 파일을 처리합니다.
- 캔버스 API: 캔버스 요소에서 이미지를 만듭니다.
- 페치 API: 이진 데이터를 보내고 받습니다.
// JSON 데이터를 Blob으로 생성
const jsonData = new Blob([JSON.stringify({ key: "value" })], { type: "application/json" });

// 서버로 Blob 전송
fetch("https://example.com/upload", {
  method: "POST",
  body: jsonData,
})
  .then(response => response.json())
  .then(data => console.log("Response:", data))
  .catch(error => console.error("Error:", error));
- Blob 생성 방법: Blob 생성자를 사용하여 Blob을 생성할 수 있습니다.
const myBlob = new Blob(["Hello, world!"], { type: "text/plain" });- URL.createObjectURL()로 Blob을 브라우저에서 사용할 수 있는 임시 링크를 만들 수 있어요.
const url = URL.createObjectURL(myBlob);
const link = document.createElement("a");
link.href = url;
link.download = "hello.txt"; // Specify a default file name for download
link.textContent = "Download Blob";
document.body.appendChild(link);
→ 클릭하면 "hello.txt" 파일을 다운로드할 수 있어요!
- Blob 작업:
- Blob의 내용을 읽거나 서버로 보낼 수 있어요.
- FileReader: Blob을 읽어서 텍스트로 변환할 수 있어요.
- fetch: Blob을 서버로 보낼 수 있어요.
TLTR.
- 파일 업로드:사용자가 사진을 업로드하면, 브라우저가 파일을 Blob으로 읽어서 서버로 보내요.
- 이미지 미리보기:사진을 선택하면, Blob으로 읽어서 화면에 보여줘요.
- 파일 다운로드:텍스트 파일을 만들어 Blob으로 저장하고, 사용자가 다운로드할 수 있게 해요.
File
파일 객체는 사용자의 파일 시스템에서 파일을 나타냅니다. 파일 이름, 크기, 유형, 마지막 수정 날짜 등 파일에 대한 정보를 포함하는 특정 유형의 Blob입니다.
File 객체는 주로 웹 애플리케이션에서 파일 업로드를 처리하고 사용자가 생성한 콘텐츠를 관리하는 데 사용됩니다.
File 특징
- Blob에서의 상속
- File 객체는 Blob의 모든 기능(데이터 처리, 읽기)을 사용할 수 있습니다.
- 파일 이름, 크기, 수정 날짜 같은 파일별 정보를 더 제공합니다.
-
File의 속성
name: 파일 이름(확장자 포함)
예: example.png
size: 파일 크기(바이트 단위)
예: 1024 (1KB)
type :파일의 MIME 유형
예: image/png, application/pdf
lastModified: 파일이 마지막으로 수정된 시간(밀리초 단위)
예: 1672531200000 (Unix 시간)
webkitRelativePath: 디렉토리 선택 시, 파일의 디렉토리 경로를 제공
예: folder/example.png -
사용
파일 객체는 일반적으로 사용자가 HTML 파일 입력 요소(<input type="file">)를 통해 파일을 선택할 때 생성됩니다.
입력 요소의 files 속성을 통해 선택한 파일에 액세스할 수 있습니다.
<input type="file" id="fileInput" multiple />
const input = document.getElementById("fileInput");
input.addEventListener("change", (event) => {
  const files = event.target.files; // FileList 객체
  for (const file of files) {
    console.log("파일 이름:", file.name);
    console.log("파일 크기:", file.size);
    console.log("파일 유형:", file.type);
  }
});- FileReader API
파일 내용을 읽어서 텍스트나 이미지를 표시합니다.
const reader = new FileReader();
reader.onload = (event) => {
  console.log("파일 내용:", event.target.result); // 파일 내용
};
reader.readAsText(input.files[0]); // 첫 번째 파일 읽기- Usage with APIs
파일 객체는 fetch나 XMLHttpRequest와 같은 API를 사용하여 서버로 전송할 수 있으므로 웹 애플리케이션에서 파일 업로드를 처리하는 데 필수적입니다.
<!DOCTYPE html>
<html lang="en">
<head>
    <meta charset="UTF-8">
    <meta name="viewport" content="width=device-width, initial-scale=1.0">
    <title>File Upload Example</title>
</head>
<body>

<input type="file" id="fileInput" />
<pre id="fileContent"></pre>

<script>
    const fileInput = document.getElementById('fileInput');
    const fileContent = document.getElementById('fileContent');

    fileInput.addEventListener('change', (event) => {
        const file = event.target.files[0]; // Get the first selected file

        if (file) {
            const reader = new FileReader();

            reader.onload = (e) => {
                fileContent.textContent = e.target.result; // Display the file content
            };

            reader.readAsText(file); // Read the file as text
        }
    });
</script>

</body>
</html>
TLTR.
- File = Blob + 파일 정보(name, size, type 등)
- 주로 사용: 파일 업로드, 미리보기, 서버 전송, 데이터 읽기
- 필수 도구: FileReader, fetch 등
Reference