
[안드로이드 클라이언트] CH5 REST API로 오늘의 질문을 가져오자
이 포스팅은 <SNS 앱을 만들면서 배우는 안드로이드 클라이언트 개발>, 장성환, 비제이퍼블릭(2022)을 읽고 개인 학습용으로 정리한 글입니다.
5.1 답 쓰기/수정 개발 문서
5.2 RESTful API란
-
⭐RESTful API: REST(REpresentational State Transfer) 아키텍쳐 스타일을 따르는 API
-
다음의 6가지 제약 조건을 잘 지키는 것이 RESTful하다고 한다
-
클라이언트-서버:
클라이언트와 서버 분리 -> 인터페이스 이용해 커뮤니케이션 -
무상태성(Stateless):
클라이언트가 서버로 보내는 요청을 이해하기 위해 필요한 모든 정보 모두 요청에 포함됨 -
캐시(cache):
서버의 응답에 캐시 가능 여부 포함 -> 클라이언트에서 캐시 가능 -
계층화된 시스템(Layered System):
여러 계층으로 구성될 수 있어야 -> 각 계층에 속한 컴포넌트는 상호작용하는 계층 너머를 볼 수 X -
주문형 코드(Code-On-Demand):
서버가 클라이언트에 실행 가능한 코드를 보내 기능 확장 가능 (반드시 지원 X) -
인터페이스 일관성(Uniform Interface):
REST의 핵심, 4가지 조건-
리소스 식별(Identification of resources):
모든 리소스는 고유한 식별자 가짐 -
⚡표현을 통한 리소스의 조작(Manipulation of resources through representations):
리소스 자체를 전송하는 것이 아닌 리소스의 표현을 이용해 조작 -
자기 기술적 메세지(Self-descriptive messages):
메세지를 이해하기 위해 필요한 정보 메세지에 모두 포함됨 -
애플리케이션의 상태 엔진으로서 하이퍼미디어(Hypermedia as the endine of a
pplication state):
리소스에서 무엇을 할 수 있는지, 상태 전이를 위한 정보 제공
-
-
-
이 제약 조건들은 분산 하이퍼미디어 시스템을 위한 것
-> 이 조건들을 만족하도록 구현된 대표적인 예: HTTP + HTML
➖
-
⭐RESTful API와 REST API 같은 의미로 사용되기도 하고 다른 의미로 사용되기도 함
-
다른 의미로 사용될 때
-> REST 아키텍처의 제약조건을 준수하는 경우: RESTful API
-> URI로 리소스를 식별하며 HTTP로 행위를 나타내는 경우: REST API -
둘 중 REST API를 더 많이 사용
5.2.1 RESTful API 설계
- URI는 리소스에 대한 행위를 나타내는 것 X, 리소스를 식별하는 것 O
-> 명사 사용 - 컬렉션은 복수 명사로 표현
- 슬래시(/)로 계층 구조 표현
- 소문자 사용
- 공백의 의미로 언더바(_) 대신 하이픈(-) 사용
-> 언더바는 정규표현식에서의 단어 문자에 포함됨
5.2.2 HTTP 메서드
-
HTTP로 리소스에 대한 행위 표현
-
리소스의 CRUD(Create, Read, Update, Delete)에 각각 POST, GET, PUT과 PATCH, DELETE 사용
5.2.3 HTTP 상태 코드
-
HTTP 상태 코드를 의미에 맞게 사용하는 것 중요
-
서비스 규모가 크고 복잡하여 HTTP 상태 코드만으로 정확한 의미를 전달하기 어려울 때
-> 클라이언트에서 구분할 수 있도록 응답 본문에 추가의 오류 코드 제공 -
정확한 상태 코드를 사용할수롣 라이브러리나 프레임워크에서 지원할 수 있는 것 많아짐
-> ex. 301 Moved Permanently 를 받으면 자동으로 변경된 페이지로 이동
-> ex. 304 Not Modified를 받으면 서버에서 데이터를 받아오지 않고 브라우저에 저장된 캐시 사용
5.3 Retrofit 사용법
- ⭐Retrofit:
- Square사가 안드로이드에서 오픈소스로 제공하는 가장 인기있는 라이브러리
- A type-safe HTTP client for Android and Java
- 모듈의 build.gradle에 Retrofit 추가
- Retrofit
- Retrofit의 요청/응답을 변환해주는 Gson 컨버터
- Activity와 Fragment의 수명주기를 따르는 코루틴 스코프
(이 스코프에서 실행된 코루틴은 Lifecycle이 DESTROYED 상태가 되면 자동으로 제거됨)
dependencies {
	...
    implementation 'com.squareup.retrofit2:retrofit:2.9.0'
    implementation 'com.squareup.retrofit2:converter-gson:2.9.0'
    implementation 'androidx.lifecycle:lifecycle-runtime-ktx:2.4.1'
    ...
}-
online.dailyq.api.response 패키지
-> '질문 가져오기' API 응답의 JSON 오브젝트와 같은 멤버를 갖는 Question 클래스 생성 -
online.dailyq.api 패키지
-> 요청을 정의하는 ApiService 인터페이스 추가
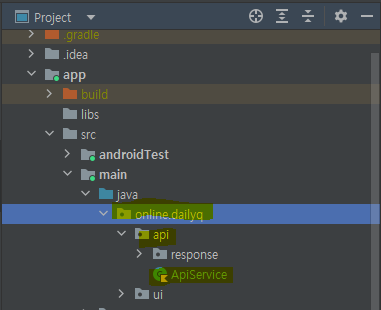
ApiService.kt
-
@GET: 메서드 어노테이션, HTTP 메서드 GET을 사용한다는 것을 알리고 경로 지정
-
@Path: 매개변수가 경로에서 사용됨을 나타냄
-> 매개변수가 채워질 위치: 경로에 중괄호로 표현됨 -
코루틴에서 사용하기 위해 중단 함수(suspend)로 선언
package online.dailyq.api

import online.dailyq.api.response.Question
import retrofit2.http.GET
import retrofit2.http.Path

interface ApiService {
    @GET("/v1/questions/{qid}")
    suspend fun getQuestion(@Path("qid") qid: String) : Question
}- 정의한 인터페이스를 Retrofit에 넘기면 구현체를 만들어줌
-> ApiService 인터페이스의 companion object에 추가
companion object{
fun create(context: Context): ApiService{
val gson = GsonBuilder()
.setFieldNamingPolicy(FieldNamingPolicy.LOWER_CASE_WITH_UNDERSCORES)
.create()
return Retrofit.Builder()
.addConverterFactory(GsonConverterFactory.create(gson))
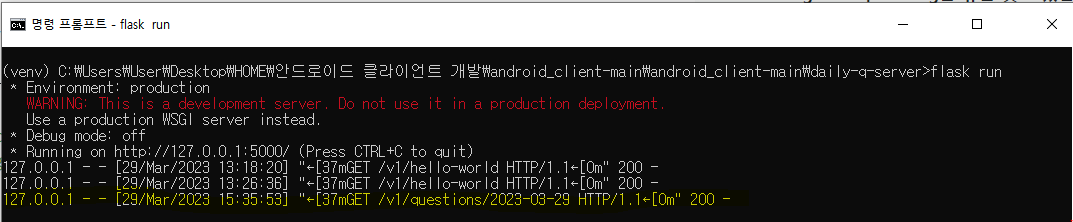
.baseUrl("http://10.0.2.2:5000")
.build()
.create(ApiService::class.java)
}
}-
⭐Retrofit은 Gson을 이용하여
- 메서드의 매개변수 -> HTTP 요청 본문 변환
- HTTP 응답 본문 -> 메서드 반환 모델 변환
-
GsonBuilder.create() 메서드 -> Gson 객체 생성
-> GsonConverterFactory.create() 메서드로 전달 -> GsonConverter 생성
-> Retrofit.Builder의 addConverterFactory() 메서드로 전달 -
Retrofit.Builder에서 baseUrl 설정
-> Retrofit 객체에 API 인터페이스를 넘기면 baseUrl + HTTP 메서드 어노테이션에 있는 경로로 URI 결정
TodayFragment.kt
-
프래그먼트의 수명 주기에서 사용할 수 있는 코루틴 스코프: lifecycleScope
프래그먼트 뷰의 수명 주기에서 사용할 수 있는 코루틴 스코프: viewLifecycleOwner.lifecycleScope -
Fragment의 binding은 뷰를 갖고 있음 -> viewLifecycleOwner.lifecycleScope이 더 안전
-
lifecycleScope는 메인 스레드에 바인딩되어 있음
-> runOnUiThread를 제거하고 직접 UI 변경 가능
 	override fun onViewCreated(view: View, savedInstanceState: Bundle?) {
        super.onViewCreated(view, savedInstanceState)

       viewLifecycleOwner.lifecycleScope.launch{
           val api = ApiService.create(requireContext())

           val qidDateFormat = SimpleDateFormat("yyyy-MM-dd")
           val qid = qidDateFormat.format(Date())
           val question = api.getQuestion(qid)

           val dateFormat = DateFormat.getDateInstance(DateFormat.MEDIUM, Locale.KOREA)
           binding.date.text = dateFormat.format(qidDateFormat.parse(qid))
           binding.question.text = question.text
       }
}- qidDateFormat은 yyyy-MM-dd를 패턴으로 가짐
-> format(): 현재 날짜 -> 10자리 문자열 변환
-> parse(): 10자리 문자열 -> Date객체 변환
➖
- Retrofit을 싱글톤 패턴으로 만들기
ApiService.kt
    companion object{
        private var INSTANCE: ApiService? = null

        private fun create(context: Context): ApiService{
            ...
        }

        fun init(context: Context) = INSTANCE ?: synchronized(this){
            INSTANCE ?: create(context).also {
                INSTANCE = it
            }
        }

        fun getInstance(): ApiService = INSTANCE!!
}- getInstance() 메서드를 호출하는 곳에서는 이미 INSTANCE가 생성되었다고 가정
-> init() 메서드는 Context를 매개변수로 받고 앱의 ApiService를 사용하기 전에 호출이 보장되어야
App.kt
-
Application을 상속받은 App 클래스 생성
-> onCreate()에서 ApiService 초기화 -
AndroidManifest.xml
-> application 태그에 name 속성 추가해 App 사용하도록 수정
import android.app.Application
import online.dailyq.api.ApiService

class App : Application() {
    override fun onCreate() {
        super.onCreate()

        ApiService.init(this)
    }
}- 이제 ApiService를 사용하려면 어디서든 ApiService.getInstance()를 호출하면 됨
-> BaseActivity.kt와 BaseFragment.kt에 멤버 변수로 추가
val api: ApiService by lazy{ApiService.getInstance()}5.3.1 컨버터 팩토리⭐
- Retrofit의 컨버터의 역할:
- 매개변수를 HTTP 요청 본문으로 변환
- HTTP 응답을 메서드의 반환 타입으로 변환
- Retrofit에는 GsonConverter외 다양한 컨버터 존재
- simplexml: XML 반환
- protobuf: Protocol Buffer의 바이너리 변환
- scalars: string, int 등 기본 자료형 변환
- 직접 컨버터를 만들어 사용할 수도 있음
➖
- '질문 가져오기' API의 매개변수를 LocalDate 클래스로 변경
-> Retrofit에서 처리할 수 있도록 컨버터 만들어 등록하기
LocalDateConverterFactory.kt
-
Converter.Factory를 상속받는 LocalDateConverterFactory 클래스 생성
-
Converter.Factory의 메서드:
- requestBodyConverter(): 특정 타입 -> 요청 본문
- responseBodyConverter(): 응답 본문 -> 특정 타입
- stringConverter(): 특정 타입 -> 문자열
-
여기서는 ApiService.getQuestion() 메서드의 인자로 받은 qid:LocalDate를 경로 문자열로 변환해야
-> strintConverter() 메서드 구현
package online.dailyq.api.converter

import retrofit2.Converter
import retrofit2.Retrofit
import java.lang.reflect.Type
import java.time.LocalDate

class LocalDateConverterFactory : Converter.Factory(){
    override fun stringConverter(
        type: Type,
        annotations:Array<out Annotation>,
        retrofit: Retrofit
    ):Converter<LocalDate, String>?{
        if(type == LocalDate::class.java){
            return Converter<LocalDate, String>{it.toString()}
        }
        return null
    }
}
ApiService.kt
- ApiService.getQuestion() 메서드의 반환 타입 LocalDate로 변경
- Retrofit.Builder에 LocalDateConverterFactory 추가
interface ApiService {
    companion object{
       		...
            return Retrofit.Builder()
                .addConverterFactory(GsonConverterFactory.create(gson))
                .addConverterFactory(LocalDateConverterFactory())
                .baseUrl("http://10.0.2.2:5000")
                .build()
                .create(ApiService::class.java)
        }
		...
    }

    @GET("/v1/questions/{qid}")
    suspend fun getQuestion(@Path("qid") qid: LocalDate) : Question
}
TodayFragment.kt
- TodayFragment에서 ApiService.getQuestion()으로 LocalDate를 넘기도록 수정
       viewLifecycleOwner.lifecycleScope.launch{
           val qidDateFormat = SimpleDateFormat("yyyy-MM-dd")
           val question = api.getQuestion(LocalDate.now())

           val dateFormat = DateFormat.getDateInstance(DateFormat.MEDIUM, Locale.KOREA)
           binding.date.text = dateFormat.format(qidDateFormat.parse(question.id))
           binding.question.text = question.text
       }
5.3.2 Gson 타입 어댑터⭐
- Gson이 LocalDate를 처리할 수 있도록 LocalDateAdapter를 만들고 Gson.Builder에 등록하기
LocalDateAdapter.kt
package online.dailyq.api.adapter

import com.google.gson.*
import java.lang.reflect.Type
import java.time.LocalDate

class LocalDateAdapter : JsonSerializer<LocalDate>, JsonDeserializer<LocalDate> {
    override fun serialize(
        src: LocalDate,
        typeOfSrc: Type?,
        context: JsonSerializationContext?
    ): JsonElement {
        src.toString()
        return JsonPrimitive(src.toString())
    }

    override fun deserialize(
        json: JsonElement,
        typeOfT: Type?,
        context: JsonDeserializationContext?
    ): LocalDate {
        return LocalDate.parse(json.asString)
    }
}
ApiService.kt
 val gson = GsonBuilder()
                .setFieldNamingPolicy(FieldNamingPolicy.LOWER_CASE_WITH_UNDERSCORES)
                .registerTypeAdapter(LocalDate::class.java,LocalDateAdapter())
                .create()
Question.kt
data class Question (
    val id: LocalDate,
    val text: String,
    val answerCount: Int,
    val updatedAt: Date,
    val createdAt: Date
    )
TodayFragment.kt
viewLifecycleOwner.lifecycleScope.launch{
val question = api.getQuestion(LocalDate.now())
val dateFormatter = DateTimeFormatter.ofPattern("yyyy.M.d")
binding.date.text = dateFormatter.format(question.id)
binding.question.text = question.text
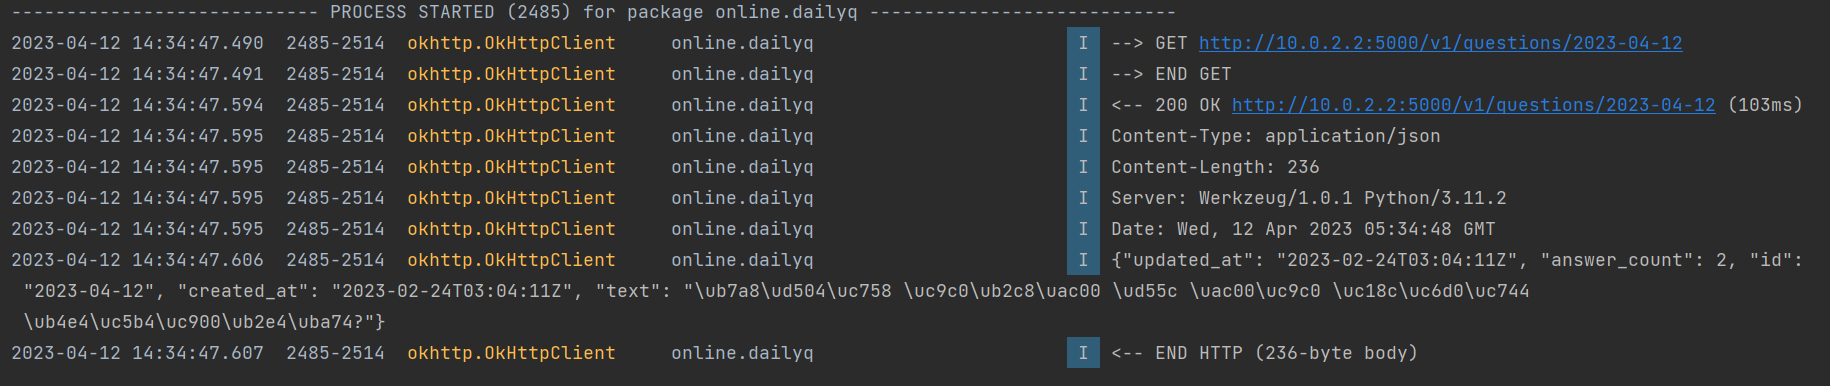
}5.3.3 HTTP 로그 출력하기
-
요청과 응답을 로그로 확인할 수 있도록 준비하는 것은 API 연동을 준비할 때 가장 기본적인 작업
-
Retrofit에서는 OkHttp를 HTTP 클라이언트로 사용
-> 로깅 기능 사용 가능
build.gradle(Module)
- logging-interceptor 의존성 추가
implementation 'com.squareup.okhttp3:logging-interceptor:4.9.0'ApiService.kt
interface ApiService {
    companion object{
        private var INSTANCE: ApiService? = null

        private fun okHttpClient(): OkHttpClient{
            val builder = OkHttpClient.Builder()
            val logging = HttpLoggingInterceptor()
            logging.level = HttpLoggingInterceptor.Level.BODY

            return builder.addInterceptor(logging).build()
        }
    }

    private fun create(context: Context): ApiService{
            ....
            return Retrofit.Builder()
                .addConverterFactory(GsonConverterFactory.create(gson))
                .addConverterFactory(LocalDateConverterFactory())
                .baseUrl("http://10.0.2.2:5000")
                .client(okHttpClient())
                .build()
                .create(ApiService::class.java)
    }
    ...
}- HttpLoggingInterceptor가 level에 따라 출력하는 내용:
- NONE: 로그를 출력하지 않는다
- BASIC: 요청 라인과 응답 라인만 출력
- HEADERS: 요청 라인과 요청 헤더, 응답 라인과 응답 헤더 출력
- BODY: 요청 라인, 헤더, 본문, 응답 라인, 헤더, 본문 출력
- HttpLoggingInterceptor가 남기는 로그는 로그캣에서 OkHttpClient 태그로 필터링
5.4.3 타임아웃 설정하기
- OkHttp에서는 서버에 연결하고, 요청을 보내고, 응답을 받는 단계별로 타임아웃 설정 가능
ApiService.kt
	private fun okHttpClient(): OkHttpClient{
    		...

            return builder
                .connectTimeout(3, TimeUnit.SECONDS)
                .writeTimeout(10, TimeUnit.SECONDS)
                .readTimeout(10, TimeUnit.SECONDS)
                .addInterceptor(logging).
                build()
}-
Connect Timeout
-> 정해진 시간 동안 서버와 TCP 핸드셰이크 과정을 완료하지 못하면 발생
-> OkHttpClient의 기본 값: 10초 -
Read Timeout
-> 서버와 연결된 후 데이터를 수신할 때 정해진 시간을 초과하면 발생
-> 전체 데이터를 수신하는데 걸리는 시간이 아니라 데이터를 읽어오는 각 작동의 간격을 의미
-> OkHttpClient의 기본 값: 10초 -
Write Timeout
-> 서버와 연결된 후 서버에 데이터를 보낼 때 정해진 시간을 초과하면 발생
-> OkHttpClient의 기본 값: 10초
5.4 오늘의 질문에 답하기
res/menu/write_menu.xml
- 사진 추가와 완료 메뉴 리소스
<menu xmlns:android="http://schemas.android.com/apk/res/android"
    xmlns:app="http://schemas.android.com/apk/res-auto">

    <item
        android:id="@+id/add_photo"
        android:icon="@drawable/ic_add_photo"
        android:title="@string/add_photo"
        app:showAsAction="always"/>

    <item
        android:id="@+id/done"
        android:icon="@drawable/ic_done"
        android:title="@string/done"
        app:showAsAction="always"/>
</menu>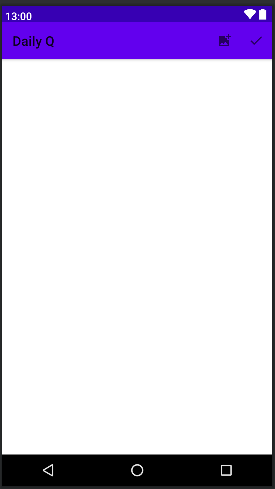
activity_write.xml
- 답하기 화면 레이아웃
- 사진을 첨부하면 화면 하단에 섬네일 표시
<?xml version="1.0" encoding="utf-8"?>
<androidx.constraintlayout.widget.ConstraintLayout
    xmlns:android="http://schemas.android.com/apk/res/android"
    xmlns:app="http://schemas.android.com/apk/res-auto"
    android:layout_width="match_parent"
    android:layout_height="match_parent"
    android:padding="@dimen/margin_normal">

    <com.google.android.material.textview.MaterialTextView
        android:id="@+id/question"
        android:layout_width = "match_parent"
        android:layout_height="wrap_content"
        android:textAppearance = "@style/TextAppearance.MaterialComponents.Headline5"
        app:layout_constraintTop_toTopOf="parent"/>

    <androidx.constraintlayout.widget.ConstraintLayout
        android:id="@+id/photo_area"
        android:layout_width="wrap_content"
        android:layout_height="wrap_content"
        android:layout_marginTop="@dimen/margin_normal"
        android:clipToPadding="false"
        android:paddingTop="@dimen/margin_small"
        android:paddingEnd="@dimen/margin_small"
        android:visibility="gone"
        app:layout_constraintBottom_toBottomOf="parent"
        app:layout_constraintStart_toStartOf="parent">

        <androidx.appcompat.widget.AppCompatImageView
            android:id="@+id/photo"
            android:layout_width="@dimen/thumbnail_size"
            android:layout_height="@dimen/thumbnail_size"
            android:scaleType="centerCrop"
            app:layout_constraintBottom_toBottomOf="parent"
            app:layout_constraintStart_toStartOf="parent"/>

        <androidx.appcompat.widget.AppCompatImageView
            android:layout_width="wrap_content"
            android:layout_height="wrap_content"
            android:src="@drawable/btn_delete"
            android:translationX="8dp"
            android:translationY="-8dp"
            app:layout_constraintEnd_toEndOf="@id/photo"
            app:layout_constraintTop_toTopOf="@id/photo"/>

    </androidx.constraintlayout.widget.ConstraintLayout>

    <com.google.android.material.textfield.TextInputEditText
        android:id="@+id/answer"
        android:layout_width="match_parent"
        android:layout_height="0dp"
        android:layout_marginTop="@dimen/margin_normal"
        android:layout_marginBottom="@dimen/margin_normal"
        android:background="@null"
        android:fadeScrollbars="true"
        android:gravity="top"
        android:hint="@string/answer_hint"
        android:scrollbars="vertical"
        app:layout_constraintBottom_toTopOf="@id/photo_area"
        app:layout_constraintTop_toBottomOf="@id/question"/>

</androidx.constraintlayout.widget.ConstraintLayout>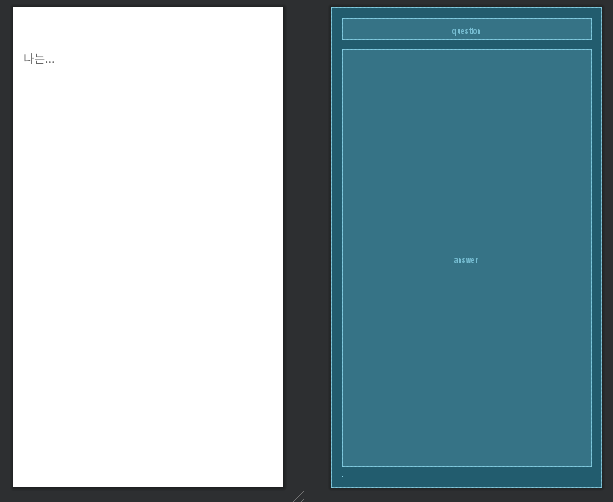
➖
Answer.kt
- 응답으로 사용할 Answer 클래스 추가
package online.dailyq.api.response

import java.time.LocalDate
import java.util.*

data class Answer (
    val qid: LocalDate, //질문 아이디
    val uid: String, //사용자 아이디
    val text: String,  //답
    val photo: String, //이미지 URL
    val updated_at: Date, //수정된 시간
    val created_at: Date //생성된 시간
    )
ApiService.kt
✍...
📌참고자료
- 주문형 코드(Code-On-Demand): 보통 서버는 XML이나 JSON으로 응답하지만, 필요한 경우 코드 자체를 데이터로 클라이언트에 전달 가능
- 인터페이스 일관성(Uniform Interface): 데이터를 식별 가능하게 해야한다는 원칙
-> 구체적으로 URI만 보고도 어느 데이터를 어떤 상태로 전송해야하는지 구별할 수 있어야
➖
➖
➖