Redux
Reducer와 Flux 두 단어를 결합했다.
자바스크립트 앱에서 예측가능한 상태변경을 해주는 컨테이너
리액트의 스테이트는 클래스 컴포넌트 안에서 관리한다. 이 때 자식컴포넌트 간에 데이터를 주고 받을 때 부모컴포넌트를 통해서 주고 받아야 한다. (자식컴포넌트간의 다이렉트적인 공유가 불가능)
=>
이런 복잡성을 줄이기 위해 Redux 사용
Redux의 세 가지 원칙
동일한 데이터는 항상 같은 곳에서 가져온다. ⇒ 데이터를 저장하는 공간(Store)이 따로 있다.
State는 읽기 전용이다. ⇒ action을 활용해 State 변경 가능
변경은 순수함수로만 가능하다. ⇒ reducer와 연결
Redux의 기본 개념
-
Store : 상태가 관리되는 단 하나의 공간으로
Store 안에 App에서 필요한 State를 두고 컴포넌트들에서 State가 필요할 때 Store에 접근을 해서 가져올 수 있다.
- Action : 자바스크립트 객체이다.
객체 안에 type을 비롯한 다양한 데이터들이 담기고 Store에 App의 데이터를 운반시켜주는 역할을 한다.
- Reducer : 현재 상태와 Action을 통해 다음 상태를 만들어 낸다.
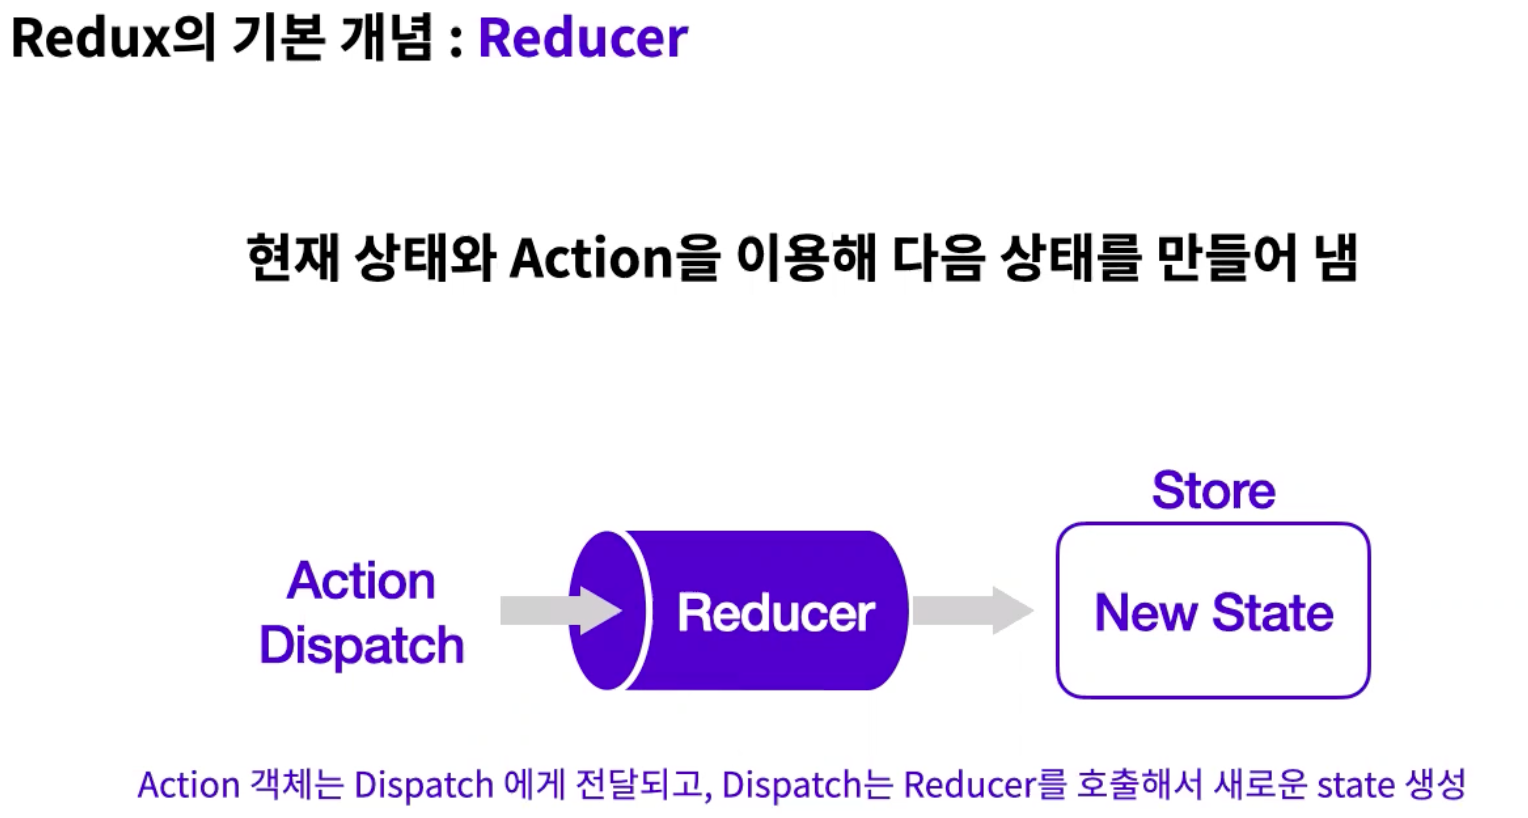
UI (Click 등의) 이벤트 발생 ⇒ Dispatch event handler 작동 ⇒ Action으로 event data가 객체화되어 전송 ⇒ Store의 이전 State와 Action을 Reducer로 전송 ⇒ 바뀐 newState로 전송 ⇒ UI에 적용
Redux의 장점
- 상태를 예측 가능하게 만들어 준다.
- 유지보수에 용이하다.
- (action과 state log 기록 시) 디버깅에 유리하다.
- 테스트를 붙이기 쉽다.
참고할 만한 레퍼런스 링크
robinwieruch 블로그: Redux - What is Redux? / Basics in Redux without React
Redux 일단 따라해보기
리액트 리덕스 설치
npm i redux react-redux
||
yarn add react redux
Redux import 하기
import { createStore } from 'redux';Redux 필수 컴포넌트 import 하기
import { Provider, useSelector, useDispatch } from 'react-redux'store 만들기
const store = createStore();내려 줄 number와 새로운 변경 될 상태 만들기
function reducer(currentState, action) {
	if (currentState === undefined)
	return {
		number: 1
	};
	const newState = {...currentState}; // 현재 스테이트의 복제본을 만들어 수정해 불변성 유지
	if (action.type === 'PLUS') {
		newState.number++;
	}
	return newState;
}
컴포넌트에 redux 내리기
function Left(props) {
	const number = useSelector((state) => state.number)
	return (
	<div>
		<h1>Left : {number}</h1>
	</div>
)
}
dispatch로 number가 ++ 되는 버튼 연결하기
...
const dispatch = useDispatch()
...
<input
	type = "button"
	value = "+"
	onClick={()=>{
		dispatch({ type: 'PLUS' })
}}
>
</input>
이후 버튼 클릭 시 number가 증가된다!
Source: 생활코딩 react-redux