# explicit 애니메이션은 언제 쓰나요...?
intent function에 주로 적용!
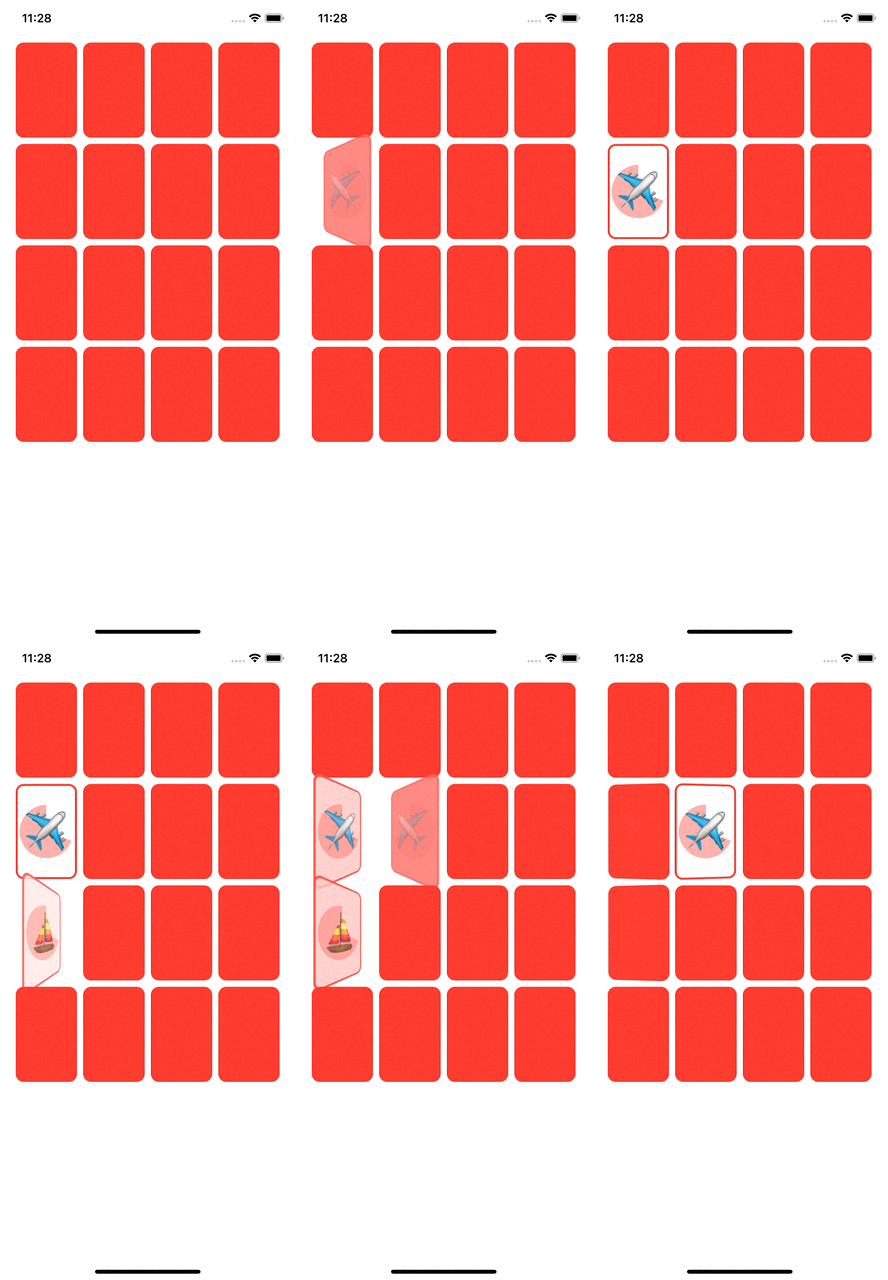
# 카드를 뒤집는 애니메이션!

- 일단 카드를 선택해서
isFaceUp이 바뀌는 것을 포착할 수 있고 카드 형태가 구현된 곳에서 카드를 뒤집는 애니메이션을 추가해야한다고 생각해서Cardify의ZStack에 카드를 3d로 뒤집어 주는 애니메이션을 추가했는데 문제가 많았다..
- 카드를 뒤집기 시작하는 순간부터 이모지가 서서히 나타나기 시작하는데 이는 아래 코드의
content.opacity(isFaceUp ? 1 : 0)부분에 의해 이모지 자체는 언제나 존재하고 있으므로isFaceUp변수의 변화에 애니메이션 효과가 적용되기 때문이다
- 또한 배경색이 페이드인/아웃하는 효과가 나타나는데 이는
isFaceUp변수가 변화하면서if isFaceUp - else에 따라 UI 상의View가 나타났다가 사라지면서 이러한appearance and disappearance에 애니메이션 효과가 적용되기 때문
struct Cardify: ViewModifier {
    var isFaceUp: Bool

    func body(content: Content) -> some View {
        ZStack {
            let shape = RoundedRectangle(cornerRadius: DrawingConstants.cornerRadius)
            // if-else -> 색깔 문제의 원인
            if isFaceUp {
                shape.fill().foregroundColor(.white)
                shape.strokeBorder(lineWidth: DrawingConstants.lineWidth)
            } else {
                shape.fill()
            }
            content.opacity(isFaceUp ? 1 : 0)  // 이모지 문제의 원인
        }
        .rotation3DEffect(Angle.degrees(isFaceUp ? 0 : 180), axis: (0, 1, 0))
    }

    private struct DrawingConstants {
        static let cornerRadius: CGFloat = 10
        static let lineWidth: CGFloat = 2.5
    }
}- 이러한 문제를 해결하려면 단순히
isFaceUp변수의 변화에 따라View를 변화시키는 게 아니라 회전 각도 에 따라View가 바뀌도록 해야하므로rotation 변수를 선언했다!
- 이 때
rotation 변수가 단순히 0 혹은 180 이라는 양분된 상태로 스위칭하는 것이 아니라 단계적으로 0에서 180까지 변화되도록 해야 실제로 각도가 순차적으로 변화함에 따라 해당 상태에 맞는View가 렌더링 될 수 있기 때문에Cardify가AnimatableModifier프로토콜에 순응하도록 해서animatableData변수로rotation을 애니메이션화 가능한 변수로 만들어주어야 한다!
struct Cardify: AnimatableModifier {
    init(isFaceUp: Bool) {
        rotation = isFaceUp ? 0 : 180
    }

    var rotation: Double = 0

    var animatableData: Double {
        get { rotation }
        set { rotation = newValue }
    }

    func body(content: Content) -> some View {
        ZStack {
            let shape = RoundedRectangle(cornerRadius: DrawingConstants.cornerRadius)
            if rotation < 90 {
                shape.fill().foregroundColor(.white)
                shape.strokeBorder(lineWidth: DrawingConstants.lineWidth)
            } else {
                shape.fill()
            }
            content.opacity(rotation < 90 ? 1 : 0)
        }
        .rotation3DEffect(Angle.degrees(rotation), axis: (0, 1, 0))
    }
# .onAppear
-
게임 시작 시 카드가 처음 화면에 나타날 때와 짝을 찾아서 카드가 사라질 때, 즉
transition이 발생하는 경우 애니메이션 효과를 주기 위해 아래와 같이 선언하면 카드가 사라질 때는 애니메이션이 나타나는 데, 게임 시작 시 카드가 등장할 때는 애니메이션이 작동하지 않는다... -
이는 각각의
CardView가 자신을 담고 있는AspectVGrid즉,container와 동시에 UI 상에 최초로 나타나므로 골든룰을 위반하기 때문!
    var gameBody: some View {
        AspectVGrid(items: game.cards, aspectRatio: 2/3) { card in
            if card.isMatched && !card.isFaceUp {
                Color.clear
            } else {
                CardView(card: card)
                    .padding(4)
                    .transition(AnyTransition.asymmetric(insertion: .scale, removal: .scale).animation(.easeIn(duration: 3)))  // 애니메이션 부분!
                    .onTapGesture {
                        withAnimation {
                            game.choose(card)
                        }
                    }
            }
        }
        .foregroundColor(CardConstants.color)
}-
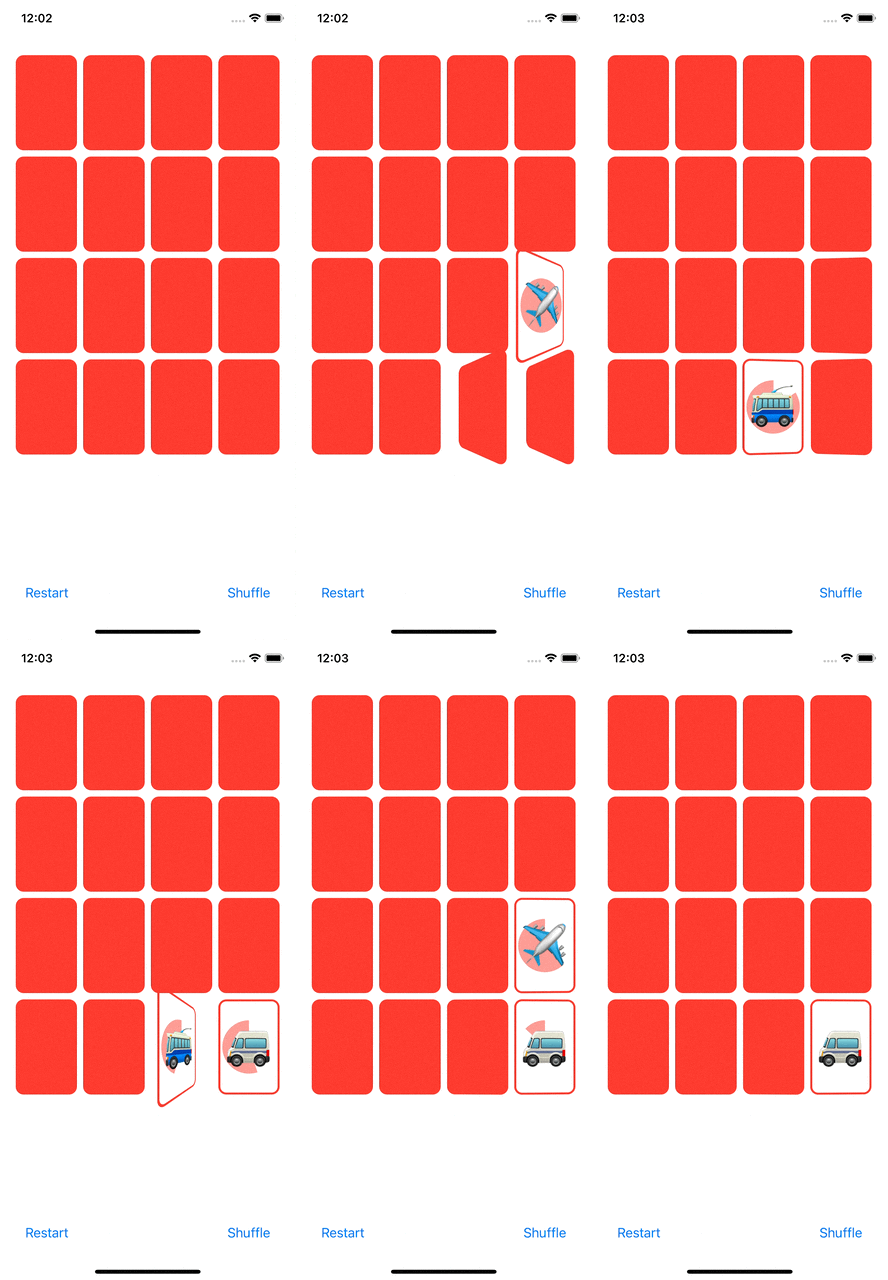
이를 해결하기 위해서는 컨테이너가 먼저 UI 상에 나타난 뒤에 각각의 카드뷰가 등장해야하는데 이때
.onAppear를 활용할 수 있다! -
즉,
dealt 변수와deal 메서드를 선언해서 컨테이너가 등장한 뒤에 카드를 나눠주도록 하면 골든룰을 충족시킬 수 있는 것
- 이때
dealt 변수는 처음에 카드를 등장시킨 뒤에는 불필요한 일시적인 변화를 나타내는 변수이므로@State로 선언한다
struct EmojiMemoryGameView: View {
    @State private var dealt = Set<Int>()

    private func deal(_ card: EmojiMemoryGame.Card) {
        dealt.insert(card.id)
    }

    private func isUndealt(_ card: EmojiMemoryGame.Card) -> Bool {
        !dealt.contains(card.id)
    }

    var gameBody: some View {
        AspectVGrid(items: game.cards, aspectRatio: 2/3) { card in
            if isUndealt(card) || card.isMatched && !card.isFaceUp {
                Color.clear
            } else {
                CardView(card: card)
                    .padding(4)
                    .transition(AnyTransition.asymmetric(insertion: .scale, removal: .scale).animation(.easeIn(duration: 3)))
                    .onTapGesture {
                        withAnimation {
                            game.choose(card)
                        }
                    }
            }
        }
        .onAppear {
            withAnimation {  // 굳이 필요없는 것 같기도..?
                for card in game.cards {
                    deal(card)
                }
            }
        }
        .foregroundColor(CardConstants.color)
    }
}
# .matchedGeometryEffect
- 한
container에서 다른container로 특정View가 이동하는 것처럼 보이게 하고 싶을 때.matchedGeometryEffect(id: card.id, in: someNameSpace)를 출발과 도착 위치에 있는 동일한View에 붙여주면, 출발지에서 도착지로 이동한 것처럼 보이게 할 수 있다!
struct EmojiMemoryGameView: View {
    ...
    @Namespace private var dealingNamespace

    var gameBody: some View {
        AspectVGrid(items: game.cards, aspectRatio: 2/3) { card in
            if isUndealt(card) || card.isMatched && !card.isFaceUp {
                Color.clear
            } else {
                CardView(card: card)
                    .matchedGeometryEffect(id: card.id, in: dealingNamespace)  // 도착!
                    .padding(4)
                    ...
            }
        }
    }

    var deckBody: some View {
        ZStack {
            ForEach(game.cards.filter(isUndealt)) { card in
                CardView(card: card)
                    .matchedGeometryEffect(id: card.id, in: dealingNamespace)  // 출발
                    ...
            }
        }
        ...
    }
}
# glitch.....(욕).....
- 애니메이션을 하나씩 계속 추가하는데 쭉 멀쩡하다가 덱에서 카드를 나눠주는 애니메이션을 추가하니까 자꾸 카드 상의 이모지가 지직거리는 버그가 발생했다...애니메이션 코드 하나하나 다 뜯어봐도 문제를 못 찾아서 고통스러웠는데 데모 코드 받아서 정말 한땀 한땀 장인정신으로 비교해보다가
Cardview의body 변수에 있는 이모지 텍스트에 패딩을 빼먹은 걸 발견했고...설마했는데 걔가 원인이 맞았다...
struct CardView: View {
    ...
    var body: some View {
        GeometryReader { geometry in
            ZStack {
                Pie(startAngle: Angle(degrees: 0 - 90), endAngle: Angle(degrees: 110 - 90))
                    .padding(DrawingConstants.contentPadding)
                    .opacity(0.4)
                Text(card.content)
                    .padding(DrawingConstants.contentPadding)  // 범인...
                    ...
            }
            .cardify(isFaceUp: card.isFaceUp)
        }
    }
}
# 지금 카드는 나야 둘이 될 수 없어...
- 게임 시작 시 덱에서 카드를 다 분배하고 나면 덱이 비게 되지만 덱이 차지하던 공간은 여전히 빈 덱이 차지한 채로 남아있게 된다
struct EmojiMemoryGameView: View {
    ...
    var body: some View {
        VStack {
            gameBody
            deckBody
            HStack {
                restar
                Spacer()
                shuffle
            }
            .padding(.horizontal)
        }
    }
}- 어차피 게임에서 카드들은 덱에 있거나 전부 분배되어 펼쳐져있거나 중의 하나이므로
ZStack에 넣어주면 불필요한 공간 차지를 막을 수 있다
    var body: some View {
        ZStack(alignment: .bottom) {
            VStack {
                gameBody
                HStack {
                    restart
                    Spacer()
                    shuffle
                }
                .padding(.horizontal)
            }
            deckBody  // ZStack 으로 관리
        }
        .padding()
    }
# restart
- 아래와 같이
restart버튼을 누를 때마다@State변수인dealt를 초기화해줘야 애니메이션 효과를 나타낼 수 있다
    var restart: some View {
        Button("Restart") {
            withAnimation {
                dealt = []  // 비워주기!
                game.restart()
            }
        }
    }
# 보너스 타임 애니메이션 추가하기
- 일단 파이 모양이 남은 보너스 시간에 따라 계속 줄어들기를 원하는 것이므로
Pie 구조체에 시작 각도와 끝 각도를animatableData로 선언하는 부분을 추가한다
struct Pie: Shape {
    var startAngle: Angle
    var endAngle: Angle
    var clockwise = false

    // 요기 추가
    var animatableData: AnimatablePair<Double, Double> {
        get { AnimatablePair(startAngle.radians, endAngle.radians) }
        set {
            startAngle = Angle.radians(newValue.first)
            endAngle = Angle.radians(newValue.second)
        }
    }
    ...
}- 그리고
CardView에서Pie(startAngle: Angle.degrees(0-90), endAngle: Angle.degrees((1-card.bonusRemaining)*360-90))와 같이bonusRemaining에 따라 파이 모양이 줄어들게 만들었지만...

- 보면 파이 모양이 줄어들긴 하는데 실시간으로 변화하는 게 아니다...이는
Model에서bonusRemaining변수를 실시간으로 관리하는 게 아니라 단지 호출하면 해당 시점에서 전체 보너스 시간 중 남은 시간의 비율을 알려주는 것이기 때문이다..! 따라서 애니메이션화할 변화가 없다
- 이를 해결하기 위해
@State private var animatedBonusRemaining변수를 선언해서 실시간으로 남은 시간의 변화를 추적한다
- 보너스 시간이 남아있을 때만
animatedBonusRemaining을 이용해 각도를 계산하고 싶으므로if-else로 분기해준다. 이렇게 하면 조건에 따라if문의Pie와else문의Pie가 번갈아 나타나고 사라진다
- 카드를 뒤집어서 앞면이 나타날 때 보너스 타임이 남아있다면 파이 모양이 줄어드는 애니메이션을 나타내고 싶은 것이므로
if 문의Pie에.onAppear{ }를 붙여준다!
- 나타내고자하는 애니메이션은 파이모양이 현재 보너스 시간부터 시작해서 보너스 시간이 남지 않을 때 까지의 모습이므로 현재 남은 보너스 시간인
animatedBonusRemaining = card.bonusRemaining에서 시작해서 0(즉, 보너스 시간이 남지 않을 때)으로 변하는 과정을 애니메이션화 하고 싶은 것이므로 아래와 같이 코드를 작성할 수 있다
- 이때, 애니메이션이 남은 보너스 타임만큼 지속되기를 원하므로(그래야 해당 시간만큼이 소모됨)
duration: card.bonusTimeRemaining으로 기간을 설정해준다...!
.onAppear {
    animatedBonusRemaining = card.bonusRemaining
    withAnimation(.linear(duration: card.bonusTimeRemaining)) {
        animatedBonusRemaining = 0
    }
}
- 전체 코드
struct CardView: View {
    let card: EmojiMemoryGame.Card

    @State private var animatedBonusRemaining: Double = 0

    var body: some View {
        GeometryReader { geometry in
            ZStack {
                Group {
                    if card.isConsumingBonusTime {
                        Pie(startAngle: Angle(degrees: 0-90), endAngle:
                                Angle(degrees: (1-animatedBonusRemaining)*360-90))
                             // 애니메이션!!!
                            .onAppear {
                                animatedBonusRemaining = card.bonusRemaining
                                withAnimation(.linear(duration: card.bonusTimeRemaining)) {
                                    animatedBonusRemaining = 0
                                }
                            }
                    } else {
                        Pie(startAngle: Angle(degrees: 0-90), endAngle:                         Angle(degrees: 1-card.bonusRemaining*360-90))
                    }
                }
                .padding(5)
                .opacity(0.5)
            }
        }
    }
}
# ☀️ 느낀점
-
withAnimation{ }으로 감싸면size와frame에 의해containter내부의View들의 포지션 변화에도 애니메이션 효과가 나타나는 게 신기했다 -
강의 다시 듣는 거 정말 * 100 싫어하는데 7, 8강은 결국 다시 들었다... 다시 들으니까 전체적으로 애니메이션이 작동하는 과정이랑 왜 이렇게 코드를 구성했는지, 왜 이 부분에서 애니메이션 효과를 줬는지 더 잘 이해가 가긴 하는데 나중에 내가 혼자 코드를 짤 때도 잘 할 수 있을지는...맨날 모르겠대... 나약한 내 자신....
- things that are self-referencing cannot be used as types u have to use them as 'where clauses'
- things that are self-referencing cannot be used as types u have to use them as 'where clauses'
Animatable Modifier
- we need to animate the degree(rotation) make it start at 0 -> 7 -> 25 -> 31->...->100 : make a variable go from some starting point thru a curve to the end point!
- take over the responsibility to animate things from the system
- withAnimation on the choose function makes the animation itself happen but the cardify which is a anmiatable modifier saids i will animate this here(i'll figure out how it looks during each step)
C
difference between transition and implict animation
- transitions can apply to diningroom chair legos and they mean the entire diningroom chair, it's comings and goings...
- on the other hand, if we apply implicit animation on a container, it distributes it out to any of the views inside..
