문제점/고민한점 (1) → 해결방안
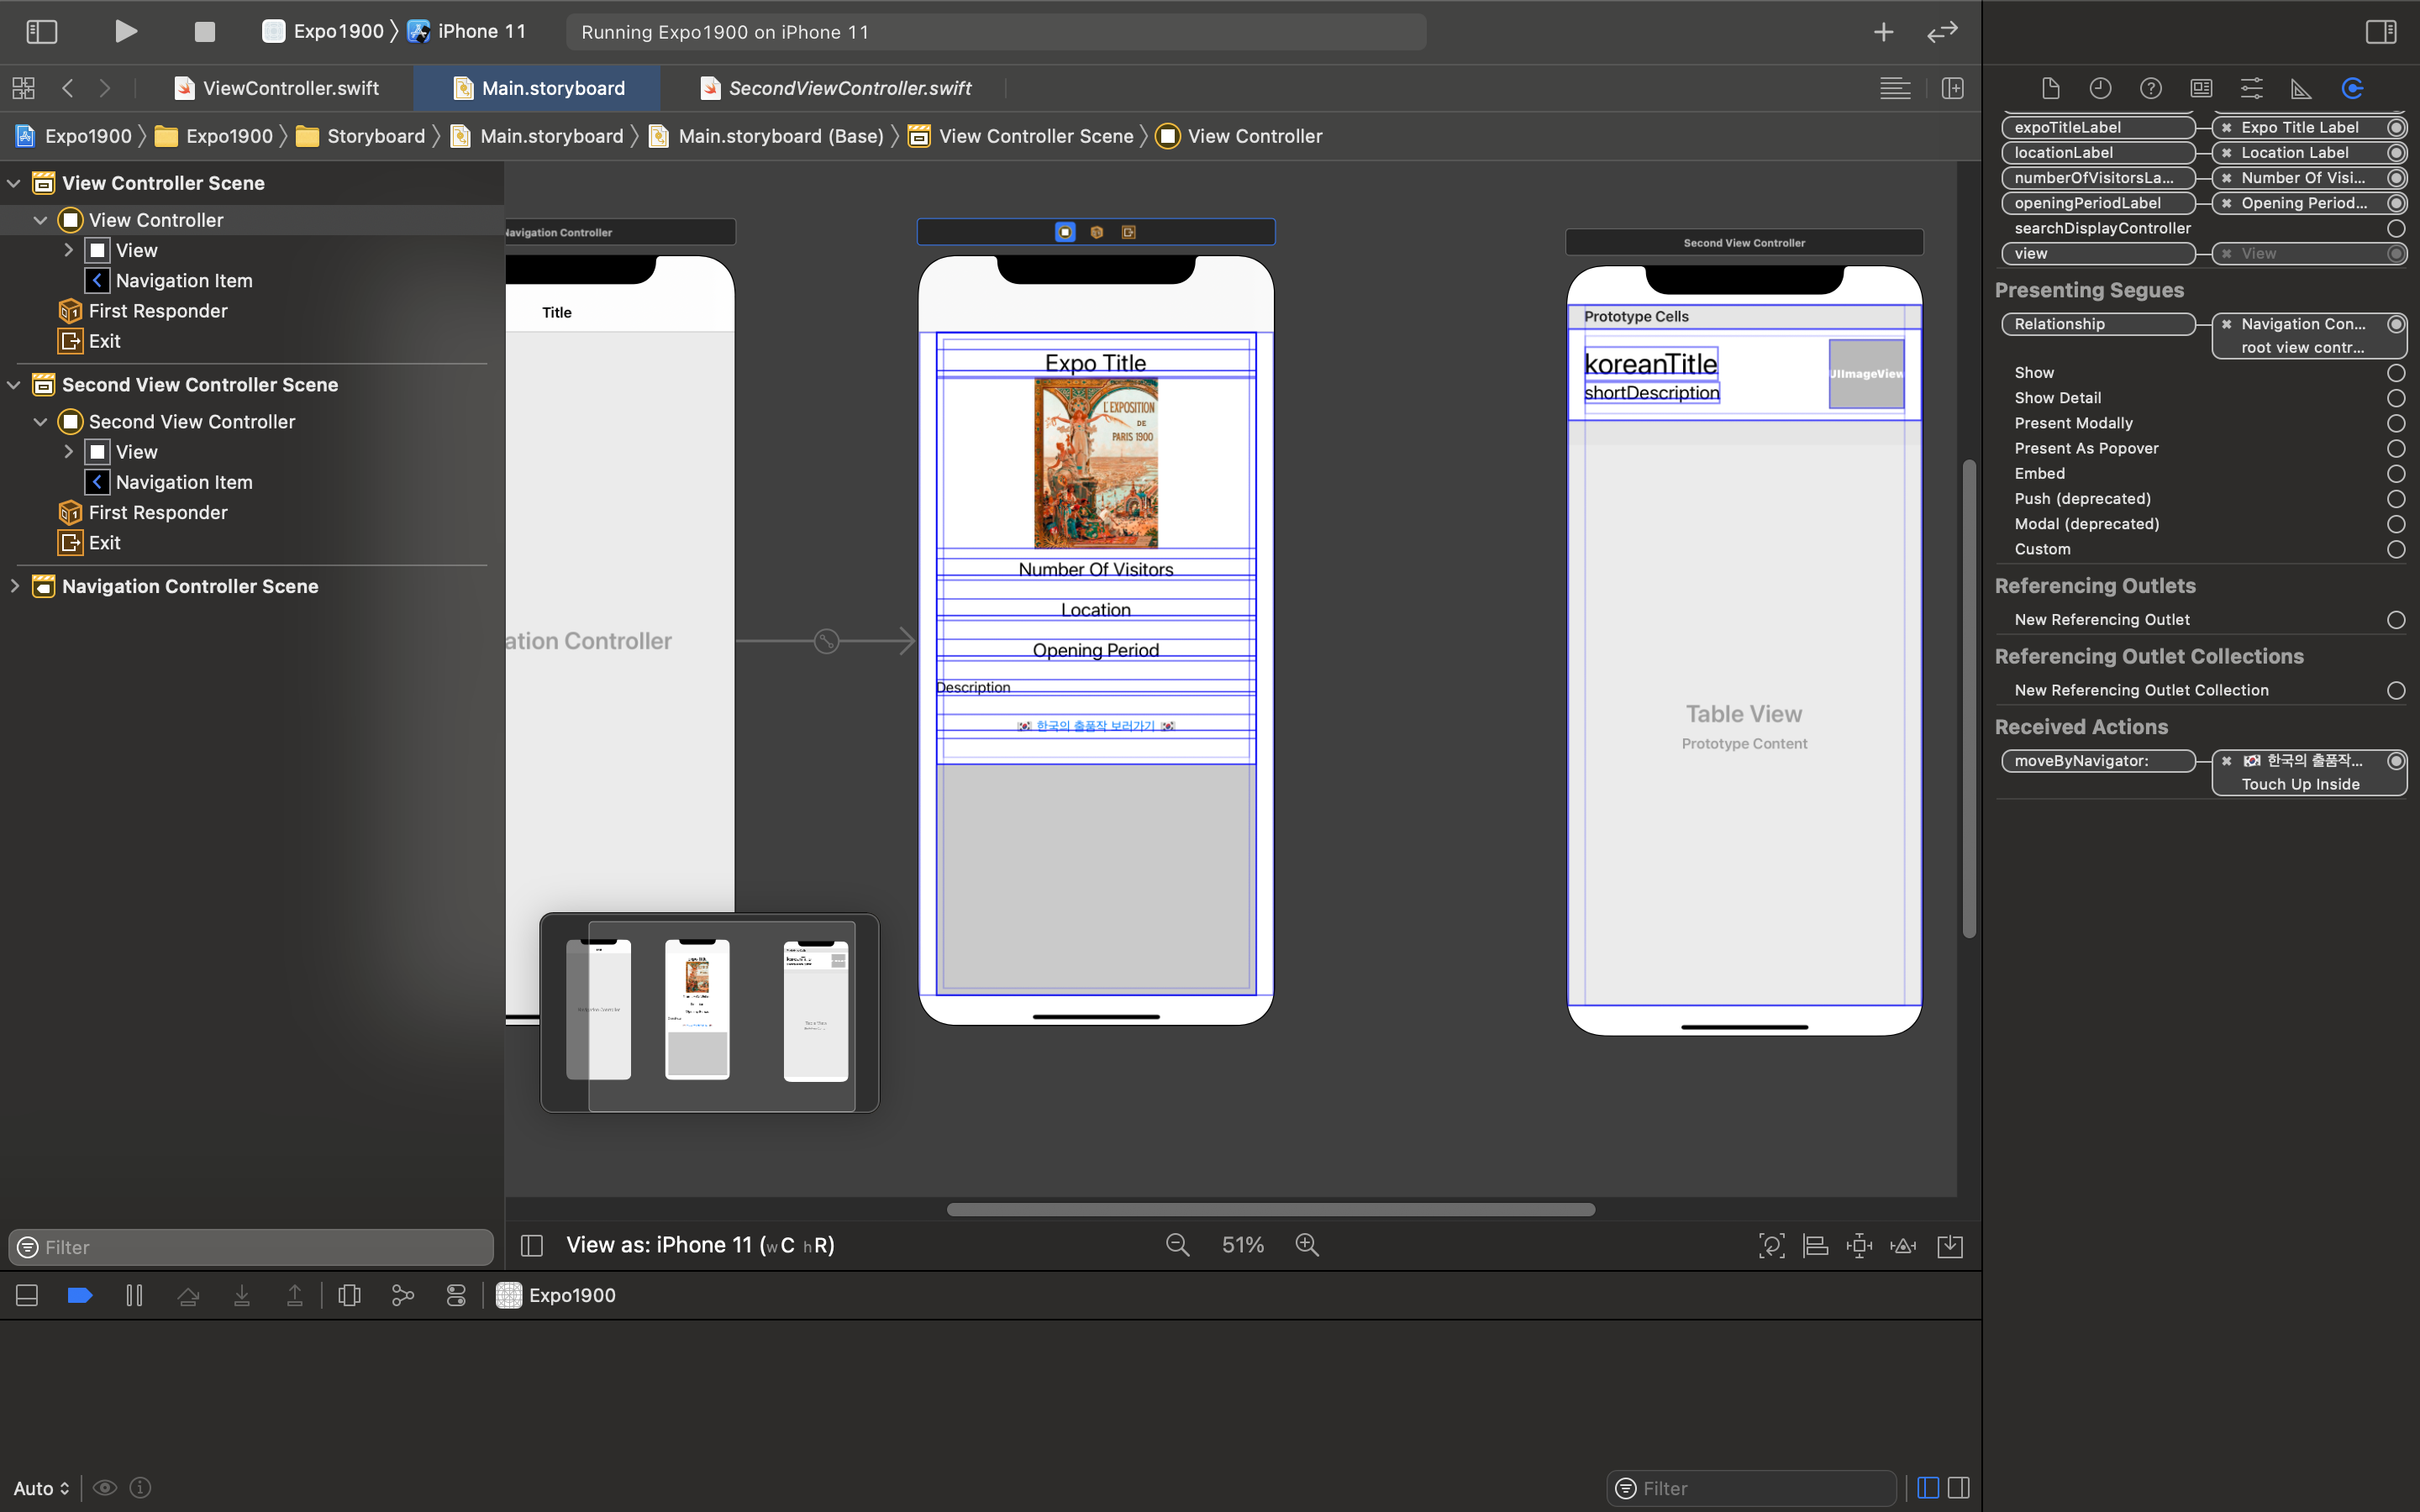
@IBAction func moveByNavigator(_ sender: Any) {

    guard let uvc = self.storyboard?.instantiateViewController(withIdentifier: "SecondVC") else { return }
    self.navigationController?.pushViewController(uvc, animated: true)
    }
Cory의 피드백
이 친구는 @IB로 시작하지만 함수에요! 들여쓰기 정리해주세요!
moveBuNavigator라는 함수명은 Navigator에 의해서 움직인다는 뜻같은데, 이 코드를 적절하게 나타내는 것 같지는 않네요! 좀 더 간결하게 접근해도 좋아요!
특정 버튼을 눌러서 발생하는 액션이라고 네이밍 하던가, 아니면 어떤 동작을 명확하게 설명하는게 좋습니다.
함수 네이밍을 바꿔주고 싶어서 moveToTheSecondScreen로 바꿔줬더니 에러가 나고 실행이 안됨
그 이유는...?
함수 네이밍만 바꿔주면 Received Actions에는 unrecognized로 인식이 돼서 실행이 안됨
식겁해서 git revert로 전 상태로 돌려놓긴 함 끙...
원래 원했던 건 moveByNavigator 함수명을 바꾸면 스토리보드에서도 동시에 바꾸게 하고 싶은데
(일일히 수정하려면 번거로우니까)
예전에 방법을 배운 것 같은데 까먹었다... ^.ㅠ
일단은 함수명 바꾼 다음에
스토리보드에서 연결 풀고 다시 새로운 함수명으로 연결해줌..ㅎ
해결방안
다음엔 이 방법으로 효율적으로 해결하자?!! ^.^
Swift IBOutlet 변수명 Refactor로 간편하게 바꾸기
https://0urtrees.tistory.com/11
문제점/고민한점 (2) → 해결방안
이미지를 파싱해온 걸 넘기는게 아닌가...?
두번째 화면에서 세번째 화면으로 이미지가 안 넘어간다 ㅎ
우리의 인재 스티븐과 우디의 도움으로 해결했다 ^.^ 👍
해결 전
원래의 계획은
1. cell.imageView?.image = UIImage(named: item.englishTitle)

이미지 셀에 넣어줌

2. prepare에서 다음 화면 뷰 컨트롤러의 이미지에 셀 이미지 넣어줌

nextViewController.itemImage = cell.imageView?.image

3. var itemImage: UIImage?

@IBOutlet weak var image: UIImage!

self.image = self.itemImage

안 넘어옴 ^.ㅠ

아무것도 출력 안됨 케..
func tableView(_ tableView: UITableView, cellForRowAt indexPath: IndexPath) -> UITableViewCell {
let cell: UITableViewCell = tableView.dequeueReusableCell(withIdentifier: self.cellIdentifier, for: indexPath)
let item: KoreanItem = self.koreanItems[indexPath.row]
cell.textLabel?.text = item.koreanTitle
cell.imageView?.image = UIImage(named: item.englishTitle)
cell.detailTextLabel?.text = item.shortDescription
return cell
}
// MARK: - Navigation
// In a storyboard-based application, you will often want to do a little preparation before navigation
override func prepare(for segue: UIStoryboardSegue, sender: Any?) {
// Get the new view controller using segue.destination.
// Pass the selected object to the new view controller.
guard let nextViewController: ItemViewController = segue.destination as? ItemViewController else {
return
}
guard let cell: UITableViewCell = sender as? UITableViewCell else {
return
}
nextViewController.textToSet = cell.textLabel?.text
nextViewController.itemImage = cell.imageView?.image
// nextViewController.itemDescription = KoreanItem.fullDescription
} //
// ItemViewController.swift
// Expo1900
//
// Created by Sunny on 2021/04/24.
//
import UIKit
class ItemViewController: UIViewController {
var textToSet: String?
var itemImage: UIImage?
// var itemDescription: String?
@IBOutlet weak var textLabel: UILabel!
@IBOutlet weak var image: UIImage!
// @IBOutlet weak var descriptionLabel: UILabel!
override func viewDidLoad() {
super.viewDidLoad()
// Do any additional setup after loading the view.
}
override func viewWillAppear(_ animated: Bool) {
super.viewWillAppear(animated)
self.navigationItem.title = self.textToSet
self.image = self.itemImage
// self.descriptionLabel.text = self.itemDescription
}
/*
// MARK: - Navigation
// In a storyboard-based application, you will often want to do a little preparation before navigation
override func prepare(for segue: UIStoryboardSegue, sender: Any?) {
// Get the new view controller using segue.destination.
// Pass the selected object to the new view controller.
}
*/
}해결 후
원래의 계획은 json에서 파싱해온 값을 cell에 바로 적용했었고, 그 셀을 다음 뷰 컨트롤러 (세번째 화면)에 데이타를 넣어준 다음에 넘겨받은 값을 세번째 화면 각각의 필요한 항목에 적용하려 했음
func tableView(_ tableView: UITableView, cellForRowAt indexPath: IndexPath) -> UITableViewCell {
        let cell: UITableViewCell = tableView.dequeueReusableCell(withIdentifier: self.cellIdentifier, for: indexPath)

        let item: KoreanItem = self.koreanItems[indexPath.row]
        cell.textLabel?.text = item.koreanTitle
        return cell
    }
guard let cell: UITableViewCell = sender as? UITableViewCell else { return }
nextViewController.textToSet = cell.textLabel?.text근데 그렇게 하지 않고
스티븐이 제시해준데로
- 어떤 row가 선택됐는지(indexPathForSelectedRow 이용)에 따라 row number를 넘김
(그럼 그 행에 해당하는 항목들이 다음 뷰컨트롤러로 모두 넘어감)
guard let rowNumber = tableView.indexPathForSelectedRow?.row else {
            return
        }

nextViewController.koreanItem = koreanItems[rowNumber]- (각각의 레이블, 이미지 값을 전달받는 것이 아니라)
    var textToSet: String?
    var itemImage: UIImageView?
    var itemDescription: String?
이런 식으로 파싱해온 타입 자체를 전달을 받고
(변수 koreanItem의 타입은 KoreanItem)
var koreanItem: KoreanItem?옵셔널을 풀어준다
guard let detailedKoreanItem = koreanItem else {
            return
        }
이제 필요한 아이들을 다 데려왔으니 (= 뷰 컨트롤러간의 데이타 이동 완료)
각각의 레이블이랑 이미지에 필요한 내용 적용!
self.navigationItem.title = detailedKoreanItem.koreanTitle
        self.itemImageView.image = UIImage(named: detailedKoreanItem.englishTitle)
        self.textLabel.text = detailedKoreanItem.fullDescription
Structure
IndexPath
A list of indexes that together represent the path to a specific location in a tree of nested arrays.
Index paths describe an item's position inside a table view or collection view, storing both its section and its position inside that section. For example, the first row in a table would have section 0, row 0, whereas the eighth row in the fourth section would have section 3, row 7.
Instance Property
indexPathForSelectedRow
An index path identifying the row and section of the selected row.
returns nil or index path representing section and row of selection
var indexPathForSelectedRow: IndexPath? { get }Instance Method
prepare(for:sender:)
Notifies the view controller that a segue is about to be performed.
override func prepare(for segue: UIStoryboardSegue, sender: Any?) {
        // Get the new view controller using segue.destination.
        // Pass the selected object to the new view controller.

        guard let nextViewController: ItemViewController = segue.destination as? ItemViewController else {
            return
        }

        guard let rowNumber = tableView.indexPathForSelectedRow?.row else {
            return
        }

        nextViewController.koreanItem = koreanItems[rowNumber]
    }
Parameters
segue
The segue object containing information about the view controllers involved in the segue.
sender
The object that initiated the segue. You might use this parameter to perform different actions based on which control (or other object) initiated the segue.
Discussion
The default implementation of this method does nothing. Subclasses override this method and use it to configure the new view controller prior to it being displayed. The segue object contains information about the transition, including references to both view controllers that are involved.
Because segues can be triggered from multiple sources, you can use the information in the segue and sender parameters to disambiguate between different logical paths in your app. For example, if the segue originated from a table view, the sender parameter would identify the table view cell that the user tapped. You could then use that information to set the data on the destination view controller.
출처
What is an IndexPath? Hacking with Swift