
🌼 학습내용
1️⃣ nodemon
자바 스크립트 파일들을 수정 할때마다 매번 ctrl+c를 통해 node를 종료 후 다시 실행해한다.하지만 파일들을 모니터링하고 있다가 수정될 경우 자동으로 서버를 재실행시켜주는 스크립트 모니터링 유틸리티 nodemon를 이용하자
1. 터미널 : yarn add nodemon (다운로드)
2. package.json 파일 안에
	“script” : {
		“start:dev: “nodemon index.js”
	}를 추가한다.

3. 터미널 : yarn start:dev
2️⃣ app.use(express.json());
app.use(express.json()) 해주지 않을 경우console.log(req.body)Error발생결론:우리는 json 데이터로 요청과 응답을 주고 받기 때문에json 데이터를 읽을 수 있다.
3️⃣ 포트
🔥 핵심
- 대부분의 경우 하나의 컴퓨터에는 여러 개의 서버가 실행될 수 있다.
- 컴퓨터에 여러 개의 서버가 실행되고 있다면,
어느 서버에 접속해야 하는지 컴퓨터에게 알려주어야 한다.
이때 사용되는 것이포트 번호이다.
각각 고유의 port가 존재함
http -> 기본 포트 80Https -> 기본 포트 443
포트 생략 가능
http://test.com(::80)https://test.com(::443)
4️⃣ Import && export
- 🐶 import
import { checkPhone, getToken, sendTokenToSMS } from './phone.js'; // export 가져오기
// import express from 'express';
// export default 가져오기

// import qweasd from 'express';
// export default 이름 바꿔서 가져오기

// import qqqqq, {checkPhone as qqq, getToken} from './phone.js';
// export default와 express 함께 쓰기

// import * as ttt from './phone.js';
// ttt.checkPhone , ttt.getToken, ttt.sendTokenToSMS
// export 한번에 다 가져오고,쓰는 방법- 🐶 export
export function checkPhone(myphone) {
    if (myphone.length < 10 || myphone.length > 11) {
        console.log('에러 발생!! 핸드폰 번호를 올바르게 입력해 주세요!!!'); // early-exit
        return false;
    } else {
        return true;
    }
}

export function getToken() {
    const result = String(Math.floor(Math.random() * 1000000)).padStart(6, '0');
    console.log(result);
    return result;
}

export default function sendTokenToSMS(myphone, result) { // 한개만 가져가기
    console.log(`${myphone}번호로 인증번호${result}를 전송합니다.`);
}
5️⃣ Swagger
API들이 가지고 있는 스펙(spec)을 명세, 관리할 수 있는 프로젝트/문서API 사용 방법을 사용자에게 알려주는 문서
- swagger-ui-express 와 swagger-jsdoc를 이용해 쉽게 작성하기
1. 터미널 : yarn add swagger-ui-express , yarn add swagger-jsdoc 설치
2. 메인.js 상단에 불러오기
	import swaggerUi from 'swagger-ui-express';
	import swaggerJSDoc from 'swagger-jsdoc';
3. options를 넣어주기 위해 같은 경로에 ./swagger/config.js 작성.
	export const options = {
  	  definition: {
      	  openapi: '3.0.0',
     	   info: {
      	      title: '🐶 나의 API 설명서',
      	      version: '1.0.0',
       	 },
   	 },
    	apis: ['./swagger/*.swagger.js'], // *.swagger.js 는 모든 파일을 쓰겠다는 의미
	};
4. 메인.js import { options } from './swagger/config.js'; 불러온다
5. 메인.js app.use('/api-docs', swaggerUi.serve, swaggerUi.setup(swaggerJSDoc(options))); 추가
//  url =  http://127.0.0.1:포트번호/api-docs -> swagger 접속 가능
 * @swagger
 * /boards:
 *   get:
 *     summary: 게시글 가져오기
 *     tags: [Board]
 *     parameters:
 *       - in: query
 *         name: number
 *         type: int
 *     responses:
 *       200:
 *         description: 성공
 *         content:
 *           application/json:
 *             schema:
 *               type: array
 *               items:
 *                 properties:
 *                   number:
 *                     type: int
 *                     example: 1
 *                   writer:
 *                     type: string
 *                     example: 철수
 *                   title:
 *                     type: string
 *                     example: 좋은아침 입니다~
 *                   contents:
 *                     type: string
 *                     example: 오늘 하루도 파이팅 하세요!
 *
6. ./swagger/넣고싶은api파일 만들기.js
/**
 * @swagger (paths : 입력시 실제 요청되는 경로 설정)
 * /boards: // 내가 만든 API
 *   get: // CRUD중 어떠한 메서드를 이용할 것 인가.
 *     summary: 게시글 가져오기 // 서브 타이틀
 *     tags: [Board] // 태그만들어서 그룹화 해주기
 *     parameters:	// 어떠한 요청을 받을것 인가 작성
 *       - in: query // queryry값으로 받겠다는 의미
 *         name: number // type number 만 가능
 *         type: int // 정수만 가능
 *     responses: // 응답값 찍어주기
 *       200: // 응답 상태코드 확인
 *         description: 성공 // 응답 메세지 확인
 *         content: // 응답 예시 작성하기
 *           application/json:
 *             schema:
 *               type: array
 *               items:
 *                 properties:
 *                   number:
 *                     type: int
 *                     example: 1
 *                   writer:
 *                     type: string
 *                     example: 철수
 *                   title:
 *                     type: string
 *                     example: 좋은아침 입니다~
 *                   contents:
 *                     type: string
 *                     example: 오늘 하루도 파이팅 하세요!
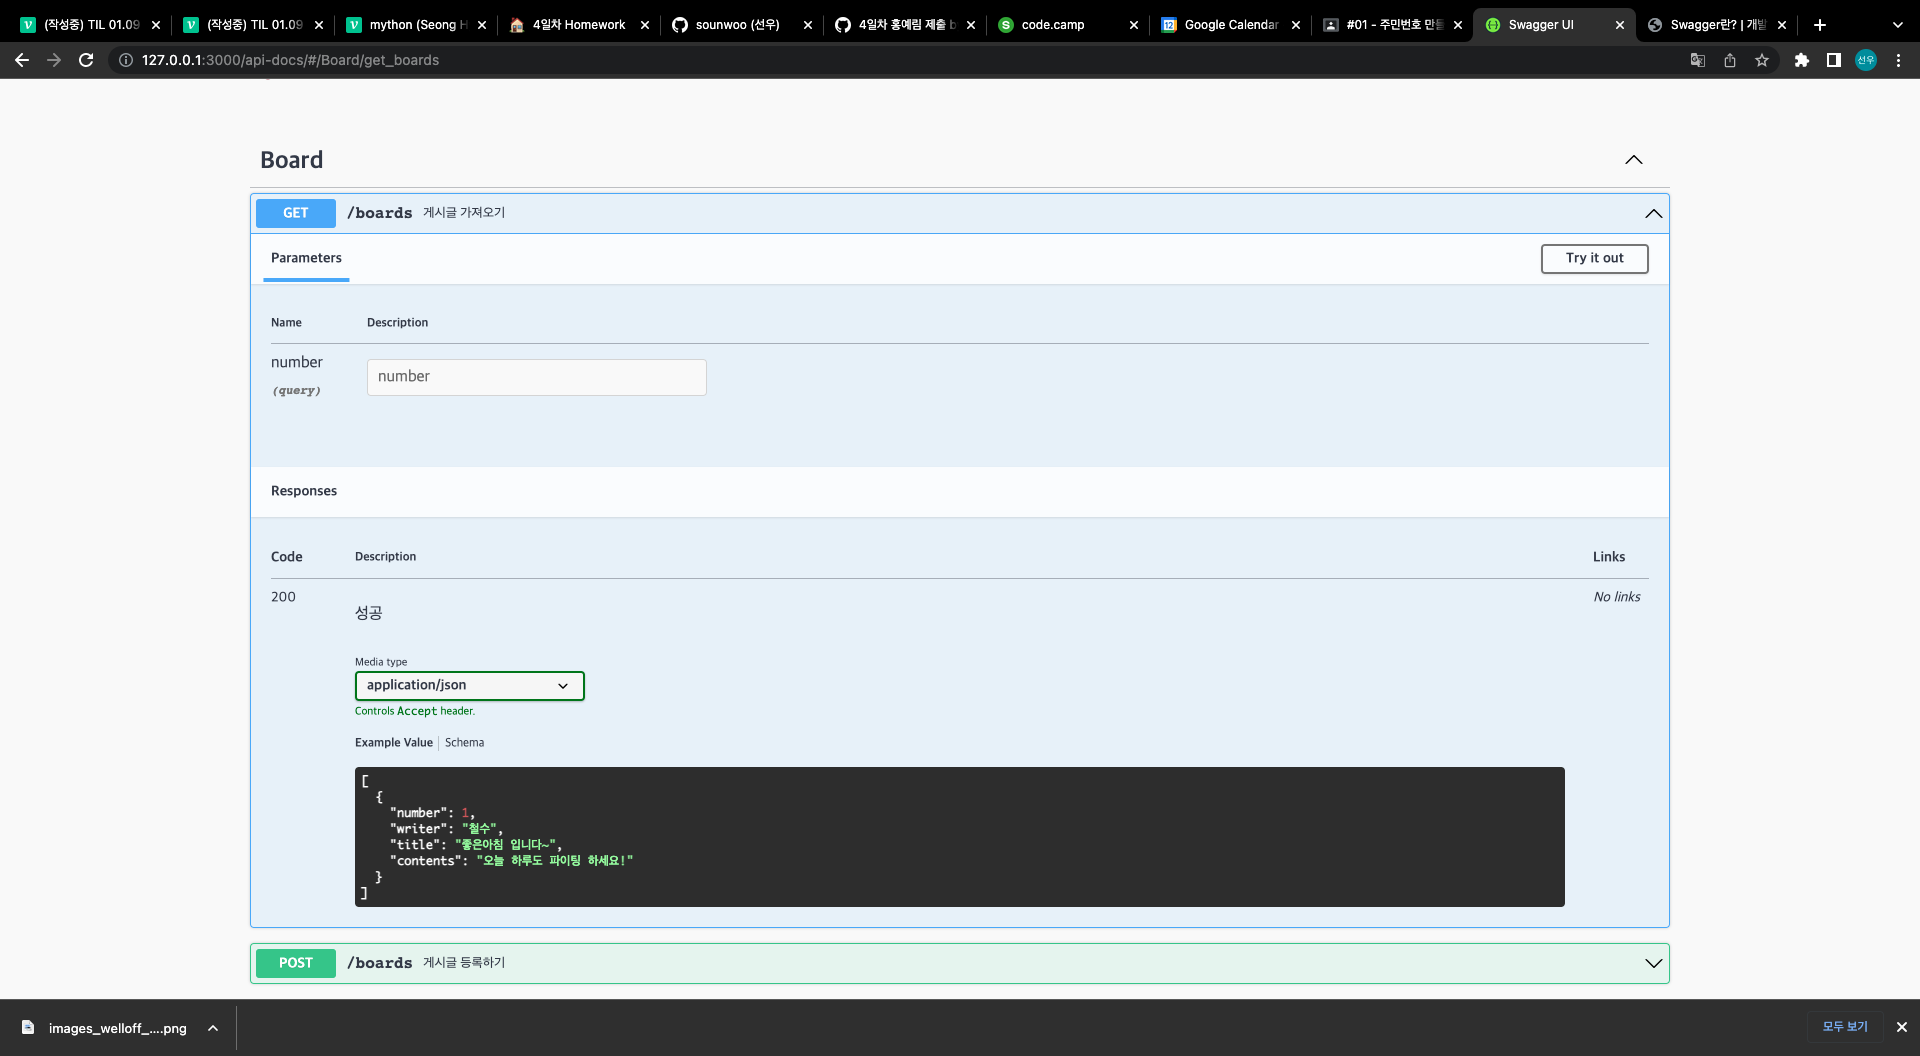
실제 보여지는 Swagger 페이지

코린이 열심히 배우자!