Frame-Based Layout
View의 위치나 크기를 설정할 때는 주어진 frame 그대로 그려버리는
Frame-Based Layout이 있다
  func setUIButton() {
    let button = UIButton(type: .system)
    button.setTitle("버튼을 눌러보세요.", for: .normal)
    button.backgroundColor = UIColor.black
    button.setTitleColor(UIColor.white, for: .normal)
    button.addTarget(self, action: #selector(buttonTapped), for: .touchUpInside)

    // frame으로 지정
    button.frame = CGRect(x: 100, y: 200, width: 200, height: 100)
    self.view.addSubview(button)
  }
  @objc func buttonTapped() {
    print("버튼이 눌렸습니다!")
  }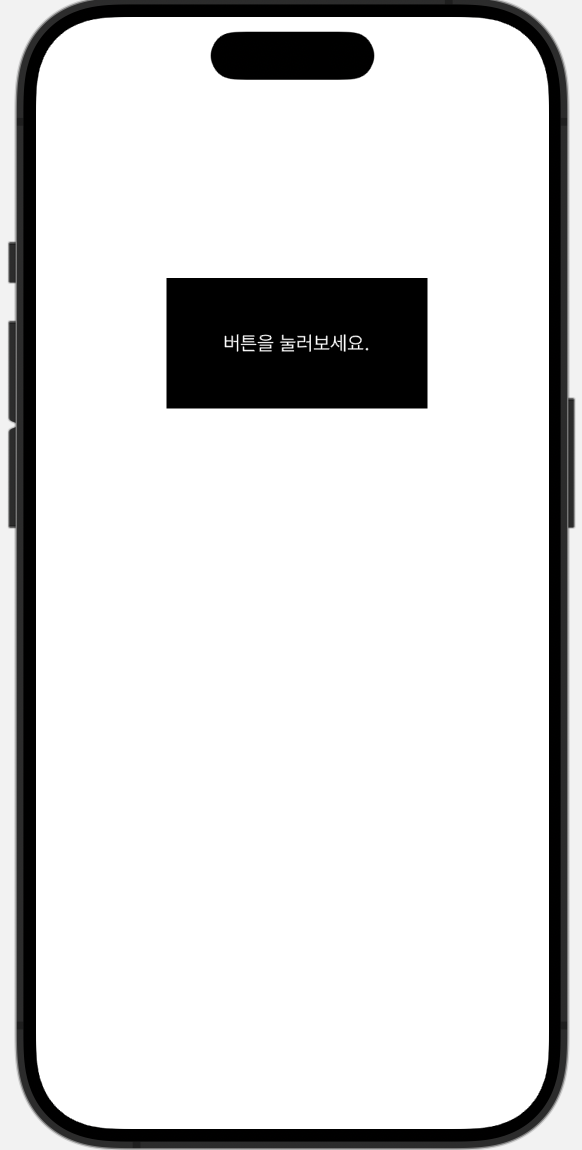
우리가 view를 만들 때 frame을 지정해주면 위처럼
Frame-Based Layout로 그린다.
적용이 잘 되기는 하지만 다른 핸드폰에서 돌려보면..?
핸드폰 마다 위치가 다르다.
그래서 뷰들간의 관계로 위치와 관계를 설정하는 Auto Layout을 사용!
Auto Layout
위치나 크기를 다른 객체를 이용해 "상대적"으로 제약을 주는 것
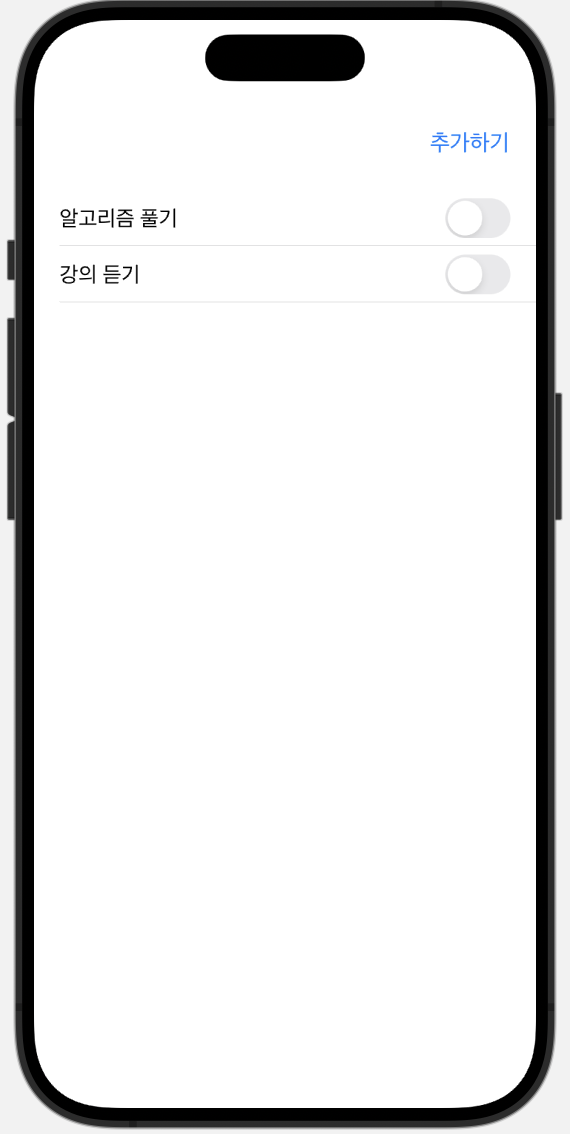
이렇게 화면을 만들려면!
1. addSubView로 뷰 추가해주기
class ViewController: UIViewController {

  	let addButton = UIButton()

	override func viewDidLoad() {
    	super.viewDidLoad()

    	addButton.setTitle("추가하기", for: .normal)
    	addButton.setTitleColor(.systemBlue, for: .normal)

    	view.addSubview(addButton)

	}
}
코드로 AutoLayout을 설정하기 전에, 먼저 SuperView를 설정하는 addSubView작업이 선행되어 있어야 함
만약 addSubView 과정을 맨 마지막에 한다던가, Constraint 설정(3번 과정) 이후에 한다면 crash..
2. translatesAutoResizeingMaskIntoConstraints를 false로 설정하기
class ViewController: UIViewController {

  	let addButton = UIButton()

	override func viewDidLoad() {
    	super.viewDidLoad()

    	addButton.setTitle("추가하기", for: .normal)
    	addButton.setTitleColor(.systemBlue, for: .normal)

    	view.addSubview(addButton)
    	addButton.translatesAutoresizingMaskIntoConstraints = false
	}
}
translatesAutoResizeingMaskIntoConstraints
- 기본 값이
true true- AutoLayout을 따르지 않고 frame을 따르겠다(Frame-Based Layout)false- AutoLayout을 따르겠다(AutoLayout)
따라서 Auto Layout을 설정하고 싶다면 해당 뷰의 이 값을 false로 무조건 설정 해주어야 함
3. 제약조건(Constraints) 설정하기
class ViewController: UIViewController {

  	let addButton = UIButton()

	override func viewDidLoad() {
    	super.viewDidLoad()

    	addButton.setTitle("추가하기", for: .normal)
    	addButton.setTitleColor(.systemBlue, for: .normal)

    	view.addSubview(addButton)
    	addButton.translatesAutoresizingMaskIntoConstraints = false

        addButton.topAnchor.constraint(equalTo: view.safeAreaLayoutGuide.topAnchor, constant: 20).isActive = true,
      	addButton.trailingAnchor.constraint(equalTo: view.trailingAnchor, constant: -20).isActive = true
	}
}
위의 코드 설명!

먼저 AutoLayout을 설정하고 싶은 View의
topAnchor / leadingAnchor / trailingAnchor / bottomAnchor 등등..
에 대고 constraint라는 메서드를 호출해주면 되는 것임
뒤에 Anchor가 붙긴 했지만, Anchor를 빼고 생각해도 무방함!!!
이때, 제일 중요한 건 마지막 isActive 상태를 true로 바꿔주어야 함
코드로 설정할 경우 해당 constraint는 기본이 비활성화기 때문에, 활성화를 시켜줘야 함
주의할 점
- trailingAnchor, bottomAnchor constant 설정 시 주의점
코드로 constant를 설정할 때, trailingAnchor / bottomAnchor에 한해서
storyboard와 달리 -(minus)를 붙여주어야 한다는 사실
.isActive = true를 매번 하기 귀찮다면 이렇게도 쓸 수 있다
       	NSLayoutConstraint.activate([
      		addButton.topAnchor.constraint(equalTo: view.safeAreaLayoutGuide.topAnchor, constant: 20),
      		addButton.trailingAnchor.constraint(equalTo: view.trailingAnchor, constant: -20)
    	])