[1] redux는 아래의 키워드를 이해해야 한다.
- store :
모든 컴포넌트에서 사용할 수 있는 Global State를 저장해놓는 저장소이다.
(컴포넌트가 접근 할 수 있는 공용스토어(Store)가 있으니, 하위 컴포넌트든 상위 컴포넌트든 상관없이 각 컴포넌트가 자신이 필요할 때 스토어에 접근해서 가져올 수 있다.)
- action :
store에 저장된 값을 변경시키는 "방식"을 정한다.
( 예를 들어 식당에 갔을 때 saying I’m hungry 하는 것이다. 실제로 행동을 하는 것이 아니다.)
reducer는 action과 이전 state을 참고해서 새로운 state를 만든다. 따라서, action은 reducer가 구분 할 수 있도록 action의 이름(타입) 과 데이터를 가진 "객체" 형식이다.
- reducer :
(state, action)를 받아서 new state로 변환시키는 함수이다. 항상 state와 action을 받아서 state를 return 해주어야한다!
(dispatch 열차를 타고 온 action의 type을 확인해서 그에 맞는 동작을 하는 곳이라고 생각하면 편하다.)
- dispatch :
dispatch(action)의 형식으로, "store의 reducer에 action을 전달"한다.
(즉, store의 값을 변경시키기 위해서는 action이 필요한데, 이 action을 dispatch가 전달해준다.)
(redux에서 상태 변경을 일으킬 수 있는 유일한 방법이다.)

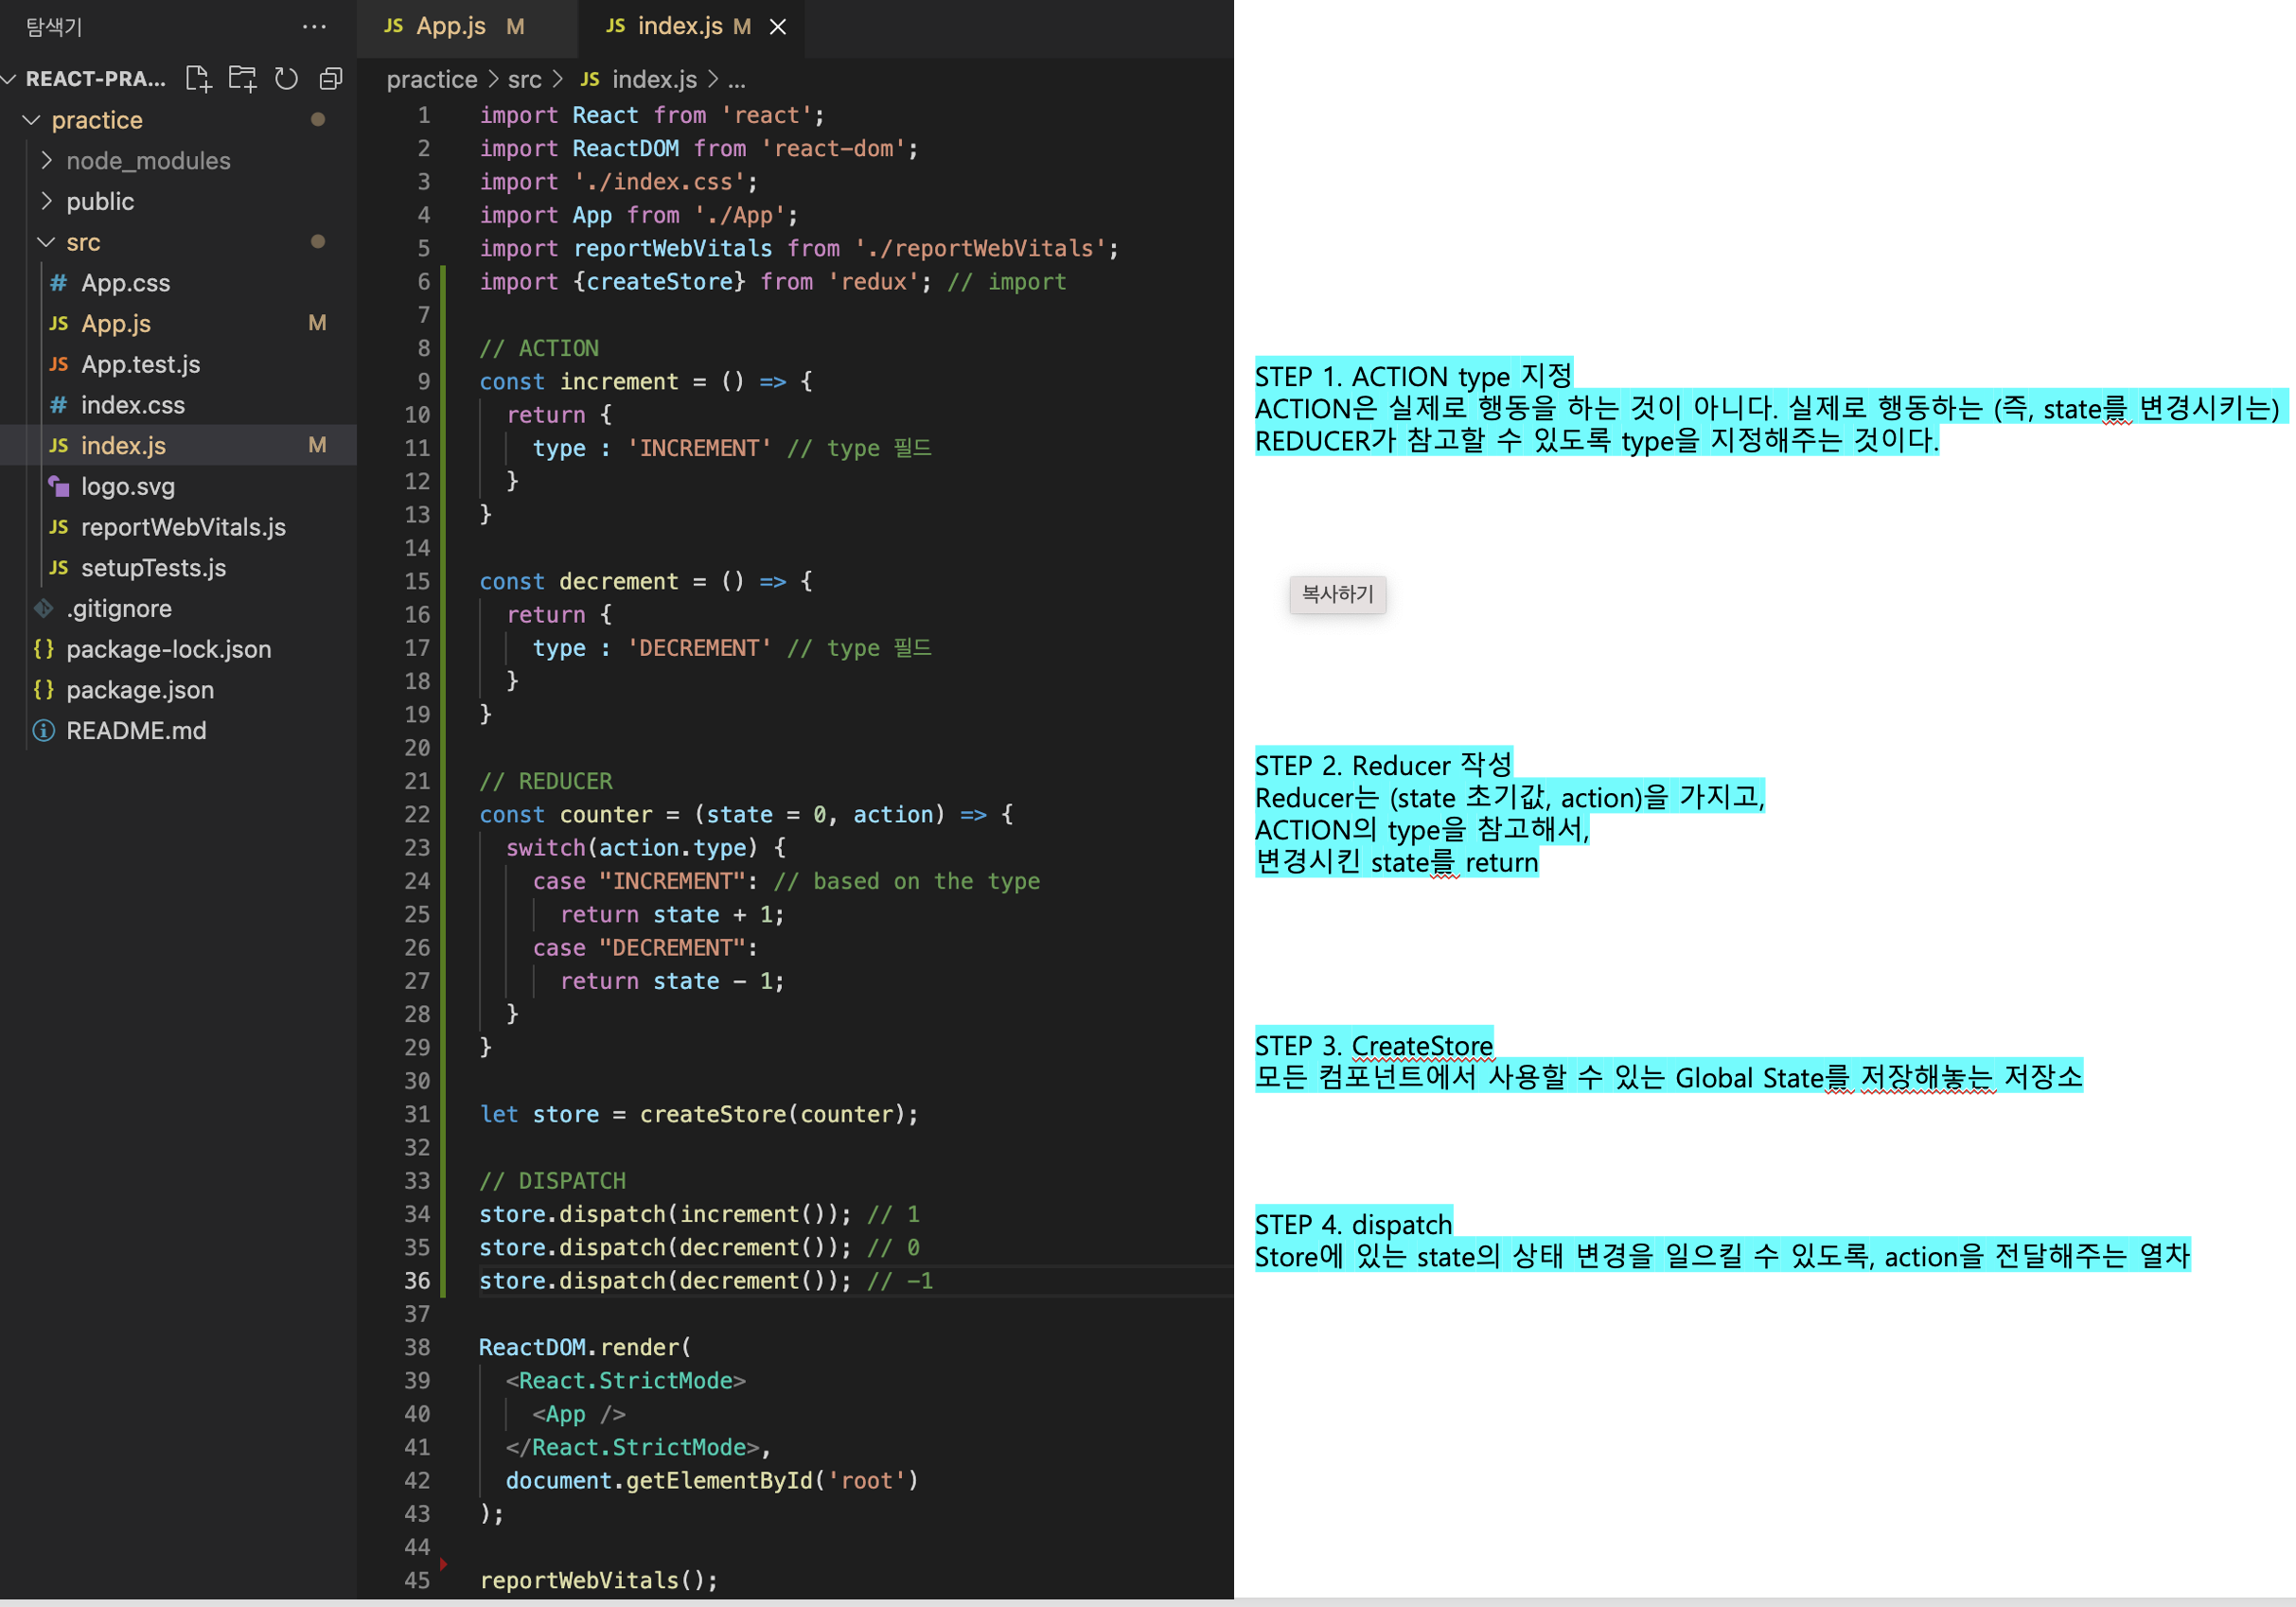
[2] 위의 내용대로 index.js 파일 하나에 redux 코드를 작성해볼 수 있다.
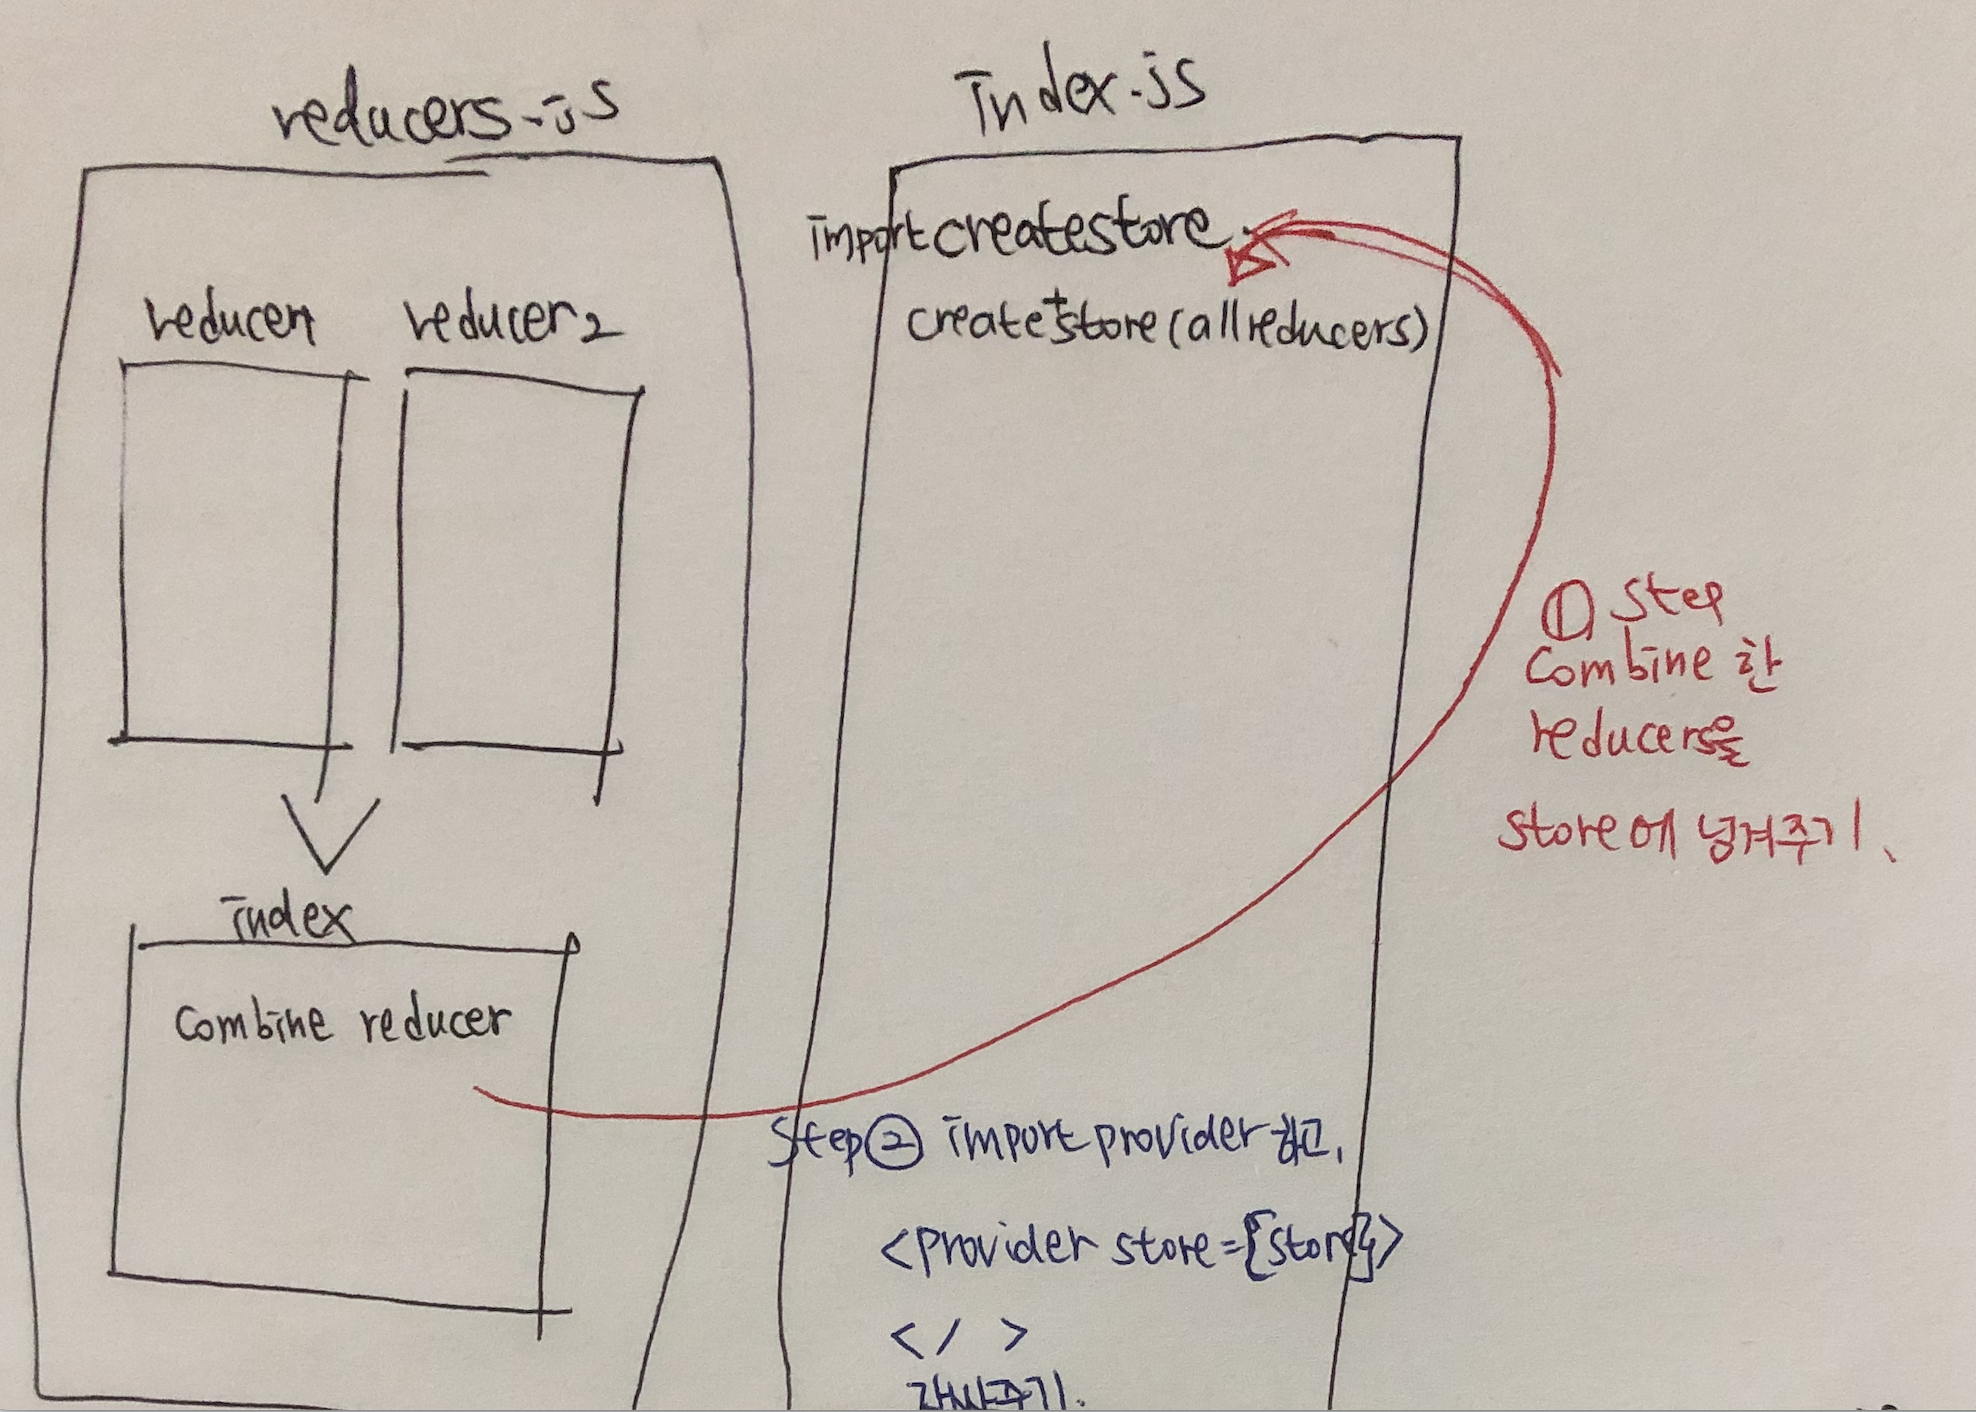
[3] 폴더에 나눠서 다시 작성해봤다.
[step1] 먼저, src 안에 reducers와 actions 폴더를 만든다.
[step2] actions < counter.js 코드를 작성한다.
// action 1
export const increment = () => {
return {
type: 'INCREMENT'
}
}
// action 2
export const decrement = () => {
return {
type: 'DECREMENT'
}
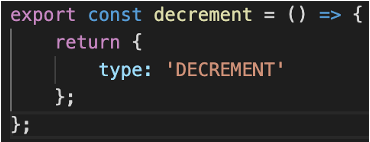
}[step3] reducers < counter.js 코드를 작성한다.
const counterReducer = (state = 0, action) => {
  switch (action.type) {
    case "INCREMENT":
      return state + 1;
    case "DECREMENT":
      return state - 1;
    default:
      return state;
  }
};

export default counterReducer;
[step4] reducers < index.js 코드를 작성한다. (reducer이 여러 개일 경우를 대비해, 하나로 combine 해주는 역할을 한다.)
import counterReducer from "./counter";
// import loggedReducer from './islogged';
import { combineReducers } from "redux";

const allReducers = combineReducers({
  counter: counterReducer,
  // isLogged : loggedReducer,
});

export default allReducers;
[step5] src < index.js 코드를 작성한다.
import { StrictMode } from "react";
import ReactDOM from "react-dom";
import {createStore} from 'redux'; // 핵심1
import allReducers from './reducers/index' // 핵심2
import {Provider} from 'react-redux'; // 핵심3

import App from "./App";

const store = createStore(allReducers); // 핵심1,2
const rootElement = document.getElementById("root");
ReactDOM.render(
  <StrictMode>
    <Provider store = {store}> // 핵심3
    <App />
    </Provider> // 핵심3
  </StrictMode>,
  rootElement
);
createStore을 해주고, combine된 reducers을 store에 넘겨주고,
Provider에 전달, 감싸주면 된다.
(Provider 는 react-redux 라이브러리에 내장되어 있는, 리액트 앱에 store 를 손쉽게 연동 할 수 있도록 도와주는 컴포넌트이다. 이 컴포넌트를 불러온 다음에, 연동 할 컴포넌트를 감싸준 다음에 Provider 컴포넌트의 props로 store 값을 설정해주면 된다.)
[step6] src < App.js 코드를 작성한다. (꼭 App.js가 아니더라도, 자신이 component를 사용하고자 하는 파일이면 된다.)
import "./styles.css";
import {useSelector, useDispatch} from 'react-redux'; // 핵심
import {increment, decrement} from './actions/counter' // 핵심
export default function App() {
const counter = useSelector(state => state.counter); // 핵심
const dispatch = useDispatch(); // 핵심
return (
<div className="App">
<h1>{counter}</h1>
<button onClick = { () => dispatch(increment())}>+</button>
<button onClick = { () => dispatch(decrement())}>-</button>
</div>
);
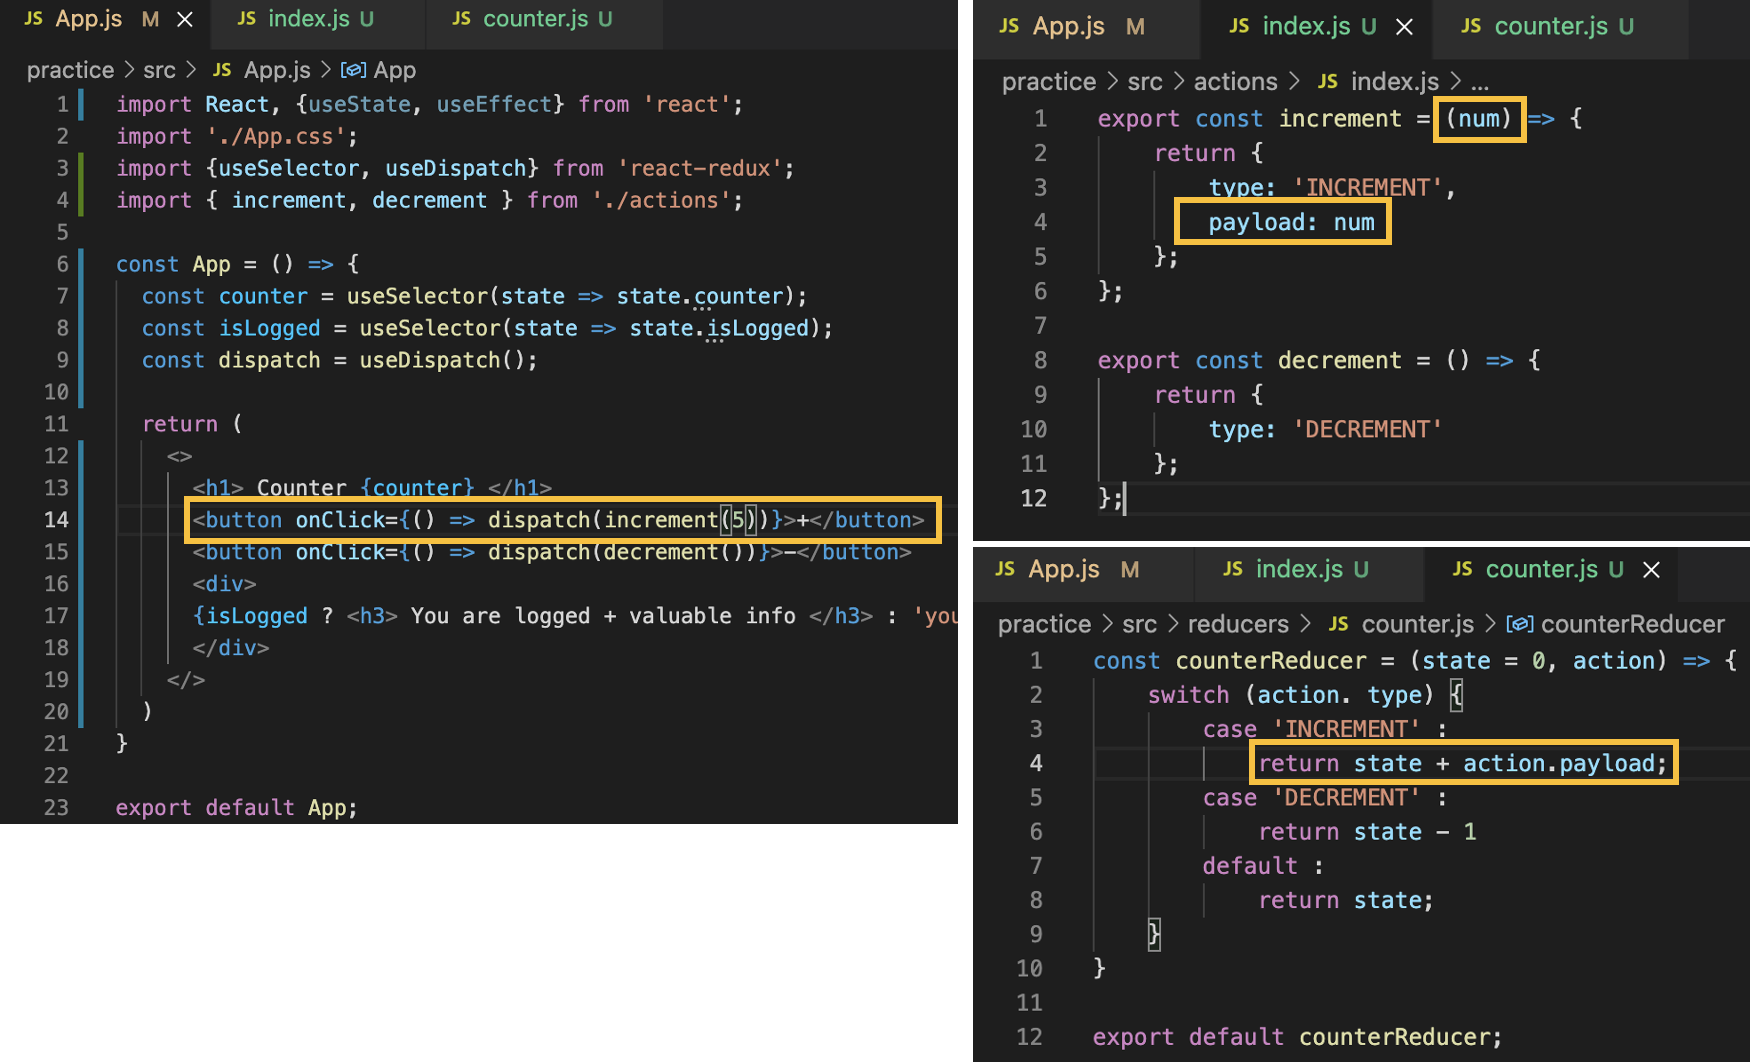
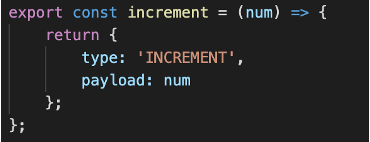
}[4] 위에 이어서, 인자를 전달해줘봤다.
App.js, actions > index.js, reducers > counter.js를 아래와 같이 수정하면 된다.