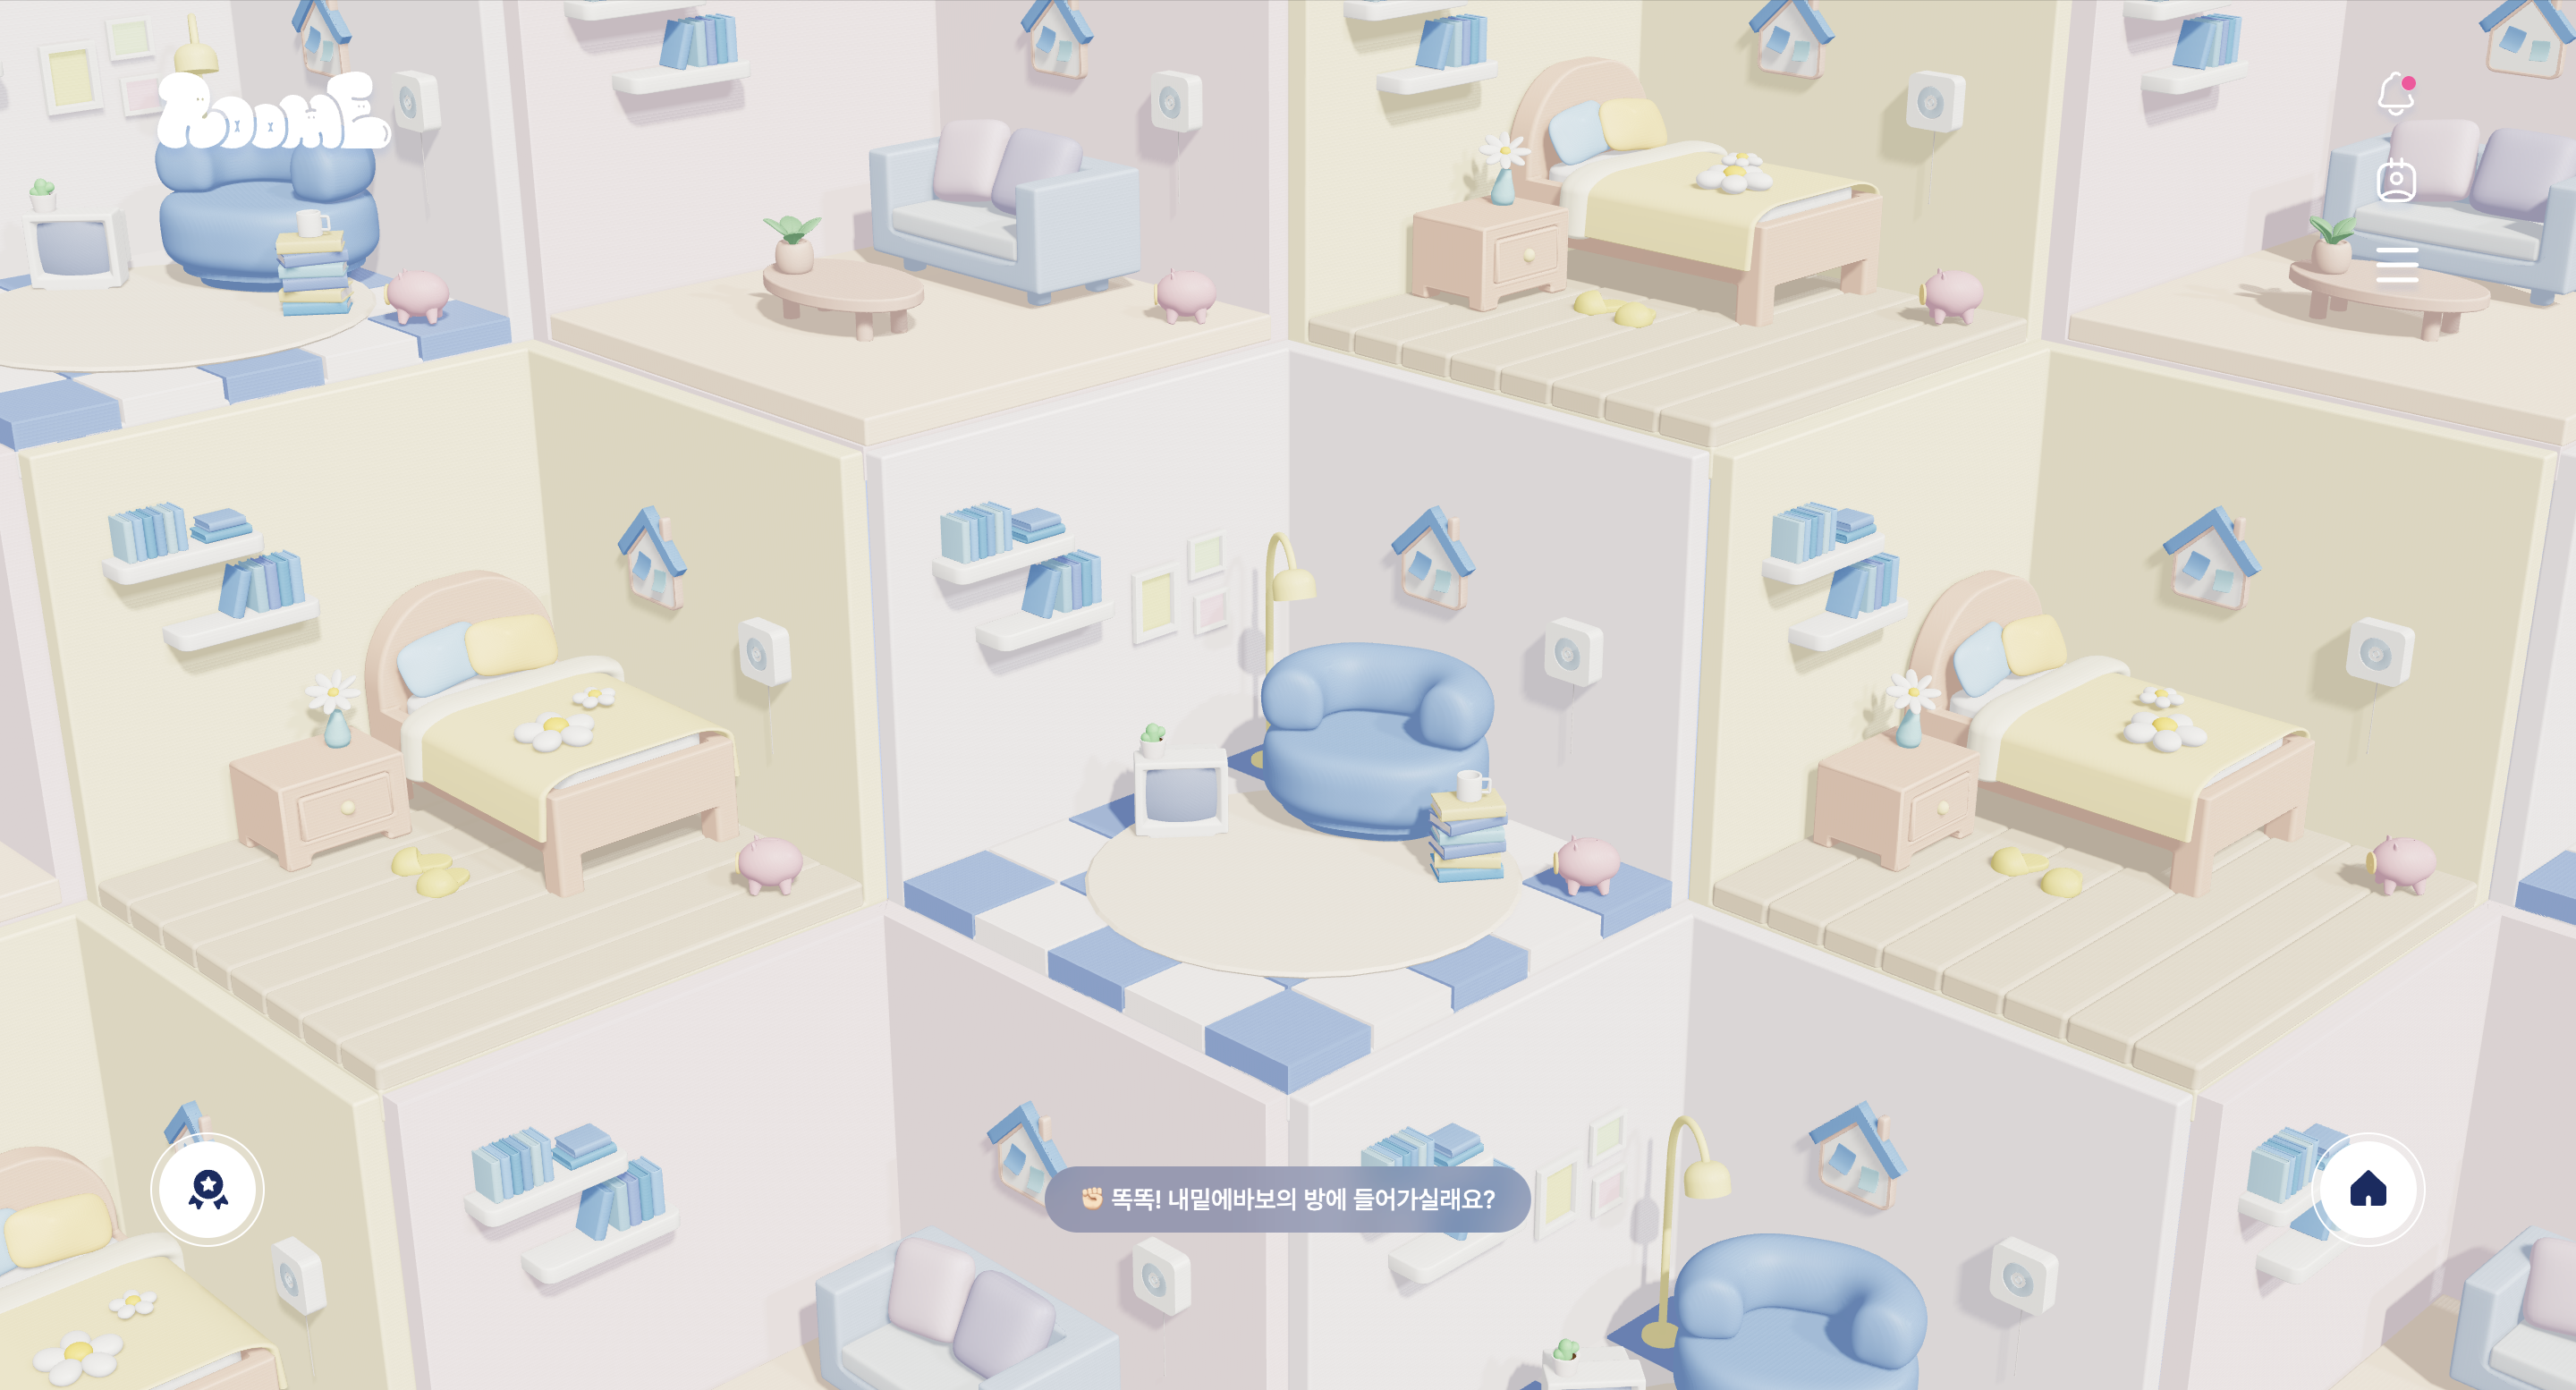
📍 방 프리뷰
메인 페이지의 핵심 기능인 방 프리뷰는 사용자의 방을 중심으로 하우스메이트(팔로잉)의 방을 시각적으로 보여주는 기능이다. 3D 모델링된 방을 벌집 구조로 배치하여 한눈에 확인할 수 있도록 구현해야 한다.
📌ㅤ제약 및 구현 조건
- 방들이 겹치거나 중간에 빈 공간이 생기지 않아야 한다.
- 규칙성 있게 확장되어야 하며, 나의 방은 항상 중앙에 위치해야 한다.
- 헥사곤 좌표계를 이용하여 배치한다.
🛠️ 구현 로직 흐름
(1)ㅤ방 정보 조회
- 팔로잉한 유저 목록 가져오기ㅤ➡️ㅤ
getFollowing()호출 - 각 유저의 방 정보 가져오기ㅤ➡️ㅤ
getRoomById(user.id)호출 - 가져온 방 정보를
rooms상태로 저장
useEffect(() => {
  const fetchData = async () => {
    try {
      const followingUsers = await getFollowing();
      const roomData = await Promise.all(
        followingUsers.map((user) => getRoomById(user.id))
      );
      setRooms(roomData);
    } catch (error) {
      console.error('방 정보 로딩 실패', error);
    }
  };
  fetchData();
}, []);
(2) 헥사곤 배치 규칙
- 중심(0,0,0) 좌표에 나의 방 배치
- 6가지 방향으로 첫 번째 링을 배치
- 이후 기존 배치를 기준으로 왼쪽, 오른쪽 방향으로 확장
- 중복 좌표 체크하여 중복 배치 방지
- 헥사곤 좌표계를 사용하여
(q,r,s)좌표를 2D(x,y,z)좌표로 변환
const getHexPosition = (index: number) => {
  const row = Math.floor(index / 3);
  const col = index % 3;
  const x = col * 1.5; // 간격 조정
  const z = row * 1.3;
  return [x, 0, z];
};
(3) 방 배치
getHexPosition(index)함수를 활용해 위치 계산Room컴포넌트를 활용해 방을 배치
<Canvas>
  {rooms.map((room, index) => (
    <Room
      key={room.id}
      modelPath={room.modelPath}
      userId={room.userId}
      position={getHexPosition(index)}
      scale={0.5} // 메인에서는 작게
      onClick={() => navigate(`/room/${room.userId}`)}
    />
  ))}
</Canvas>
📁 로직 분리 및 구현
1. useRooms - 방 데이터 불러오기
📍 역할
- 현재 로그인한 사용자의 방 정보와 팔로잉한 사용자의 방 정보를 불러와
rooms상태에 저장- 방 테마 정보를 매핑하여
modelPath추가
export default function useRooms(limit = 30, myUserId: number) {
  const [rooms, setRooms] = useState<Room[]>([]);
  const [loading, setLoading] = useState(true);
  const [error, setError] = useState<Error | null>(null);

  useEffect(() => {
    const fetchData = async () => {
      try {
        const houseMateUsers = await housemateAPI.getFollowing(0, limit);
        const roomData = await Promise.all(
          houseMateUsers?.housemates?.map((mate: Housemate) =>
            roomAPI.getRoomById(mate.userId)
          )
        );

        const modelRooms = roomData.map((room) => {
          const themeKey = mapThemeKeyToFullThemeKey(room.theme);
          return { ...room, modelPath: FullThemeData[themeKey].modelPath };
        });

        setRooms(modelRooms);
      } catch (error) {
       ...에러처리 코드
    };
    fetchData();
  }, [limit, myUserId]);

  return { rooms, loading, error };
}
✅ㅤ로직의 흐름
(1) 로그인한 사용자의 방 정보 가져오기
roomAPI.getRoomById(myUserId)호출mapThemeKeyToFullThemeKey를 이용해 테마 키를 변환 후,modelPath추가
(2) 팔로잉한 유저들의 방 정보 가져오기
housemateAPI.getFollowing(0, limit)호출- 각 유저의 방 정보를 비동기적으로 가져옴
(3) 데이터 저장
- 나의 방 정보와 팔로잉한 유저들의 방을 하나의 배열로 합쳐
rooms상태로 업데이트
2. useHexagonGrid - 방을 헥사곤 그리드 형태로 배치
📍 역할
rooms배열을 헥사곤 구조로 배치- 중앙을 기준으로 점진적으로 확장하며 배치
⚙️ㅤ이동 방향 벡터 (좌표 시스템)
const directions: Position[] = [
  [-1, 0, 1], [1, 0, -1], [0, -1, 1],
  [1, -1, 0], [-1, 1, 0], [0, 1, -1],
];
⚙️ㅤ링 확장 규칙을 정의한 배열
const expansions: Expansion[] = [
  { directionIndex: 2, dir: [-1, 0, 1], side: 'left' },
  { directionIndex: 0, dir: [-1, 0, 1], side: 'left' },
  { directionIndex: 4, dir: [-1, 0, 1], side: 'left' },
  { directionIndex: 3, dir: [1, 0, -1], side: 'right' },
  { directionIndex: 1, dir: [1, 0, -1], side: 'right' },
  { directionIndex: 5, dir: [1, 0, -1], side: 'right' },
];
⚙️ㅤexpandRing 함수
헥사곤 그리드의 새로운 링을 확장할 때 사용하며, 기존 링을 기준으로 새로운 헥사곤 방을 배치하는 역할을 한다. 원래는
useHexagonGrid에서 코드 분리가 안되어 있었지만, 로직이 복잡해지는 관계로 따로 분리하여 사용하고 있다.
function expandRing(
  expansion: Expansion, // 확장 규칙
  previousRing: number[], // 이전 링에 속한 방의 인덱스 배열
  result: RoomPosition[], // 전체 배치된 방들의 목록
  visited: Set<string>, // 방문한 방 좌표를 기록한 Set
  rooms: Room[], // 배치할 전체 방 목록
  roomIndex: number, // 현재 배치 중인 방의 인덱스
  placedInRing: number, // 현재 링에 배치된 방 개수
  positionsInRing: number // 현재 링에 배치할 수 있는 최대 방 개수
)
// 헥사곤 그리드 확장 함수
function expandRing(...): { roomIndex: number; placedInRing: number } {
const { directionIndex, dir } = expansion;
if (placedInRing >= positionsInRing || roomIndex >= rooms.length)
return { roomIndex, placedInRing };
for (let i = 0; i < previousRing.length; i++) {
const baseIndex = previousRing[(directionIndex + i) % previousRing.length];
const basePos = result[baseIndex].position;
const [dx, dy, dz] = dir;
const newPos: Position = [basePos[0] + dx, basePos[1] + dy, basePos[2] + dz];
const posKey = `${newPos[0]},${newPos[1]},${newPos[2]}`;
if (!visited.has(posKey) && newPos[0] + newPos[1] + newPos[2] === 0) {
visited.add(posKey);
result.push({ position: newPos, room: rooms[roomIndex] });
return { roomIndex: roomIndex + 1, placedInRing: placedInRing + 1 };
}
}
return { roomIndex, placedInRing };
}✅ㅤ로직의 흐름
(1) 배치 종료 조건 체크
- 현재 링에 배치된 방이 최대 배치 가능 개수를 초과하면 종료
- 남은 방이 없으면 종료
(2) 이전 링을 기준으로 새로운 방 배치
(3) 새로운 위치 계산
- 이전 링의 특정 위치를 기준으로 새 방의 좌표를 계산ㅤ➡️ㅤ
newPos - 새로운 위치를
posKey문자열로 변환해 중복 체크에 사용
(4) 중복 체크 및 방 배치
- 이미 배치된 방이면 스킵
- 헥사곤 좌표계의 특성인
x + y + z = 0을 만족하는 경우만 추가 - 방을 추가한 후
roomIndex와placedInRing값을 증가
📌ㅤ주요 로직 : 헥사곤 그리드 배치
const result: RoomPosition[] = [];
const visited = new Set<string>();
const ringRooms: number[][] = [[]];result: 배치된 방들의 목록visited: 방문한 좌표를 저장하여 중복 방지ringRooms: 링별로 방 인덱스를 저장하는 배열
✅ㅤ로직의 흐름
// 중앙에 첫 번째 방 배치
result.push({ position: [0, 0, 0], room: rooms[0] });
visited.add('0,0,0');
ringRooms[0] = [0];
let roomIndex = 1;

// 첫 번째 링 배치 (최대 6개)
if (roomIndex < rooms.length) {
  const firstRingIndices: number[] = [];
  for (let dir = 0; dir < 6 && roomIndex < rooms.length; dir++) {
    const [dx, dy, dz] = directions[dir];
    const posKey = `${dx},${dy},${dz}`;

    if (!visited.has(posKey)) {
      visited.add(posKey);
      result.push({ position: [dx, dy, dz], room: rooms[roomIndex] });
      firstRingIndices.push(roomIndex);
      roomIndex++;
    }
  }
  ringRooms.push(firstRingIndices);
}
(1) 초기 방 배치
- 첫 번째 방(나의 방)을
(0,0,0)에 배치 - 이후 6가지 방향을 돌며 첫 번째 링 완성
// 이후 링 확장
let ring = 1;
while (roomIndex < rooms.length) {
  const positionsInRing = Math.min(rooms.length - roomIndex, 6);
  let placedInRing = 0;
  const previousRing = ringRooms[ring];

  if (!previousRing) break;

  for (const expansion of expansions) {
    const updated = expandRing(
      ...매개변수
    );
    roomIndex = updated.roomIndex;
    placedInRing = updated.placedInRing;
  }

  if (placedInRing > 0) {
    ringRooms.push(result.slice(roomIndex - placedInRing, roomIndex).map((_, i) => roomIndex - placedInRing + i));
    ring++;
  }
  ...
(2) 추가 방 배치
- 방이 많아지면 링을 확장하여 배치
expandRing()을 사용하여 각 방향에 배치 가능 여부 확인 후 추가- 새 링 추가 시,
ringRooms에 추가
// 2D 좌표 변환 (q, r -> x, y 변환)
return result.map(({ position: [q, r], room }) => {
  const x = centerX + width * (q + r / 2);
  const y = centerY - height * (2.98 / 4.2) * r;
  return { room, position: [x, y, r * 0.7] };
});
}, [rooms, centerX, centerY]);
(3) 위치 변환
q, r, s좌표계를 화면x, y좌표로 변환ㅤ➡️ㅤ헥사곤 좌표계를 2D 좌표로 변환
3. HiveRooms - 방을 3D 씬에 렌더링
📍 역할
useRooms에서 가져온 방 데이터를useHexagonGrid로 배치 후, Three.js로 렌더링Canvas를 활용하여 방 모델을 배치하고 마우스 이벤트를 처리
export default function HiveRooms({ myUserId }) {
  const { rooms } = useRooms(30, myUserId);
  const positionedRooms = useHexagonGrid(rooms, 0, 0);
  const [hoveredRoom, setHoveredRoom] = useState<number | null>(null);

  return (
    <div className='w-full h-screen relative'>
      <Canvas camera={{ position: [0, 4, 10], fov: 25 }} shadows>
        <RoomLighting />
        {positionedRooms.map(({ room, position }, index) => (
          <group
            key={index}
            position={position}
            onPointerOver={() => setHoveredRoom(index)}
            onPointerOut={() => setHoveredRoom(null)}>
            <HiveRoomModel room={room} />
          </group>
        ))}
      </Canvas>
      {hoveredRoom !== null && (
        <div className='absolute bottom-22 left-1/2 transform -translate-x-1/2'>
          ✊🏻 똑똑! {rooms[hoveredRoom]?.nickname}의 방에 들어가실래요?
        </div>
      )}
    </div>
  );
}
✅ㅤ로직의 흐름
(1) 방 데이터 가져오기
(2) 헥사곤 그리드 위치 계산
(3) Three.js로 방 모델 렌더링
Canvas내부에서HiveRoomModel을 반복 렌더링onPointerOver,onPointerOut을 통해 호버 효과 추가
(4) 마우스 이벤트 처리
mousedown,mousemove,mouseup이벤트를 활용해 드래그/클릭 감지- 클릭한 방으로 이동하도록 구현
✨ 사용자 경험 개선
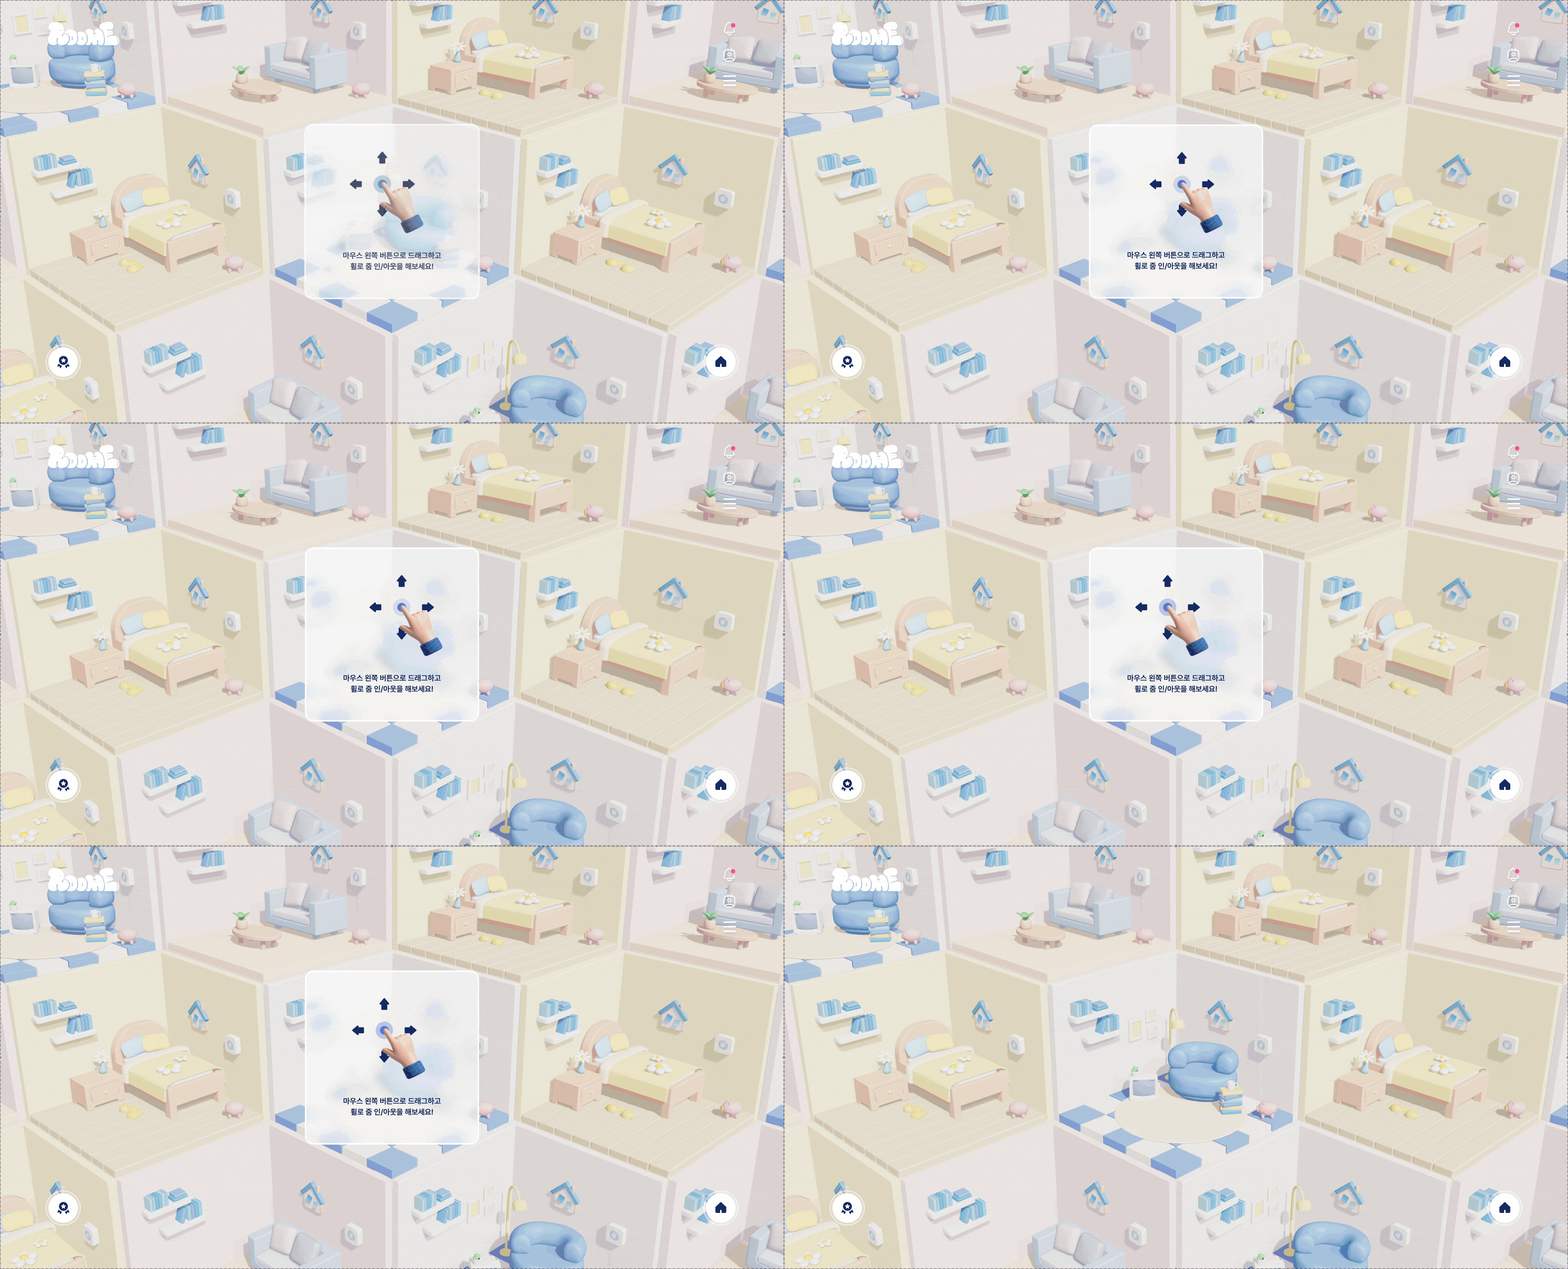
👉 UX 개선 포인트
✅ㅤ프리뷰 기능의 직관적인 사용을 돕기 위해 가이드 애니메이션 추가
- 마우스 왼쪽 클릭으로 드래그 가능
- 휠 스크롤을 사용해 줌 인/아웃 조작 가능