
lottie는 유명 animation 라이브러리로 직접 만든 애니메이션을 적용하는것 이외에 사람들이 무료로 올려놓은 자료를 이용할 수 있다.
lottie 라이브러리 적용 방법(https://github.com/lottie-react-native/lottie-react-native)
lottie 애니메이션 무료 다운로드 (https://lottiefiles.com/featured)
개발환경
react-native: 0.64.0
설치
- React Native >= 0.60.0
yarn add lottie-react-native
yarn add lottie-ios@3.1.8

npm i --save lottie-react-native
npm i --save lottie-ios@3.1.8
ios앱도 지원하기 위해서는 ios 폴더에서 명령어 실행
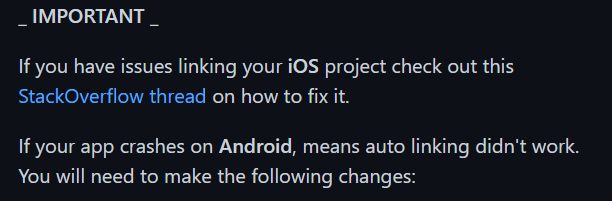
pod install0.60.0 버전 이상이라면 link를 자동으로 지원하지만, Android에서 link가 동작하지 않는다고함(아래 사진 참고)
- android/app/src/main/java//MainApplication.java
- import 부분에 추가
import com.airbnb.android.react.lottie.LottiePackage;on the imports section
List<ReactPackage> getPackages()부분에 추가- add
packages.add(new LottiePackage());inList<ReactPackage> getPackages();
- add
- import 부분에 추가
- android/app/build.gradle
dependenciesimplementation project(':lottie-react-native')
-
android/settings.gradle
include ':lottie-react-native'
project(':lottie-react-native').projectDir = new File(rootProject.projectDir, '../node_modules/lottie-react-native/src/android')
사용
- 애니메이션 파일 받기!(
.json파일) (https://lottiefiles.com/featured)
-
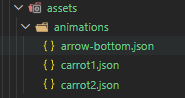
파일 저장
-
사용
import React from 'react';
import LottieView from 'lottie-react-native';

export default class BasicExample extends React.Component {
  render() {
    return <LottieView source={require('../assets/carrot1.json')} autoPlay loop />;
  }
}
심화
애니메이션을 screen에서 바로 적용하려고 시도해보니까 오류가 발생...
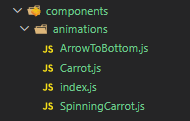
이런저런 시도 끝에 애니메이션을 컴포넌트화하여 적용해야한다는 사실을 깨닫고, components폴더에 animations 폴더를 생성하여 사용할 애니메이션을 컴포넌트화 했다.(이러니까 오히려 관리하기 더 좋아지는 듯 싶다.)
- Carrot.js(예시)
import React from 'react';
import LottieView from 'lottie-react-native';

const Carrot = () => {
  return <LottieView source={require('@/assets/animations/carrot2.json')} autoPlay loop />;
};

export default Carrot;
index.js 는 각 컴포넌트에서 한번에 여러 애니메이션을 사용할 수 있게 모아서 뿌려주기 위한 파일
export { default as ArrowToBottom } from './ArrowToBottom';
export { default as Carrot } from './Carrot';
export { default as SpinningCarrot } from './SpinningCarrot';
이제 HomeScreen에서 부를 때, 아래와 같이 한 번에 부를 수 있음
import { Carrot, SpinningCarrot, ArrowToBottom } from '@/components/animations';이제 사용해보자.
- HomeScreen.js
import React, { useState } from 'react';
import { View, Text, Button } from 'react-native';

// 1. 불러오고
import { Carrot, SpinningCarrot, ArrowToBottom } from '@/components/animations';

function HomeScreen({ navigation }) {
  ...

  return (
    <View style={{ flex: 1, alignItems: 'center', justifyContent: 'center' }}>
      <Text>Home Screen</Text>
      {/* 2. 사용하고 */}
      <Carrot />
      <SpinningCarrot />
      <ArrowToBottom style={{ width: 50, height: 50, position: 'absolute', bottom: 0 }} />

      ...
    </View>
  );
}
export default HomeScreen;
결과
컴포넌트에 props로 style주기
애니메이션을 컴포넌트처럼 사용하고나니 아쉬운점이 발생했다. 각 애니메이션마다 각기 다른 style을 주려면 어떻게 해야하지....?
고민끝에 props로 css 속성을 넘겨주기로 했다.
아래 화살표를 보면 너무 크다. 위치도 정중앙이라 아래로 내려주고싶다.
- 먼저
ArrowToBottom.js컴포넌트로 데이터(style)를 넘겨준다.
- HomeScreen.js
import React, { useState } from 'react';
import { View, Text, Button } from 'react-native';

import { ArrowToBottom } from '@/components/animations';

function HomeScreen({ navigation }) {
  return (
    <View style={{ flex: 1, alignItems: 'center', justifyContent: 'center' }}>
      ...
      <ArrowToBottom style={{ width: 50, height: 50, position: 'absolute', bottom: 0 }} />
    </View>
  );
}
export default HomeScreen;
- props로 받은 데이터를 style로 그대로 적용해준다.
- ArrowToBottom.js
import React from 'react';
import LottieView from 'lottie-react-native';

function ArrowToBottom({ style }) {
  console.log(style);
  return (
    <LottieView
      style={style} // 적용하기
      source={require('@/assets/animations/arrow-bottom.json')}
      autoPlay
      loop
    />
  );
}
export default ArrowToBottom;- 감상한다.
출처
https://lottiefiles.com/57448-carrot
https://lottiefiles.com/55693-arrow-carrot

오 수완이~ 여깃네