준비사항
Django project
- 완성된 프로젝트
- 의존성 저장 -
pip freeze > requirements.txt - 원격저장소 업로드
AWS (https://aws.amazon.com/ko/)
- AWS 계정 생성
- 기본정보입력
- 카드정보입력 (해외결제가 가능한 체크카드 or 신용카드)
- 휴대폰인증
- 완료후 로그인
사용할 것들의 개념
- cloud9
- 원격 컴퓨터에 접속할 수 있는 인터페이스를 제공하는 서비스
- 코드를 쓸 수 있는 인터페이스
- EC2
- 가상 컴퓨터
- pyenv
- 리눅스 시스템에서 python 환경 설치 및 관리 api
- 이걸로 python 을 install 할 것
- nginx
- django는 서버가 아님
- 정확하게 표현하면 django는 서버에서 돌아가는 어플리케이션
- django에서 run server를 하면 내장된 작은 development 용 서버가 실행되는 것
- 이것이 실제 서버역할
- client 요청이 처음 도달하는 곳
- 우리가 여기서 할것
/(루트주소)로 들어오면 django로 가게/static/으로 들어오면 staticfiles 폴더로 가게
- django는 서버가 아님
- uWSGI
- nginx 와 django 사이를 중재하는 역할
Deploy
cloud9
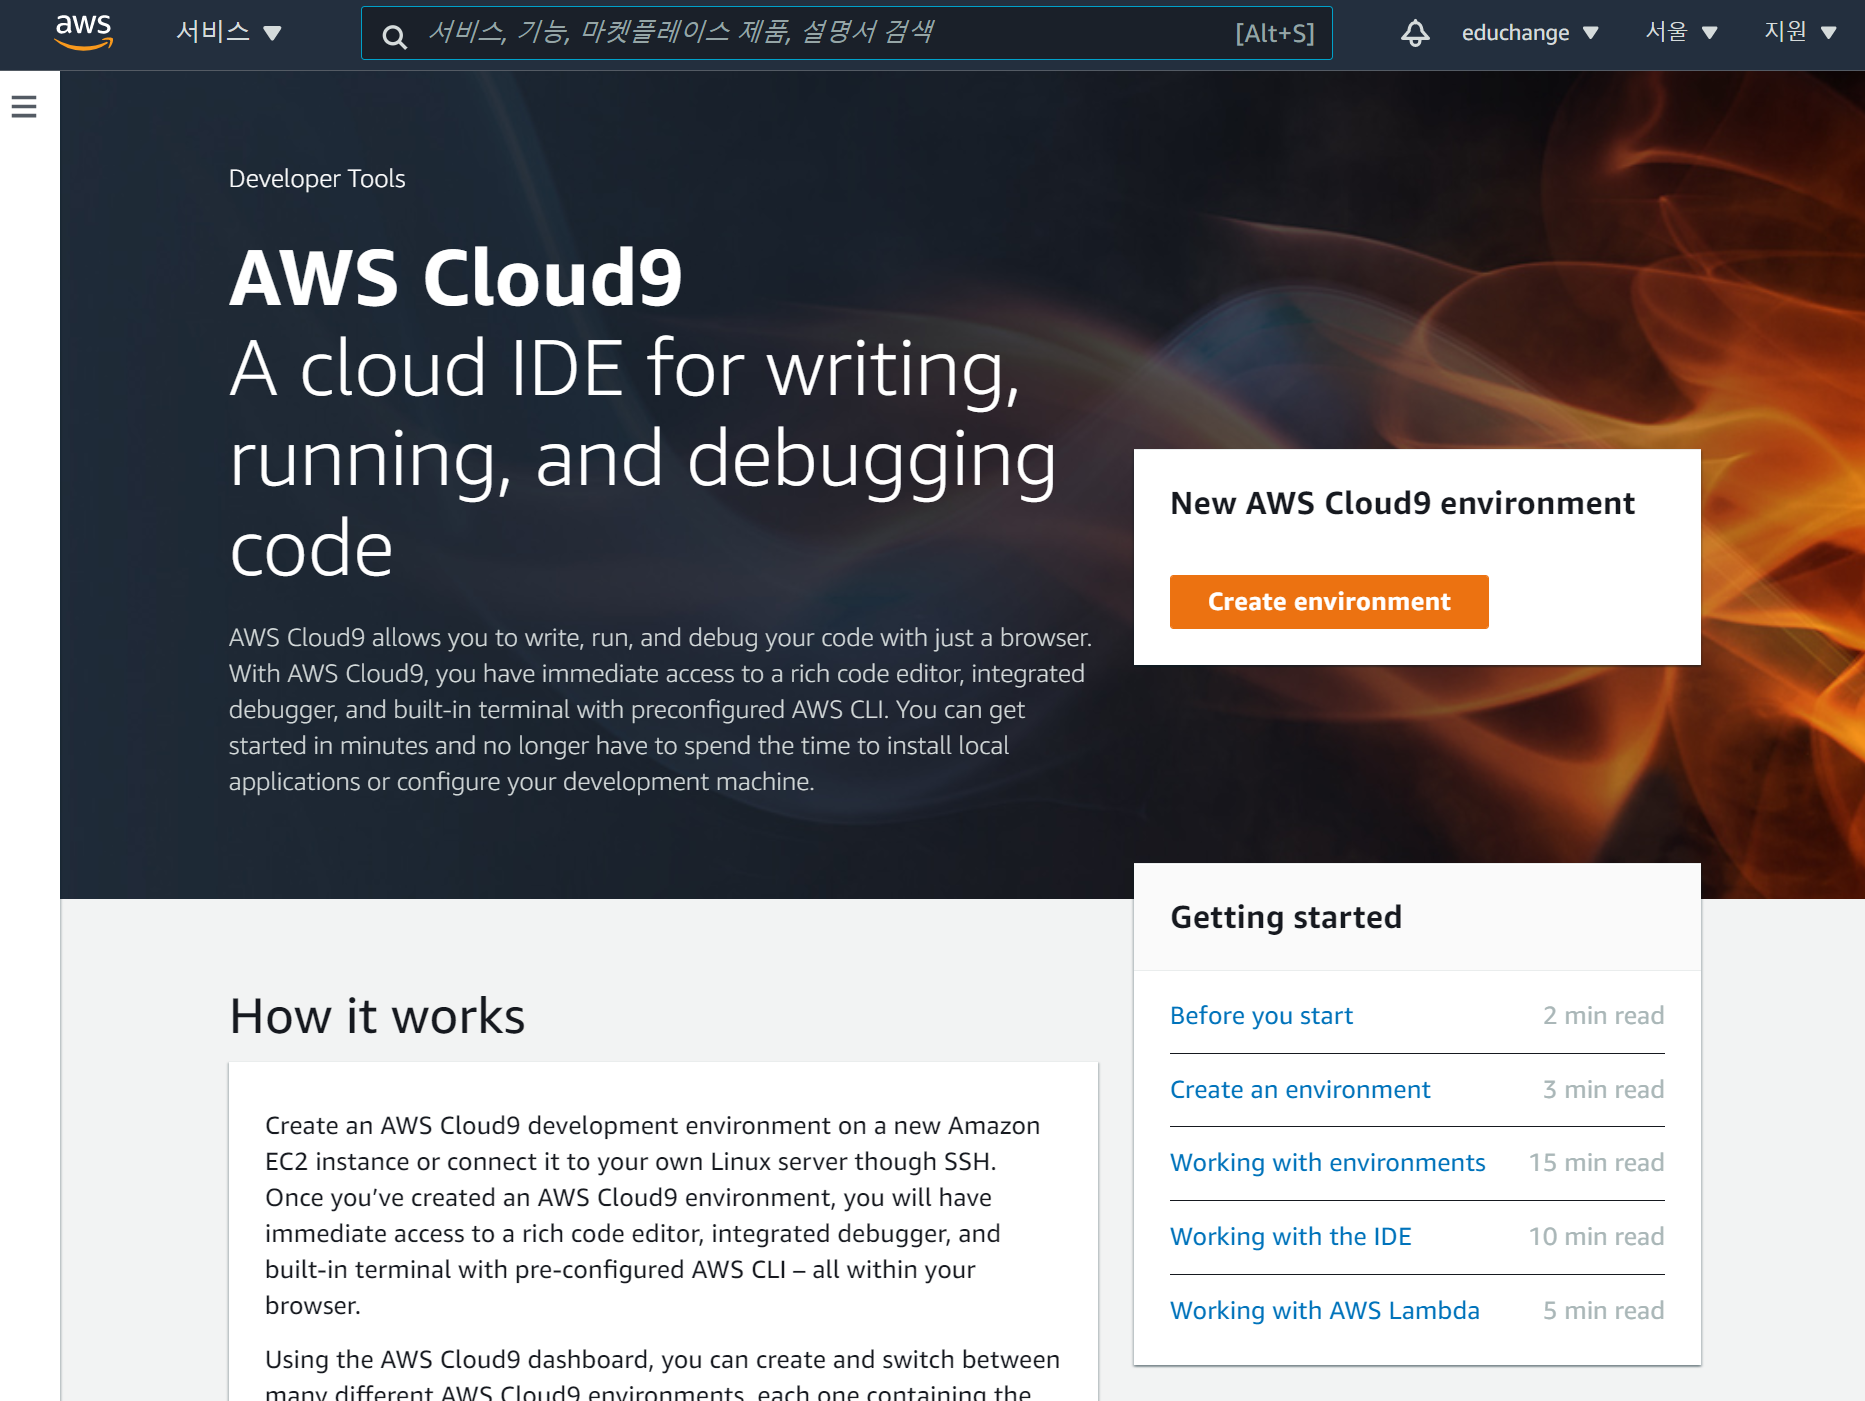
- AWS Management Console 에서 Cloud9 검색 후 Create environment 클릭
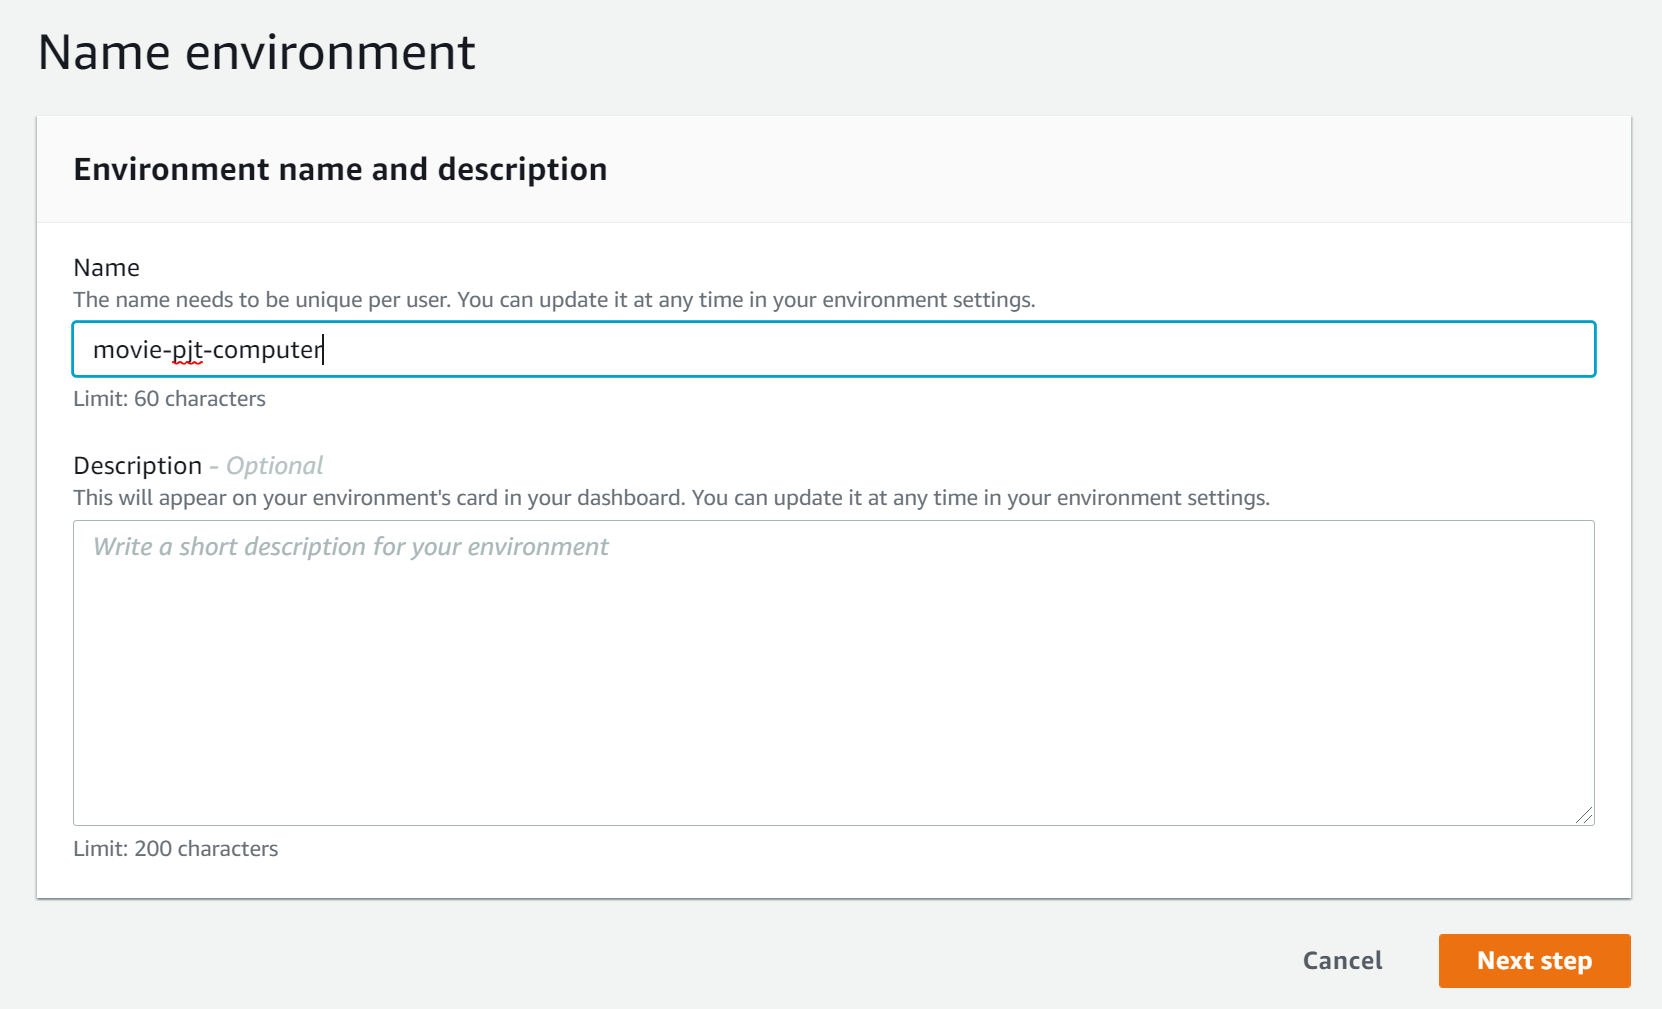
- 이름입력 후 Next step
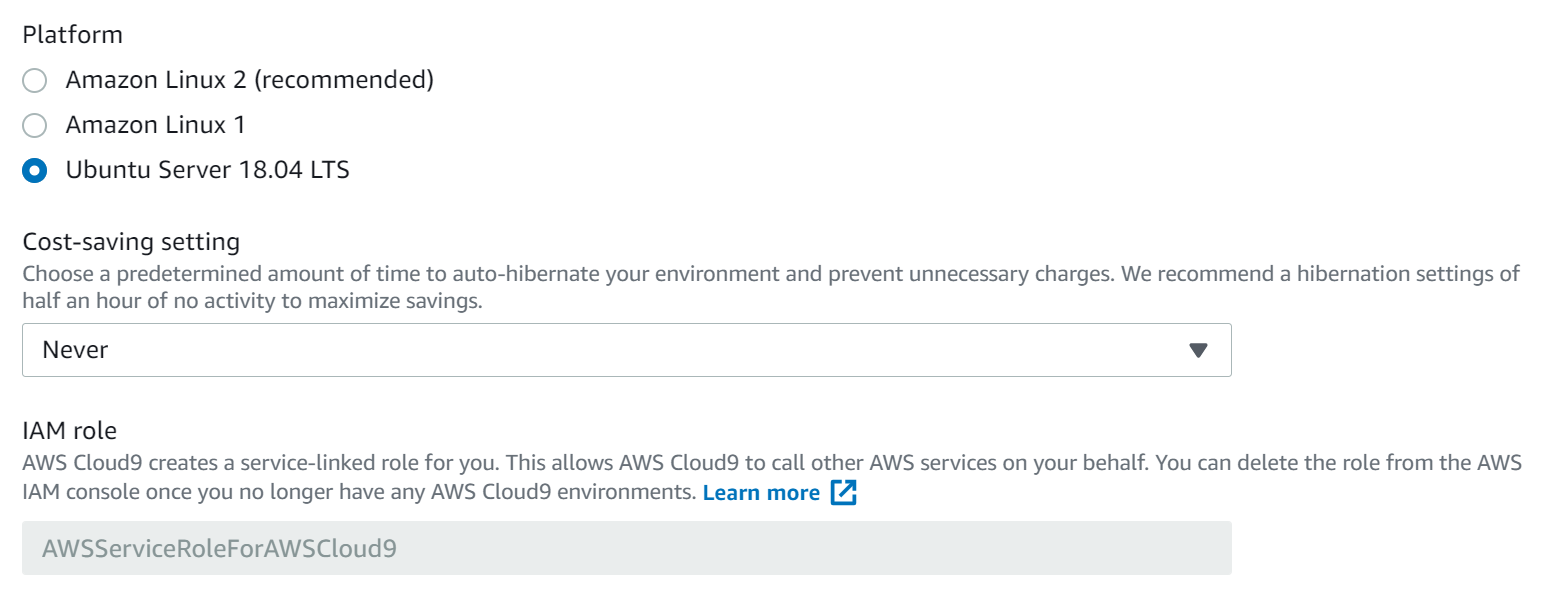
- 설정
- Platform - Ubuntu Server 18.04 LTS
- Cost-saving setting - 일정시간 후 꺼지도록 설정가능 (Never 설정시 과금주의)
- 생성 완료 후 cloud9 화면 확인
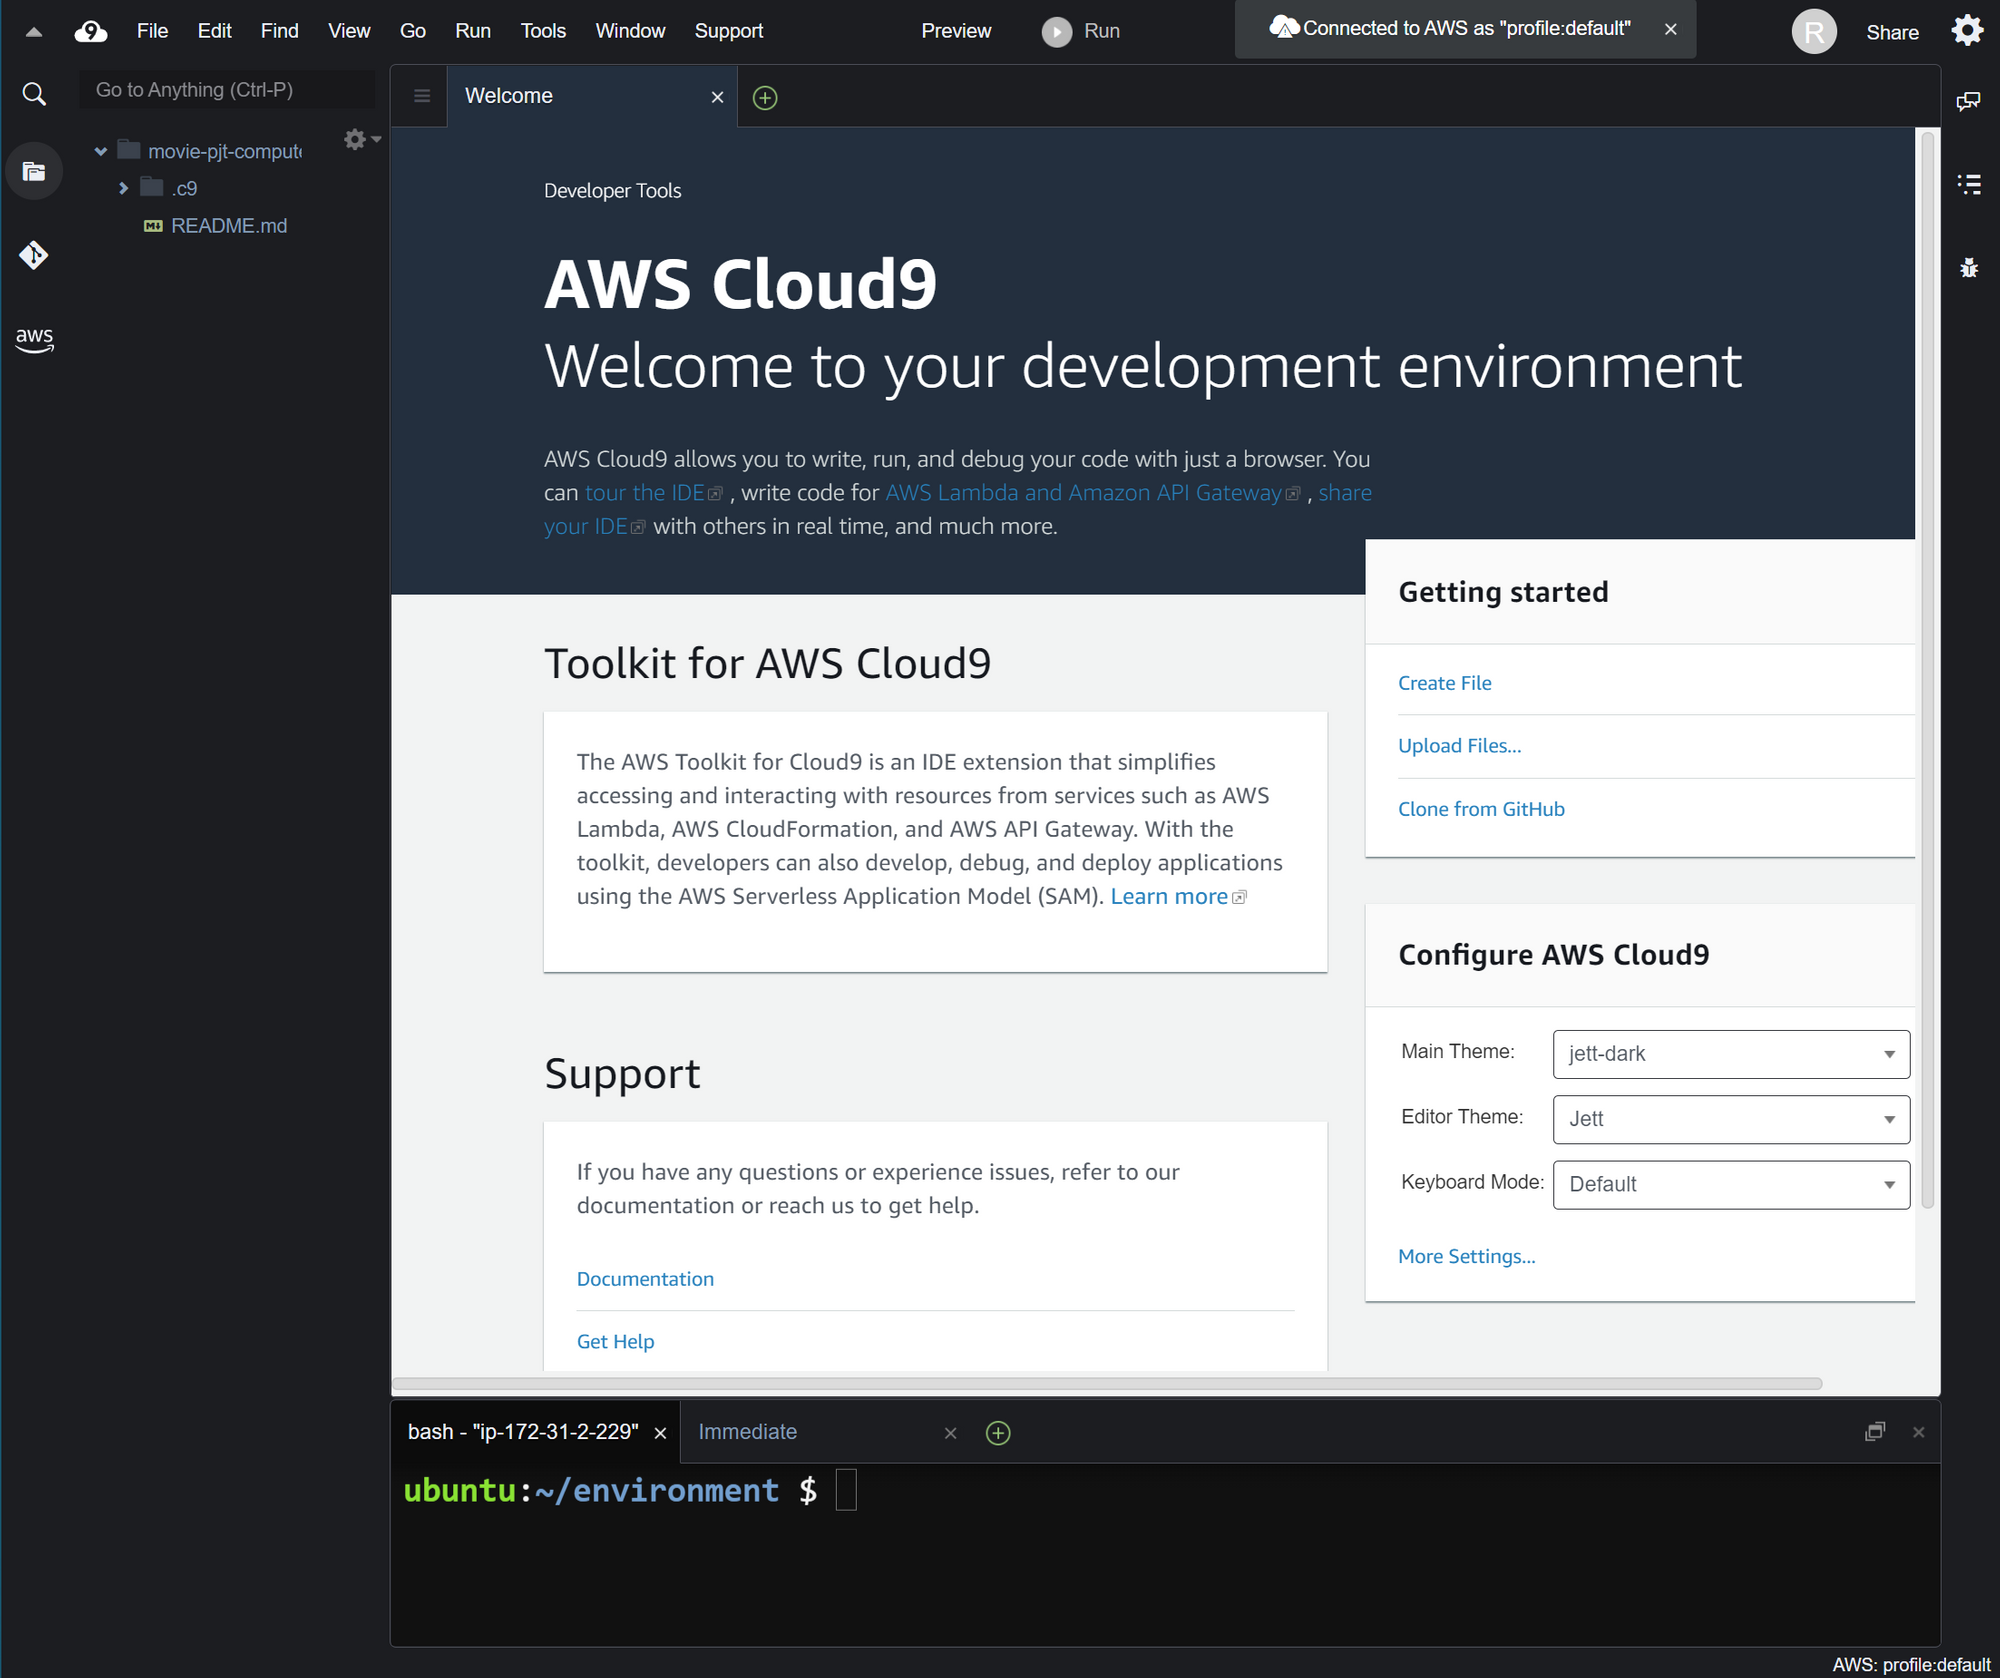
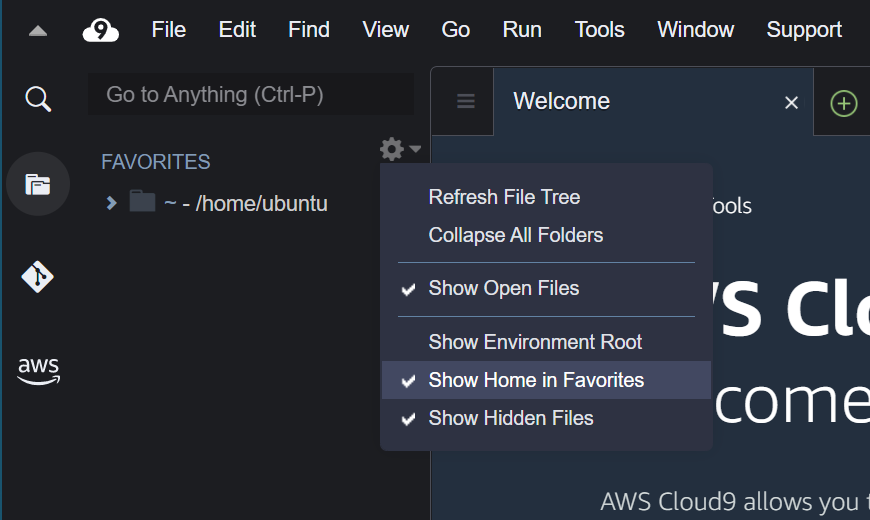
- 파일트리 설정 (home directory기준으로 진행)
- Show Environment Root 체크해제
- Show Home in Favorites 체크
EC2
새로운 탭에서 진행
EC2는 cloud9 생성시 자동생성
- 서비스 검색
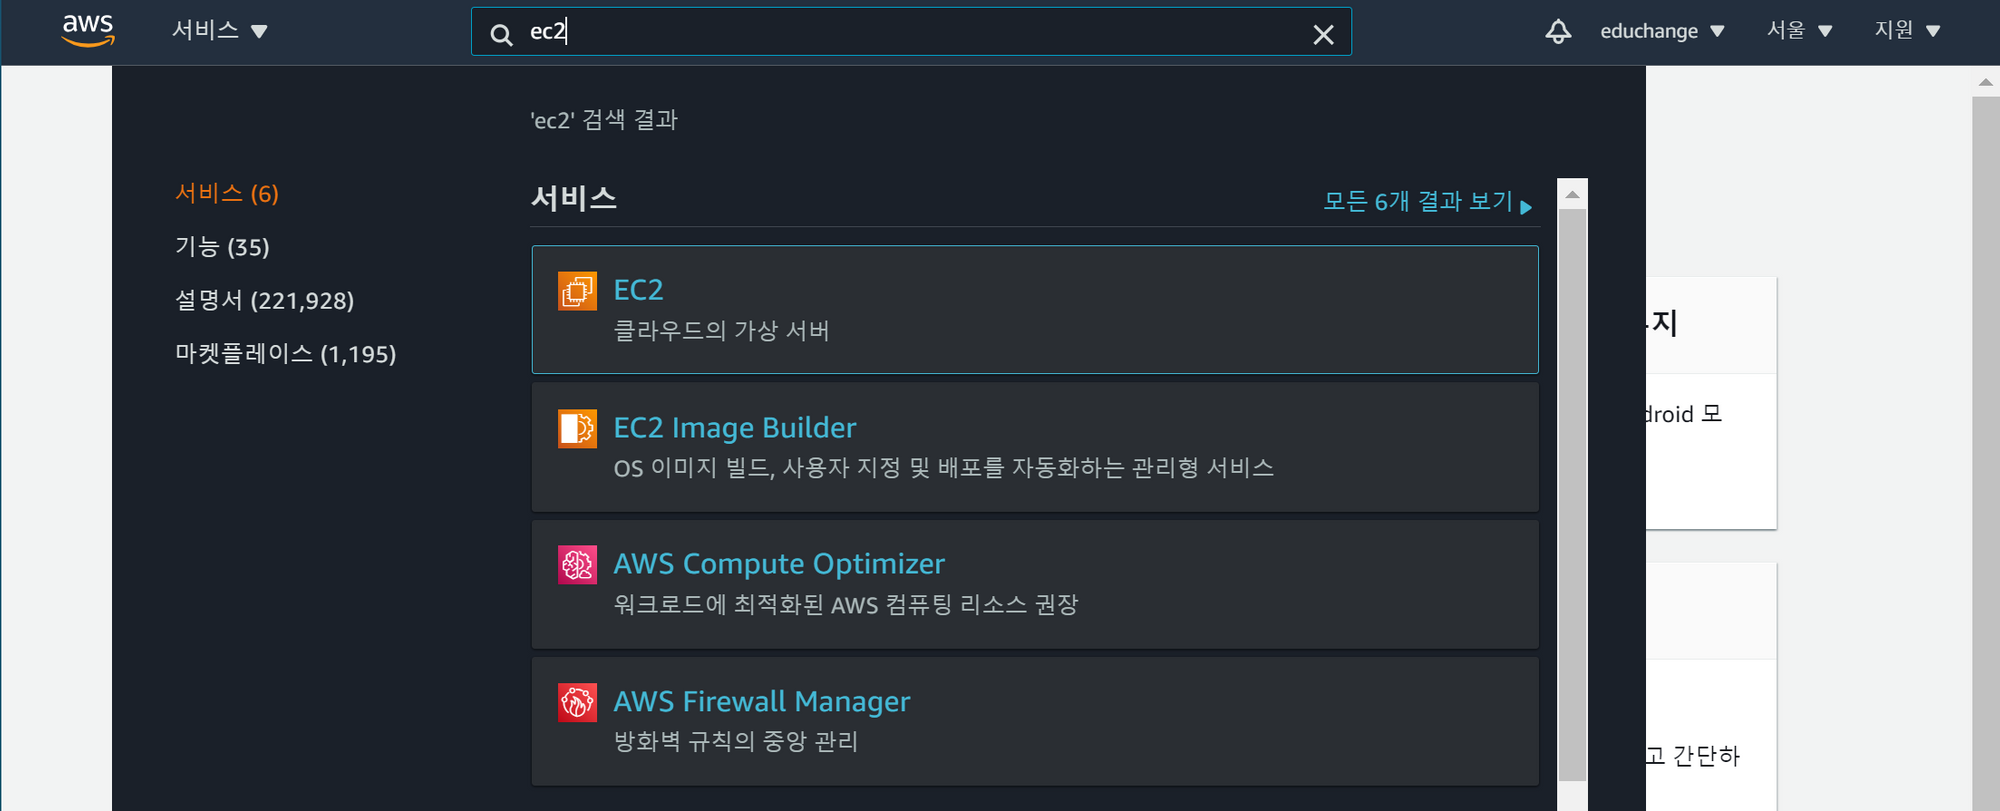
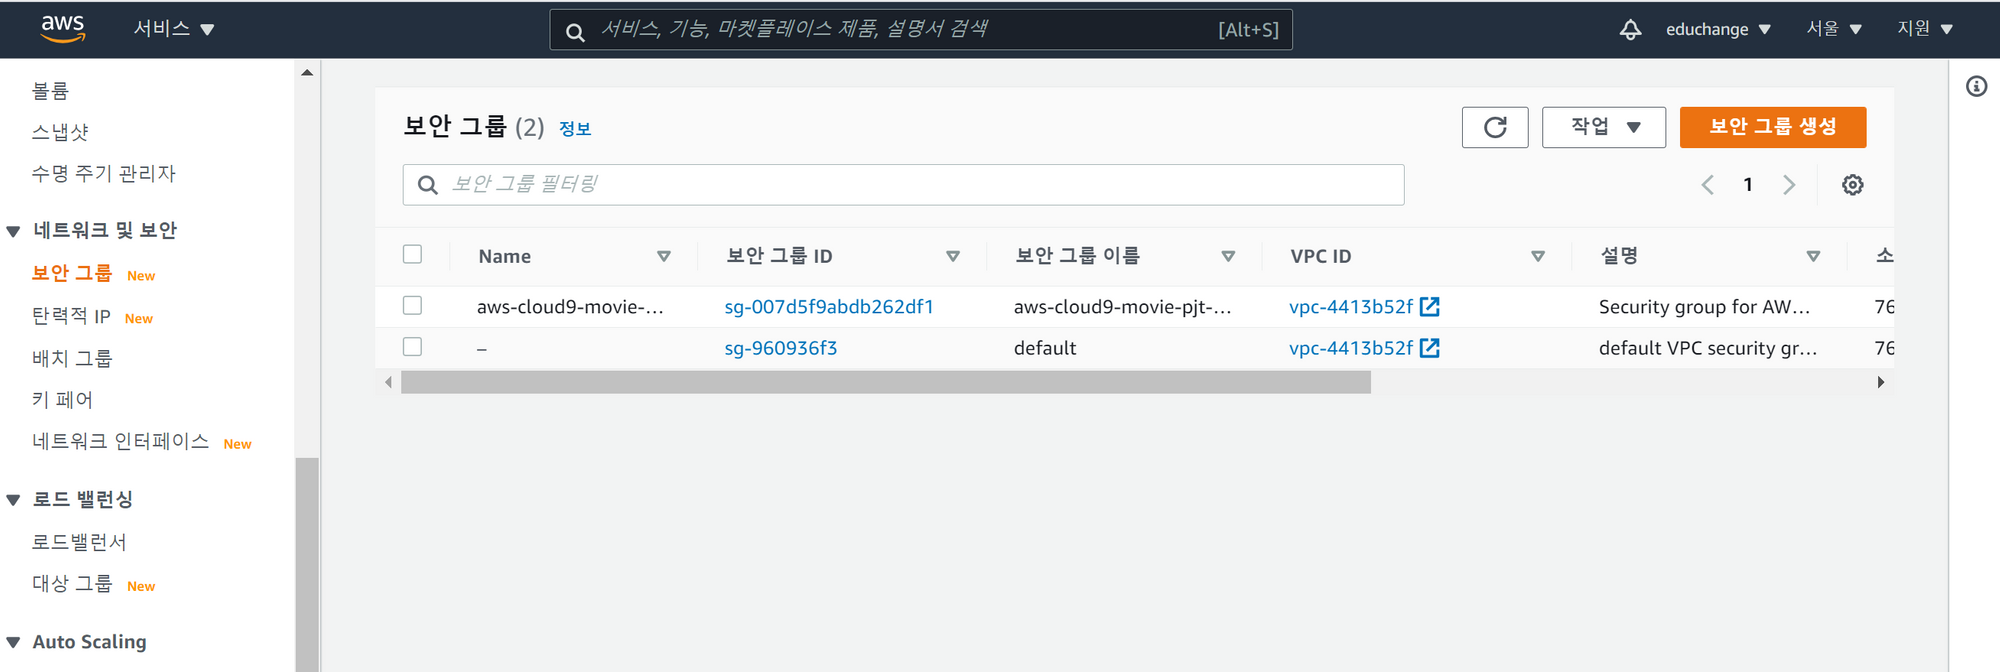
- 보안그룹 탭 이동 후 생성된 보안 그룹 ID 클릭
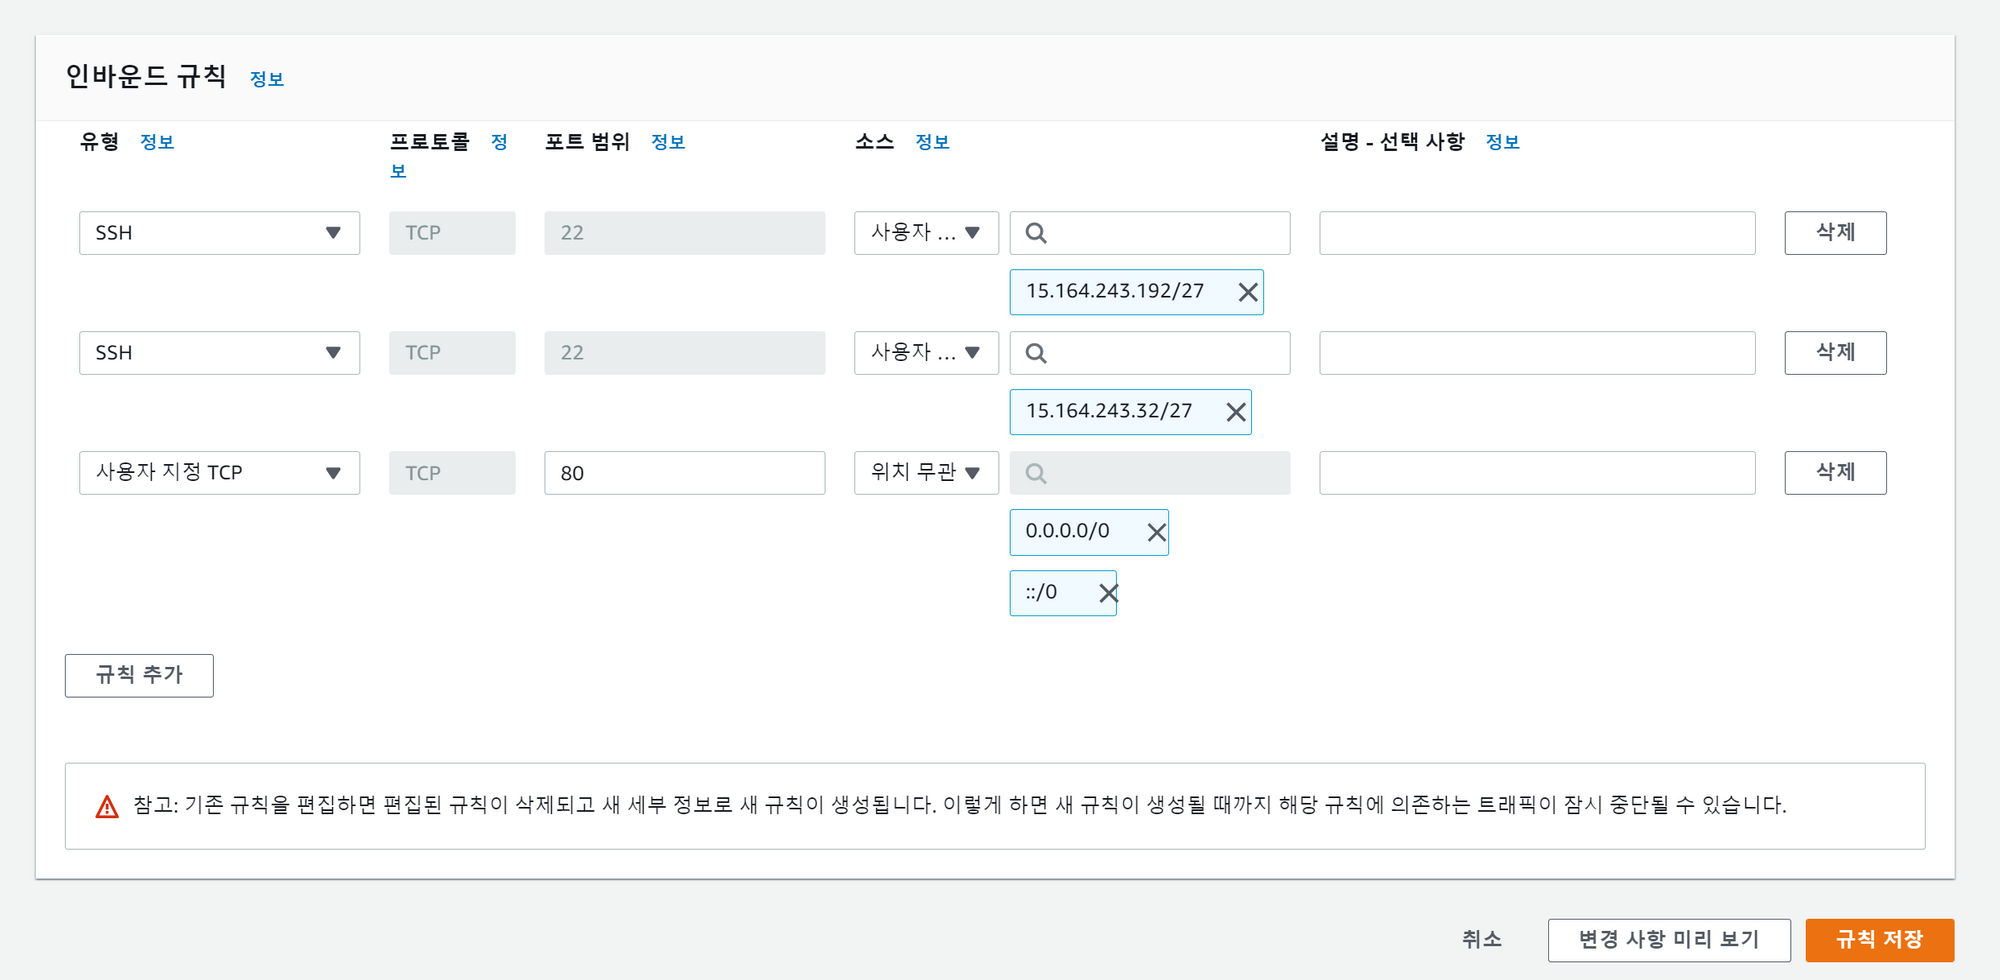
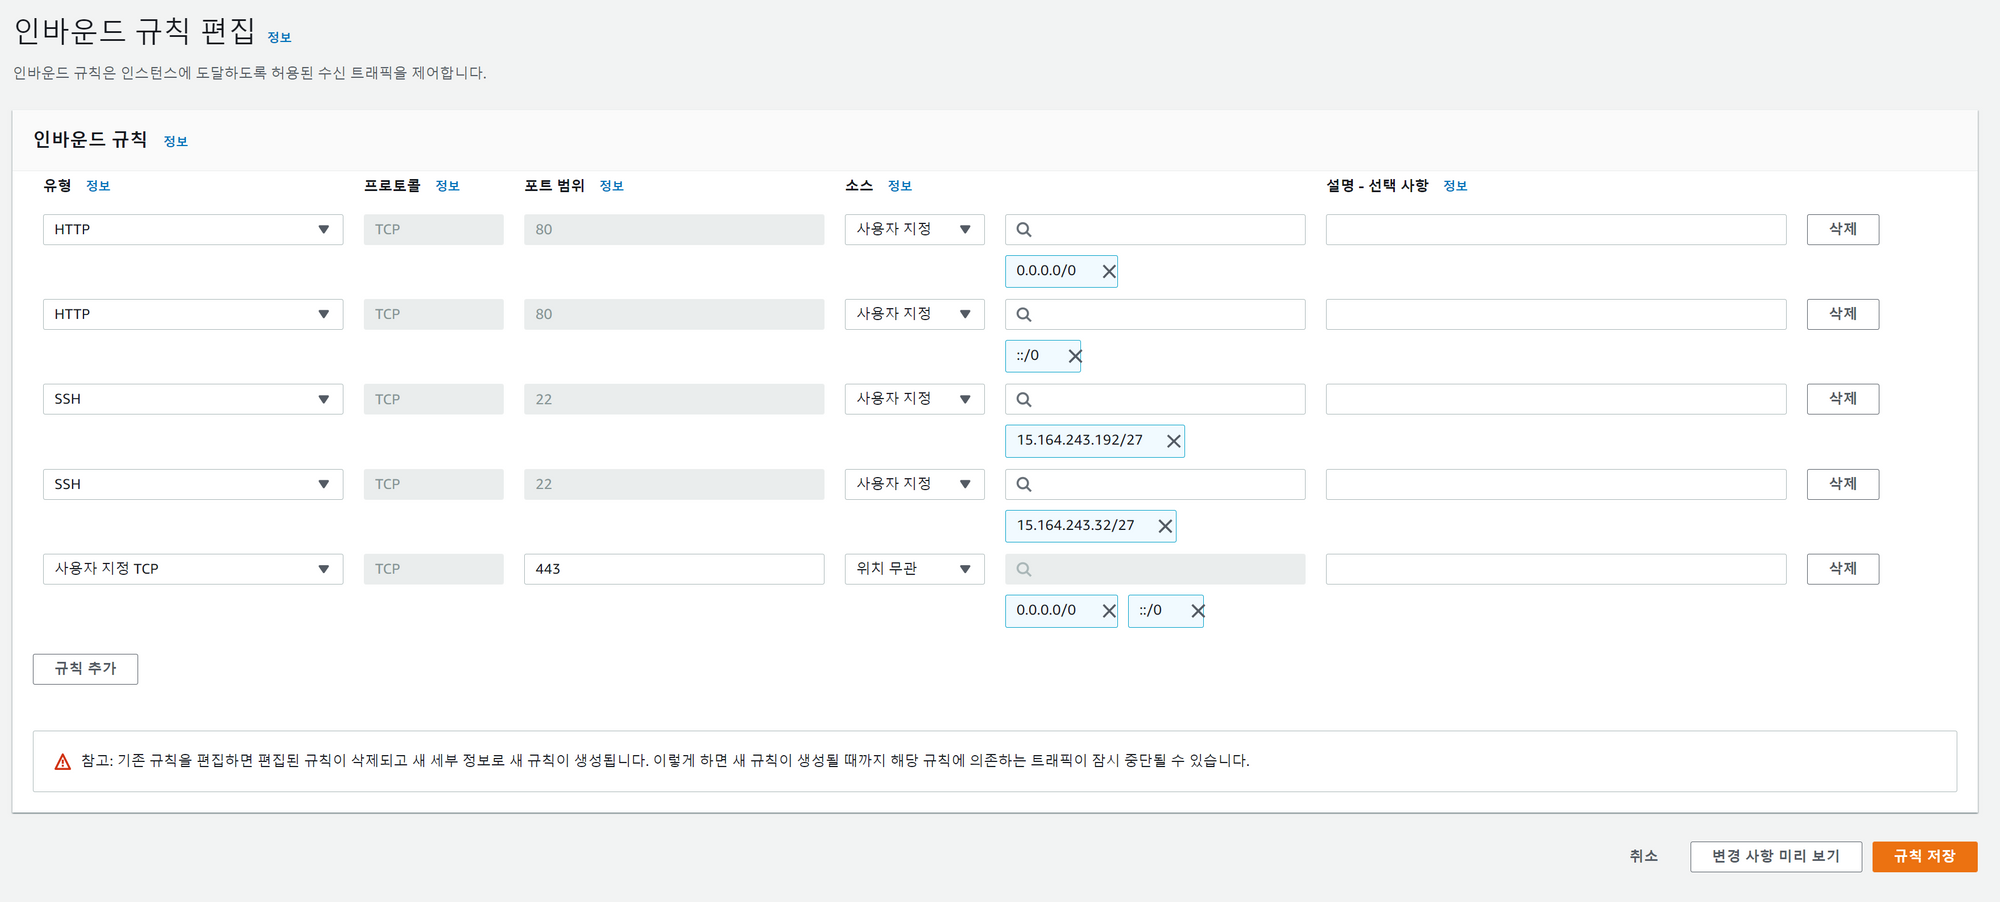
- 하단 화면의 인바운드 규칙 편집
- 수신 트래픽 제어
- EC2 접근 제어

- 규칙 추가 후 저장
- 포트 범위 - 80
- 소스 -
0.0.0.0/0,::/0
서버 설정
이후 내용은 cloud9 터미널에서 진행합니다.
- pyenv 설치
- https://github.com/pyenv/pyenv
- 1줄 : pyenv 설치
- 2~5줄 : bash 설정
git clone https://github.com/pyenv/pyenv.git ~/.pyenv
echo 'export PYENV_ROOT="$HOME/.pyenv"' >> ~/.profile
echo 'export PATH="$PYENV_ROOT/bin:$PATH"' >> ~/.profile
echo 'eval "$(pyenv init --path)"' >> ~/.profile
echo -e 'if command -v pyenv 1>/dev/null 2>&1; then\n eval "$(pyenv init -)"\nfi' >> ~/.bashrc- 터미널 재시작 후 pyenv 설치 확인
pyenv -v
# 출력 확인 => pyenv 1.2.27-31-ga7f3e3a5- python 설치 (프로젝트에서 사용한 버전설치)
- global 설정 후 버전확인
- global 명령어 사용 전에는 python 2버전 대가 찍힘
pyenv install 3.8.7
pyenv global 3.7.4
python -V
#=> Python 3.7.4
project clone
루트폴더와 프로젝트폴더, 두개의 이름에 주의하며 진행
두 폴더의 이름을 통일하면 조금더 편하게 설정할 수 있음
- clone
- home을 기준으로 진행(
cd ~는 홈디렉토리로 이동)
- home을 기준으로 진행(
cd ~
git clone {project_remote_url}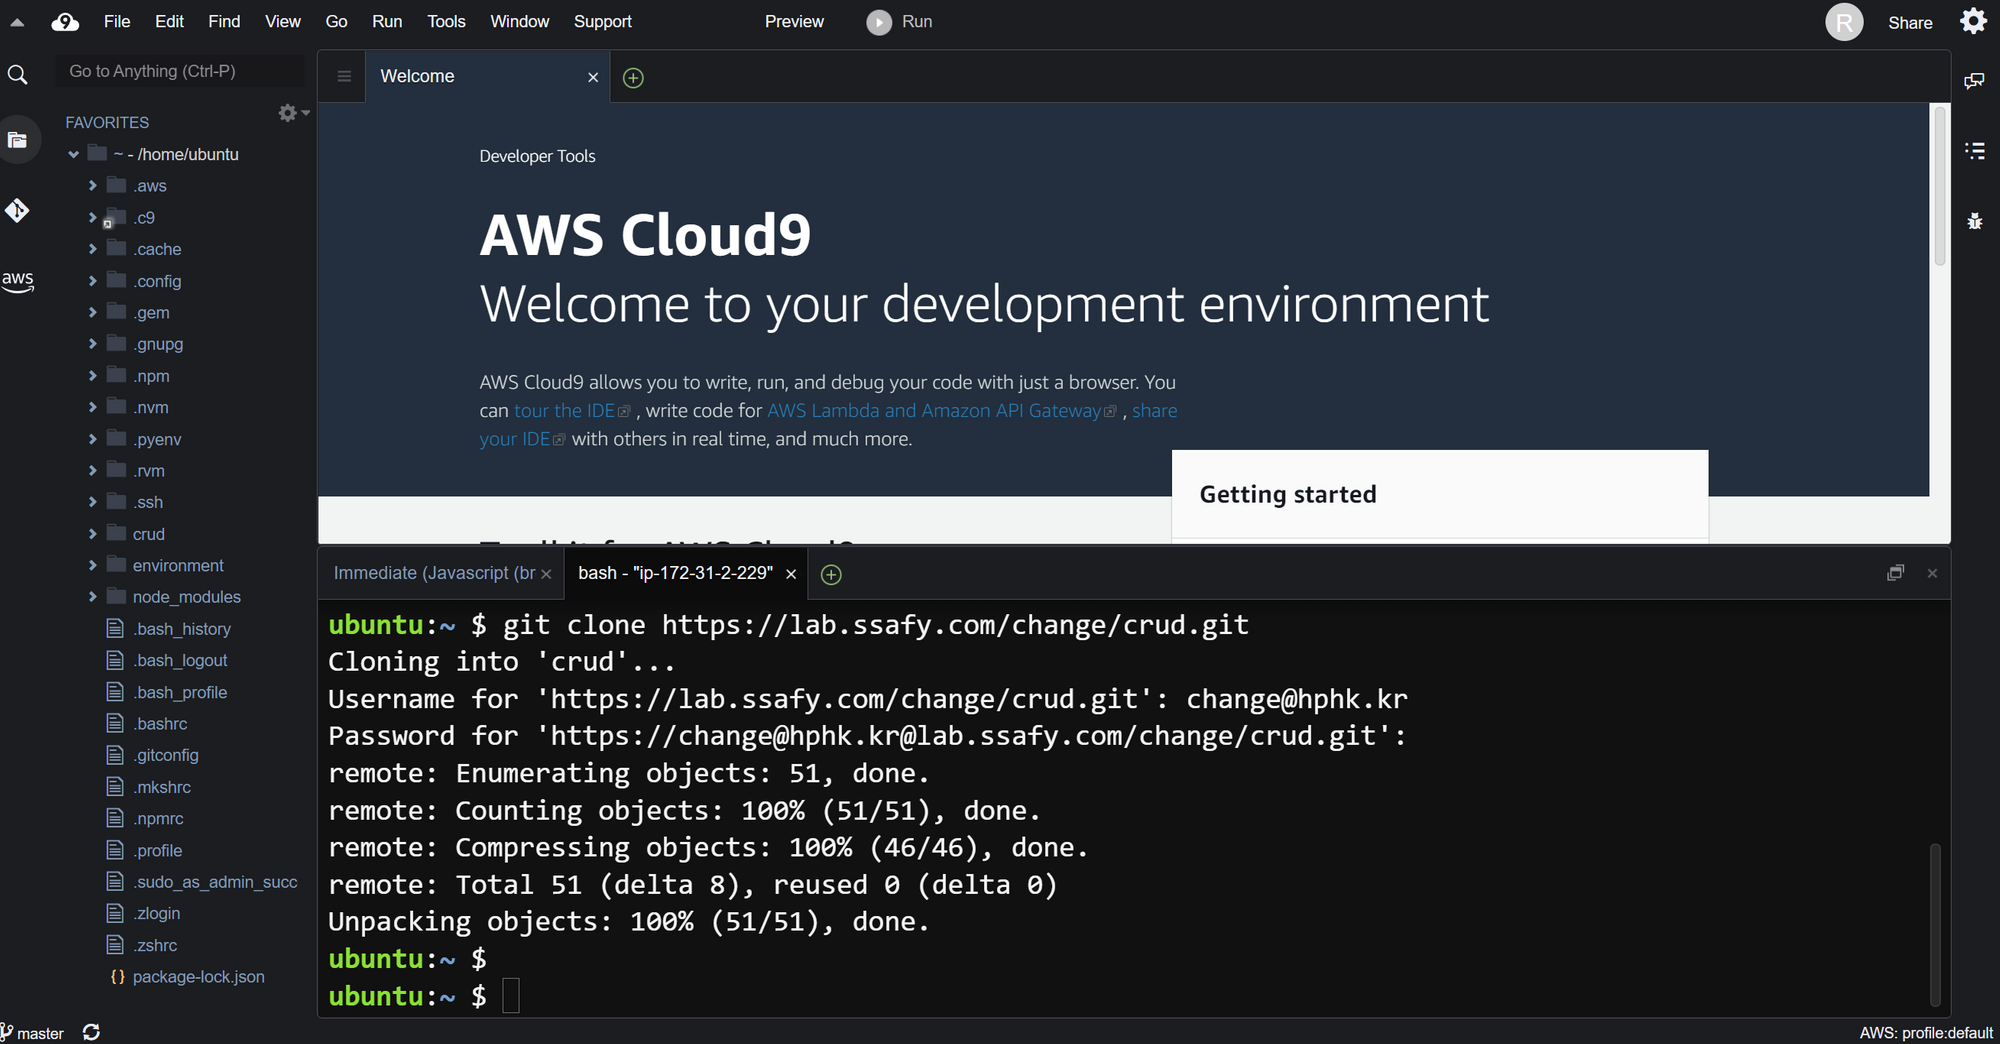
- 폴더구조
- 프로젝트 이름은 변수처럼 사용예정 이름을 기억해주세요!
- 루트 폴더 - 프로젝트 이름
- 프로젝트 폴더 - 프로젝트 내 setting 들어있는 app
home/
	ubuntu/
		{루트폴더}
			{프로젝트폴더}
			{앱}
			manage.py
			requirements.txt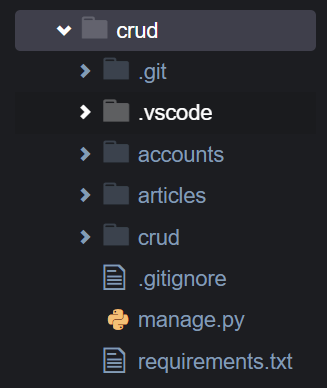
편의를 위해 루트폴더와 프로젝트 폴더의 이름을 통일하였습니다.
- 루트폴더로 이동
cd ~/{루트폴더}- 가상환경생성 (가상환경이름 기억)
python -m venv venv- 가상환경설정 (window와 명령어가 다름)
source venv/bin/activate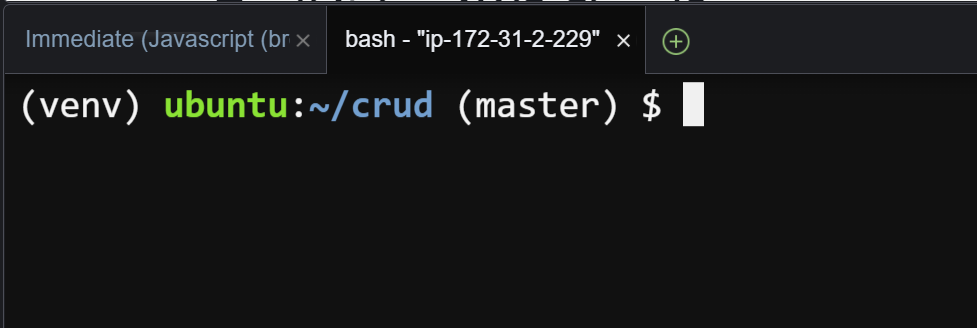
- 라이브러리 설치
pip install -r requirements.txt- 마이그레이션
python manage.py migrate- createsuperuser
python manage.py createsuperuser- loaddata (fixture가 있는경우)
python manage.py loaddata {data.json}-
collectstatic
-
static 파일은 기본적으로 django가 직접적으로 관리 x
django 앞에 있는 서버가 그 역할을 하게 됨
그것은 Nginx가 할 수 있도록 static파일을 모으는 작업을 하는 것
-
[setting.py](http://setting.py)수정# settings.py import os STATIC_ROOT = os.path.join(BASE_DIR, 'staticfiles') -
collectstatic
-
staticfiles란 폴더에 137개의 static파일이 카피됨
python manage.py collectstatic
-
-
nginx
vim을 사용하여 터미널에서 파일을 수정
- 설치
- apt-get 은 pip같은 역할임
- 리눅스 시스템에서 내가 필요한 패키지를 다운로드 받을 떄 사용
- apt-get 은 pip같은 역할임
sudo apt-get update
sudo apt-get install -y nginx- 복사할 코드 작성
- 아래의 코드에서 각자의 프로젝트이름에 맞게 수정 후 메모장에 입력
- staticfiles의 경우 다른 폴더를 썼다면 이름수정
- 코드의 역할
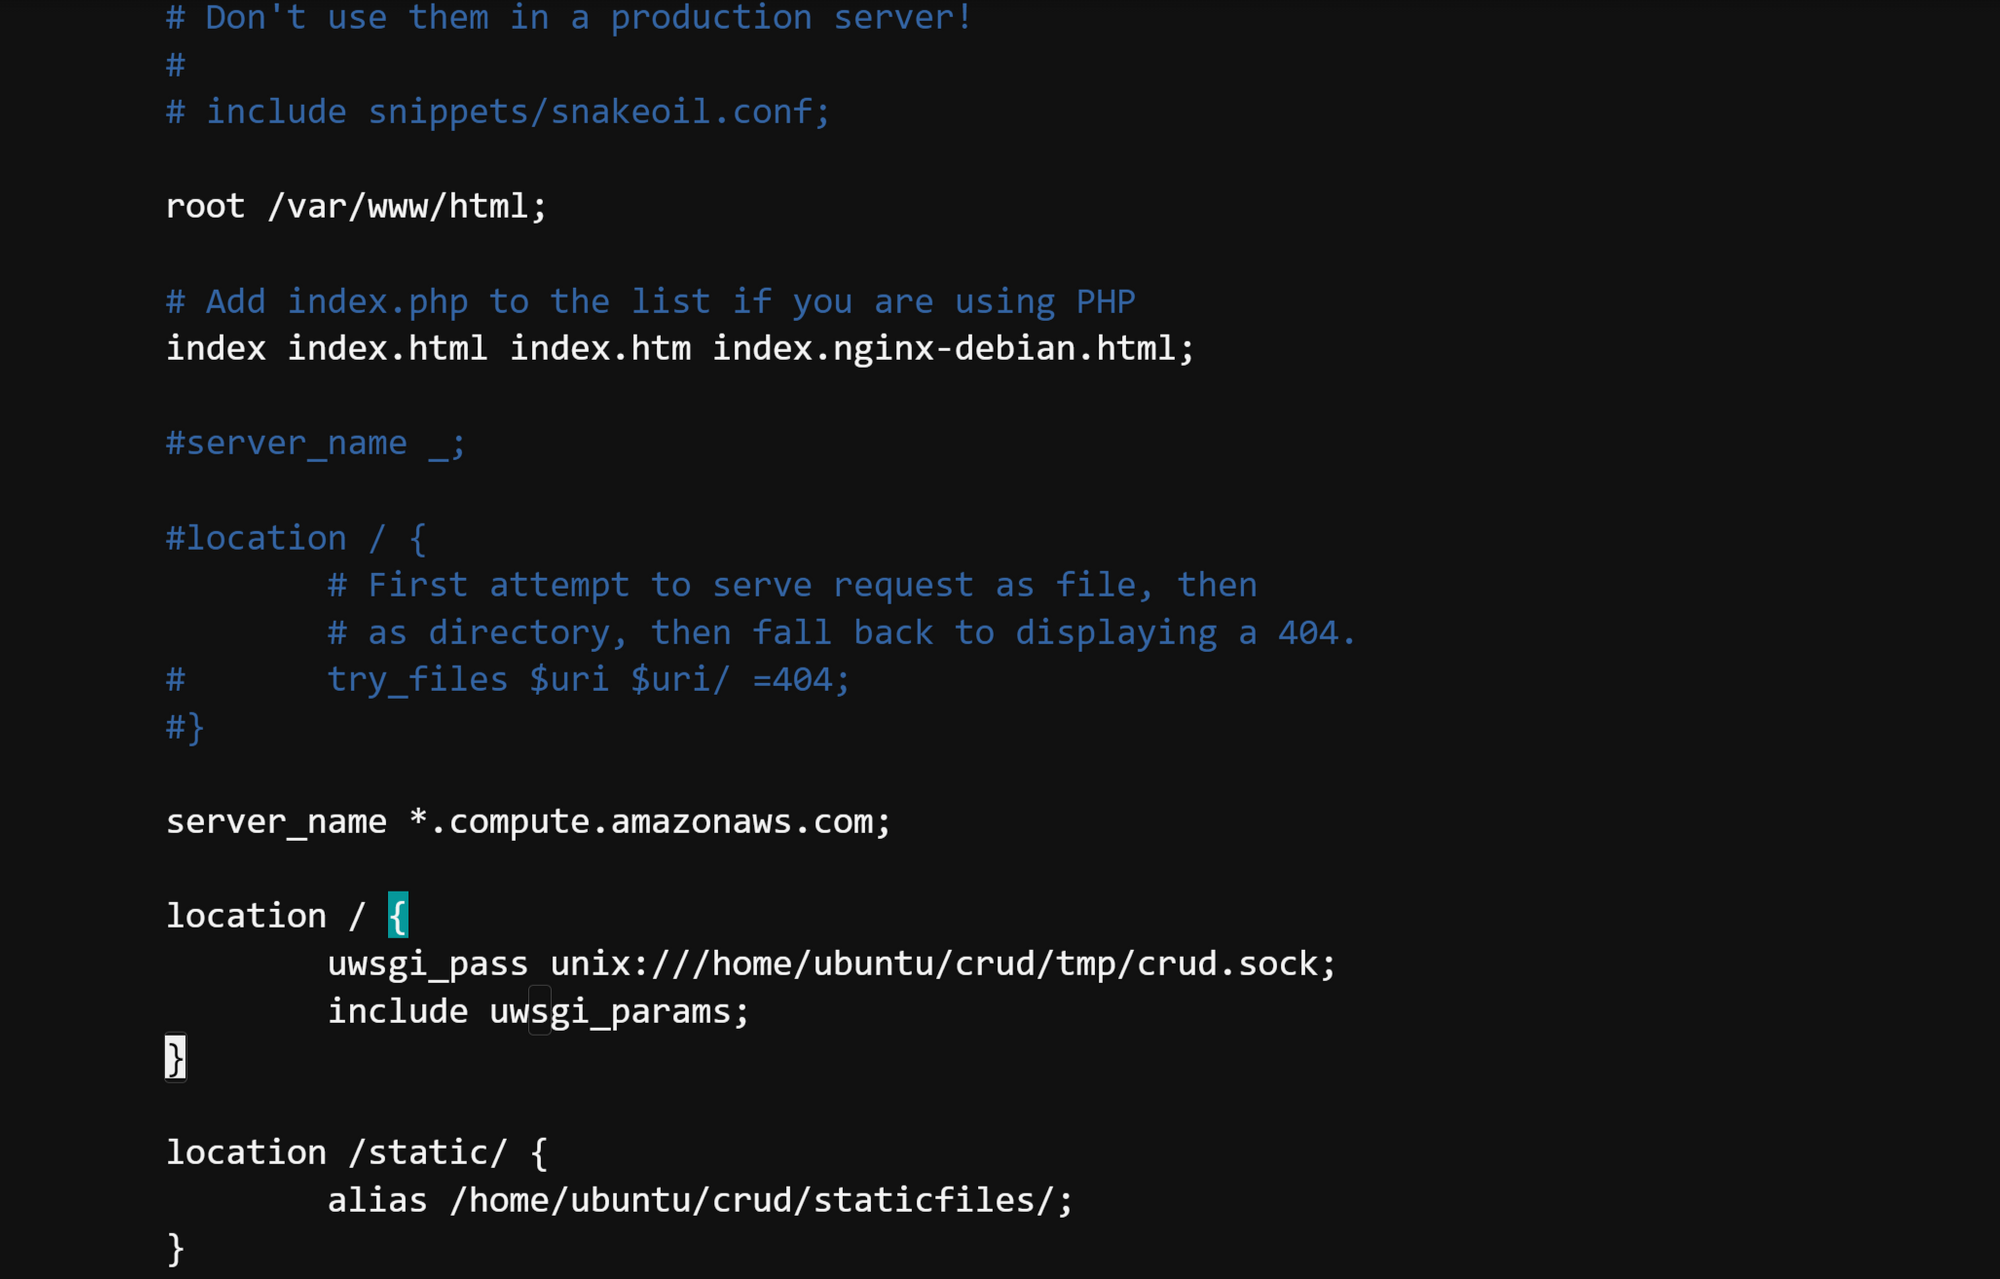
/(루트주소)로 들어오면 django로 가게/static/으로 들어오면 staticfiles 폴더로 가게
server_name *.compute.amazonaws.com;

location / {
	uwsgi_pass unix:///home/ubuntu/{루트폴더}/tmp/{프로젝트폴더}.sock;
	include uwsgi_params;
}

location /static/ {
	alias /home/ubuntu/{루트폴더}/staticfiles/;
}-
파일수정
-
c9 환경에서는 root folder에 접근할 수 있는 권한이 없기 때문에
vim을 이용하여 수정을 하는 것
-
sudo vi /etc/nginx/sites-enabled/default- vim 명령어
i버튼으로 수정모드로 전환- 아래의 부분으로 방향키를 이용하여 이동
- 수정
esc로 수정모드 빠져나오기:wq명령어로 저장 후 종료
- 수정
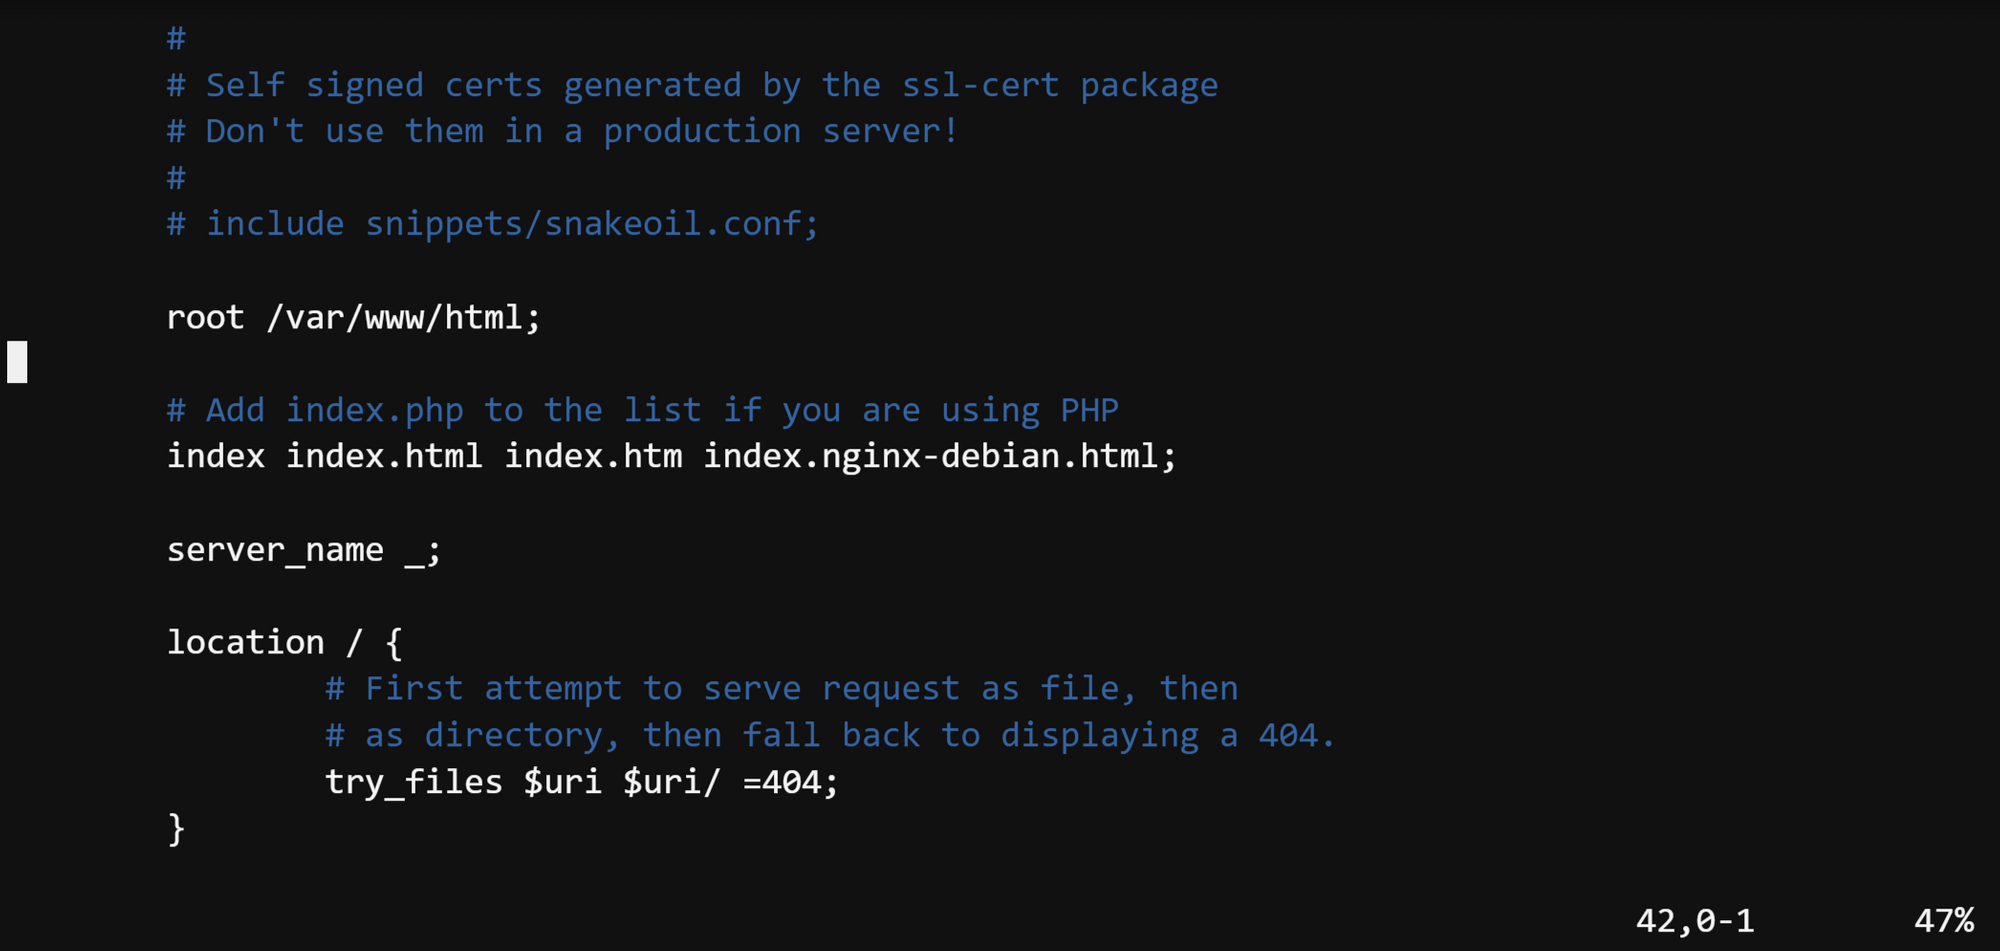
- 수정후
uWSGI
- 설치
pip install uwsgi- 루트 폴더 이동 (기존의 위치와 동일)
cd ~/{루트폴더}- uwsgi 설정, 로그 저장할 폴더 생성 (파일트리에서 생성해도 무방)
mkdir tmp
mkdir -p log/uwsgi
mkdir -p .config/uwsgi/- uwsgi 설정파일 생성 (파일트리에서 생성해도 무방)
touch .config/uwsgi/{프로젝트폴더}.iniuwsgi.ini수정- chdir = django 프로젝트위치
- home = django 프로젝트 실행 환경
# {루트폴더}/.config/uwsgi/{프로젝트폴더}.ini

[uwsgi]
chdir = /home/ubuntu/{루트폴더}
module = {프로젝트폴더}.wsgi:application
home = /home/ubuntu/{루트폴더}/{가상환경이름}

uid = ubuntu
gid = ubuntu

socket = /home/ubuntu/{루트폴더}/tmp/{프로젝트폴더}.sock
chmod-socket = 666
chown-socket = ubuntu:ubuntu

enable-threads = true
master = true
vacuum = true
pidfile = /home/ubuntu/{루트폴더}/tmp/{프로젝트폴더}.pid
logto = /home/ubuntu/{루트폴더}/log/uwsgi/@(exec://date +%%Y-%%m-%%d).log
log-reopen = true
daemon
- 설정파일 생성
touch .config/uwsgi/uwsgi.service.config/uwsgi/uwsgi.service설정파일 수정
[Unit]
Description=uWSGI Service
After=syslog.target

[Service]
User=ubuntu
ExecStart=/home/ubuntu/{루트폴더}/{가상환경이름}/bin/uwsgi -i /home/ubuntu/{루트폴더}/.config/uwsgi/{프로젝트폴더}.ini

Restart=always
KillSignal=SIGQUIT
Type=notify
StandardError=syslog
NotifyAccess=all

[Install]
WantedBy=multi-user.target-
심볼릭링크 생성
- 바로가기 설정 정도로 이해하면 됨
sudo ln -s ~/{루트폴더}/.config/uwsgi/uwsgi.service /etc/systemd/system/uwsgi.service- 등록 (아래의 명령어 모두 실행)
# daemon reload
sudo systemctl daemon-reload

# uswgi daemon enable and restart
sudo systemctl enable uwsgi
sudo systemctl restart uwsgi.service

# check daemon
sudo systemctl | grep nginx
sudo systemctl | grep uwsgi

# nginx restart
sudo systemctl restart nginx
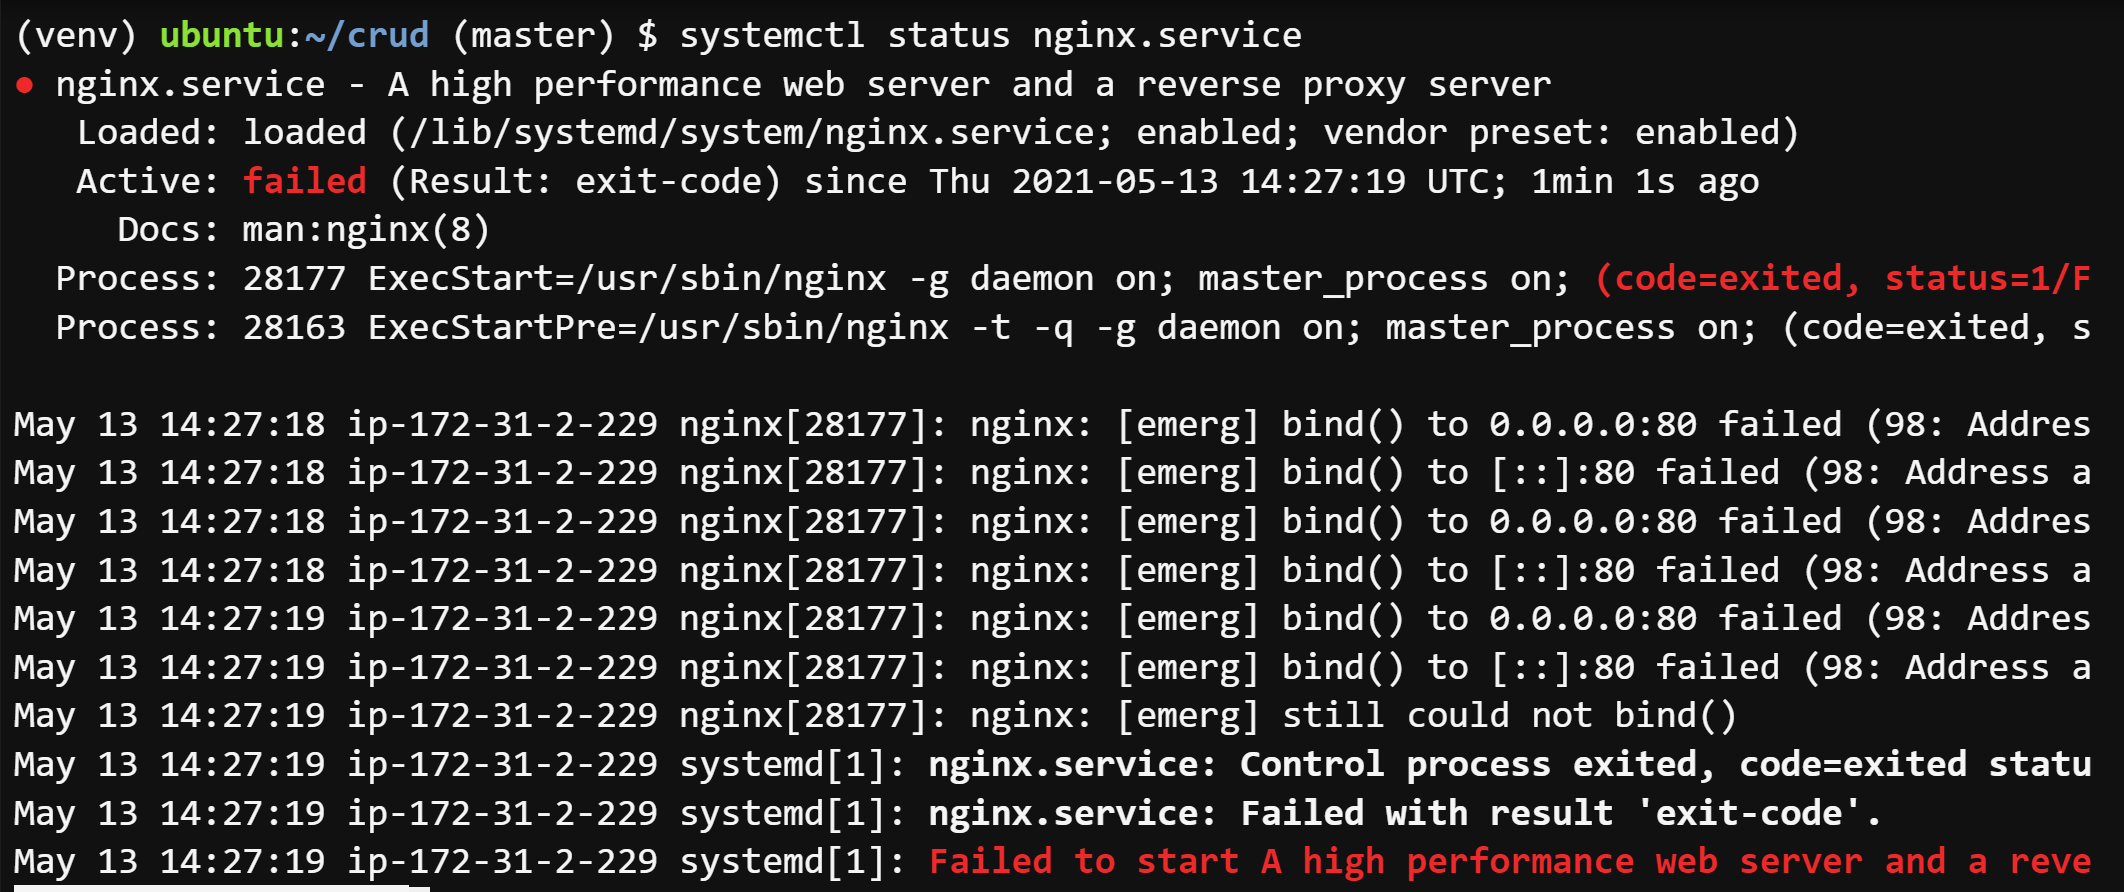
sudo systemctl restart uwsgi- nginx status
systemctl status nginx.service- 80번 포트를 이미 사용중인경우 아래의 명령어 입력 후
nginx재시작sudo lsof -t -i tcp:80 -s tcp:listen | sudo xargs kill- Nginx는 기본설정으로 apach2 페이지를 랜더링하기 떄문에 그것을 없애는 것
배포확인
- EC2 대시보드에서 퍼블릭 IP로 접속
- DisallowedHost
- 이 화면이 뜬다면 django까지 도달한 것

settings.py수정- settings.py 맨 위 쪽에 있음
- 수정 후
nginx재시작- sudo systemctl restart nginx
sudo systemctl restart uwsgi
- sudo systemctl restart nginx
ALLOWED_HOSTS = [
    '3.35.230.223'
]- 이제 제대로 작동하는 것을 볼 수 있음
- 하지만 https 설정이 아직 안되어 있어 주소창에 주의요함 이 뜨게 됨
DNS
도메인 결제 후 진행
- click 같이 끝나는 도메인은 가격이 쌈
- 도메인이 만들어지는데 1~3일정도 소요됨

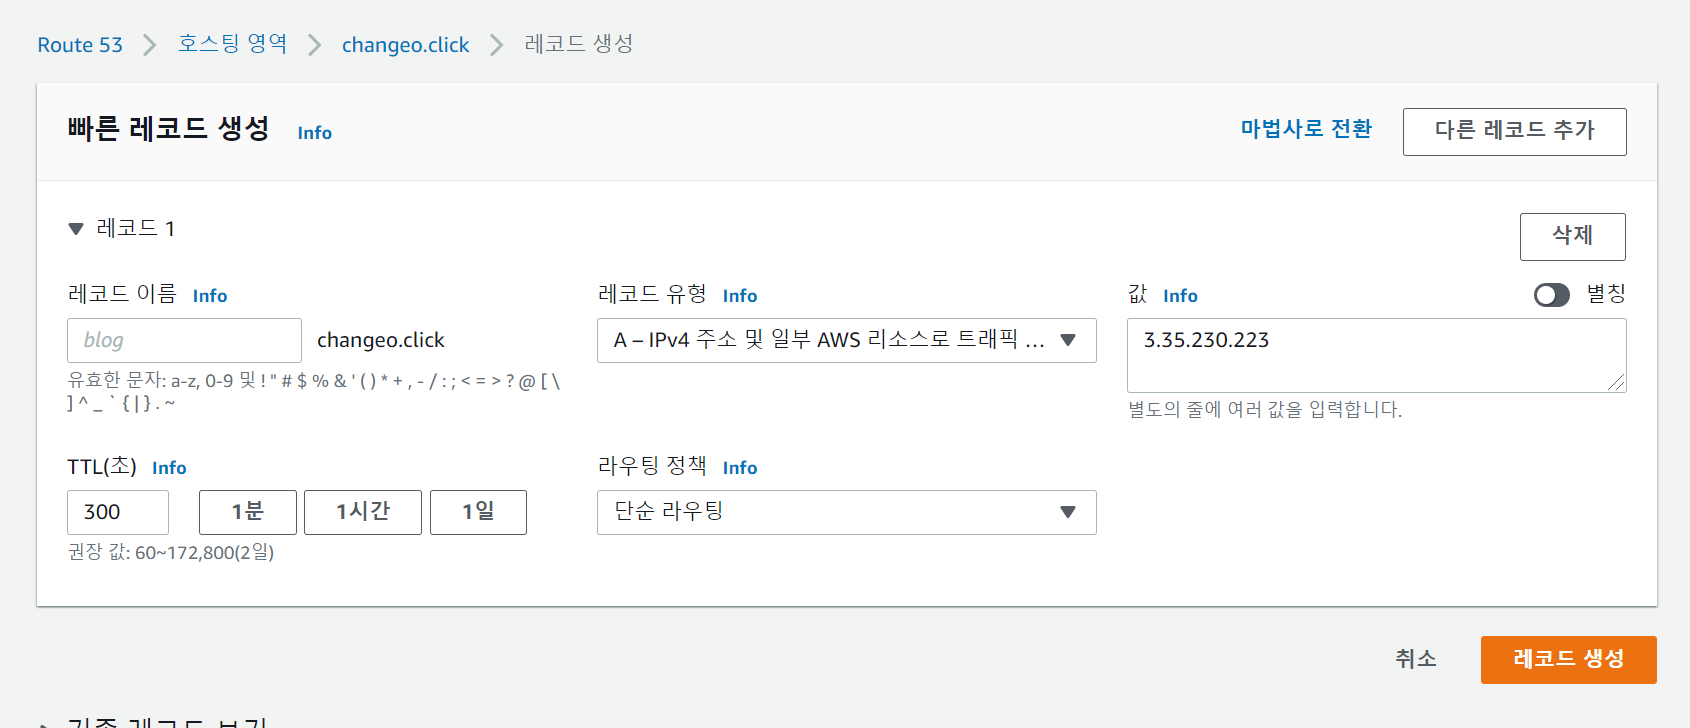
Route53
- 레코드 생성
- 레코드 유형 - A
- 값 - EC2 퍼블릭IP
settings.py수정- 수정 후
nginx재시작
- 수정 후
ALLOWED_HOSTS = [
    '3.35.230.223',
    'tsman9404.click'
]
HTTPS
Let's Encrypt
https://letsencrypt.org/ko/getting-started/
certbot 사용을 권장
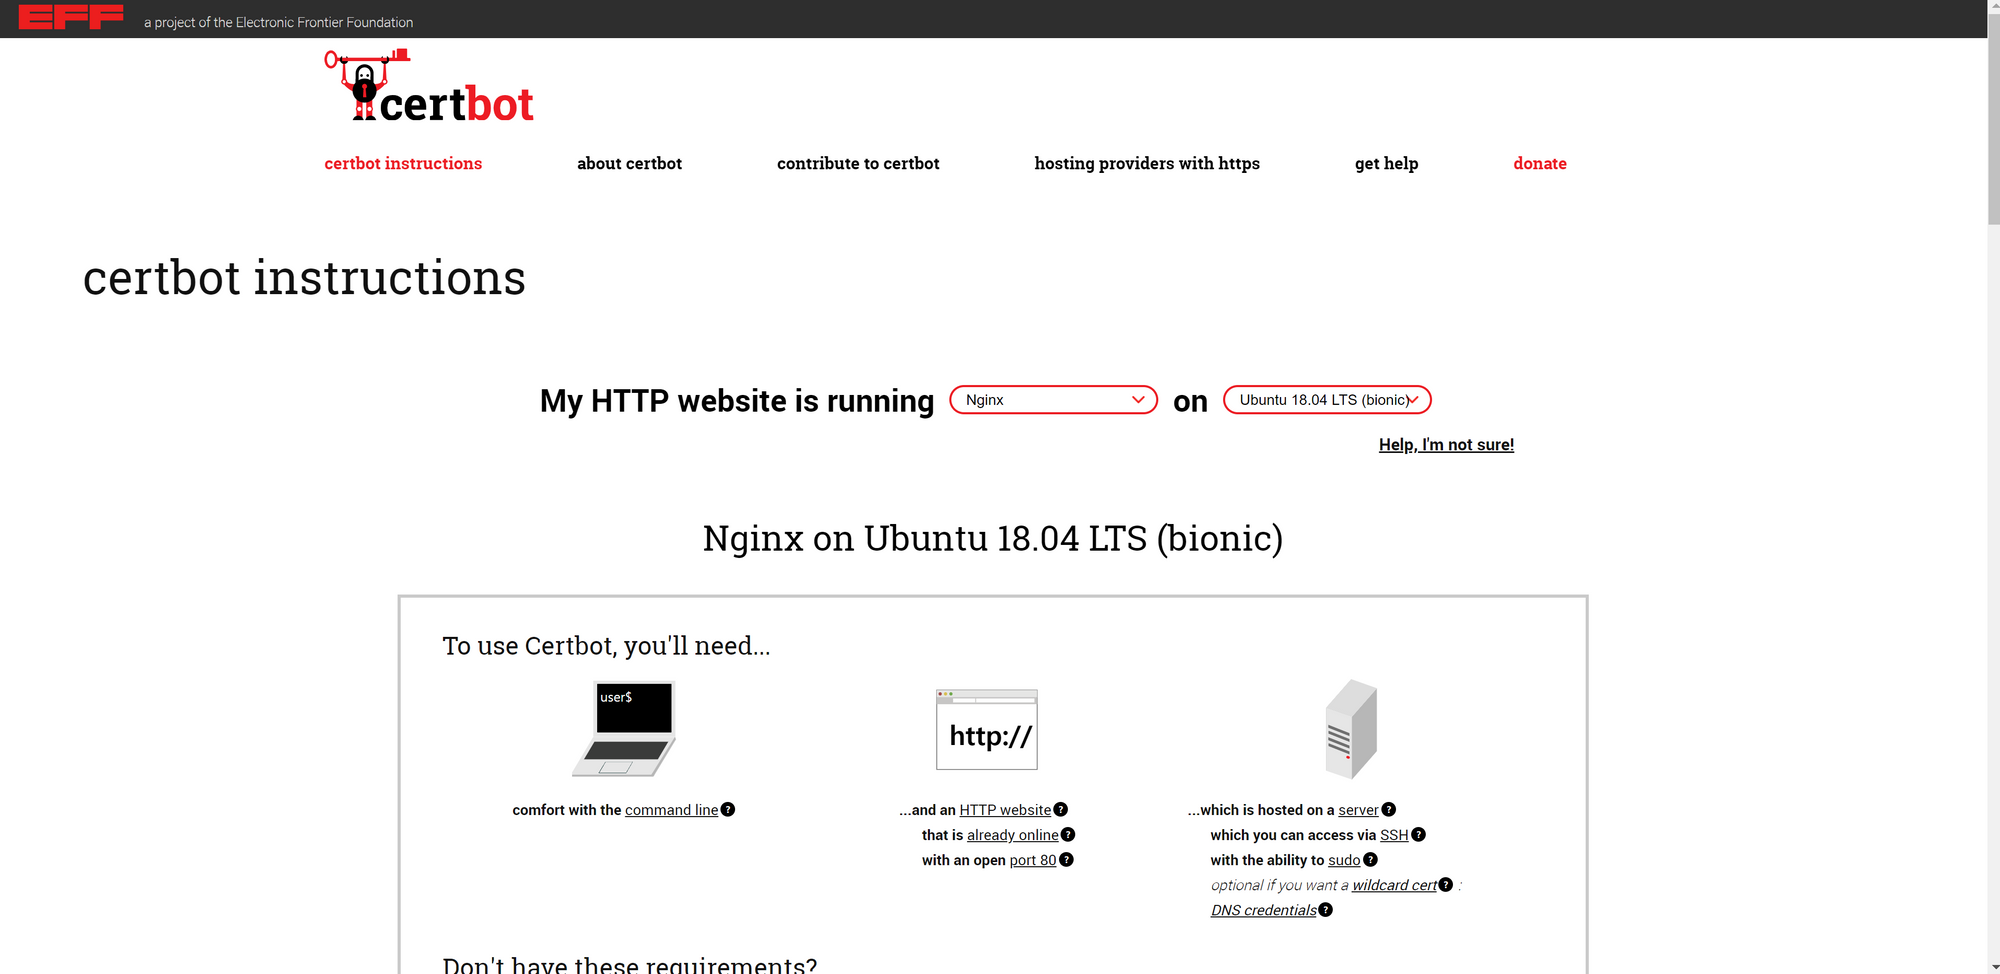
certbot
- Software(nginx), System(Ubuntu) 선택 후 가이드진행
- core 설치 (EC2에 설치되어있음)
sudo snap install core; sudo snap refresh core- certbot 설치
sudo snap install --classic certbot- 명령어 확인
sudo ln -s /snap/bin/certbot /usr/bin/certbot- 자동 설정
sudo certbot --nginx- 이메일 입력

- 동의 (y입력)


- 도메인 입력 (
http://를 제외하고 입력합니다.)

- EC2 보안그룹 탭 이동 후 생성된 보안 그룹 ID 클릭
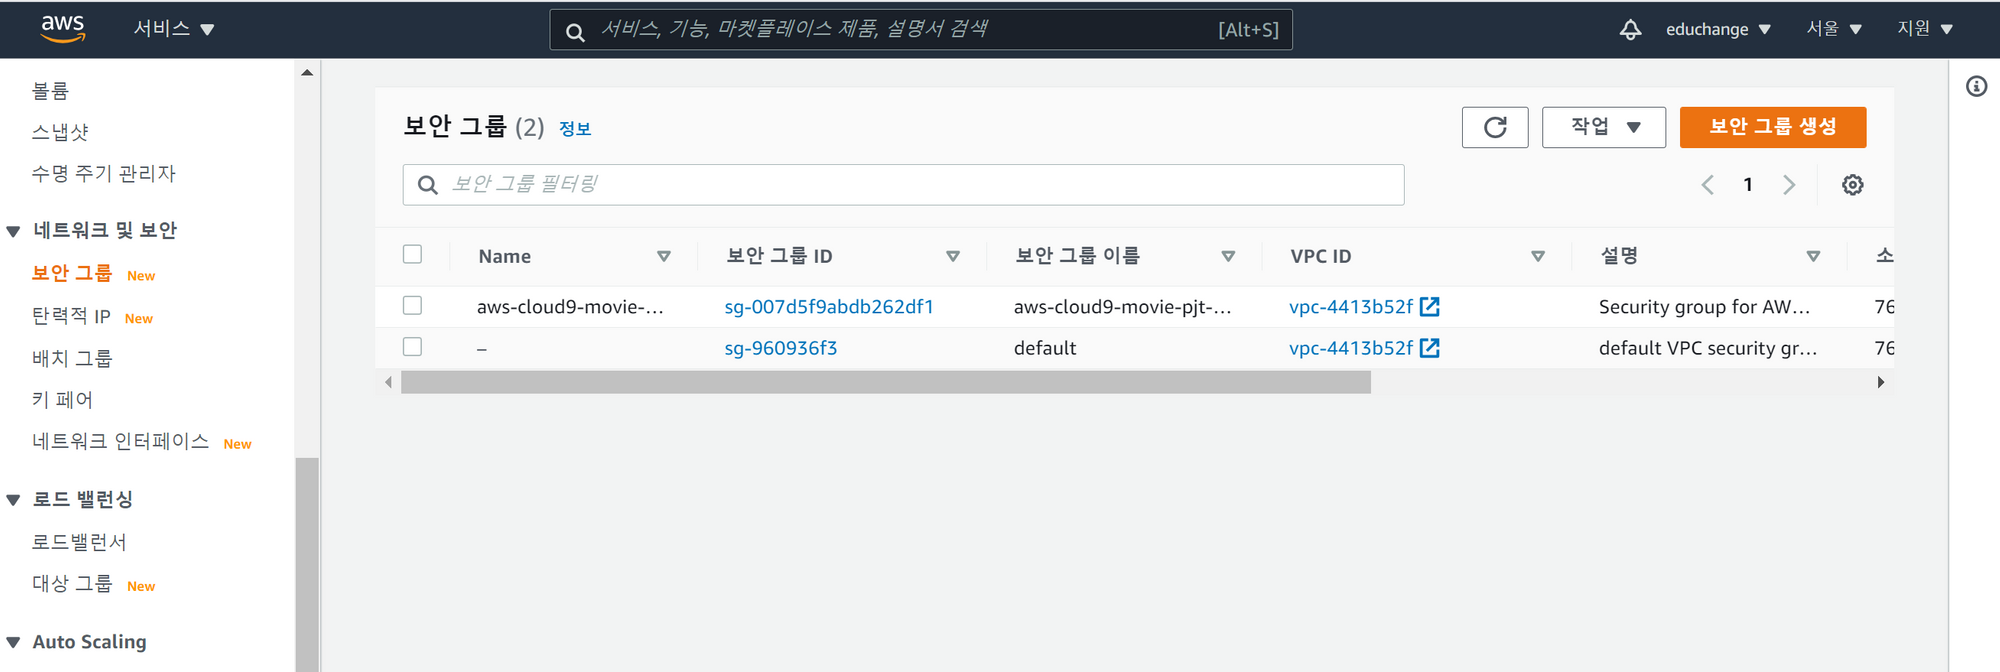
- 하단 화면의 인바운드 규칙 편집

- 규칙 추가 후 저장
- 포트 범위 - 443
- 소스 -
0.0.0.0/0,::/0
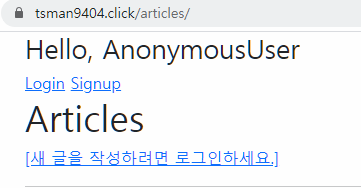
https://주소로 요청 후 확인- 좌물쇠 모양 생긴 것 확인
더 해야할 것
- settings.py 에서
- DEBUG = False
- 등 수정할 작업이나 여러가지 할 것들이 많음
