1. pagination
1.1 django-bootstrap-pagination 를 이용한 방식
-
pip install django-pagination-bootstrap
INSTALLED_APPS = (
    # other apps
    "django_pagination_bootstrap",
)
TEMPLATES = [
{
# ...
"OPTIONS": {
"context_processors": [
# ...
"django.template.context_processors.request"
# ...
],
},
},
]- html
{% load pagination_tags %}{% autopaginate object_list 갯수 %}- 갯수는 한 페이지에 보일 글의 갯수
{% paginate %}- 페이지 목록 표시
1.2 django.paginator만 이용한 방식
- https://docs.djangoproject.com/en/3.1/topics/pagination/
- Paginator 다루는 법 소개
- https://docs.djangoproject.com/en/3.1/ref/paginator/
Paginator( object_list , per_page , orphans = 0 , allow_empty_first_page = True )- orphans : 항목이 거의없는 마지막 페이지를 원하지 않을 때 사용
- allow_empty_first_page : 첫 페이지를 비워 둘 수 있는지 여부입니다.
False및object_list이 비어 있으면EmptyPage오류가 발생 Paginator.get_page( 페이지번호): 페이지에 해당하는 page객체 반환Paginator.count: 총 페이지 수
- Page클래스
Page.has_next(): 다음페이지가 있으면 True 반환Page.next_page_number(): 다음페이지 번호 반환 / 없으면 InvalidPage 에러Page.has_previous(): 이전페이지가 있으면 True 반환Page.previous_page_number(): 이전페이지 번호 반환 / 없으면 InvalidPage 에러Page.has_other_pages(): 다음 또는 이전 페이지가 있으면 True 반환Page.start_index(): 페이지 내에 글 시작번호를 거져옴Page.end_index(): 페이지 내에 글 끝번호를 가져옴Page.object_list: 이 페이지의 개체 목록Page.number: 현재 페이지 번호Page.paginator: 연결된 Paginator 객체
- https://getbootstrap.com/docs/5.0/components/pagination/
1.2.1 글.views.py
from django.core.paginator import Paginator

@require_safe
def index(request):
    page = int(request.GET.get('page', default='1')) # page 매개변수가 없을 경우 1 이 되게, GET방식으로 page 변수를 받음
    all_reviews = Review.objects.order_by('-pk') # 전체 글 목록을 정렬해서 데이터 베이스에서 가져옴
    paginator = Paginator(all_reviews, 5, allow_empty_first_page = True) # Paginator(자료목록, 몇개씩출력할지)
    reviews = paginator.get_page(page) # 현재 페이지에 대한 자료를 가져옴

    all_page_list = paginator.page_range # 전체 페이지 리스트 가져오기
    alpha= beta = 0 # 항상 목록에 5개만 나오게 하기 위한 임시변수

    if page -2 <= 0 :
        alpha = 3 - page
    elif page +2 > len(all_page_list) :
        beta = 2 + page - len(all_page_list)
    page_list = all_page_list[max((page-1)-2-beta, 0)  : min((page-1)+3+alpha, len(all_page_list))] # paginator에서 쓸 페이지 리스트


    context = {
        'reviews': reviews,
        'page_list' : page_list,
    }
    return render(request, 'community/index.html', context)
1.2.2 index.html
{% extends 'base.html' %}

{% block content %}
  <h1>Community</h1>
  <hr>
  <br>
  {% for review in reviews %}
    <a href="{% url 'community:detail' review.pk %}">{{ review.title }}</a>
    <p>영화 : {{ review.movie_title }}</p>
    <p>평점 : {{ review.rank }}</p>
    <p>리뷰 : {{ review.content }}</p>
  {% endfor %}


<!-- 여기서 부터 -->
  <nav aria-label="Page navigation example">
    <ul class="pagination">
      {% if reviews.has_previous %} <!-- Previous 버튼 관련 -->
        <li class="page-item"><a class="page-link" href="{% url 'community:index' %}?page={{ reviews.previous_page_number }}">Previous</a></li>
      {% else %}
        <li class="page-item"><a class="page-link" href="{% url 'community:index' %}?page=1">Previous</a></li>
      {% endif %}

      {% for p in page_list %} <!-- 페이지 목록 출력 관련 -->
        {% if p == reviews.number %} <!-- 현재 페이지 파란색으로 표시 -->
          <li class="page-item active"><a class="page-link" href="{% url 'community:index' %}?page={{ p }}">{{ p }}</a></li>
        {% else %}
          <li class="page-item"><a class="page-link" href="{% url 'community:index' %}?page={{ p }}">{{ p }}</a></li>
        {% endif %}

      {% endfor %}


      {% if reviews.has_next %} <!-- Next 버튼 관련-->
        <li class="page-item"><a class="page-link" href="{% url 'community:index' %}?page={{ reviews.next_page_number }}">Next</a></li>
      {% else %}
        <li class="page-item"><a class="page-link" href="{% url 'community:index' %}?page={{ reviews.number }}">Next</a></li>
      {% endif %}
    </ul>
  </nav>
{% endblock content %}
2. 소셜 로그인
2.1 세팅
- https://django-allauth.readthedocs.io/en/latest/installation.html
pip install django-allauth
2.2 google gcp
- https://console.developers.google.com/ 접속
- OAuth 동의 화면 만들기
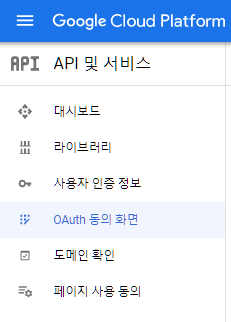
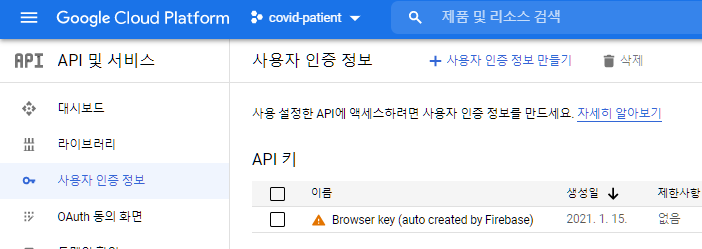
- 사용자 인증정보
+ 사용자 인증정보 만들기> OAuth 2.0 클라이언트 ID- 애플리케이션 유형 - 웹 애플리케이션
- URI :
http://127.0.0.1:8000 - 승인된 리디렉션 URI -
http://127.0.0.1:8000/accounts/google/login/callback/
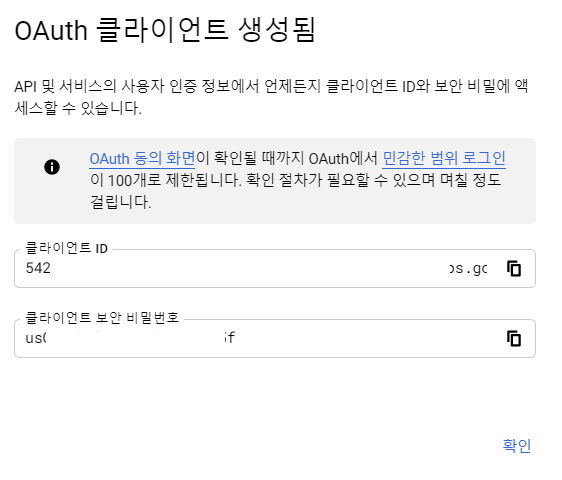
- 만들면 2가지를 받음
- 클라이언트 ID
- 클라이언트 보안 비밀번호
2.3 settings.py
-
INSTALLED_APPSINSTALLED_APPS = [ "django.contrib.sites", 'allauth', 'allauth.account', 'allauth.socialaccount', # providers 'allauth.socialaccount.providers.google', ]
-
AUTHENTICATION_BACKENDS추가AUTHENTICATION_BACKENDS = [ # Needed to login by username in Django admin, regardless of `allauth` 'django.contrib.auth.backends.ModelBackend', # `allauth` specific authentication methods, such as login by e-mail 'allauth.account.auth_backends.AuthenticationBackend', ]
-
SITE_ID추가SITE_ID = 1
-
SOCIALACCOUNT_PROVIDERS추가# Provider specific settings SOCIALACCOUNT_PROVIDERS = { 'google': { 'APP': { 'client_id': '아까받은클라이언트ID', 'secret': '아까받은secretKey', 'key': '' } } }
-
urls.py에서 추가path('accounts/', include('allauth.urls')),
- 여기까지 하고 나서
python manage.py migrate- INSTALLED_APPS 에 추가한 부분에 이미 makemigrations가 다 되어 있기 떄문에 migrate만 하면 됨
2.4 login.html
- next는 로그인 이후 어디로 url을 이동할지에 대한 변수임
{% load socialaccount %}

<a href="{% provider_login_url "google" next='/community/' %}" >Google</a>-
추가적 구글 버튼 이미지로 하고 싶다면?
- https://developers.google.com/identity/branding-guidelines?hl=ko 에서 버튼 다운로드
accounts/static/accounts폴더 만들고 안에 원하는 로그인 이미지파일 넣기
{% load socialaccount %}
{% load static %}

  <div>
    <a href="{% provider_login_url "google" next='/community/' %}" >
      <img src="{% static 'accounts/btn_google_signin_dark_normal_web@2x.png' %}" alt="" height="30px">
    </a>
  </div>
3. gravatar 이용한 프로필 사진
3.1 accounts/urls.py
- path('/profile/', views.profile, name='profile'),
3.2 accounts/views.py
def profile(request, username):
    person = get_object_or_404(get_user_model(), username=username)
    context = {
        'person' : person,
    }
    return render(request, 'accounts/profile.html', context)
3.3 custom filter 추가
-
accounts/tempaltetags/만들고__init__.py만들태그.py만들기
-
gravatar.pyimport hashlib from django import template register = template.Library() @register.filter def gravatar_url(email) : return hashlib.md5(email.encode('utf-8').strip().lower()).hexdigest()
3.4 profile.html + gravatar
{% load gravatar %}<img src="https://www.gravatar.com/avatar/{{ person.email|gravatar_url }}" alt="{{ person.email }}사진"><i class="fas fa-user-plus" style="color:blue;"></i>
{% extends 'base.html' %}
{% load gravatar %}

{% block content %}

  <h1>{{ person.username}} 님의 프로필</h1>
  <div>사진 : <img src="https://www.gravatar.com/avatar/{{ person.email|gravatar_url }}" alt="{{ person.email }}사진"></div>

  {% with followers=person.followers.all followings=person.followings.all  %}
    <div> 팔로잉 : {{ followings|length }} / 팔로워 : {{ followers|length }}</div>

    {% if person != user %}
      <div>
        <form action="{% url 'accounts:follow' person.pk %}" method="POST">
          {% csrf_token %}
          {% if request.user in followers %}
            <button class="btn"> <i class="fas fa-user-plus" style="color:blue;"></i> </button>
          {% else %}
            <button class="btn"> <i class="fas fa-user-plus"></i> </button>
          {% endif %}
        </form>
      </div>
    {% endif %}
  {% endwith %}

{% endblock  %}
4. FontAwesome을 이용한 아이콘 사용
-
회원가입
-
오른쪽 마이페이지 사진
-
Kits 메뉴 클릭
-

-
들어가서 Script src로 되어있는거 복사 해서 쓸 html 에 붙여넣기
-
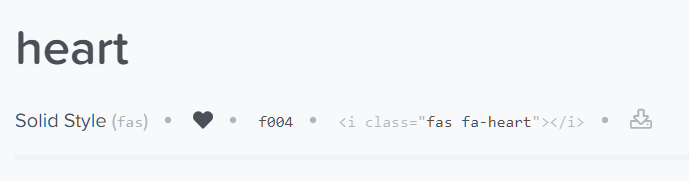
원하는 아이콘 검색
i class부분 복사 사용
5. Django-bootstrap
5.1 설치
pip install django-bootstrap-v5프로젝트.settings.py > INSTALLED_APPS
"bootstrap5" 추가하기
5.2 템플릿에 적용하기
{% load_bootstrap %}을{% extend %}밑에 작성
5.2.1 bootstrap CDN 적용하기
{% bootstrap_css %}
{% bootstrap_javascript %}
5.2.2 form 사용
{% bootstrap_form form %}{% bootstrap_form form layout='inline' %}- 쓸 수 있는 매개변수
- layout
- inline
- horizontal
- form_group_class
- mb-3
- field_class
- div
- label_class
- form-label
- show_help
- Show the field's help text, if the field has help text.
- 기본값 True
- show_label
- 기본값 True
- exclude
- A list of field names that should not be rendered
- size
- small
- medium
- large
- placeholder
- addon_before, addon_after
- addon_before_class, addon_after_class
- required_css_class
- error_css_class
- bound_css_class
- layout
- https://github.com/zelenij/django-bootstrap-v5/blob/f1c9092c1e54f901ff04b38163730b79b4bb5b35/src/bootstrap5/templatetags/bootstrap5.py#L362
- 쓸 수 있는 매개변수
5.2.3 button 사용
{% bootstrap_button "Save" button_type="submit" button_class="btn-primary" %}

함께 성장하고 싶은 백엔드 개발자