
- 이번엔 지금까지 구현해보았던 것을 따로 저장해놓고 초기상태에서 메일서버를 구현해 본 과정이다.
- 메일서버를 구현해보기 위해 naver.com과 daum.net을 활용해보았다.
메일 프로토콜
- SMTP(Simple Message Transfer Protocol)
- 클라이언트가 메일을 보내거나 메일 서버끼리 메일을 주고받을 때 사용하는 프로토콜
- POP3(Post Office Protocol)
- 메일 서버에 도착한 메일을 클라이언트로 가져올 때 사용하는 프로토콜
- IMAP(Internet Mail Access Protocol)
- POP3와 동일한 기능
메일 서버 구현
사전 작업
- 메일서버를 구현하기 위한 준비
[root@localhost ~]# dnf -y install sendmail
[root@localhost ~]# vi /etc/hostname
[root@localhost ~]# vi /etc/hosts
[root@localhost ~]# vi /etc/mail/local-host-names
[root@localhost ~]# vi /etc/sysconfig/network
[root@localhost ~]# reboot- 편집 내용
# etc/hostname
mail.naver.com

# etc/hosts
(상략)
192.169.111.100		mail.naver.com

# etc/mail/local-host-names
(상략)
mail.naver.com

# etc/sysconfig/network
HOSTNAME=mail.naver.com
이 준비과정을 Server(B)에서도 동일하게 한다. 다만 mail.naver.com이 아닌 mail.daum.net으로 한다.
- 네임서버 준비
[root@mail ~]# dnf -y install bind bind-chroot
[root@mail ~]# vi /etc/named.conf
[root@mail ~]# cd /var//named/
[root@mail named]# touch naver.com.db daum.net.db
[root@mail named]# ls
chroot  daum.net.db  named.ca     named.localhost  naver.com.db
data    dynamic      named.empty  named.loopback   slaves
[root@mail named]# vi naver.com.db
[root@mail named]# vi daum.net.db
[root@mail named]# named-checkconf
[root@mail named]# named-checkzone naver.com naver.com.db
zone naver.com/IN: loaded serial 2
OK
[root@mail named]# named-checkzone daum.net daum.net.db
zone daum.net/IN: loaded serial 2
OK- 편집 내용
#
zone "naver.com" IN {
        type master;
        file "naver.com.db";
        allow-update { none;};
};
zone "daum.net" IN {
        type master;
        file "daum.net.db";
        alloa-update { none;};
};

#
$TTL    3H
@       SOA     @       root.   ( 2 1D 1H 1W 1H )
        IN      NS      @
        IN      A       192.168.111.100
        IN      MX      10      mail.naver.com.

mail IN A 192.168.111.100 - named 재시작 및 방화벽 일시중지
[root@mail named]# systemctl restart named
[root@mail named]# systemctl enable named
Created symlink /etc/systemd/system/multi-user.target.wants/named.service → /usr/lib/systemd/system/named.service.
[root@mail named]# systemctl status named
● named.service - Berkeley Internet Name Domain (DNS)
   Loaded: loaded (/usr/lib/systemd/system/named.service; enabled; vendor prese>
   Active: active (running) since Wed 2022-07-27 18:29:40 KST; 16s ago
[root@mail named]# systemctl stop firewalld
[root@mail named]# systemctl disable firewalld
Removed /etc/systemd/system/multi-user.target.wants/firewalld.service.
Removed /etc/systemd/system/dbus-org.fedoraproject.FirewallD1.service.- 설정 확인 및 파일 편집
[root@mail named]# nslookup
> server 192.168.111.100
Default server: 192.168.111.100
Address: 192.168.111.100#53
> mail.naver.com
Server:		192.168.111.100
Address:	192.168.111.100#53

Name:	mail.naver.com
Address: 192.168.111.100
> mail.daum.net
Server:		192.168.111.100
Address:	192.168.111.100#53

Name:	mail.daum.net
Address: 192.168.111.200
> exit

[root@mail named]# vi /etc/sysconfig/network-scripts/ifcfg-ens160
[root@mail named]# vi /etc/resolv.conf
[root@mail named]# reboot- 편집 내용
# etc/sysconfig/network-scripts/ifcfg-ens160
DNS1="192.168.111.100"

# etc/resolv.conf
nameserver 192.168.111.100
Client, Server(B), WinClient에서도 각각의 파일을 편집하고 nslookup으로 네임서버 설정을 확인해본다.
- 편집할 파일
Client : etc/resolv.conf
Server(B) : etc/sysconfig/network-scripts/ifcfg-ens160, etc/resolv.conf- WinClient에서 설정하는 방법
PS C:\Windows\system32> netsh interface ip set dns "Ethernet0" static 192.168.111.100
서버 구현
메일 서버를 구현하는 필수 패키지는 sendmail, sendmail-cf, dovecot 이렇게 3가지다.
- 미설치 패키지 설치
[root@mail ~]# dnf -y install sendmail-cf dovecot
[root@mail ~]# rpm -qa | grep sendmail
sendmail-8.15.2-31.el8.x86_64
sendmail-cf-8.15.2-31.el8.noarch
[root@mail ~]# rpm -qa dovecot
dovecot-2.2.36-5.el8_0.1.x86_64- naver.com 메일 서버 설정
[root@mail ~]# vi /etc/mail/sendmail.cf
[root@mail ~]# vi /etc/mail/access
[root@mail ~]# makemap hash /etc/mail/access < /etc/mail/access
[root@mail ~]# vi /etc/dovecot/dovecot.conf
[root@mail ~]# vi /etc/dovecot/conf.d/10-ssl.conf
[root@mail ~]# vi /etc/dovecot/conf.d/10-mail.conf
[root@mail ~]# useradd MailTestNaver
[root@mail ~]# passwd MailTestNaver
[root@mail ~]# systemctl restart sendmail
[root@mail ~]# systemctl enable sendmail
Created symlink /etc/systemd/system/multi-user.target.wants/sendmail.service → /usr/lib/systemd/system/sendmail.service.
Created symlink /etc/systemd/system/multi-user.target.wants/sm-client.service → /usr/lib/systemd/system/sm-client.service.
[root@mail ~]# systemctl restart dovecot
[root@mail ~]# systemctl enable dovecot
Created symlink /etc/systemd/system/multi-user.target.wants/dovecot.service → /usr/lib/systemd/system/dovecot.service.- 편집 내용
# etc/mail/sendmail.cf
85	Cwnaver.com
267 O DaemonPortOptions=Port=smtp, Name=MTA

# etc/mail/access
naver.com                               RELAY
daum.net                                RELAY
192.168.111                             RELAY

# etc/dovecot/dovecot.conf
24 protocols = imap pop3 lmtp
30 listen = *, ::
33 base_dir = /var/run/dovecot/

# etc/dovecot/conf.d/10-ssl.conf
8 ssl = yes

# etc/dovecot/conf.d/10-mail.conf
25 	mail_location = mbox:~/mail:INBOX=/var/mail/%u
121 mail_access_groups = mail
166 lock_method = fcntl- daum.net 메일 서버 구축
앞 단계에서 했던 내용 중 주소만 daum.net으로 주의하며 설정한다. - 메일 서버 구축 완료
모든 설정이 끝나면 에볼루션, 오페라 메일 또는 아웃룩에서 사용하는 메일서버가 구축된 것이다.
웹 메일 설치 및 사용
앞서 언급한 것처럼 아웃룩 등을 활용한 메일보다 웹에서 메일을 송수신하는 경우가 많기 때문에 메일 서버를 구축할 때 필수적으로 웹 메일을 설치한다.
라운드큐브 설치 및 운영
- Server에서의 설치과정 및 설정
[root@mail ~]# dnf -y install httpd mariadb-server php php-mysqlnd php-gd php-mbstring php-pecl-zip php-xml php-json php-intl
[root@mail ~]# systemctl restart httpd
[root@mail ~]# systemctl enable httpd
Created symlink /etc/systemd/system/multi-user.target.wants/httpd.service → /usr/lib/systemd/system/httpd.service.
[root@mail ~]# systemctl restart mariadb
[root@mail ~]# systemctl enable mariadb
Created symlink /etc/systemd/system/mysql.service → /usr/lib/systemd/system/mariadb.service.
Created symlink /etc/systemd/system/mysqld.service → /usr/lib/systemd/system/mariadb.service.
Created symlink /etc/systemd/system/multi-user.target.wants/mariadb.service → /usr/lib/systemd/system/mariadb.service.
[root@mail ~]# wget https://github.com/roundcube/roundcubemail/releases/download/1.3.10/roundcubemail-1.3.10-complete.tar.gz
[root@mail ~]# tar xfz roundcubemail-1.3.10-complete.tar.gz
[root@mail ~]# mv roundcubemail-1.3.10 /var/www/html
[root@mail ~]# ln -s /var/www/html/roundcubemail-1.3.10 /var/www/html/roundcube
[root@mail ~]# chmod 777 /var/www/html/roundcube/temp/
[root@mail ~]# chmod 777 /var/www/html/roundcube/logs/
[root@mail ~]# mysql- 데이터베이스 생성
MariaDB [(none)]> CREATE DATABASE emailDB;
MariaDB [(none)]> GRANT ALL ON emailDB.* TO 'emailAdmin'@'localhost' IDENTIFIED BY '1234';
MariaDB [(none)]> FLUSH PRIVILEGES;
MariaDB [(none)]> EXIT- 브라우저에서 접속
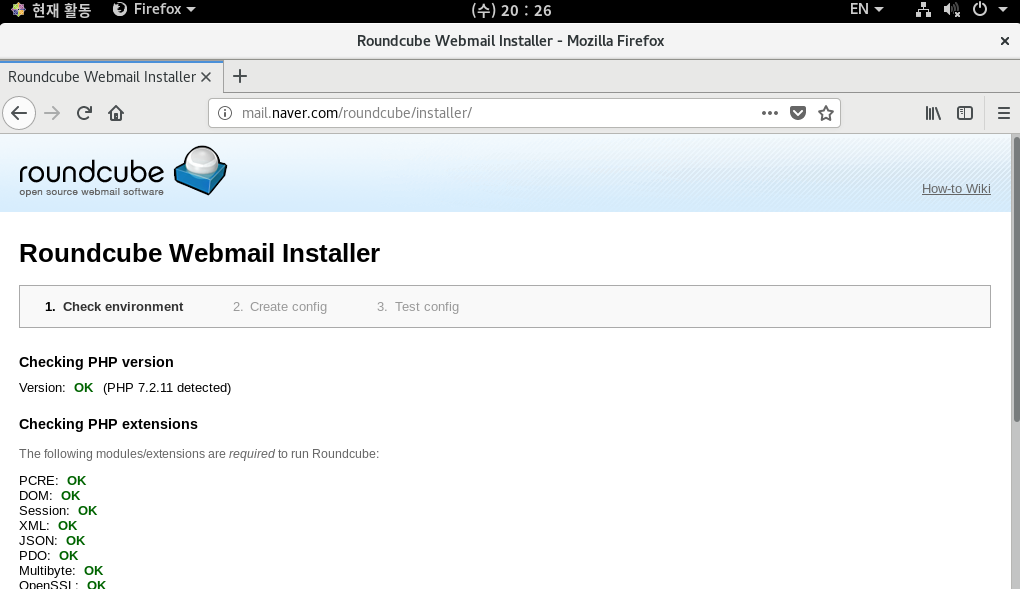
아래로 내려보면 NEXT 버튼을 누르고 데이터베이스 부분에 방금 생성한 데이터베이스의 정보를 입력 후 CREATE CONFIG 버튼을 눌러 파일을 다운로드한다. - 다운로드한 파일 이동
[root@mail ~]# mv /root/다운로드/config.inc.php  /var/www/html/roundcube/config/
[root@mail ~]# chmod 707 /var/www/html/roundcube/config/config.inc.php- 테스트
CONTINUE 버튼 클릭 후 Instalize database 버튼을 클릭하여 메일 서버가 잘 동작하는지 확인할 수 있다. - php.in 파일 설정 변경
2MB보다 큰 파일을 업로드 가능하도록vi /etc/php.ini명령어를 통해 아래와 같이 수정하게 되면 500MB까지 업로드가 가능하다.
383 max_execution_time = 300
672 post_max_size = 500M
825 upload_max_filesize = 500M
재시작이 후 비로소 웹 메일까지 설치한 메일서버가 구축된 것이다.

아침엔 운동하고 밤엔 잠을 잔다.