
maruzzing님의 블로그글을 십분참고하여 구현한 기능이라는 것을 미리 밝혀놓는다.
구현해야하는 기능
- 사용자가 회원가입 및 로그인 후 핸드폰 번호와 프로필 이미지를 추가할 수 있는 마이페이지 관련 기능
- 문자열과 이미지가 함께 들어가야하고 로그인 한 바로 그 회원에 할당된 정보를 수정해야하는 상황.
초기세팅
AWS S3 버킷만들기
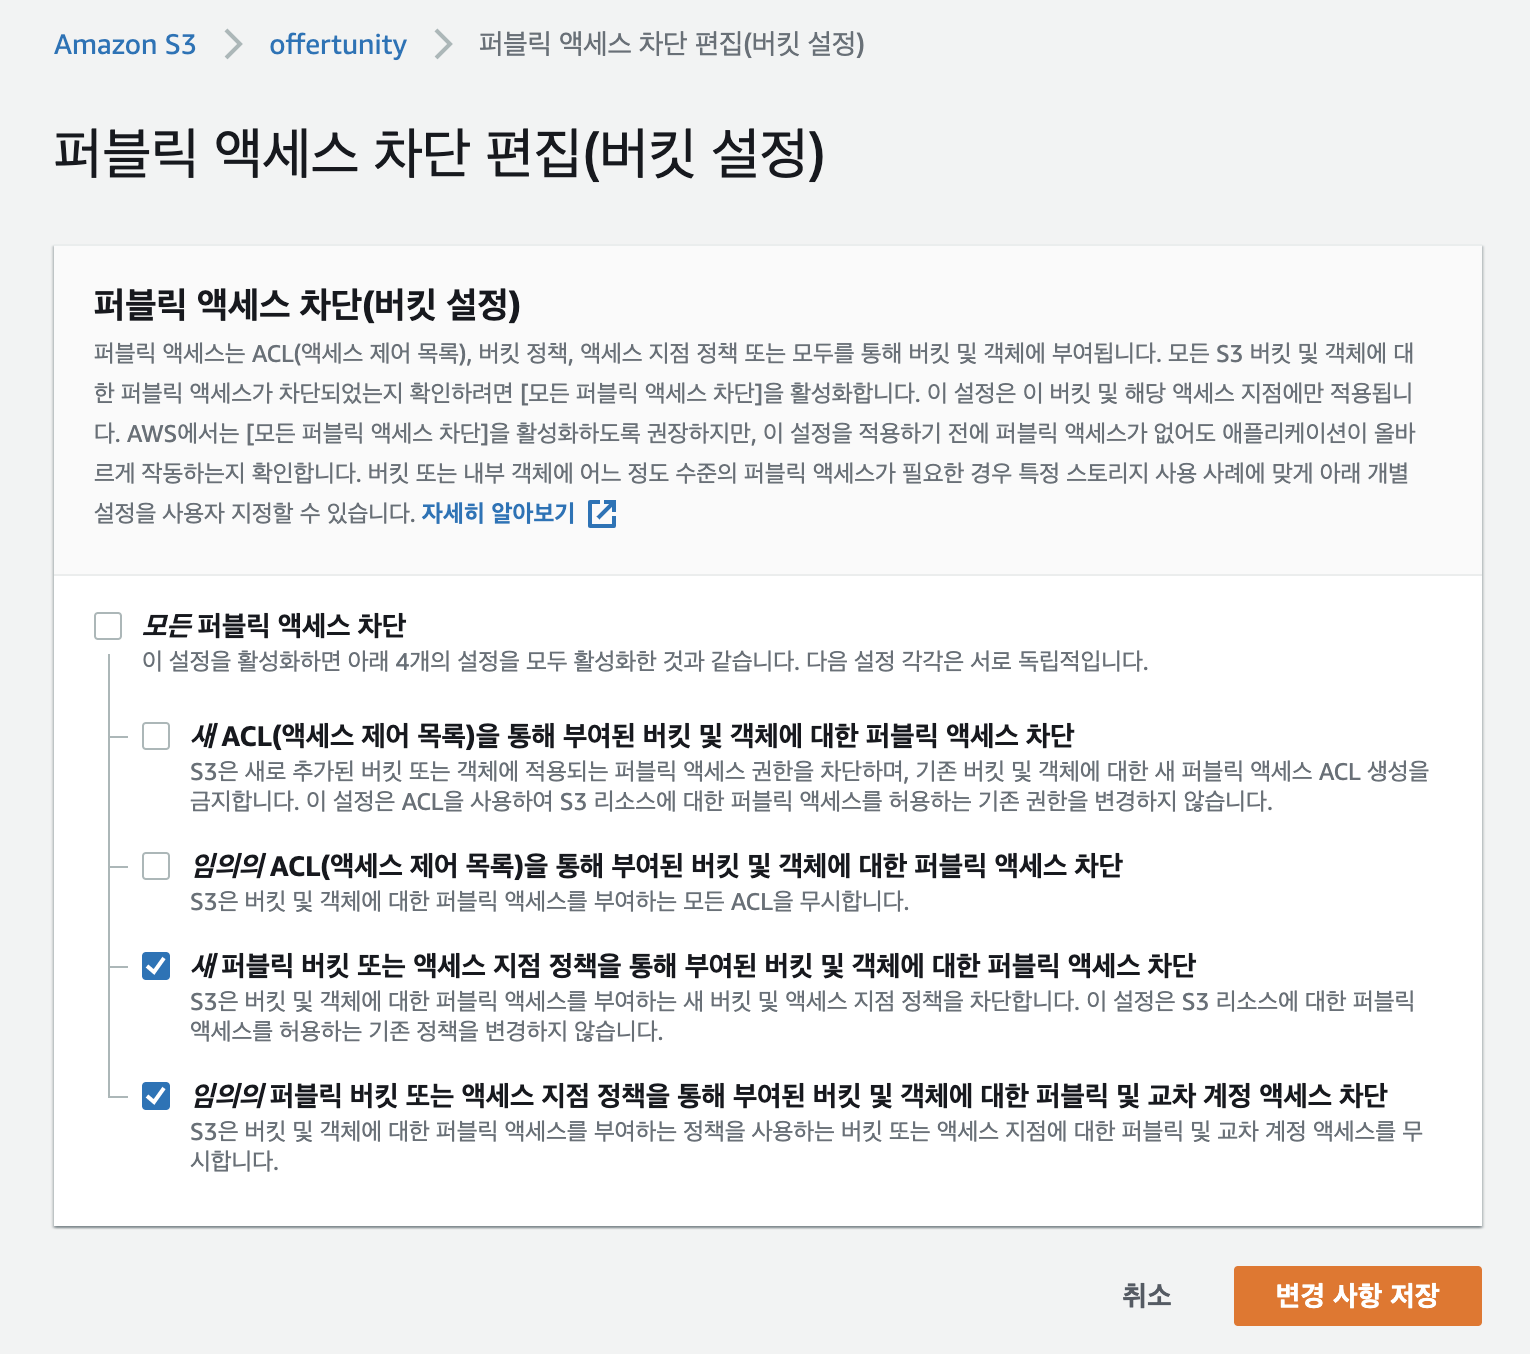
- 퍼블릭 엑세스 설정만 다음과 같이 변경해준 후 원하는 이름으로 버킷을 생성한다.
- CORS 구성은 다음과 같이 편집해준다.
<?xml version="1.0" encoding="UTF-8"?>
<CORSConfiguration xmlns="http://s3.amazonaws.com/doc/2006-03-01/">
  <CORSRule>
    <AllowedOrigin>*</AllowedOrigin>
    <AllowedMethod>POST</AllowedMethod>
    <AllowedMethod>GET</AllowedMethod>
    <AllowedMethod>PUT</AllowedMethod>
    <AllowedMethod>DELETE</AllowedMethod>
    <AllowedMethod>HEAD</AllowedMethod>
    <AllowedHeader>*</AllowedHeader>
  </CORSRule>
</CORSConfiguration>
Cognito 자격증명 받기
- Cognito에서 새 자격 증명 풀을 만드는데 이때 '인증되지 않은 자격 증명에 대한 액세스 활성화'를 체크한 상태에서 생성해준다.
- 여기서 중요! 다음 페이지에 unauthenticated identities와 authenticated identities의 정책들이 나오는데 unauthenticated identities의 정책만 다음과 같이 편집해준다. (BUCKET_NAME은 본인이 아까 설정한 버킷 이름으로 바꾸기)
{
  "Version": "2012-10-17",
  "Statement": [
    {
      "Effect": "Allow",
      "Action": ["s3:*"],
      "Resource": ["arn:aws:s3:::BUCKET_NAME/*"]
    }
  ]
}- 이 편집을 잘못하면 지옥과 같은 AccessDenied의 굴레에 빠지게 될 것이다...
- 여기까지 하면 자격 증명코드가 나오는데 플랫폼 dropdown box에서 javascript를 선택하고 AWS.config.region과 IdentityPoolId에 있는 내용을 복사해서 .env에 저장해놓아라. 나중에 필요함!
기능 구현
필요한 모듈 설치
npm install --save aws-sdk
npm install --save multer-s3
Cognito 자격 증명 연결하기 및 업로드 모듈 만들기
- 자격 증명과 업로드를 다루는 s3.js파일을 utils 파일 아래에 만들어 줄 것이다.
//utils/s3.js
const AWS = require('aws-sdk');

var multer = require("multer");
var multerS3 = require("multer-s3");

const path = require("path")

const dotenv = require('dotenv')
dotenv.config()

const { AWS_config_region, AWS_IDENTITYPOOLID } = process.env

const bucket = 본인 버킷 이름

AWS.config.update({
  region : AWS_config_region,
  credentials : new AWS.CognitoIdentityCredentials({
    IdentityPoolId: AWS_IDENTITYPOOLID
})
})

const s3 = new AWS.S3({
  apiVersion: "2006-03-01",
  params: {Bucket: bucket}
});

const upload = multer({
  storage: multerS3({
    s3: s3,
    bucket: bucket,
    contentType: multerS3.AUTO_CONTENT_TYPE, // 자동으로 콘텐츠 타입 세팅
    acl: "public-read",
    key: (req, file, cb) => {
      let extension = path.extname(file.originalname)
      cb(null, 'profileimage/'+Date.now().toString()+extension);
    }
  }),
  limits: { fileSize: 5 * 1024 * 1024 } // 용량 제한
});

module.exports = upload- key부분은 파일이 업로드될 위치와 이름을 정해주는 부분. s3버킷에 profileimage라는 파일이 자동 생성되고 지금 날짜시간과 확장자를 가진 파일이 그곳에 업로드된다.
라우터 작성
//routes/UserRouter.js
const express = require('express')
const passport = require('passport')
const router = express.Router()
const { body } = require('express-validator')
const upload = require('../utils/s3') //업로드 모듈을 불러온다.
const { UserController } = require('../controllers')
const { validateToken } = require('../middlewares')

router.post(
  "/mypage",
  validateToken,
  upload.single('profile_picture'), //여기서 업로드가 이루어진다.
  UserController.addInfo,
  )

module.exports = router- 위의 코드는 이미지 한장만으로 업로드할 때 쓰는 코드다. 한장보다 많을 때에는 upload.single('profile_picture')부분을 수정해주면 된다.
case1: 하나의 필드명을 가지는 여러개의 파일을 받을 때
router.post(
  "/mypage",
  validateToken,
  upload.array('profile_picture', 5), //이미지 최대 수를 입력
  UserController.addInfo,
  )
case2: 여러개의 필드명을 가지는 여러개의 파일을 받을 때
router.post(
  "/mypage",
  validateToken,
  upload.fields([
    { name: 'profile_picture', maxCount: 1 },
    { name: 'company_pictures', maxCount: 5 },
    )],
  UserController.addInfo,
  )
컨트롤러 작성
//controllers/UserController.js
require("dotenv").config();
const { AUTH_TOKEN_SALT } = process.env
const bcrypt = require('bcryptjs')
const jwt = require('jsonwebtoken')
const { UserService } = require('../services')
const { errorWrapper, errorGenerator } = require('../errors')

const addInfo = errorWrapper(async(req, res) => {
    const { id: userId } = req.foundUser //지금 로그인한 회원의 정보로 접근
    const requestedFields = req.body    //request로 들어온 문자열을 저장
    const profile_picture = req.file.location //request로 들어온 파일의 경로를 저장. 파일의 수가 많다면 files[index_num] 혹은 files[field_name]
    const addInfo = await UserService.updateInfo({ userId, requestedFields, profile_picture })
    res.status(201).json({
        message: 'information successfully added'
    })
})

module.exports = addInfo //export하는 다른 모듈에 추가해준다.
서비스 작성
//services/UserService.js
const updateInfo = (async (fields) => {
    const { userId, requestedFields, profile_picture } = fields
    console.log(profile_picture)

    return prisma.users.update({
        where: {
            id: Number(userId),
        },
        data: {
            phone_number : requestedFields.phone_number,
            profile_picture
        }
        })
    })