이전 게시글에서는 상품 Link UI였고, 이번에는 상세페이지 UI인데 특별히 어려운 부분은 없지만 처음 구현해본 부분이 있어서 오래 기억하기 위해 기록한다.
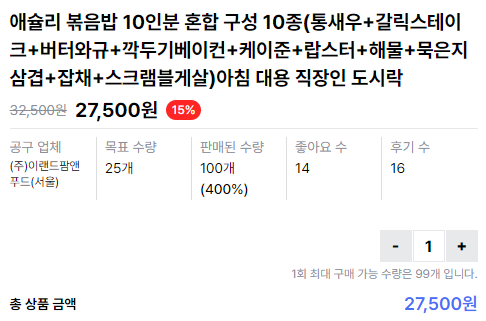
다음과 같이 UI를 구현했는데, 수량을 입력하는 부분을 다음과 같이 -/+ 버튼이 포함된 input으로 구현하게 되었다. 일반적인 input[type=number]의 경우는 input 안에 -/+ 버튼이 있기 때문에 어떻게 구현을 해야 할까? 싶었는데 생각보다 구현이 간단했다.
풀어설명을 하자면, 일단 기본 기능인 number input에 -/+ 버튼을 제거하고 input 양 옆에 button을 둔다. - 버튼이 눌리면 input의 값을 1 줄이고, + 버튼이 눌리면 input의 값을 1 늘려주면 된다.
<div className="w-full flex justify-end gap-[1px] mb-[4px]">
	<button
		className="product-quantity__button"
		value="-"
		onClick={(e) => handleQuantity(e)}
    >-</button>
	<input
		className="border w-[32px] h-[32px] font-bold text-center product-quantity__input"
		type="number"
		value={quantity}
		onChange={(e) => {
			const newValue = parseInt(e.target.value, 10);
			if (newValue >= 99) setQuantity(99);
			else if (newValue >= 1) setQuantity(newValue);
		}}
		min={1}
		max={99}
	/>
	<button
		className="product-quantity__button"
		value="+"
		onClick={(e) => handleQuantity(e)}
	>+</button>
</div>
다음과 같이 마크업을 해주었다. 수량은 1~99까지만 입력 가능하도록 해야 하기 때문에, onChange 이벤트 발생 시에 e.target.value 값이 99보다 크다면 수량을 99로 저장하고, 1 이상이면 해당 값으로 변경해준다. min과 max은 사용자가 직접 입력하거나 값을 복사해서 붙여넣는 경우에는 여전히 그 범위를 벗어난 값이 들어갈 수 있다고 한다. 그래서 따로 onChange 이벤트를 통해 제어해주었다.
const [quantity, setQuantity] = useState(1);

const handleQuantity = (e) => {
    if (e.target.value === '-') {
      if (quantity === 1) return;
      setQuantity(quantity - 1);
    } else {
      if (quantity >= 99) return;
      setQuantity(quantity + 1);
    }
};
버튼을 클릭했을 때도 동작을 해야 하기 때문에 handleQuanttity를 설정해주었다. 버튼의 value에 따라 해당 값을 변경해주도록 해주었다. 물론, 이 때 min/max 값을 벗어난다면 아무동작도 하지 않도록 해주었다.
input에 기본으로 포함된 버튼을 제거하기 위해 CSS에 다음과 같은 값도 추가해주었다.
/* Chrome, Safari, Edge, Opera */
.product-quantity__input::-webkit-outer-spin-button,
.product-quantity__input::-webkit-inner-spin-button {
  -webkit-appearance: none;
  margin: 0; /* 레이아웃에 영향을 미치지 않도록 한다. */
}

/* Firefox  */
.product-quantity__input {
  -moz-appearance: textfield; /* 숫자 입력 필드를 일반 텍스트 필드처럼 보이게 만듦 */
  outline: none;
}