수많은 query key와 수많은 쿼리 파일들..
처음에는 관리가 어려운 쿼리 키를 관리하려고 했다. 쿼리 키는 협업에 있어 되게 중요한 요소인데, 만약 프로필 조회 API를 queryKey: ["profile"] 이렇게 설정해놓고, 프로필 관련 API의 쿼리를 동일하게 queryKey: ["profile"] 이렇게 설정한다면?
쿼리 키가 같기 때문에 받아야할 데이터를 못받거나 데이터가 자꾸 바껴서 고생할 것이다.
그래서 협업을 위해 쿼리키를 한번에 관리할 수 있는 파일을 만들려고 했다.
쿼리 키 관리
@lukemorales/query-key-factory 라는 라이브러리가 있다고 하지만, 나는 라이브러리를 설치하기 보다는 직접 관리해보려고 쿼리 팩토리를 만들어봤다. 사실 만들어봤다기 보다는 블로그에서 긁어왔다.
이렇게 계층적인 구조로 작성해봤다.
export const queryFactory = {
  recipe: {
    all: ["recipe"],
    searches: () => [...queryFactory.recipe.all, "search"],
    searchRecipe: (keyword: string) => [...queryFactory.recipe.all, keyword],
    popularSearch: () => [...queryFactory.recipe.searches(), "popular"],
    recommendSearch: () => [...queryFactory.recipe.searches(), "recommend"],
  },

  recommend: {
    all: (category?: string) => ["recommend", category],
    recommendWishHigh: (category?: string) => [
      ...queryFactory.recommend.all(category),
      "wishHigh",
    ],
    recommendSafeHigh: (category?: string) => [
      ...queryFactory.recommend.all(category),
      "safeHigh",
    ],
    recommendSafeTop: (category?: string) => [
      ...queryFactory.recommend.all(category),
      "safeTop",
    ],
  },

  wishList: {
    all: (familyRoomId: number | null) => ["wishLists", familyRoomId],
    familyWishLists: (familyRoomId: number | null) => [
      ...queryFactory.wishList.all(familyRoomId),
      "family",
    ],
    profileWishLists: (
      familyRoomId: number | null,
      profileId: number | undefined,
    ) => [...queryFactory.wishList.all(familyRoomId), profileId, "profile"],
    transWishes: (
      familyRoomId: number | null,
      profileId: number | undefined,
    ) => [
      ...queryFactory.wishList.profileWishLists(familyRoomId, profileId),
      "trans",
    ],
    originWishes: (
      familyRoomId: number | null,
      profileId: number | undefined,
    ) => [
      ...queryFactory.wishList.profileWishLists(familyRoomId, profileId),
      "origin",
    ],
    wishIds: (familyRoomId: number | null, profileId: number | undefined) => [
      ...queryFactory.wishList.profileWishLists(familyRoomId, profileId),
      "ids",
    ],
  },
};
우리 팀의 서버는 돈을 아끼기 위해 꺼져있는 관계로... 테스트를 해보지 못해 내가 썼던 쿼리들만 반영해봤다.
쿼리키의 사용은 이런식으로 하면 된다.
queryKey: queryFactory.wishList.familyWishLists(familyRoomId)다른 파일들과 똑같이 import해서 사용해주면 된다.
쿼리 폴더구조 정리
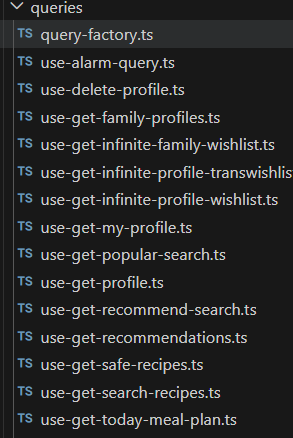
위 사진에서 보았듯이, 너무 많은 쿼리 파일들이 있다. 각각의 파일들은 하나의 API를 받고 있는데, 그렇다보니 기능이 많아질수록 파일이 복잡해진다.
그래서 queryOptions를 사용해서 하나의 파일에 모아서 여러 쿼리들을 한꺼번에 관리했다. 내가 선택한 방법은 카테고리별로 관리하는 것이다.
export const wishQueries = {
  family: (familyRoomId: number | null, size: number) =>
    infiniteQueryOptions({
      queryFn: ({ pageParam }) =>
        getFamilyWishList(familyRoomId, size, pageParam),
      queryKey: queryFactory.wishList.familyWishLists(familyRoomId),
      initialPageParam: null as string | null,
      getNextPageParam: (lastPage) => {
        if (lastPage.headers["x-has-next"] === false) return undefined;
        return lastPage.headers["x-next-cursor"];
      },
      staleTime: 1000 * 60 * 5, // 5분
      gcTime: 1000 * 60 * 10, // 10분
      enabled: !!familyRoomId,
      select: (data) => ({
        pages: data.pages.flatMap((page) => page.data.result),
        pageParams: data.pageParams,
      }),
    }),

  profileOrigin: (
    familyRoomId: number | null,
    profileId: number | undefined,
    size: number,
  ) =>
    infiniteQueryOptions({
      queryFn: ({ pageParam }) =>
        getProfileWishList(familyRoomId, profileId, size, pageParam),
      queryKey: queryFactory.wishList.originWishes(familyRoomId, profileId),
      initialPageParam: 0,
      getNextPageParam: (lastPage) => {
        return lastPage.result.hasNext ? lastPage.result.nextCursor : undefined;
      },
      staleTime: 1000 * 60 * 5, // 5분
      gcTime: 1000 * 60 * 10, // 10분
      enabled: !!familyRoomId && !!profileId,
      select: (data) => ({
        pages: data.pages.flatMap((page) => page.result.items),
        pageParams: data.pageParams,
      }),
    }),

  profileTrans: (
    familyRoomId: number | null,
    profileId: number | undefined,
    size: number,
  ) =>
    infiniteQueryOptions({
      queryFn: ({ pageParam }) =>
        getProfileTransWishList(familyRoomId, profileId, size, pageParam),
      queryKey: queryFactory.wishList.profileWishLists(familyRoomId, profileId),
      initialPageParam: 0,
      getNextPageParam: (lastPage) => {
        return lastPage.result.hasNext ? lastPage.result.nextCursor : undefined;
      },
      staleTime: 1000 * 60 * 5, // 5분
      gcTime: 1000 * 60 * 10, // 10분
      enabled: !!familyRoomId && !!profileId,
      select: (data) => ({
        pages: data.pages.flatMap((page) => page.result.items),
        pageParams: data.pageParams,
      }),
    }),
};
참고로 무한 스크롤의 경우, infiniteQueryOptions를 사용하면 된다.
queryOptions는 useQuery 사용과 동일하게 작성해주면 된다. TanStack Query v5부터 적용된 기술로, 객체 하나로 쿼리를 관리할 수 있도록 도와주는 툴이다.
useInfiniteQuery({
    queryFn: ({ pageParam }) =>
      getProfileTransWishList(familyRoomId, profileId, size, pageParam),
    queryKey: [QUERY_KEY.profileTransWish, familyRoomId, profileId, size],
    initialPageParam: 0,
    getNextPageParam: (lastPage) => {
      return lastPage.result.hasNext ? lastPage.result.nextCursor : undefined;
    },
    staleTime: 1000 * 60 * 5, // 5분
    gcTime: 1000 * 60 * 10, // 10분
    enabled: !!familyRoomId && !!profileId,
    select: (data) => ({
      pages: data.pages.flatMap((page) => page.result.items),
      pageParams: data.pageParams,
    }),
  });
그래서 이전 코드와 똑같이 작성했다.
사용 방법
그럼 이제 어떻게 사용하느냐?
useInfiniteQuery(wishQueries.family(familyRoomId, 6));이런식으로 useQuery 혹은 useInfIniteQuery를 호출해서 사용하면 된다.
이제 한 곳에서 wishlists를 관리하며, 모든 쿼리 키는 한 곳에서 관리하게 되었다.
-> 협업에서 쿼리키가 헷갈리는 일은 줄어들 것이다..
결론
팀원들의 코드도 리팩토링이 되어 한 곳에서 관리된다면 앞으로 동일한 쿼리 키를 선언할 일은 적어질 것이다.
그리고 한가지 또 장점이 있다.
만약 useMutation을 사용한다면 성공시에 관련된 쿼리를 한번에 초기화해줄 수 있다! 귀찮게 하나씩 선언하지 않아도 된다.
// 옛날 코드

onSuccess: () => {
      queryClient.invalidateQueries({ queryKey: [QUERY_KEY.myWishlistIds] });
      queryClient.invalidateQueries({ queryKey: [QUERY_KEY.profileWish] });
      queryClient.invalidateQueries({ queryKey: [QUERY_KEY.profileTransWish] });
    },
// 수정된 코드
onSuccess: () => {
queryClient.invalidateQueries({
queryKey: queryFactory.wishLists(roomId)
});
}
});