이번 수업시간에는 javascript를 이용해 블록구조 설계 후 postman에 api를 요청해서 결과를 확인해 보았다.
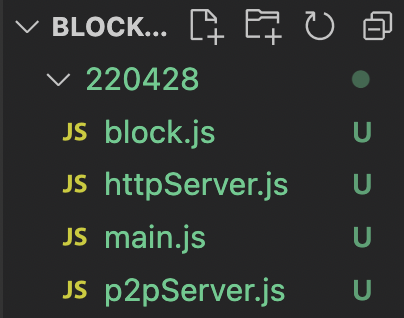
폴더구조
main.js
// p2p 서버 초기화, 사용
// http 서버 초기화, 사용
// 블록체인 함수 사용
import { initHttpServer } from "./httpServer.js";
import { initP2PServer } from "./p2pServer.js";

// process.env.HTTP_PORT를 쓰는 이유 외부에서 쉽게 제어 할 수 있다.
const httpPort = parseInt(process.env.HTTP_PORT) || 3001;
const p2pPort = parseInt(process.env.HTTP_PORT) || 6001;
// 환경변수

initHttpServer(httpPort);
initP2PServer(p2pPort);
httpServer.js
// 웹에 명령어를 입력해서 내 노드를 제어하는 서버
// express, body-parser (명령어를 해석))
// const express = require('express'); // 예전버전 , javascript COMMONJS에서 통째도 다 가져온다.
import express from 'express'; // 딱 필요한 express만 불러온다. 속도나 크기면에서 import express를 많이 쓴다.
import bodyParser from 'body-parser';
import { getBlocks, createBlock} from './block.js';

// 초기화 함수
const initHttpServer = (myHttpPort) => { // 함수의 이름 (매개변수)
    const app = express();
    app.use(bodyParser.json());
		// application/json 방식의 Content-Type 데이터를 받아준다.
		// Content-Type은 api 연동시에 보내는 자원을 명시하기 위해 보통 사용한다.
    app.get('/', (req, res) => {
        res.send('Hello, World!!!');
    })

    app.get('/blocks', (req,res) => {
        res.send(getBlocks());
    })

    app.post('/createBlock', (req,res) => {
        const data = req.body.data
        res.send(createBlock(data));
        // res.send(req.body.data);
        // createBlock(req.body.data);
        // res.send(createBlock(req.body.data));
    })

    app.listen(myHttpPort, () => {
        console.log('listening httpServer Port : ', myHttpPort);
    })
}

export { initHttpServer } ;
p2pServer.js
// pear two pear  > express 가 아닌 웹소켓을 쓴다.
// 블록체인은 중앙서버가 있는것이 아닌 개인과 개인을 통해서 데이터가 이루어짐
// 다른 노드와 통신을 위한 서버

import WebSocket from 'ws';
import { WebSocketServer } from 'ws';

// WebSocket 객체는 서버와의 WebSocket 연결을 생성하고 관리할 수 있는 API 들을 제공합니다. 이는 데이터를 전송하거나 주고 받는 등의 API 들을 포함합니다.

const sockets = [] ; // 상수로 만들었다. sockets의 메모리 주소 push 들어가는 데이터 값과는 별개이다.
// sockets = 1; // sockets의 값을 바꾸는 것이기 떄문에 안된다.

const initP2PServer = (p2pPort) => {
    const server = new WebSocketServer({port:p2pPort});
    server.on('connection', (ws) => {  // 웹소켓으로 만든 서버에 호출을 한다.
        initConnection(ws); // 내부 함수가 아닌 만들어 줘야하는 함수
    })
    console.log('listening P2PServer Port : ', p2pPort);
}

const initConnection = (ws) => {
    sockets.push(ws);
}

export { initP2PServer };
block.js
// 블록체인 관련 함수
// 블록 구조 설계
/*
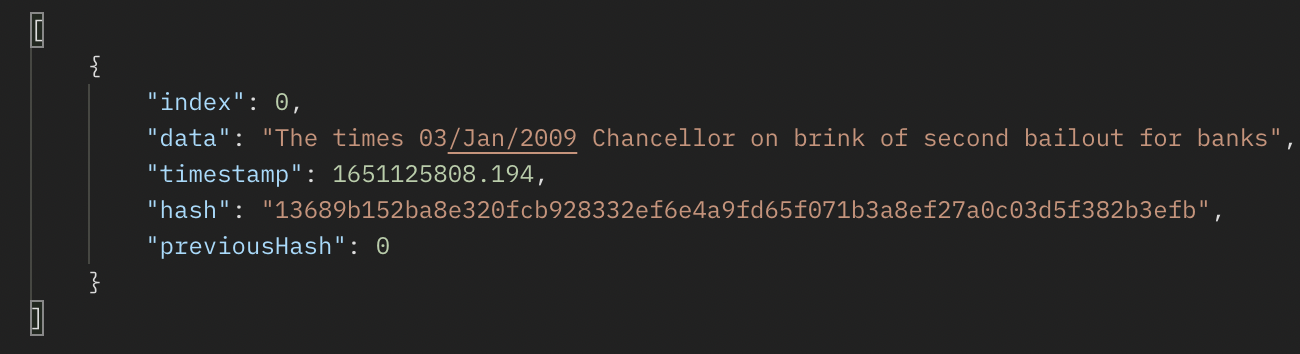
블록의 구조?
index : 블록체인의 높이
data : 블록에 포함된 모든 데이터 (트랜잭션 포함)
timestamp : 블록이 생성된 시간
hash : 블록 내부 데이터로 생성한 sha256 값 (블록의 유일성)
previousHash : 이전 블록의 해쉬 (이전 블록을 참조) 블록을 타고타고 가다보면 geneiss 블록이 나온다.
*/
import CryptoJS from 'crypto-js';
// crypto-js : 여러가지 정보(ex:비밀번호)를 안전하게 암호화 할 수 있다.
class Block { // Block 의 구조 정리
constructor(index, data, timestamp, hash, previousHash)
{
this.index = index;
this.data = data; // 외부에서 넣어준다.
this.timestamp = timestamp // 블록이 만들어질때 현재시간가지고 넣어준다.
this.hash = hash; // 직접 계산을 해줘야 한다.
this.previousHash = previousHash; // 외부요인에 의해 결정이된다.
}
}
// function getBlocks() {
// return blocks;
// }
const getBlocks = () => {
return blocks;
}
// Hash 계산
const calculateHash = (index, data, timestamp, previousHash) => { // 일반적으로는 index,data,timestmap,previousHash 값을 합해서 암호화를 한 형태로 만든다.
return CryptoJS.SHA256 ((index + data + timestamp + previousHash).toString()).toString(); // sha256알고리즘으로 암호화를 한다.
// return CryptoJS.SHA256((2).toString()).toString();
}
// genesis 블록을 만들때 다른값으 전부 똑같고 시간이 달라진다.
const createGenesisBlock = () => {
const genesisBlock = new Block(0, 'The times 03/Jan/2009 Chancellor on brink of second bailout for banks', new Date().getTime() / 1000, 0, 0);
genesisBlock.hash = calculateHash(
genesisBlock.index,
genesisBlock.data,
genesisBlock.timestamp,
genesisBlock.previousHash);
return genesisBlock;
}
// 만들고 나서 담아준다.
const createBlock = (blockData) => {
const previousBlock = blocks[blocks.length -1];
const nextIndex = previousBlock.index + 1;
const nextTimestamp = new Date().getTime() / 1000;
const nextHash = calculateHash(nextIndex, blockData, nextTimestamp, previousBlock.hash);
const newBlock = new Block(nextIndex, blockData, nextTimestamp, nextHash, previousBlock.hash);
if (isValidNewBlock(newBlock, previousBlock)) {
blocks.push(newBlock);
return newBlock;
}
console.log('faile to create new block');
return null;
}
// 블록의 무결성 검증
/*
블록의 인덱스가 이전 블록인덱스보다 1 크다.
블록의 previousHash가 이전 블록의 hash이다.
블록의 구조가 일치해야 한다.
*/
const isValidBlockStructure = (newBlock) => {
if (typeof (newBlock.index) === 'number'
&& typeof (newBlock.data) === 'string'
&& typeof (newBlock.timestamp) === 'number'
&& typeof (newBlock.hash) === 'string'
&& typeof (newBlock.previousHash) === 'string')
{
return true;
}
return false;
}
const isValidNewBlock = (newBlock, previousBlock) => {
if (newBlock.index !== previousBlock.index + 1) // !== type까지 같이 검사
{
console.log('invalid index');
return false;
}
else if (newBlock.previousHash !== previousBlock.hash)
{
console.log('invalid previous hash');
return false;
}
else if (isValidBlockStructure(newBlock) == false)
{
console.log('invalid block structure');
return false;
}
return true;
}
const blocks = [createGenesisBlock()];
export { getBlocks, createBlock } ;Postman GET POST 결과
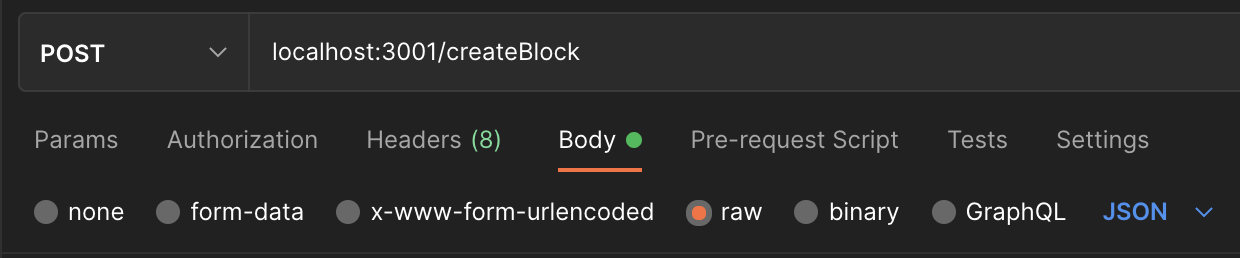
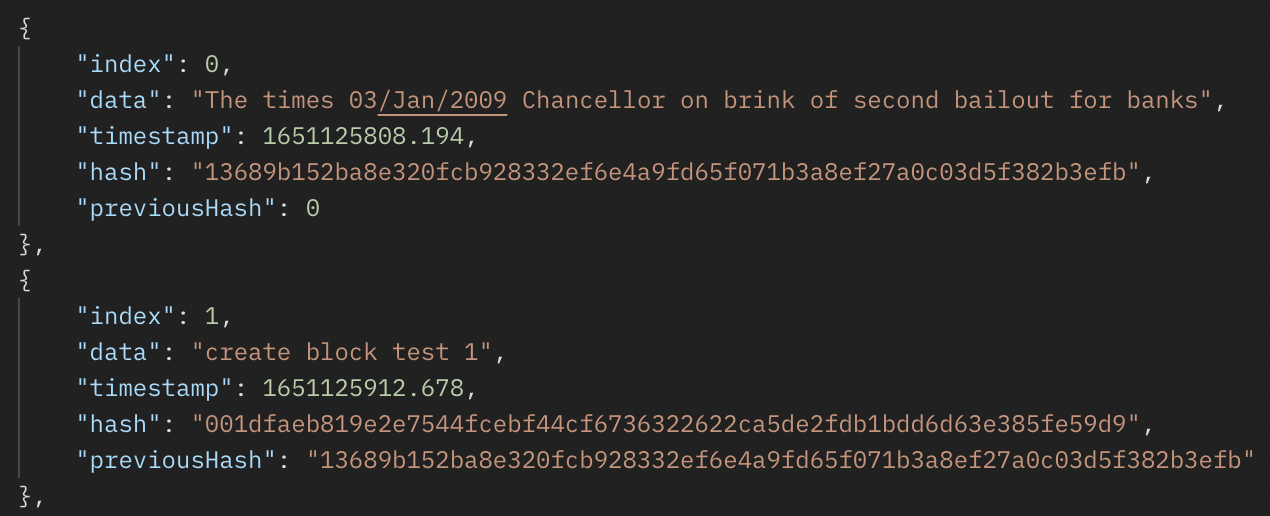
결과 값을 보기위해서 POSTMAN에서 GET,POST를 이용해 결과를 출력해보았다.
GET

POST
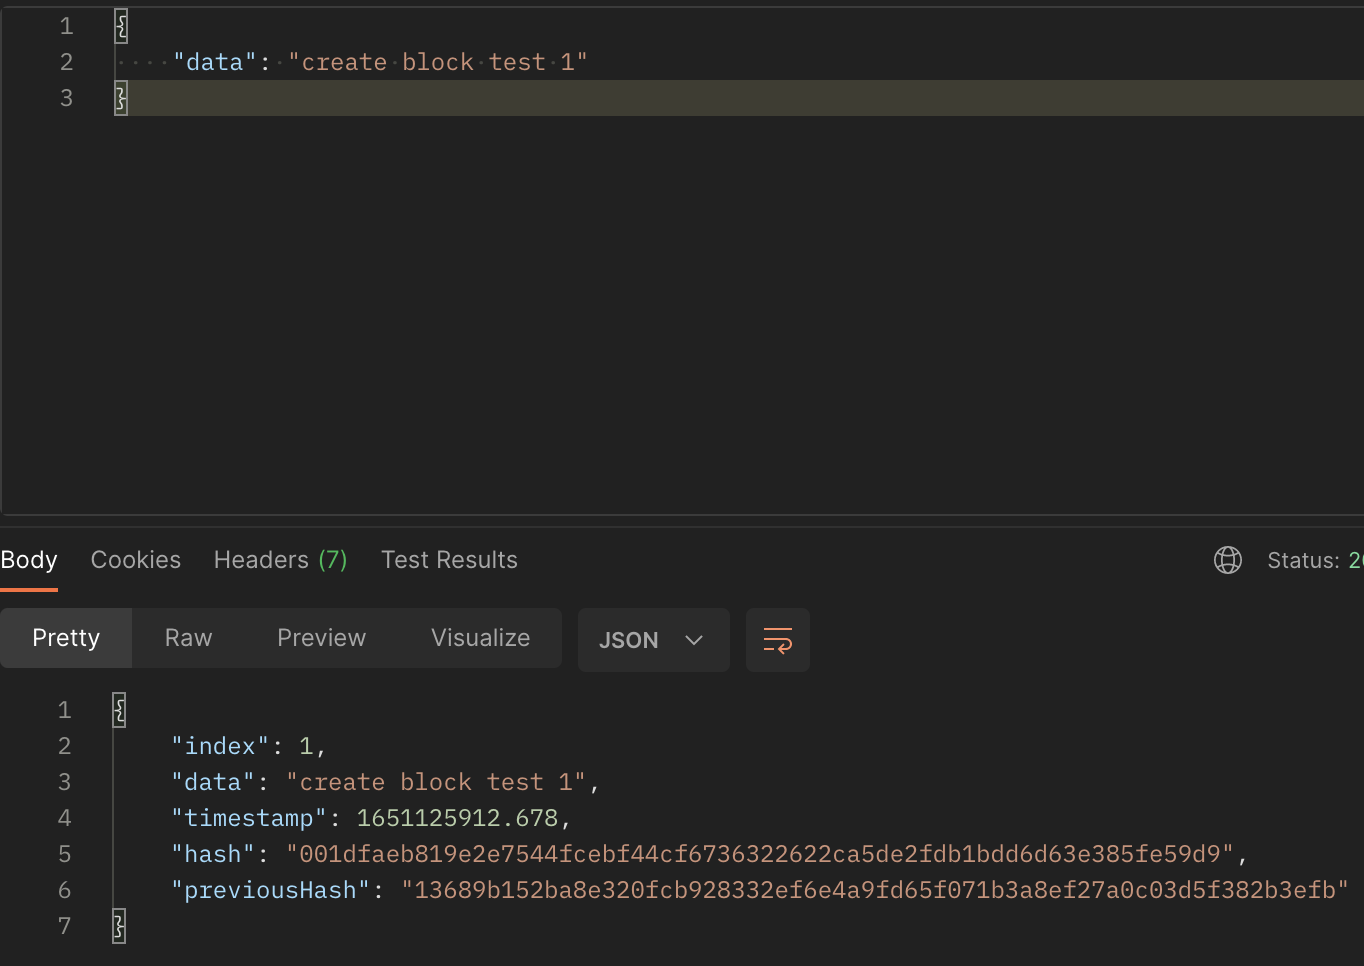
POST data 값을 주고 다시GET을 통신해보면 POST에 서 요청된 값이 들어가 있다.
const isValidBlockStructure = (newBlock) => {
    if  (typeof (newBlock.index) === 'number'
        &&  typeof (newBlock.data) === 'string'
        &&  typeof (newBlock.timestamp) === 'number'
        &&  typeof (newBlock.hash) === 'string'
        &&  typeof (newBlock.previousHash) === 'string')
        {
            return true;
        }
            return false;
}
위 코드에서 isValidBlockStructure에 새로 생성될 newBlock의 타입을 정해주었다. 정해준대로 , string 또는 number 타입으로 결과물이 나타났다.

꿈을 찾는 Frontend 개발자 입니다.