문득 생각해보니, React로 쉽게쉽게 할 수 있던 것들인데 순수 Html, CSS, JS로만 어디서부터 어디까지 할 수 있는지 궁금했다. 쉽게 생각했던 것들이 막상 하려니 '어떻게 해야하지'라는 생각이 들었고 이제부터라도 기본기를 처음부터 다져보자는 생각에 이 시리즈를 시작하게 되었다. 이 글은 시리즈의 첫번째, Todo-List를 만들며 DOM 조작과 이벤트처리, 그리고 비동기성에 대한 이해를 목표로 한다.
0. 목적
- DOM 조작
- 이벤트 처리
- 비동기성 이해
1. 기본 구성
먼저 렌더링될 HTML 파일을 작성해주도록 하자. 내 IDE는 VS CODE이다.
index.html 파일을 생성해주고 !입력후 엔터하면 기본 html 틀이 자동으로 완성된다.
<!DOCTYPE html>
<html lang="en">
<head>
    <meta charset="UTF-8">
    <meta name="viewport" content="width=device-width, initial-scale=1.0">
    <title>Vanila Todo-List</title>
</head>
<body>

</body>
</html>title태그는 페이지 탭의 제목이므로 나는Vanila Todo-List라고 명명해줬다.
1-1 body 태그 구성
<!-- index.html -->

<!DOCTYPE html>
<html lang="en">
<head>
    <meta charset="UTF-8">
    <meta name="viewport" content="width=device-width, initial-scale=1.0">
    <title>Vanila Todo-List</title>
</head>
<body>
      <div class="container">
        <div class="todo-title">Todo List</div>
        <p>
        <h4>TODO</h4>
        <ul class="todo-list">
            <li class="todo-item">
                <input type="checkbox">
                <label class="todo-label">Study Vanila JS</label>
                <button class="delete-button">del</button>
                <button class="edit-button">edit</button>
            </li>
        </ul>
        </p>
        <p>
        <h4>COMPLETED</h4>
        <ul class="completed-list">
            <li class="todo-item">
                <input type="checkbox" checked>
                <label>Work-out</label>
            </li>
        </ul>
        </p>
        <p>
        <h4>ADD ITEM</h4>
        <div class="input-wrap">
            <input type="text" id="new-todo" class="add-todo-text">
            <button class="add-button">Add</button>
        </div>
        </p>
    </div>
</body>
</html>-
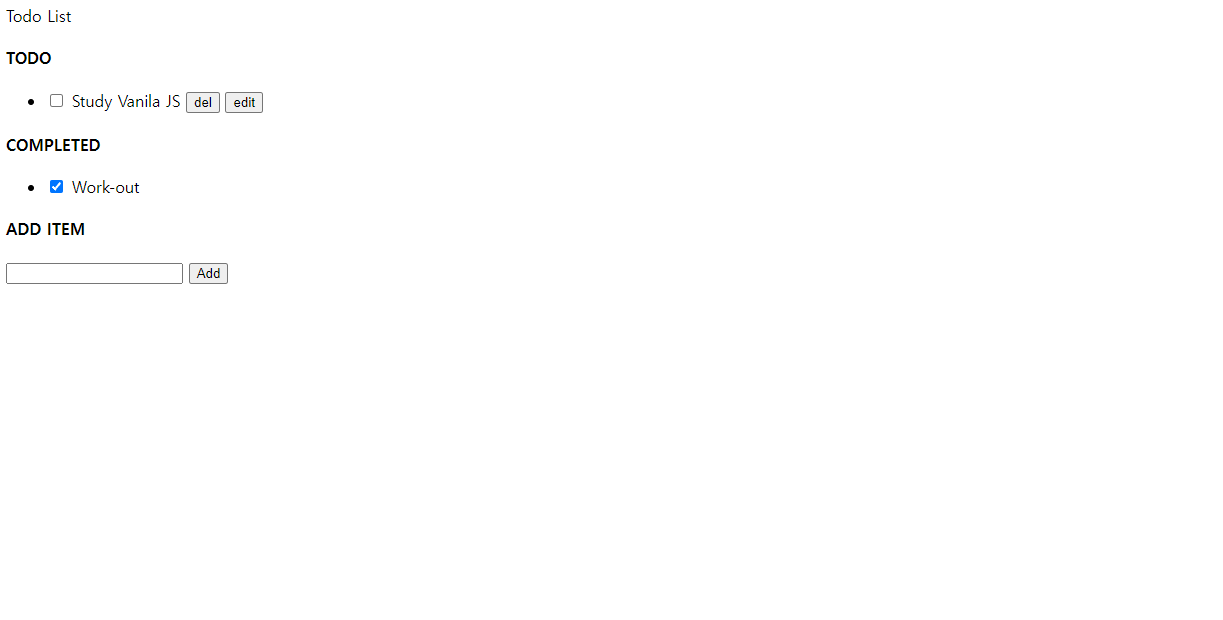
여러 개의 할 일을 담을 수 있는 순서가 상관 없는 리스트를 나타내기 위해
<ul class='todo-list'>를 만들고, 각각의 할 일을 나타내기 위해<li class="todo-item">를 사용한다. 각 Todo 아이템은 한 일과 아직 하지 않은 일을 나타내는 체크박스<input>과 해당 일의 텍스트를 나타내는<label>로 구성된다. 나중에 추가할 삭제와 수정 버튼도 포함시켜두자. -
다음으로는 완료된 할 일의 목록이 담긴
<ul class="completed-list">를 만들고, 완료된 할 일 목록을li태그를 이용해 표현해주었는데, 여기서 체크박스<input>에checked속성을 주어서 완료되었다는 표시를 미리 해주었다. -
마지막으로, 할 일 목록 추가를 위해 텍스트
<input>에 기능 연결을 위해id와button을 추가해줬다.
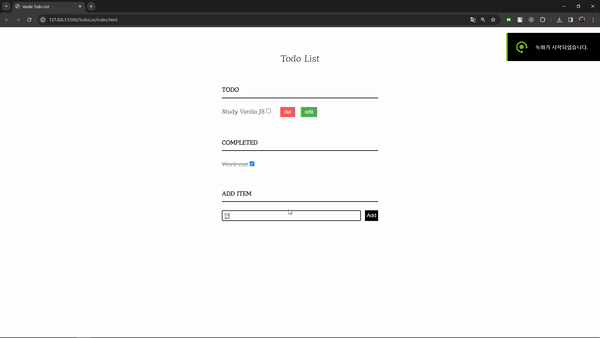
여기까지 완성된 모습
2. script 파일 작성
index.html 파일과 같은 폴더에 Todo.js 파일을 생성하고 html 파일
body태그 최하단에
<script src="Todo.js"></script>를 적용시켜주면 된다.
2-1 할 일 추가
<input>에 적힌 내용이Add버튼을 누를 때,<ul class="todo-list">에li요소를 하나씩 추가하게 되면 된다.
2-1.1 요소 가져오기
// index.html
<div class="input-wrap">
  <input type="text" id="new-todo" class="add-todo-text">
  <button class="add-button">Add</button>
</div>
// Todo.js
let todoInput = document.getElementById("new-todo");
let addButton = document.querySelector(".add-button");id가"new-todo"인 요소를 가져와todoInput변수에 할당하고, 또한 버튼 중class가"add-button"인 요소를 가져와addButton변수에 할당한다.
2-1.2 이벤트 리스너 등록
addButton.addEventListener("click", addTodo);addbutton이 클릭되면addTodo함수를 실행한다.addEventListener메서드는 첫번째 인자로 어떤 이벤트인지 받고, 두번째 함수를 실행한다.
2-1.3 addTodo 함수 작성
function addTodo() {
  const newTodoText = todoInput.value;
  if (newTodoText !== "") {
    const todoList = document.querySelector(".todo-list");
    const newTodoItem = document.createElement("li");
    newTodoItem.classList.add("todo-item");
    newTodoItem.innerHTML = `
        <input type='checkbox'>
        <label class="todo-label">${newTodoText}</label>
        <button class="delete-button">del</button>
        <button class="edit-button">edit</button>
    `;
    todoList.appendChild(newTodoItem);

    todoInput.value = "";
  }
}-
input입력 필드에 텍스트를 가져와newTodoText변수에 할당한다. -
addTodo는 입력 필드가 비어있지 않은 경우에만 실행하는데, 이때 새로운li요소를 생성하고, 이를newTodoItem변수에 할당한다 -
새로운
li요소에todo-item이라는 클래스를 부여하고,innerHTML메서드로 HTML 내용을 설정한다. -
이후
appendChild메서드로 Todo list에 추가한다. -
위 과정이 끝난 후에 입력 필드를 비워준다.
추가 사항 ( 엔터키 이벤트 등록 )
마우스로 번거롭게 'ADD' 버튼을 누르는 것보다 엔터키로 등록하면 더 편하지 않겠는가 해서 엔터키를 누를 시에도 똑같이 작동하도록 만들어줬다.
todoInput.addEventListener("keyup", function (event) {
  if (event.key === "Enter") {
    addTodo();
  }
});
2-1.4 Todo item 추가 기능 완성
-
Add버튼 클릭과 엔터키 입력 두가지 모두 잘 작동하는 것을 확인할 수 있다. -
전체 코드
// Todo.js - ADD TODO
let todoInput = document.getElementById("new-todo");
let addButton = document.querySelector(".add-button");

addButton.addEventListener("click", addTodo);
function addTodo() {
  const newTodoText = todoInput.value;
  if (newTodoText !== "") {
    const todoList = document.querySelector(".todo-list");
    const newTodoItem = document.createElement("li");
    newTodoItem.classList.add("todo-item");
    newTodoItem.innerHTML = `
        <input type='checkbox'>
        <label class="todo-label">${newTodoText}</label>
        <button class="delete-button">del</button>
        <button class="edit-button">edit</button>
    `;
    todoList.appendChild(newTodoItem);

    todoInput.value = "";
  }
}

todoInput.addEventListener("keyup", function (event) {
  if (event.key === "Enter") {
    addTodo();
  }
});
2-2 Todo / Completed 상태 변경
체크박스의 선택 여부에 따라 할 일 항목을 Todo 또는 Completed로 이동시키고, 해당 항목의 버튼 상태를 조절하는 기능을 구현해보자.
2-2.1 이벤트 리스너 등록
document.addEventListener("change", changeItem)change이벤트를 감지하고, 발생 시에changeItem함수를 실행시킨다.
2-2.2 changeItem 함수 작성
// Todo.js - changeItem
document.addEventListener("change", changeItem);
function changeItem(e) {
  if (e.target.type === "checkbox") {
    const todoItem = e.target.parentElement;

    const completedList = document.querySelector(".completed-list");
    const todoList = document.querySelector(".todo-list");

    if (e.target.checked) {
      completedList.appendChild(todoItem);
      todoItem.classList.add("completed");
    } else {
      todoList.appendChild(todoItem);
      todoItem.classList.remove("completed");
    }
  }
}-
먼저 체크박스의 부모 요소를 가져와
todoItem변수에 할당해준다. -
클래스가
completed-list인 요소를 가져와completedList( 완료된 Todo )변수에 할당해주고,todo-list인 요소 또한 가져와todoList( Todo ) 변수에 할당해준다. -
e.target.checked를 이용해 체크가 된 경우, Todo 목록을 Completed로 이동시키고 완료된 Todo에completed클래스를 추가해준다. -
반대로 체크가 되지 않은 경우는
completed클래스를 제거해준다.
2-2.3 Item 상태에 따른 버튼 호출
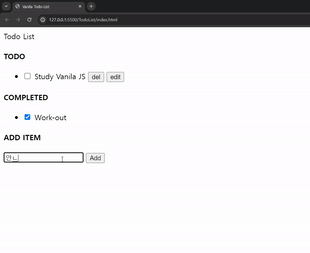
위 GIF를 보면 뭔가 이상한 점이 있다. Completed 리스트에서 Todo 리스트로 이동했을 때 수정, 삭제 버튼이 나오지 않는다는 것이다. 이는 상태에 따라서 버튼의 활성/비활성 코드를 작성해주지 않아서 그렇다.
changeItem함수 내부에 버튼 요소 가져오고 변수 할당
const deleteButton = todoItem.querySelector(".delete-button");
const editButton = todoItem.querySelector(".edit-button");- 위와 같이 삭제 버튼과 수정 버튼을 함수 내부로 가져와주고 변수로 할당해준다.
- 버튼 활성/비활성 함수 생성
toggleButton
function toggleButton(parent, button, buttonClass) {
  if (button) {
    parent.removeChild(button);
  } else {
    const newButton = document.createElement("button");
    newButton.classList.add(buttonClass);
    newButton.textContent = buttonClass === "delete-button" ? "del" : "edit";
    parent.appendChild(newButton);
  }
}- changeItem 함수 내부에
toggleButton사용
function changeItem(e) {
  if (e.target.type === "checkbox") {
    const todoItem = e.target.parentElement;
    const deleteButton = todoItem.querySelector(".delete-button");
    const editButton = todoItem.querySelector(".edit-button");

    const completedList = document.querySelector(".completed-list");
    const todoList = document.querySelector(".todo-list");

    if (e.target.checked) {
      completedList.appendChild(todoItem);
      todoItem.classList.add("completed");
    } else {
      todoList.appendChild(todoItem);
      todoItem.classList.remove("completed");
    }
	// 여기에 추가
    toggleButton(todoItem, deleteButton, "delete-button");
    toggleButton(todoItem, editButton, "edit-button");
  }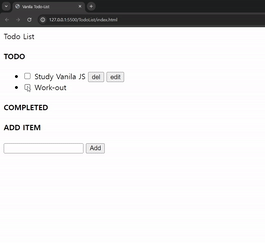
}- 구현 모습
- 상태가 바뀔때 마다 버튼이 활성/비활성이 된다.
- 전체 코드
// Todo.js - changeItem
function toggleButton(parent, button, buttonClass) {
  if (button) {
    parent.removeChild(button);
  } else {
    const newButton = document.createElement("button");
    newButton.classList.add(buttonClass);
    newButton.textContent = buttonClass === "delete-button" ? "del" : "edit";
    parent.appendChild(newButton);
  }
}

document.addEventListener("change", changeItem);
function changeItem(e) {
  if (e.target.type === "checkbox") {
    const todoItem = e.target.parentElement;
    const deleteButton = todoItem.querySelector(".delete-button");
    const editButton = todoItem.querySelector(".edit-button");

    const completedList = document.querySelector(".completed-list");
    const todoList = document.querySelector(".todo-list");

    if (e.target.checked) {
      completedList.appendChild(todoItem);
      todoItem.classList.add("completed");
    } else {
      todoList.appendChild(todoItem);
      todoItem.classList.remove("completed");
    }

    toggleButton(todoItem, deleteButton, "delete-button");
    toggleButton(todoItem, editButton, "edit-button");
  }
}
2-3 Delete Todo
잘못 등록하거나 못 할 것같은 Todo item을 삭제, 부모요소와 target, click 이벤트를 이용해 구현해보자
// Todo.js - deleteItem
document.addEventListener("click", deleteItem);
function deleteItem(e) {
  const btn = e.target;
  if (btn.classList.contains("delete-button")) {
    const todoItem = btn.parentElement;
    const parentList = todoItem.parentElement;
    parentList.removeChild(todoItem);
  }
}- 클릭 이벤트가 일어난 곳에 부모요소를 찾고, 그 부모 요소의 리스트를 가져와 해당 Todo item을 제거하면된다.
2-4 Edit Todo
클릭 이벤트가 일어난 곳의 text를 받아와서, 생성되는 input 필드에 넣어주고, 그것을 수정해주면 된다. 이것 또한 addTodo와 마찬가지로 text수정을 완료한 이후에 edit 버튼 클릭으로 완료하거나 엔터키 이벤트 둘 다 함수를 실행할 수 있도록 구현해보자.
- 구현 과정
edit버튼을 누르면label이input으로 바뀐다.- 입력 필드의 기본값을 현재 라벨의 텍스트로 설정한다.
focus()메서드를 이용해서 입력 필드에 포커스를 설정하고, 그 이후에 포커스가 빠져나가면 (inputField.addEventListener('blur', ~~~))completeEdit함수를 호출한다.
// Todo.js - editItem
document.addEventListener("click", editItem);
function editItem(e) {
  const btn = e.target;
  if (btn.classList.contains("edit-button")) {
    const todoLabel = btn.parentElement.querySelector(".todo-label");

    const inputField = document.createElement("input");
    inputField.type = "text";
    inputField.value = todoLabel.textContent;
    inputField.classList.add("edit-input");
	// label -> input 교체
    todoLabel.replaceWith(inputField);

    inputField.focus();
    inputField.addEventListener("blur", function () {
      completeEdit(inputField, todoLabel);
    });

    inputField.addEventListener("keyup", function (event) {
      if (event.key === "Enter") {
        completeEdit(inputField, todoLabel);
      }
    });
  }
}

function completeEdit(inputField, todoLabel) {
  todoLabel.textContent = inputField.value;
  inputField.replaceWith(todoLabel);
}
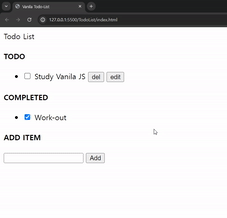
- 완료 화면

- 잘 보일지 모르겠지만, 요소탭에 보면
label이input으로 바뀌고 입력한 내용으로 잘 바뀌는 걸 확인할 수 있다.
3. CSS 적용
목표했던 기능 구현은 끝났으니 이제 마무리로 폰트적용과 간단한 CSS를 작성해보자. style.css 파일을 생성하고 index.html 파일과 같은 폴더에 위치시킨다음 html head 태그 안에 아래의 내용을 작성하자.
<link rel="stylesheet" type="text/css" href="style.css">3-1 폰트 적용
개인적으로 느끼는 건데 기본 폰트는 이상하므로 Browse Fonts 사이트에서 다른 폰트를 적용해보록 하자. 난 기본 폰트와 차이를 느끼고 적용이 된 것을 잘 볼 수 있는 'Diphylleia' 라는 폰트를 적용해보았다.
<head>
    <meta charset="UTF-8">
    <meta name="viewport" content="width=device-width, initial-scale=1.0">
    <link
        href="https://fonts.googleapis.com/css2?family=Diphylleia&family=Nanum+Gothic&family=Noto+Sans+KR&display=swap"
        rel="stylesheet">
    <link rel="stylesheet" type="text/css" href="style.css">
    <title>Vanila Todo-List</title>
</head>
// style.css
body {
margin: 0;
padding: 0;
background: #fff;
font-family: 'Diphylleia', serif;
}-
<head>태그 안에 Browse Fonts에서 제공하는 링크를 복사 붙여넣기하고, css 파일에body에 적용시켜준다.body태그에margin과padding0 을 준 이유는 브라우저 기본 마진과 패딩이 있어서인데 그것에 대해 따로 더 설명하진 않겠다. -
css는 기본적인 것만 적용 해보도록 하자
// style.css

body {
    margin: 0;
    padding: 0;
    background: #fff;
    font-family: 'Diphylleia', serif;
}
ul {
margin: 0;
padding: 0;
}
li {
list-style: none;
}
h4 {
border-bottom: 2px solid black;
padding: 30px 0px 10px;
}
.add-todo-text {
padding: 4px;
width: 90%;
}
input[type="checkbox"] {
margin-right: 8px;
}
input[type="checkbox"]:checked+label {
text-decoration: line-through;
color: #808080;
}
.container {
display: block;
width: 400px;
margin: 60px auto 0;
}
.todo-title {
text-align: center;
font-size: 24px;
font-weight: 500;
}
.todo-item {
clear: both;
margin-top: 10px;
}
.todo-item label {
float: left;
}
.input-wrap {
display: flex;
width: 100%;
gap: 10px;
}
.add-button {
clear: both;
border: none;
padding: 5px;
background: black;
color: white;
cursor: pointer;
}
.delete-button {
background-color: #ff5858;
color: #fff;
border: none;
padding: 5px 10px;
cursor: pointer;
margin-left: 10px;
}
.delete-button:hover {
background-color: #ff0000;
}
.edit-button {
background-color: #4caf50;
color: #fff;
border: none;
padding: 5px 10px;
cursor: pointer;
margin-left: 10px;
}
.edit-button:hover {
background-color: #45a049;
}
.edit-input {
width: 50%;
padding: 5px;
outline: none;
}3-2. 적용 모습
4. 마치며
자바스크립트에 대한 기본적인 이해가 있다고 생각했고, React를 사용하면 훨씬 쉽게 만들 수 있으니 솔직히 얕잡아봤었다 (새로운 요소들 추가하는 함수 작성하고 상태 조작하면되겠지 뭐 이런생각들). 하지만 생각보다 오랜시간이 걸렸고 왜 프레임워크가 등장했는지, 왜 자주사용되는지 온 몸으로 느낄 수 있었다. 고작 Todo List를 만들었을 뿐이지만 DOM에 대한 이해나, 이벤트 처리 등 자바스크립트에 대한 이해가 한층 더 깊어진걸 느낄 수 있었다.
긍정적인 점은 요즘들어 개발 자체에 대한 열정을 잃어가고 있었는데, 지식이 깊어지는 걸 느끼면서 예전에 처음 개발을 배우고 나의 생각을 코드로 표현했을 때의 짜릿함을 다시 한 번 느낄 수 있었다.
더욱 더 겸손하고 정진해야겠다.