다운로드 기능 구현
이번 프로젝트에서 다운로드 기능을 구현한 내용을 정리해보려고 한다.
다운로드를 하기 위해서는 필요한 내용들이 있다.
HTTP Headers, MIME Type, Blob, URL.createObjectURL, a 태그 등이 있으니 하나씩 알아보도록 하자.
HTTP Headers
HTTP Headers에는 다양한 헤더들이 존재하지만, 그 중 다운로드 기능 시 필요한 헤더들만 알아볼 것이다.
Content-Disposition
일반적인 HTTP 응답에서 해당 헤더는 컨텐츠가 브라우저 내부에 보여줄지(inline) 혹은 다운로드되거나 로컬에 저장할 용도인지(attachment) 알려주는 헤더다.
또한 데이터가 너무 클 경우 multipart/form-data 의 하위 파트로 활용(form-data)될 수 있다.
헤더에서 사용되는 파라미터는 inline, form-data, attachment, name, filename 이 쓰이고, name과 filename은 필수 파라미터는 아니다.
파일 다운로드 형식 예시
Content-Disposition: inline // 기본값
Content-Disposition: attachment // 반드시 다운로드 받아야함
Content-Disposition: attachment; filename="filename.jpg" // 저장 시 해당 이름으로
아래는 cool.html이라는 파일을 다운로드하라는 응답이다.
Content-Type은 MIME Type으로 지정되고, 해당 파일과 타입이 일치해야한다.
200 OK
Content-Type: text/html; charset=utf-8
Content-Disposition: attachment; filename="cool.html"
Content-Length: 21
multipart 형식 예시
Content-Type: multipart/form-data;boundary="boundary"
Content-Disposition: form-data
Content-Disposition: form-data; name="fieldName"
Content-Disposition: form-data; name="fieldName"; filename="filename.jpg"
아래는 총 2개의 데이터로 쪼개져서 전달된 것이고, Content-Type헤더에 boundary가 있다.
boundary의 역할은 조각난 데이터의 처음과 끝을 알 수 있게 해주는 역할이다.
boundary는 유니크해야하므로 대부분 UUID로 만든다.
--boundary는 전송되는 파일 데이터의 구분자다.
--boundary--는 쪼개진 데이터의 요청(body)의 끝을 알려주는 것이다.
POST /test.html HTTP/1.1
Host: example.org
Content-Type: multipart/form-data;boundary="boundary"

--boundary
Content-Disposition: form-data; name="field1"

value1
--boundary
Content-Disposition: form-data; name="field2"; filename="example.txt"

value2
--boundary-- 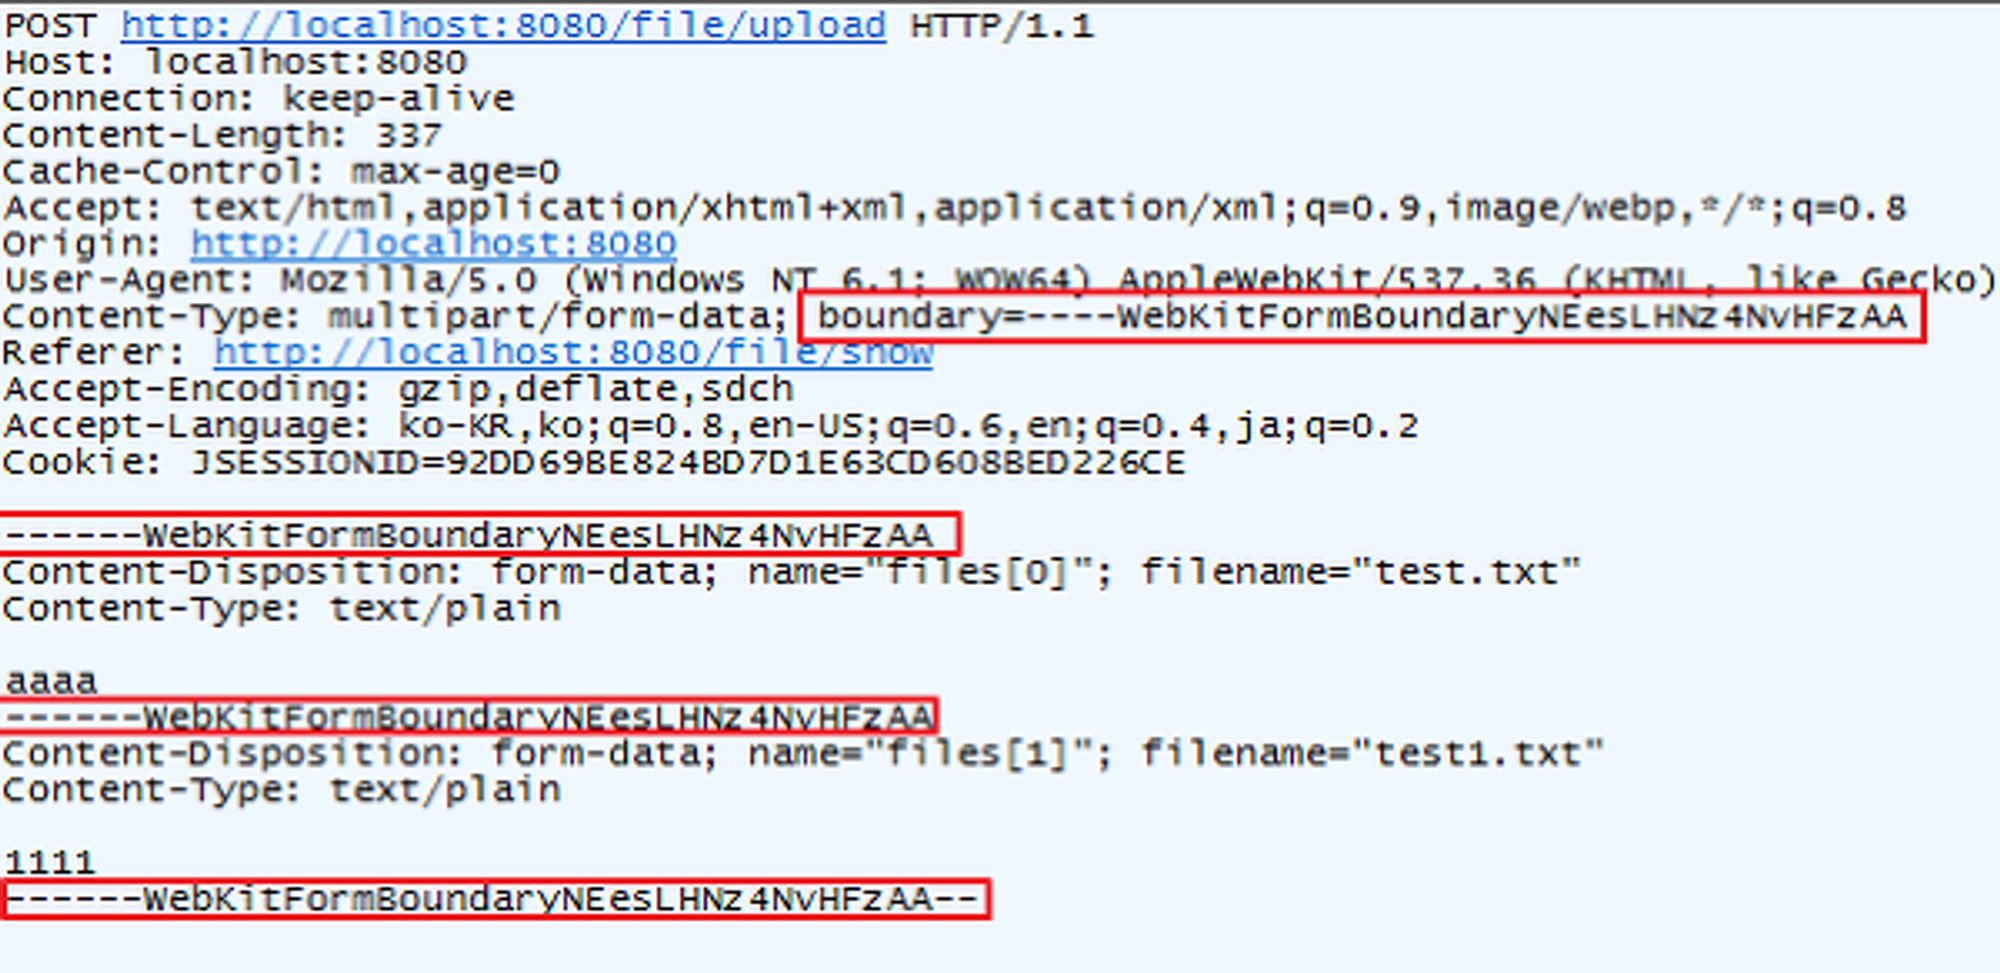
Content-Type
해당 헤더는 리소스의 Media Type을 나타내기 위해 사용된다.
즉, 반환된 컨텐츠의 유형이 실제로 무엇인지를 알려준다.
💡 Media Type(MIME Type)은 파일의 형식을 나타내는 문자열로 파일과 같이 송신되며, content의 형식을 나타내기 위해 사용ex) 오디오 파일 - audio/ogg, 그림 파일은 image/png
어떤 경우에는 MIME 스니핑을 해서 이 헤더의 값을 따르지 않을 수도 있다.
이를 막기 위해 X-Content-Type-Options 헤더를 nosniff로 설정할 수 있다.
형식 예시
Content-Type: text/html; charset=utf-8
Content-Type: multipart/form-data; boundary=something
자주 사용하는 MIME Type의 예시
| 타입 | 설명 | 서브타입 |
|---|---|---|
| text | 텍스트를 포함하는 모든 문서 | text/plain, text/html, text/css, text/javascript |
| image | 모든 종류의 이미지 | image/gif, image/png, image/jpeg, image/bmp, image/webp |
| audio | 모든 종류의 오디오 파일 | audio/midi, audio/mpeg, audio/webm, audio/ogg, audio/wav |
| video | 모든 종류의 비디오 파일 | video/webm, video/ogg |
| application | 모든 종류의 이진 데이터 | application/octet-stream, application/vnd.mspowerpoint, application/xhtml+xml, application/xml, application/pdf |
적합한 MIME Type을 가진 리소스만이 HTML 엘리먼트 내에서 인식되어 사용할 수 있다. 예로 video나 audio가 이에 해당된다.
또한 파일 업로드나 다운로드 구현 시 file type 파라미터로 MIME Type이 필요하다.
자세한 MIME Type의 종류를 확인할 수 있다.
Blob
Blob이란 Binary Large Object(이진 대형 객체)의 약자로 이진 데이터를 나타내는 JavaScript 객체다.
주로 텍스트, 이미지 같은 이진 데이터를 다룰때나 파일 관련 작업에서 유용하게 사용된다.
Blob 생성자
Blob 객체는 생성자를 사용하여 생성할 수 있다.
// new Blob(array, options)
const obj = { hello: "world" };
const blob = new Blob([JSON.stringify(obj, null, 2)], { type: "application/json" });array: Blob 객체에 포함시킬 배열 또는 데이터options: MIME Type이나 다른 설정을 담고있는 객체(선택 값)
속성
size: Blob 객체 바이트(Byte) 단위 사이즈type: 객체의 MIME Type, 타입을 알 수 없는 경우 빈 문자열
Blob URL
Blob 객체를 가리키는 URL을 생성하기 위해 URL 객체의 정적 메소드로 URL.createObjectURL과 URL.revokeObjectURL을 사용할 수 있다,
URL.createObjectURLBlob 객체나 File 객체를 나타내는 URL을 포함한 DOMString을 생성한다. 이 Blob URL은 생성된 window의 document에서만 유효하며, 다른 window에서 재활용할 수 없고 URL의 수명이 한정되어 있다. Blob URL 형태
Blob URL 활용blob:http://localhost:1234/28ff8746-94eb-4dbe-9d6c-2443b581dd30<img src="blob:http://localhost:1234/28ff8746-94eb-4dbe-9d6c-2443b581dd30" alt="Blob URL Image" />URL.revokeObjectURLURL.createObjectURL을 통해 생성한 기존 URL을 해제한다. 기존 URL을 해제하지 않으면 유효한 URL로 판단하여 자바스크립트 엔진에서 GC되지 않아 메모리 누수가 될 수 있기 때문에 URL을 바인딩한 후에는 해제하는 것이 좋다.// Create Blob URL const blobUrl = window.URL.createObjectURL(blob); // Revoke Blob URL after DOM updates.. window.URL.revokeObjectURL(blobUrl);
<a> 태그
a 태그에는 download라는 속성이 존재하는데 이는 href에 지정된 파일을 다운로드해주는 기능이다.
사용 방법
<a href='fileurl' download> <!-- fileurl의 파일 이름으로 다운로드 -->

<a href='fileurl' download="sample"> <!-- fileurl의 sample파일 명으로 다운로드 -->
이렇게 a태그에 직접 인라인으로 걸어줄 수 있고, JavaScript로 작성할 수도 있다.
const url = URL.createObjectURL(blob)
const link = document.createElement('a')
link.href = url
link.setAttribute('download', `${fileName}`)
document.body.appendChild(link)
link.click()
document.body.removeChild(link)
URL.revokeObjectURL(url)
다운로드 기능 구현
위 내용들을 기반으로 다운로드 기능을 fetch API로 사용해서 구현해보겠습니다.
let fileName;

const options = {
    method: 'POST',
    headers: {
        'Content-Type': 'application/json'
    }
};

const key = '다운로드 API URI';

fetch(key, options)
    .then(response => {
        const contentDisposition = response.headers.get('Content-Disposition');
        fileName = contentDisposition.split('filename=')[1].replace(/['"]/g, '');
        return response.blob();
    })
    .then(blobData => {
        const blob = new Blob(['\ufeff', blobData], { type: file.fileType });
        const url = URL.createObjectURL(blob);
        const link = document.createElement('a');
        link.href = url;
        link.setAttribute('download', fileName);
        document.body.appendChild(link);
        link.click();
        document.body.removeChild(link);
        URL.revokeObjectURL(url);
    })
    .catch(error => {
        console.error('Error:', error);
    });
여기서 blob 배열에 \ufeff를 추가한 이유는 csv나 exel 파일 같은 경우 한글이 꺠져서 저장되는 이슈가 있었다.
발생하는 이유는 바이트 순서 표식(BOM)에 의해 UTF-8로 인식되지 않아 깨지는 것이고, 해결하기 위해서는 \ufeff를 데이터 맨 앞에 추가하면 된다.
참고
https://developer.mozilla.org/ko/docs/Web/HTTP/Headers/Content-Type
https://developer.mozilla.org/ko/docs/Glossary/MIME_type
https://developer.mozilla.org/ko/docs/Web/API/Blob
https://heropy.blog/2019/02/28/blob/