Next에 구글 폰트 적용하기
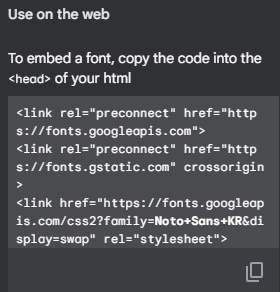
1. 원하는 폰트 찾기
링크를 복사
2. _document.tsx Head에 삽입
// Styled-components 세팅이 된 _document.tsx

import Document, {
  Html,
  Head,
  Main,
  NextScript,
  DocumentContext,
  DocumentInitialProps,
} from 'next/document';
import { ServerStyleSheet } from 'styled-components';

export default class MyDocument extends Document {
  static async getInitialProps(
    ctx: DocumentContext,
  ): Promise<DocumentInitialProps> {
    const sheet = new ServerStyleSheet();
    const originalRenderPage = ctx.renderPage;

    try {
      ctx.renderPage = () =>
        originalRenderPage({
          enhanceApp: (App) => (props) =>
            sheet.collectStyles(<App {...props} />),
        });

      const initialProps = await Document.getInitialProps(ctx);
      return {
        ...initialProps,
        styles: [
          <>
            {initialProps.styles}
            {sheet.getStyleElement()}
          </>,
        ],
      };
    } finally {
      sheet.seal();
    }
  }

  render() {
    return (
      <Html>
        <Head>
          <link rel="preconnect" href="https://fonts.googleapis.com" />
          <link
            rel="preconnect"
            href="https://fonts.gstatic.com"
            crossOrigin="true"
          />
          <link
            href="https://fonts.googleapis.com/css2?family=Noto+Sans+KR&display=swap"
            rel="stylesheet"
          />
        </Head>
        <body>
          <Main />
          <NextScript />
        </body>
      </Html>
    );
  }
}
3. GlobalStyle.ts body에 적용
import { createGlobalStyle } from 'styled-components';

export const GlobalStyle = createGlobalStyle`
@import url('https://fonts.googleapis.com/css2?family=Source+Sans+Pro:wght@300;400&display=swap');
html, body, div, span, applet, object, iframe,
h1, h2, h3, h4, h5, h6, p, blockquote, pre,
a, abbr, acronym, address, big, cite, code,
del, dfn, em, img, ins, kbd, q, s, samp,
small, strike, strong, sub, sup, tt, var,
b, u, i, center,
dl, dt, dd, menu, ol, ul, li,
fieldset, form, label, legend,
table, caption, tbody, tfoot, thead, tr, th, td,
article, aside, canvas, details, embed,
figure, figcaption, footer, header, hgroup,
main, menu, nav, output, ruby, section, summary,
time, mark, audio, video {
  margin: 0;
  padding: 0;
  border: 0;
  font-size: 100%;
  font: inherit;
  vertical-align: baseline;
}
/* HTML5 display-role reset for older browsers */
article, aside, details, figcaption, figure,
footer, header, hgroup, main, menu, nav, section {
  display: block;
}
/* HTML5 hidden-attribute fix for newer browsers */
*[hidden] {
    display: none;
}
body {
  line-height: 1;
}
menu, ol, ul {
  list-style: none;
}
blockquote, q {
  quotes: none;
}
blockquote:before, blockquote:after,
q:before, q:after {
  content: '';
  content: none;
}
table {
  border-collapse: collapse;
  border-spacing: 0;
}
* {
  box-sizing: border-box;
}
body {
  font-weight: 300;
  font-family: 'Noto Sans KR', sans-serif;
  line-height: 1.2;
  background-color: white;
}
a {
  text-decoration:none;
  color:inherit;
}
`;
Chakra UI와 함께 사용하기
_document.tsx에 링크를 삽입하는 것은 똑같다.
//_document.tsx
import { ColorModeScript } from '@chakra-ui/react';
import NextDocument, { Html, Head, Main, NextScript } from 'next/document';
import theme from '../styles/theme';

export default class Document extends NextDocument {
  render() {
    return (
      <Html lang="en">
        <Head>
          <link rel="preconnect" href="https://fonts.googleapis.com" />
          <link rel="preconnect" href="https://fonts.gstatic.com" />
          <link
            href="https://fonts.googleapis.com/css2?family=Stylish&display=swap"
            rel="stylesheet"
          />
        </Head>
        <body>
          {/* 👇 Here's the script */}
          <ColorModeScript initialColorMode={theme.config.initialColorMode} />
          <Main />
          <NextScript />
        </body>
      </Html>
    );
  }
}
그 후 _app.tsx에 extendTheme에다가 폰트를 추가하자.
//_app.tsx
import { ChakraProvider, extendTheme } from '@chakra-ui/react';
import { AppProps } from 'next/app';

const theme = extendTheme({
  fonts: {
    heading: `'Stylish', sans-serif`,
    body: `'Stylish', sans-serif`,
  },
});

function MyApp({ Component, pageProps }: AppProps) {
  return (
      <ChakraProvider theme={theme}>
        <Component {...pageProps} />
      </ChakraProvider>
  );
}

export default MyApp;

><