
프로젝트 진행 중에 scss에서 폰트 디자인 시스템을 아래처럼 정의해서 사용하려는데 자동완성이 작동하지 않았다...
자동완성 intellisense없이는 작업하지 못하는 병이 있어서 못 참고 해결법을 알아보았습니다.
@layer typography {
  @mixin font-default {
    padding: 0;
    margin: 0;
  }
  .font-h1 {
    @include font-default;
    font-size: 2rem; // 32px
    line-height: 1.2;
    letter-spacing: -0.02rem;
  }

  .font-subhead-1 {
    @include font-default;
    font-size: 1.375rem; // 22px
    line-height: 1.3;
    letter-spacing: -0.01rem;
  }

  .font-body-1 {
    @include font-default;
    font-size: 1rem; // 16px
    line-height: 1.5;
    letter-spacing: -0.005rem;
  }
	...
}
생각보다 정보가 많지 않던 와중 나랑 비슷한 환경의 사람들이 많은 깃헙이슈를 발견했다.
https://github.com/tailwindlabs/tailwindcss-intellisense/issues/227
가장 따봉이 많았던 방법인 tailwind.config 에서 커스텀 플러그인을 정의하고 사용하는 방식을 채택했다.
css in js 방식으로 작성해야하는데 기존에 작성해둔 css가 있다면 아래 링크에서 간편하게 변환해서 사용가능하다.
module.exports = {
  plugins: [
    ({ addUtilities }) => {
      addUtilities({
        '.font-default': {
          padding: 0,
          margin: 0,
        },
        '.font-h1': {
          '@apply font-default': {},
          fontSize: '2rem',
          lineHeight: 1.2,
          letterSpacing: '-0.02rem',
        },
        '.font-subhead-1': {
          '@apply font-default': {},
          fontSize: '1.375rem',
          lineHeight: 1.3,
          letterSpacing: '-0.01rem',
        },
        ' .font-body-1': {
          '@apply font-default': {},
          fontSize: '1rem',
          lineHeight: 1.5,
          letterSpacing: '-0.005rem',
        },
      });
    }
  ]
}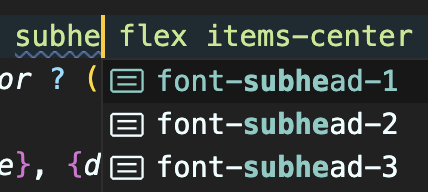
tailwind intellisense가 잘 작동하고
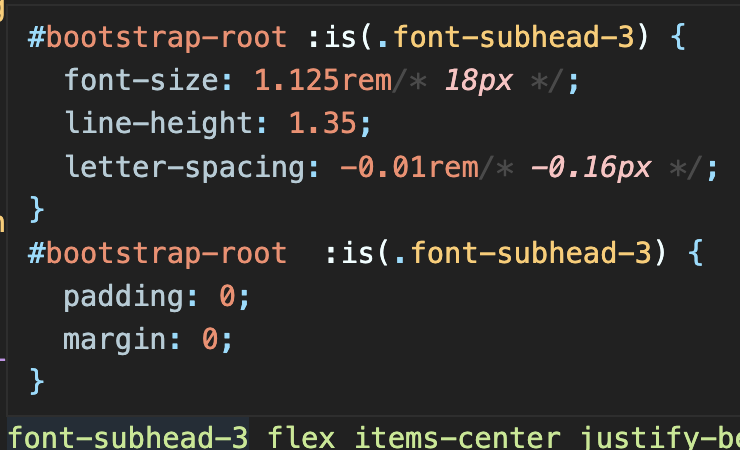
마우스 호버할 경우 cheatsheet도 잘 작동한다!👍

응애🐣 프론트엔드