🚀 발단
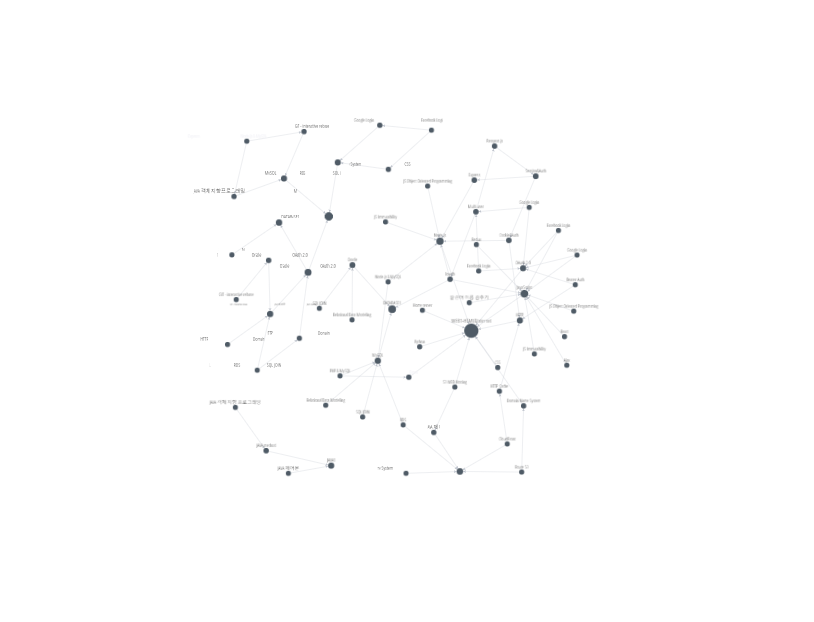
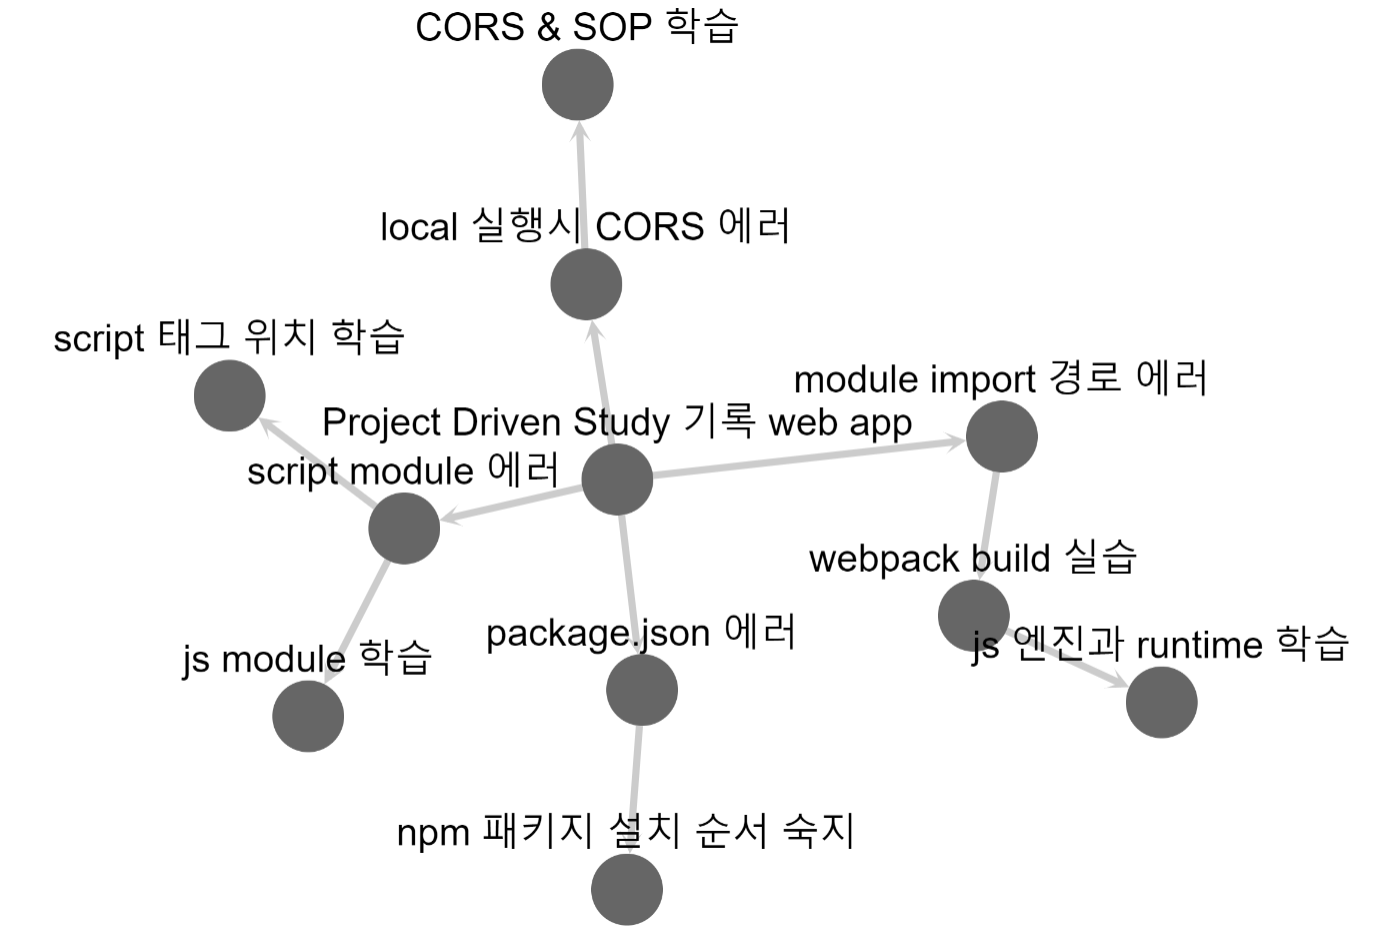
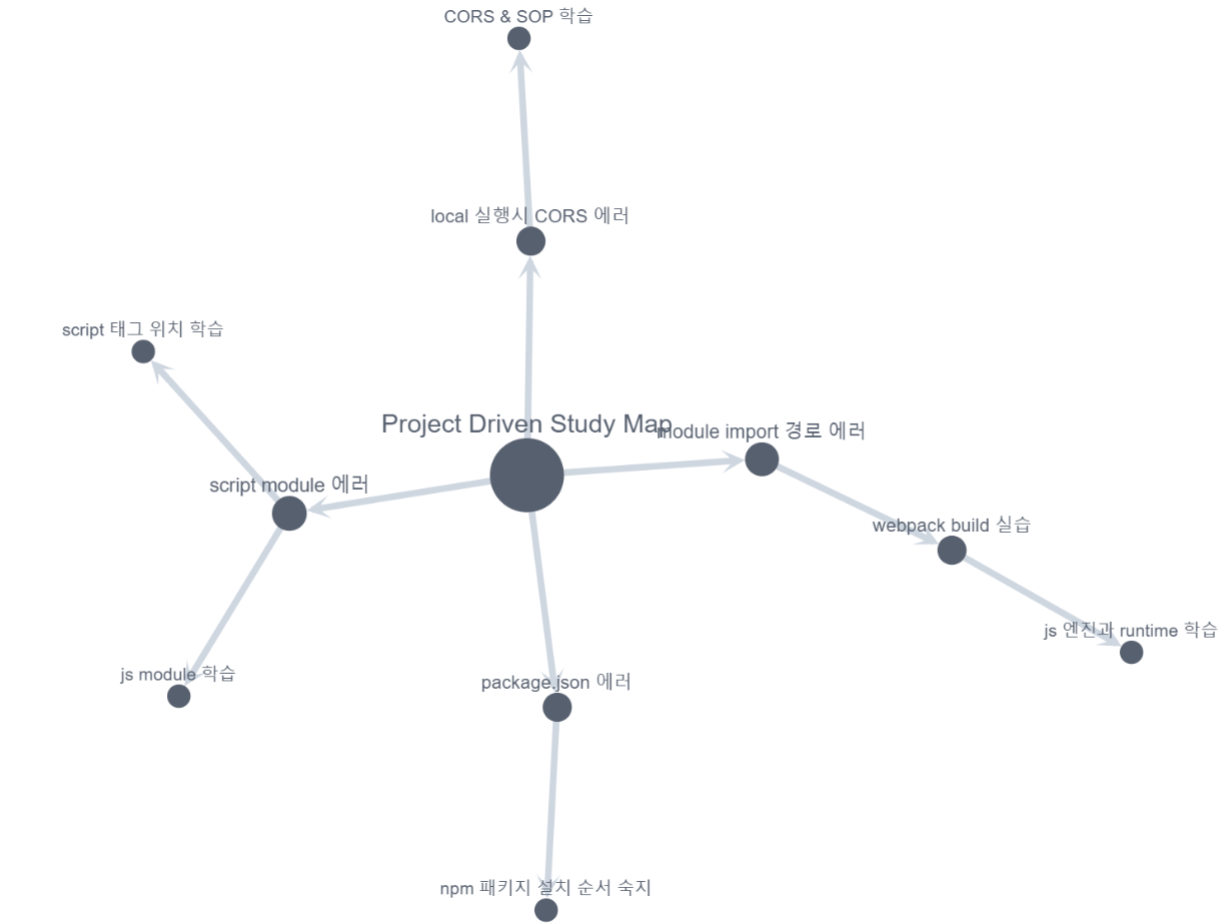
생활코딩에 접속해서 수업 소개 섹션으로 가면 수업간의 관계를 확인할 수 있는 마인드 맵이 있습니다.
개인적으로 공부한 것들의 흐름을 위와 같이 정리하면 좋을 것 같았습니다.
그래서 해당 라이브러리가 cytoscape라는 것을 확인 후 이를 활용해 비슷한 사이트를 개발을 해봤습니다.
그러나 cytoscape 관련한 별도의 한글 정보가 없어 영어를 잘 못하는 저는 수많은 삽질의 시간을 거쳐야 했기에 다른 분들은 해당 라이브러리를 좀 더 편하게 쓰실 수 있도록 개발하면서 알게 된 것들을 한글기록으로 남깁니다. 도움이 되었으면 좋겠습니다!
🧵 초기 설정
툴은 Visual Studio Code 기준으로 설명드리고 NPM은 설치되어 있다고 가정하겠습니다.
먼저 필요한 패키지를 설치해야 합니다. 터미널을 열어서
npm init -y로 초기화 한 후
npm install @babel/core @babel/preset-env @babel/preset-react babel-loader clean-webpack-plugin css-loader html-loader file-loader html-webpack-plugin mini-css-extract-plugin webpack webpack-cli webpack-dev-server cytoscape 를 입력해 필요한 패키지들을 설치해 줍니다. 그 다음엔
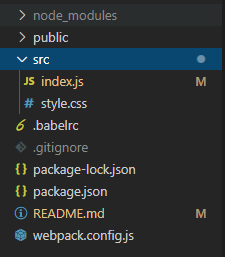
위와 같이 경로를 구성하고 파일을 생성합니다. 내용은 아래와 같습니다.
index.html
<!DOCTYPE html>
<html lang="ko">
<head>
    <meta charset="UTF-8">
    <meta name="viewport" content="width=device-width, initial-scale=1.0">
    <meta http-equiv="X-UA-Compatible" content="ie=edge">
    <title>Take Knowledge's Study Map</title>
</head>
<body>
    <div id="cy"></div>
</body>
</html>
style.css
html,body,#cy {
    width: 100%;
    height: 100%;
}
body {
    margin: 0;
}
index.js
import cytoscape from 'cytoscape';
import './style.css';
// webpack으로 묶어줘야 하니 css파일을 진입점인 index.js 에 import 합니다

// 아래는 공식 사이트에 올라와 있는 예제 코드입니다
var cy = cytoscape({

    container: document.getElementById('cy'), // container to render in

    elements: [ // list of graph elements to start with
        { // node a
            "data": { "id": 'a' }
        },
        { // node b
            "data": { "id": 'b' }
        },
        { // edge ab
            "data": { "id": 'ab', "source": 'a', "target": 'b' }
        }
    ],

    style: [ // the stylesheet for the graph
        {
            selector: 'node',
            style: {
                'background-color': '#666',
                'label': 'data(id)'
            }
        },

        {
            selector: 'edge',
            style: {
                'width': 3,
                'line-color': '#ccc',
                'target-arrow-color': '#ccc',
                'target-arrow-shape': 'triangle'
            }
        }
    ],

    layout: {
        name: 'grid',
        rows: 5
    }

});
webpack.config.js
const path = require("path");
const HtmlWebPackPlugin = require("html-webpack-plugin");
// html 파일 추출 플러그인입니다
const MiniCssExtractPlugin = require("mini-css-extract-plugin");
// css 파일 추출 플러그인입니다
const { CleanWebpackPlugin } = require("clean-webpack-plugin");
// build 폴더 자동 정리를 위한 플러그인 입니다

module.exports = {
  entry: "./src/index.js",
  output: {
    filename: "bundle.js",
    path: path.resolve(__dirname + "/build")
  },
  devServer: {
    contentBase: path.resolve("./build"),
    index: "index.html",
    port: 9000
    // 변경 사항 자동 적용을 위한 설정입니다
  },
  mode: "none",
  module: {
    rules: [
      {
        test: /\.(js|jsx)$/,
        exclude: "/node_modules",
        use: ['babel-loader'],
      },
      {
        test: /\.html$/,
        use: [
          {
            loader: "html-loader",
            options: { minimize: true }
          }
        ]
      },
      {
        test: /\.css$/,
        use: [MiniCssExtractPlugin.loader,'css-loader']
      }
    ]
    // js, jsx, html, css 파일 번들링 관련 설정입니다
  },
  plugins: [
    new HtmlWebPackPlugin({
      template: './public/index.html',
      filename: 'index.html'
    }),
    new MiniCssExtractPlugin({
      filename: 'style.css'
    }),
    new CleanWebpackPlugin()
    // 플러그인 설정들입니다
  ]
};
package.json
// 설치가 되었다면 다른 부분은 이미 동일하게 입력되어 있을 겁니다.
// scripts 부분만 잘 적어주세요!
{
  "name": "프로젝트 이름",
  "version": "1.0.0",
  "description": "",
  "main": "index.js",
  "scripts": {
    "build": "webpack",
    "start": "webpack-dev-server --hot"
  },
  "keywords": [],
  "author": "",
  "license": "ISC",
  "dependencies": {
    "@babel/core": "^7.7.7",
    "@babel/preset-env": "^7.7.7",
    "@babel/preset-react": "^7.7.4",
    "babel-loader": "^8.0.6",
    "clean-webpack-plugin": "^3.0.0",
    "css-loader": "^3.4.0",
    "cytoscape": "^3.12.1",
    "html-loader": "^0.5.5",
    "html-webpack-plugin": "^3.2.0",
    "mini-css-extract-plugin": "^0.9.0",
    "style-loader": "^1.1.1",
    "webpack": "^4.41.4",
    "webpack-cli": "^3.3.10",
    "webpack-dev-server": "^3.10.1"
  }
}
.babelrc
// .babelrc
{
    "presets": [
        "@babel/preset-env"
    ]
}
.gitignore
node_modules를 github에 올리지 않기 위해 추가해 줬습니다
package-lock.json은 이 목록에 추가되어선 안됩니다
이유는 링크를 참조하세요 : package-lock.json은 왜 필요할까?
.gitignore
/node_modules
위와 같이 설정해 준 다음
npm run start위의 키워드를 입력하면
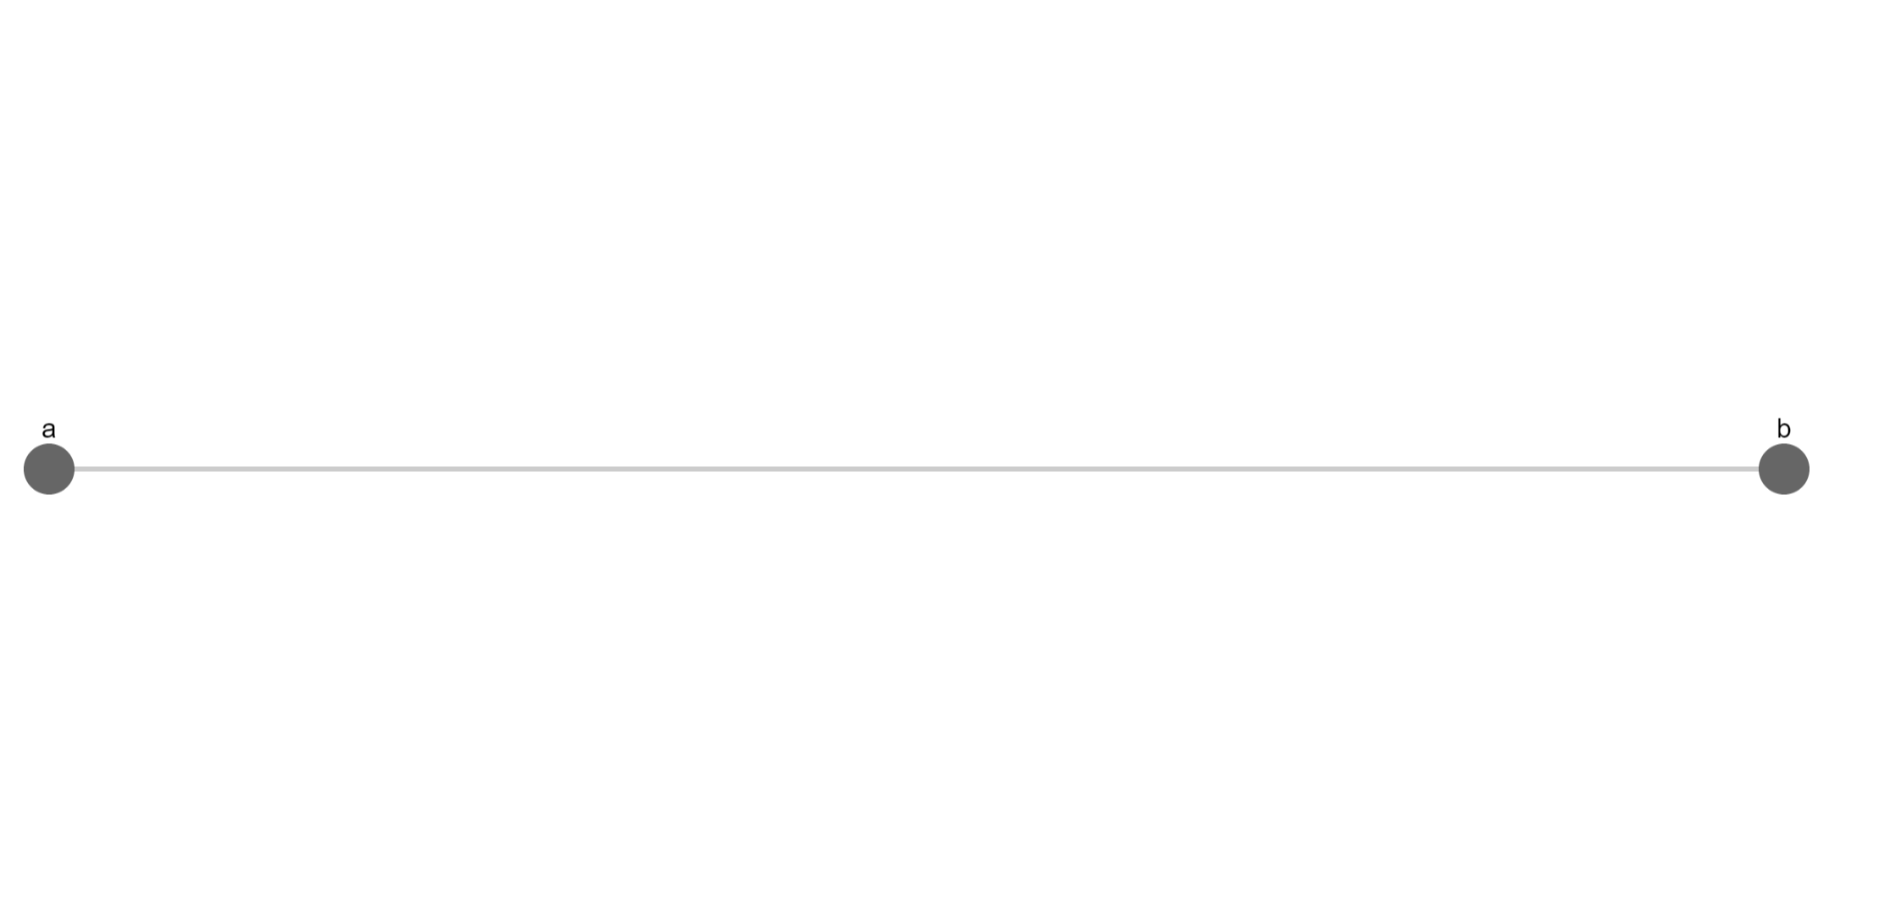
위와 같은 화면이 출력됩니다. 이제 세팅은 끝났습니다.
🔥 cytoscape 활용법
🏹 데이터 구성
cytoscape를 활용하기 위해선 먼저 node와 edge를 구성해야 합니다.
먼저 거점이 되는 node는
"data": {
  "id": 'id',
  "url": '링크걸고 싶은 주소(옵션)'
  "label": '표시하고 싶은 내용(옵션)'
}
와 같은 형태로 구성해주면 되고 연결선인 edge는
"data": {
	"id": 'id',
    "source": '연결할 노드 중 하위에 둘 node id',
    "target":'연결할 노드 중 상위에 둘 node id'
}
형태로 입력하면 됩니다.
source에 하위에 둘 node를, target에 상위에 둘 node를 둬야 한다는 부분이 의아하실 테지만(저는 이게 어색했습니다) 그 이유는 잠시 후 'depth에 따라 node의 크기를 다르게' 챕터에서 확인하실 수 있습니다.
그 외에 주의할 점은 id에 공백과 .이 포함되면 안됩니다. 포함해도 당장 렌더링엔 문제가 없지만 포함되어 있으면 cytoscape가 제공하는 함수 중 id로 node를 검색하는 함수를 쓸 때 에러가 나니 포함하지 맙시다.
이 점을 주의해서 node와 edge를 구성한 후 배열로 cytoscape 함수 내부의 elements 부분에 입력해주면 됩니다. 제 필요에 따라 구성하고 입력한 소스는 아래와 같습니다.
index.js
import cytoscape from 'cytoscape';
import './style.css';
// webpack으로 묶어줘야 하니 css파일을 진입점인 index.js 에 import 합니다
const data = [
{
"data": {
"id": "PJ-mindMap",
"url": "https://github.com/nomelancholy/js-project-driven-study-mind-map/projects/1?add_cards_query=is%3Aopen",
"label": "Project Driven Study Map"
}
},
{
"data": {
"id": "ISSUE-packageJson",
"url": "https://www.google.co.kr/search?newwindow=1&safe=off&sxsrf=ACYBGNQPahfceN-IrrIMqFcBxt0bBJxcog%3A1577373548670&source=hp&ei=bM8EXp3aJoKpoASW2InwAg&q=no+such+file+or+directory%2C+open+%27C%3A%5Cdev%5Cworkspace%5Cjs-seomal-clone%5Cpackage.json%27&oq=no+such+file+or+directory%2C+open+%27C%3A%5Cdev%5Cworkspace%5Cjs-seomal-clone%5Cpackage.json%27&gs_l=psy-ab.3...7437.7437..8911...1.0..0.95.95.1......0....2j1..gws-wiz.pzIrSS2UT84&ved=0ahUKEwidwK2wztPmAhWCFIgKHRZsAi4Q4dUDCAY&uact=5",
"label": "package.json 에러"
}
},
{
"data": { "id": "PJ-mindMap->ISSUE-packageJson", "source": "ISSUE-packageJson", "target": "PJ-mindMap" }
},
{
"data": {
"id": "STUDY-npmInit",
"url": "https://stackoverflow.com/questions/9484829/npm-cant-find-package-json",
"label": "npm 패키지 설치 순서 숙지"
}
},
{
"data": { "id": "ISSUE-packageJson->STUDY-npmInit", "source": "STUDY-npmInit", "target": "ISSUE-packageJson" }
},
{
"data": {
"id": "ISSUE-outsideModule",
"url": "https://www.google.co.kr/search?newwindow=1&safe=off&sxsrf=ACYBGNT3L0sknJfq3DO75H55Q5VQJODk-Q%3A1577373778729&ei=UtAEXvGVLMLh-AbOm7CYDA&q=Uncaught+SyntaxError%3A+Cannot+use+import+statement+outside+a+modul&oq=Uncaught+SyntaxError%3A+Cannot+use+import+statement+outside+a+modul&gs_l=psy-ab.3..35i39j0l2j0i203l7.513620.513620..514369...0.0..0.167.374.1j2......0....2j1..gws-wiz.gwgT-rwsfWw&ved=0ahUKEwjxhomez9PmAhXCMN4KHc4NDMMQ4dUDCAs&uact=5",
"label": "script module 에러"
}
},
{
"data": { "id": "PJ-mindmap->ISSUE-outsideModule", "source": "ISSUE-outsideModule", "target": "PJ-mindMap" }
},
{
"data": {
"id": "STUDY-scriptModule",
"url": "https://velog.io/@takeknowledge/%EC%9E%90%EB%B0%94%EC%8A%A4%ED%81%AC%EB%A6%BD%ED%8A%B8-%EB%AA%A8%EB%93%88-%ED%95%99%EC%8A%B5-%EB%82%B4%EC%9A%A9-%EC%9A%94%EC%95%BD-lwk4drjnni",
"label": "js module 학습"
}
},
{
"data": { "id": "ISSUE-outsideModule->STUDY-scriptModule", "source": "STUDY-scriptModule", "target": "ISSUE-outsideModule" }
},
{
"data": {
"id": "STUDY-scriptPosition",
"url": "https://velog.io/@takeknowledge/script-%ED%83%9C%EA%B7%B8%EB%8A%94-%EC%96%B4%EB%94%94%EC%97%90-%EC%9C%84%EC%B9%98%ED%95%B4%EC%95%BC-%ED%95%A0%EA%B9%8C%EC%9A%94",
"label": "script 태그 위치 학습"
}
},
{
"data": { "id": "ISSUE-outsideModule->STUDY-scriptPosition", "source": "STUDY-scriptPosition", "target": "ISSUE-outsideModule" }
},
{
"data": {
"id": "ISSUE-localCORS",
"url": "https://www.google.co.kr/search?newwindow=1&safe=off&sxsrf=ACYBGNSmKE1wN_fBQuRtT5pwz0hZ5JqldQ%3A1577374293889&ei=VdIEXtP7NY-lmAX82Z7oDg&q=Access+to+script+at+%27file%3A%2F%2F%2FC%3A%2Fdev%2Fworkspace%2Fjs-seomal-clone%2Fjs%2Fcyto.js%27+from+origin+%27null%27+has+been+blocked+by+CORS+policy%3A+Cross+origin+requests+are+only+supported+for+protocol+schemes%3A+http%2C+data%2C+chrome%2C+chrome-extension%2C+https.&oq=Access+to+script+at+%27file%3A%2F%2F%2FC%3A%2Fdev%2Fworkspace%2Fjs-seomal-clone%2Fjs%2Fcyto.js%27+from+origin+%27null%27+has+been+blocked+by+CORS+policy%3A+Cross+origin+requests+are+only+supported+for+protocol+schemes%3A+http%2C+data%2C+chrome%2C+chrome-extension%2C+https.&gs_l=psy-ab.3..35i39j0i20i263l2j0i203l7.516217.516217..516645...0.0..0.177.281.0j2......0....2j1..gws-wiz.JE3_EPpI5o4&ved=0ahUKEwiT-tuT0dPmAhWPEqYKHfysB-0Q4dUDCAs&uact=5",
"label": "local 실행시 CORS 에러"
}
},
{
"data": { "id": "PJ-mindmap->ISSUE-localCORS", "source": "ISSUE-localCORS", "target": "PJ-mindMap" }
},
{
"data": {
"id": "STUDY-localCORS",
"url": "https://velog.io/@takeknowledge/%EB%A1%9C%EC%BB%AC%EC%97%90%EC%84%9C-CORS-policy-%EA%B4%80%EB%A0%A8-%EC%97%90%EB%9F%AC%EA%B0%80-%EB%B0%9C%EC%83%9D%ED%95%98%EB%8A%94-%EC%9D%B4%EC%9C%A0-3gk4gyhreu",
"label": "CORS & SOP 학습"
}
},
{
"data": { "id": "ISSUE-localCORS->STUDY-localCORS", "source": "STUDY-localCORS", "target": "ISSUE-localCORS" }
},
{
"data": {
"id": "ISSUE-moduleImport",
"url": "https://goenning.net/2017/07/21/how-to-avoid-relative-path-hell-javascript-typescript-projects/",
"label": "module import 경로 에러"
}
},
{
"data": { "id": "PJ-mindmap->ISSUE-moduleImport", "source": "ISSUE-moduleImport", "target": "PJ-mindMap" }
},
{
"data": {
"id": "STUDY-webpackBuild",
"url": "https://github.com/nomelancholy/webpack-build-practice",
"label": "webpack build 실습"
}
},
{
"data": { "id": "ISSUE-moduleImport->STUDY-webpackBuild", "source": "STUDY-webpackBuild", "target": "ISSUE-moduleImport" }
},
{
"data": {
"id": "STUDY-jsBrowser",
"url": "https://github.com/nomelancholy/webpack-build-practice",
"label": "js 엔진과 runtime 학습"
}
},
{
"data": { "id": "STUDY-webpackBuild->STUDY-jsBrowser", "source": "STUDY-jsBrowser", "target": "STUDY-webpackBuild" }
}
];
// 아래는 공식 사이트에 올라와 있는 예제 코드입니다
const cy = cytoscape({
container: document.getElementById('cy'), // container to render in
elements: data,
style: [ // the stylesheet for the graph
{
selector: 'node',
style: {
'background-color': '#666',
'label': 'data(id)'
}
},
{
selector: 'edge',
style: {
'width': 3,
'line-color': '#ccc',
'target-arrow-color': '#ccc',
'target-arrow-shape': 'triangle'
}
}
],
layout: {
name: 'grid',
rows: 5
}
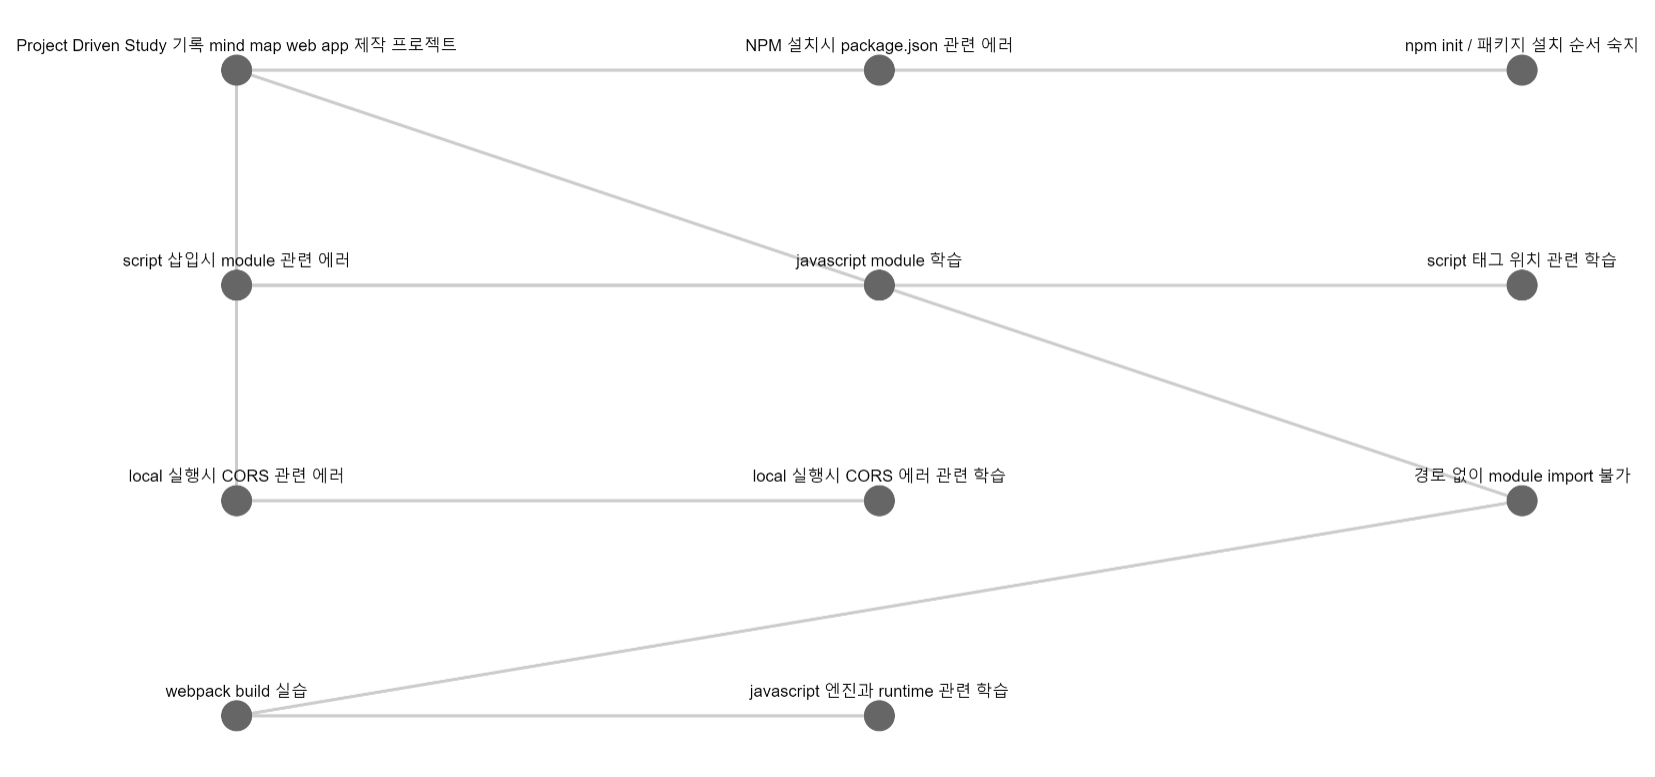
});그러나 위와 같이 입력하면
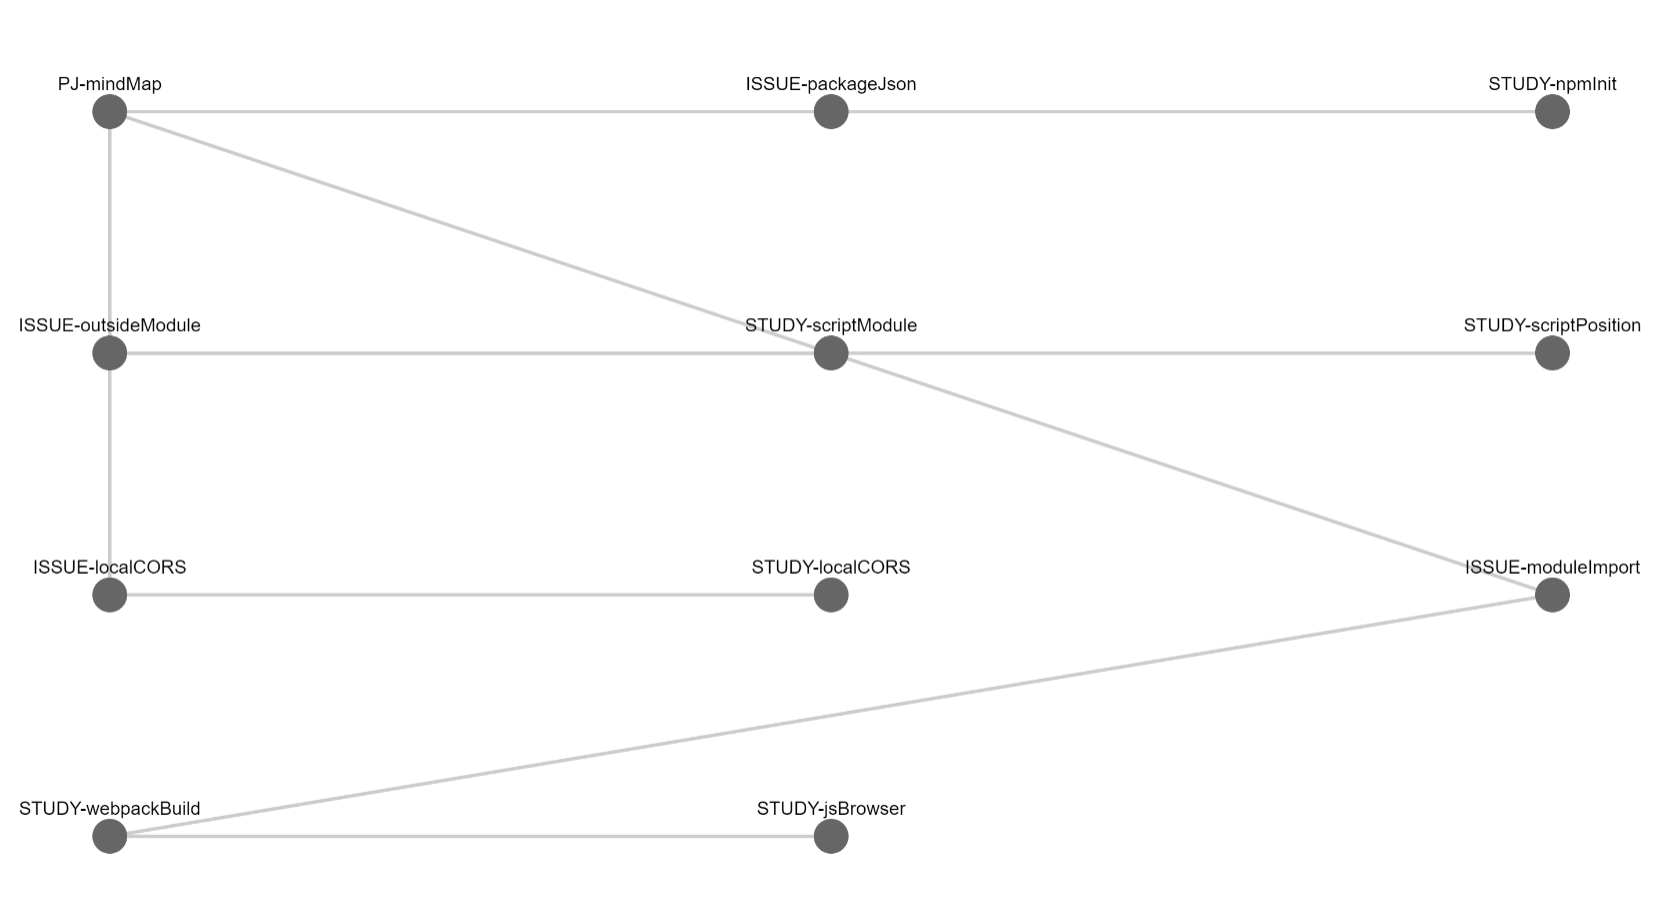
보다시피 화면이 seomal.org에서 보던 것과는 많이 다른 화면이 나옵니다. 차근 차근 쫓아가 봅시다.
👛 id가 아닌 라벨이 표시되게
먼저 node 위에 id가 아닌 우리가 입력한 라벨이 표시되도록 해봅시다. 방법은 간단합니다. index.js 하단 style 쪽에서 node의 style을 설정하는 부분을 보면 label이 data(id)로 되어 있는데 이걸 data(label)로 바꿔주면
import cytoscape from 'cytoscape';
import './style.css';

const data = ...

const cy = cytoscape({

    container: document.getElementById('cy'), // container to render in

    elements: data,

    style: [ // the stylesheet for the graph
        {
            selector: 'node',
            style: {
                'background-color': '#666',
              // 변경된 부분
              	'label': 'data(label)'
              //
            }
        },

        {
            selector: 'edge',
            style: {
                'width': 3,
                'line-color': '#ccc',
                'target-arrow-color': '#ccc',
                'target-arrow-shape': 'triangle'
            }
        }
    ],

    layout: {
        name: 'grid',
        rows: 5
    }
});
id가 아닌 label이 node의 이름으로 나오는 걸 볼 수 있습니다.
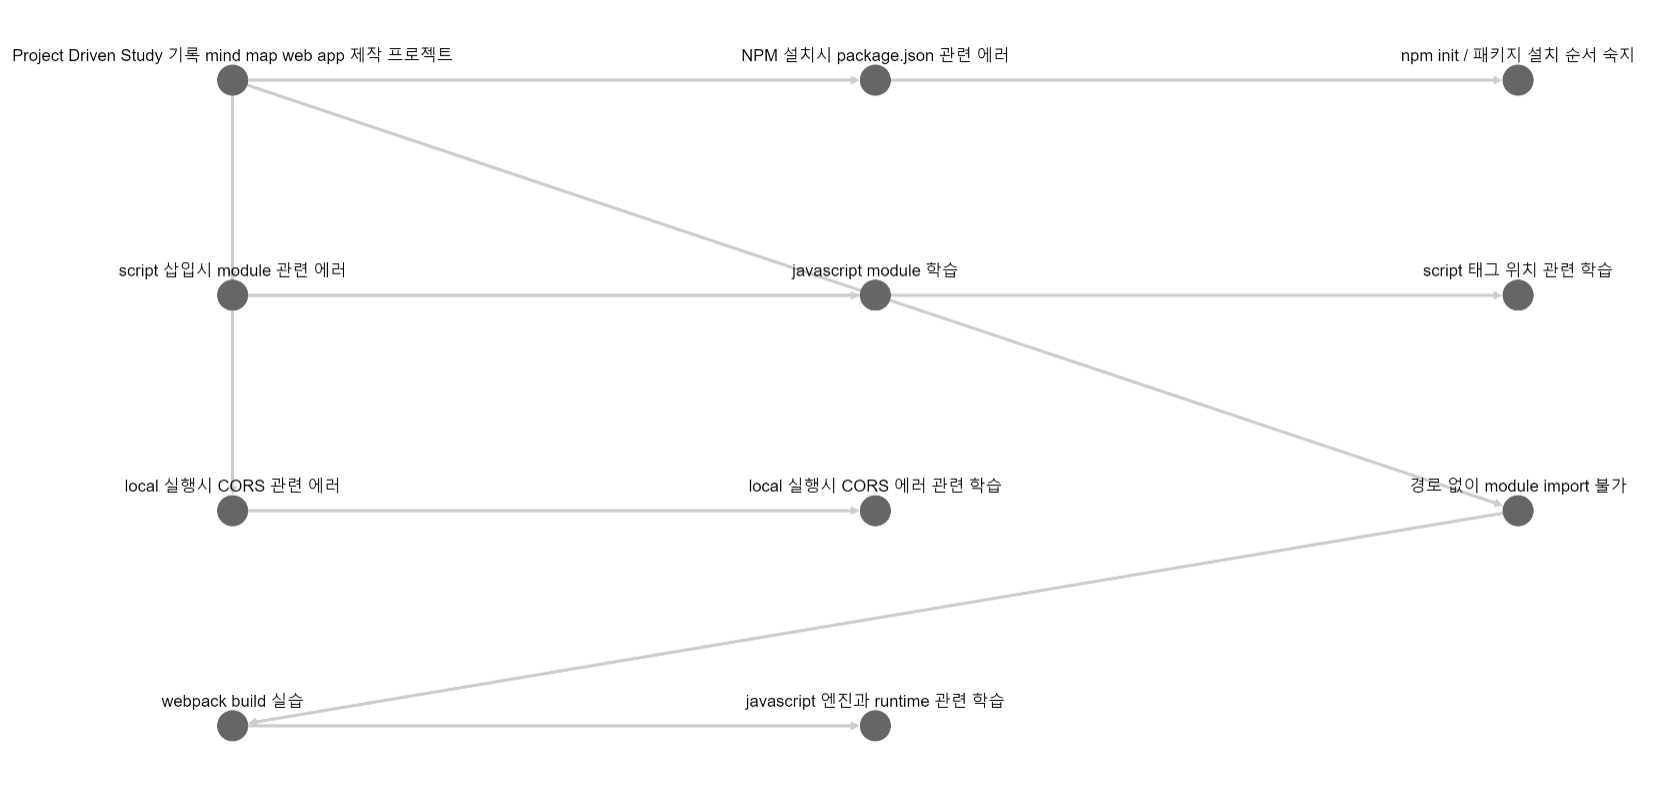
🔀 edge styling
다음으로는 edge의 스타일링을 해보죠. 먼저 edge의 방향을 표시해봅시다. 이 설정은 style에서 edge의 style을 설정하는 부분의 값을 통해 제어할 수 있습니다.
먼저 세팅되어 있는 상태에서 'curve-style'의 값을 'bezier'로 주면 화살표가 등장합니다.
// index.js 의 style 부분입니다. 전체 코드는 마지막에 올릴게요

    style: [ // the stylesheet for the graph
        {
            selector: 'node',
            style: {
                'background-color': '#666',
                'label': 'data(label)'
            }
        },

        {
            selector: 'edge',
            style: {
                'width': 3,
              // 추가된 부분
                'curve-style': 'bezier',
              //
                'line-color': '#ccc',
                'target-arrow-color': '#ccc',
                'target-arrow-shape': 'triangle'
            }
        }
    ],
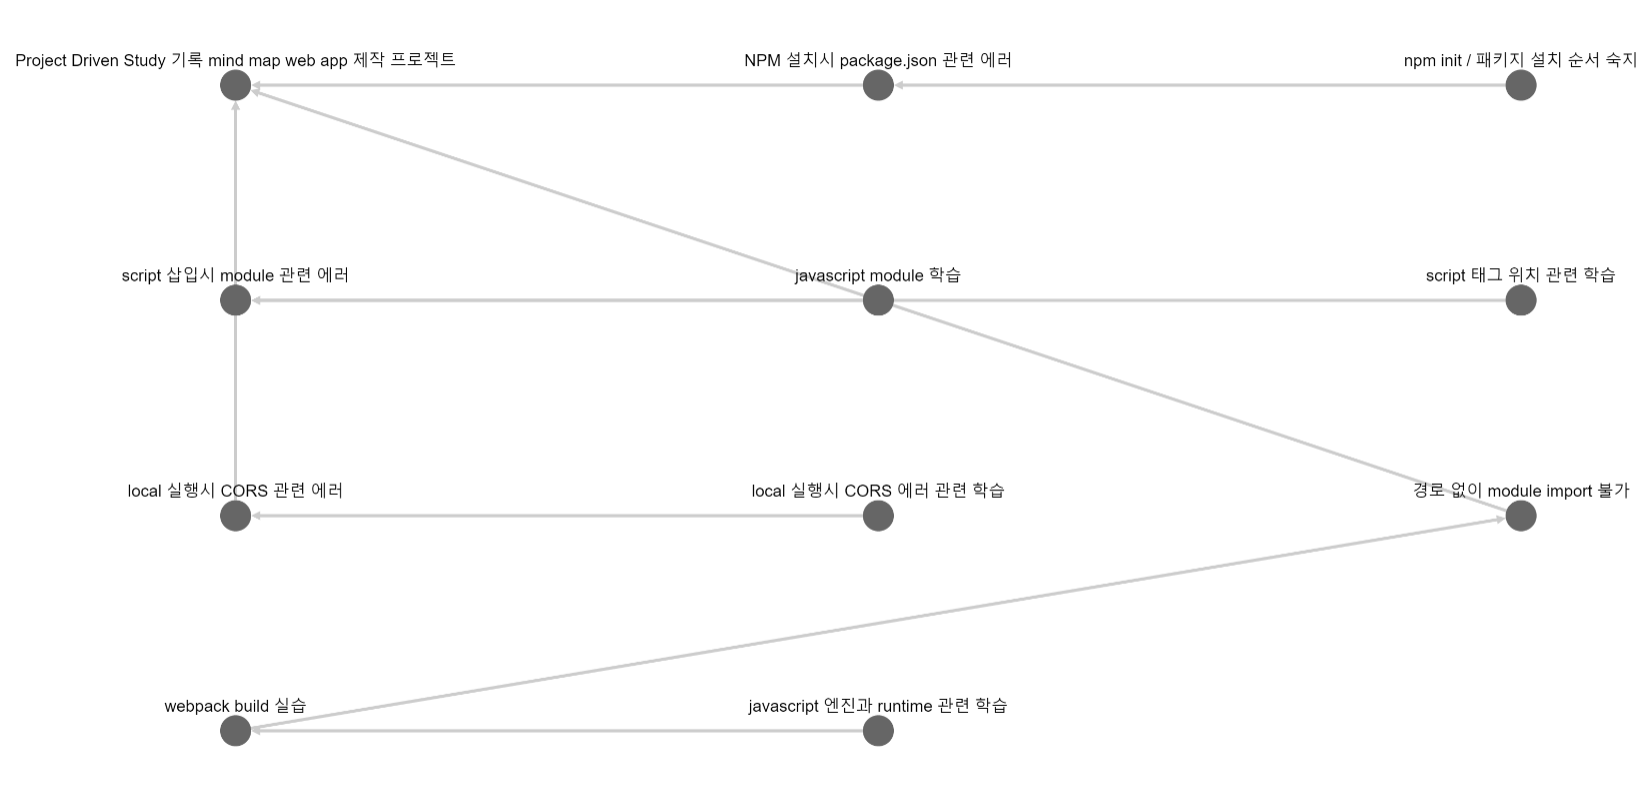
그런데 화살표 방향이 상위를 가르키고 있는게 뭔가 어색하죠? 고쳐봅시다.
target-arrow-shape와 target-arrow-color에서 source-arrow-shape와 source-arrow-color로요.
그렇게 해주면 화살표 방향이 바뀝니다
  style: [ // the stylesheet for the graph
        {
            selector: 'node',
            style: {
                'background-color': '#666',
                'label': 'data(label)'
            }
        },

        {
            selector: 'edge',
            style: {
                'width': 3,
                'curve-style': 'bezier',
                'line-color': '#ccc',
              // 변경된 부분
                'source-arrow-color': '#ccc',
                'source-arrow-shape': 'triangle'
              //
            }
        }
    ],
마지막으로 화살표 모양도 바꿔봅시다. 화살표 모양은 여기서 확인 가능합니다.
전 vee가 마음에 들더군요. 적용하면
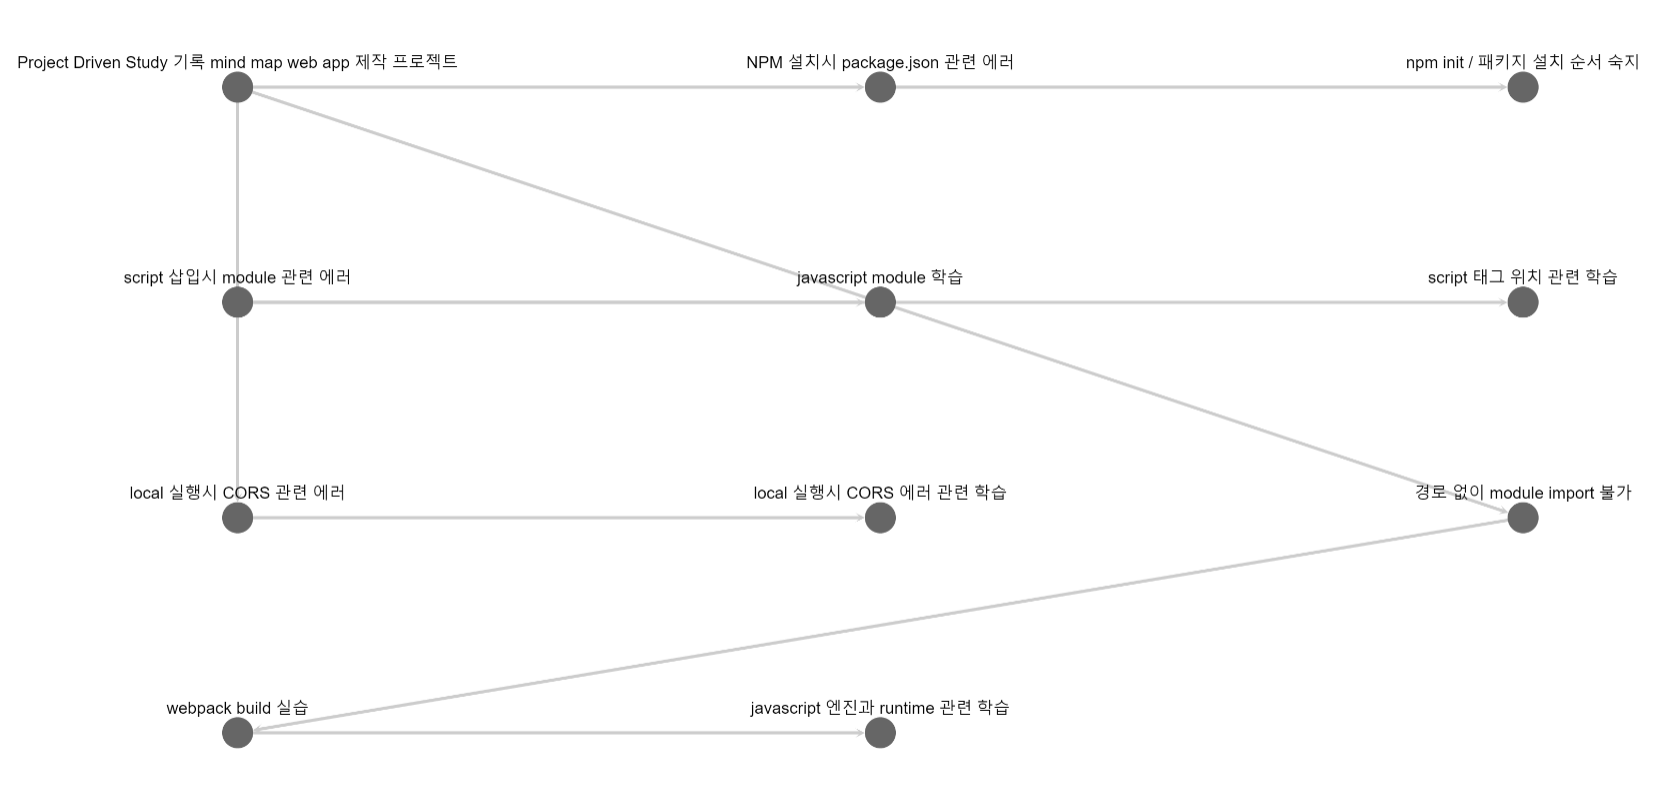
좀 더 날카로운 화살표 모양으로 잘 바뀌었습니다.
data 부분을 생략한 여기까지의 전체 코드는 아래와 같습니다.
import cytoscape from 'cytoscape';
import './style.css';

const data = ...

const cy = cytoscape({

    container: document.getElementById('cy'), // container to render in

    elements: data,

    style: [ // the stylesheet for the graph
        {
            selector: 'node',
            style: {
                'background-color': '#666',
              	'label': 'data(label)'
            }
        },

        {
            selector: 'edge',
            style: {
                'width': 3,
                'line-color': '#ccc',
                'source-arrow-color': '#ccc',
              // 변경된 부분
                'source-arrow-shape': 'vee'
              //
            }
        }
    ],

    layout: {
        name: 'grid',
        rows: 5
    }
});
id가 아닌 라벨이 표시되게 & edge styling commit log
📟 layout 설정
다음으로는 layout을 설정해서 ~쓸데없이~ 정렬되어 있는 형태를 좀 더 마인드맵스럽게 바꿔봅시다
layout의 형태들은 여기서 확인할 수 있습니다. 전 cose-bilkent가 마음에 드네요. 이걸 사용해보겠습니다.
먼저 설치를 해줘야합니다. 터미널을 하나 더 여시고
npm install cytoscape-cose-bilkent
을 입력해 해당 layout을 설치합니다. 이후엔 index.js 최상단으로 이동해서
import cytoscape from 'cytoscape';
import coseBilkent from 'cytoscape-cose-bilkent';

cytoscape.use(coseBilkent);

import './style.css';

...
위와 같이 cytoscape-cose-bilkent를 import 하고 사용하도록 선언해줍니다.
그 이후엔 node와 edge의 style관련 설정을 해줬던 부분 아래 있는 layout을
...
style: [ // the stylesheet for the graph
{
selector: 'node',
style: {
'background-color': '#666',
'label': 'data(label)'
}
},
{
selector: 'edge',
style: {
'width': 3,
'curve-style': 'bezier',
'line-color': '#ccc',
'source-arrow-color': '#ccc',
'source-arrow-shape': 'vee'
}
}
],
// 변경된 부분
layout: {
name: 'cose-bilkent',
animate: false,
gravityRangeCompound: 1.5,
fit: true,
tile: true
}
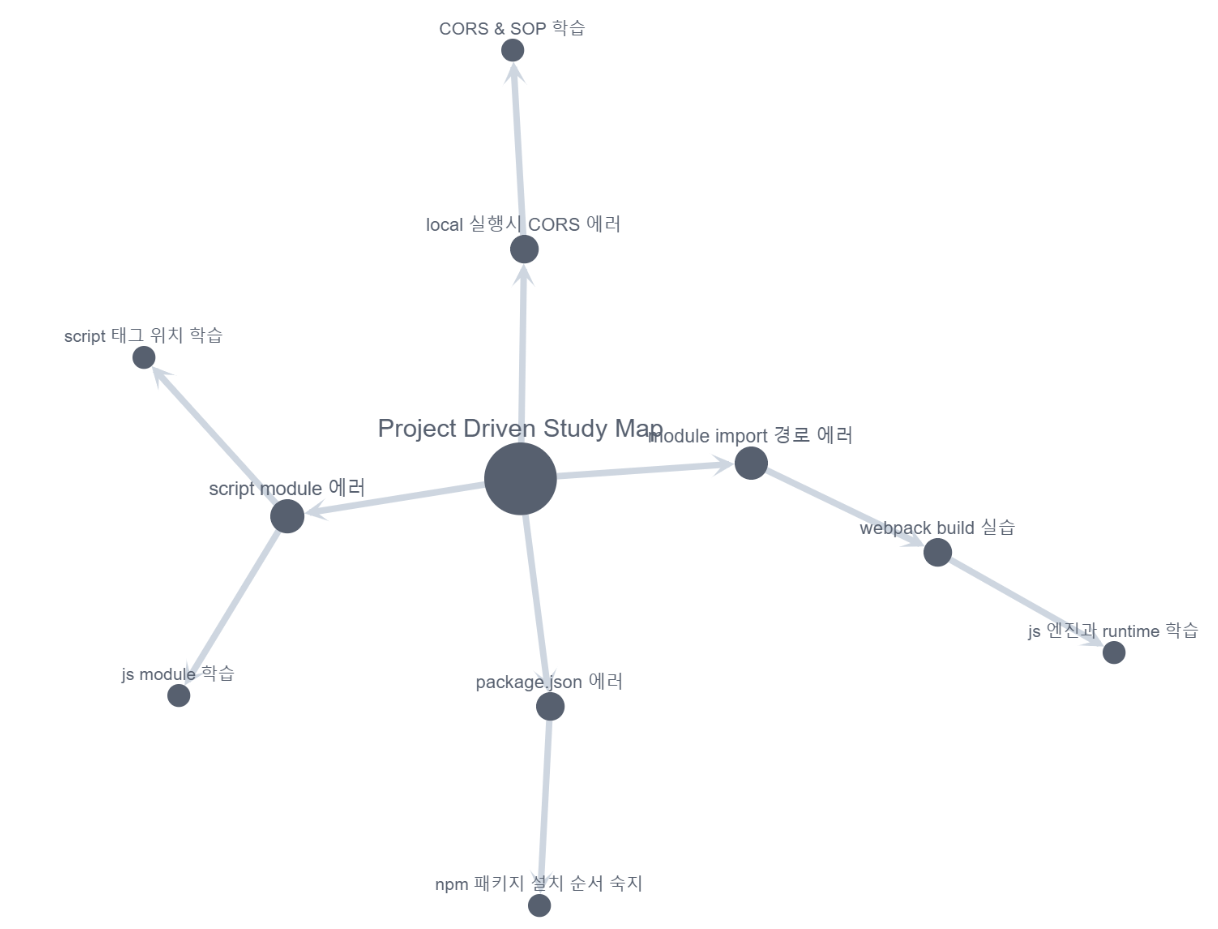
//위와 같이 바꿔주면
마침내 마인드맵 같은 형태가 나타났습니다!
🧲 하이퍼 링크 연결
이제 node를 클릭하면 데이터 구성때 입력해준 url이 새창에서 열리게 설정해 줍시다.
cytoscape에는 on() 메소드를 이용해 이벤트를 부여할 수 있습니다. cytoscape의 scope 밖에, 그러니까
const cy = cytoscape({ ... });

// 여기
주석 표시한 부분에 cytoscape 객체를 담은 변수 cy를 활용해 이벤트를 연결할 수 있습니다.
const cy = cytoscape({ ... });
cy.on('tap', function (e) {
    const url = e.target.data('url')
    if (url && url !== '') {
        window.open(url);
    }
});
tap을 인자로 줘서 클릭이벤트를 주고 해당 url이 새창으로 연결되게 설정해주면
클릭시 링크로 연결되는 이벤트가 잘 작동합니다.
🔊 depth에 따라 node의 크기를 다르게
이제 depth에 따라 node의 크기를 다르게 만들어 봅시다.
먼저 이걸 위해선 동일한 data를 elements로 갖는 cytoscape 객체가 하나 더 있어야 합니다.
const data = [...];

const cy_for_rank = cytoscape({
    elements: data
});
// rank를 활용하기 위해 data만 입력한 cytoscape 객체입니다

const pageRank = cy_for_rank.elements().pageRank();
// elements들의 rank들입니다.

const nodeMaxSize = 50;
const nodeMinSize = 5;
const fontMaxSize = 8;
const fontMinSize = 5;
// 추후 마우스 인/아웃 시에도 활용해야 하니 node와 font의 최대값/최소값은 변수로 빼줍니다

const cy = cytoscape({...});
data와 cy 사이에 위와 같은 코드를 추가해줍시다. 그리고 node의 styling을 해줬던 부분으로 가서
...
    style: [ // the stylesheet for the graph
        {
            selector: 'node',
            style: {
                'background-color': '#666',
                'label': 'data(label)',
                'width': function (ele) {
                    return nodeMaxSize *  pageRank.rank('#' + ele.id())  + nodeMinSize;
                },
                'height': function (ele) {
                    return nodeMaxSize *  pageRank.rank('#' + ele.id()) + nodeMinSize;
                },
                'font-size': function (ele) {
                    return fontMaxSize *   pageRank.rank('#' + ele.id()) + fontMinSize;
                }
            }
        },
      ...
width와 height와 font-size를 위와 같이 설정해주면
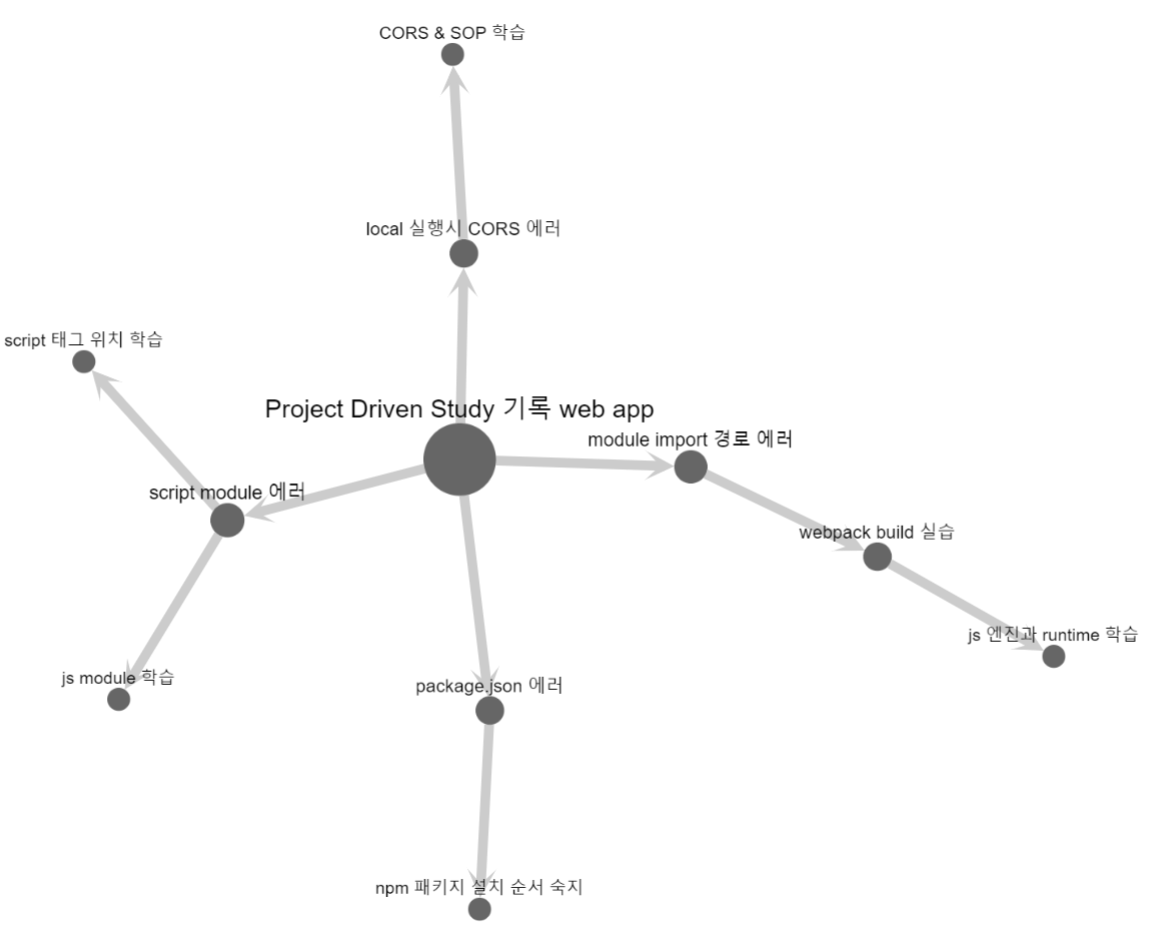
마침내 depth에 따라 크기가 차등 적용되는 부분까지도 구현이 끝났습니다.
위에서도 적었지만 만약 node id에 공백이나 . 이 들어가 있으면 이 부분에서 에러가 발생합니다.
target으로 depth가 깊을 수록 rank 값이 높게 적용되더군요.
위에서 source와 target을 거꾸로 적은 이유가 이 rank 값 만큼 node의 크기를 설정하기 위해서입니다
depth에 따라 node 크기를 다르게 commit log
✨ 마우스 인 / 아웃시 하이라이트 적용 / 해제
이제 마우스 인 / 아웃시 하이라이트 적용 / 해제 기능을 구현해봅시다.
마우스 인/아웃 감지 둘 모두 클릭시 하이퍼링크 연결 기능 구현때 사용한 on 메소드를 사용합니다.
...
cy.on('tap', function (e) {...});

cy.on('tapstart mouseover', 'node', function(e){
    console.log("in");
});


cy.on('tapend mouseout', 'node', function(e){
    console.log("out");
});
먼저 위와 같이 작성해 잘 감지하는지 확인해줍시다.
잘 작동한다면 다음은 node와 edge의 style을 바꿔줄 함수를 작성할 차례합니다.
먼저 사용할 색과 크기값들을 변수로 꺼냅시다. 색은 전 여기서 선택했습니다. 선택 node의 크기와 색, font 크기, edge & 화살표 크기와 색 등등을 설정해
const pageRank = cy_for_rank.elements().pageRank();
// elements들의 rank들입니다.

/// 변경된 부분
const nodeMaxSize = 50;
const nodeMinSize = 5;
const nodeActiveSize = 28;
const fontMaxSize = 8;
const fontMinSize = 5;
const fontActiveSize = 7;
// node & font 크기 값

const edgeWidth = '2px';
var edgeActiveWidth = '4px';
const arrowScale = 0.8;
const arrowActiveScale = 1.2;
// edge & arrow 크기값

const dimColor = '#dfe4ea';
const edgeColor = '#ced6e0';
const nodeColor = '#57606f';
const nodeActiveColor = '#ffa502';

const successorColor = '#ff6348';
// 상위 node & edge color
const predecessorsColor = '#1e90ff';
// 하위 node & edge color

// 변경된 부분

const cy = cytoscape({...});
위의 위치에 작성해줍니다. 값을 변수로 빼냈으니 하드코딩 되어 있던 style 값도 변경을 해줘야겠죠
    style: [ // the stylesheet for the graph
        {
            selector: 'node',
            style: {
              // 변경된 부분
                'background-color': nodeColor,
              //
                'label': 'data(label)',
                'width': function (ele) {
                    return nodeMaxSize * pageRank.rank('#' + ele.id()) + nodeMinSize;
                },
                'height': function (ele) {
                    return nodeMaxSize * pageRank.rank('#' + ele.id()) + nodeMinSize;
                },
                'font-size': function (ele) {
                    return fontMaxSize * pageRank.rank('#' + ele.id()) + fontMinSize;
                },
              // 추가된 부분
                'color': nodeColor
              //
            }
        },

        {
            selector: 'edge',
            style: {
              // 변경된 부분
                'width': edgeWidth,
                'curve-style': 'bezier',
                'line-color': edgeColor,
                'source-arrow-color': edgeColor,
                'source-arrow-shape': 'vee',
                'arrow-scale': arrowScale
              //
            }
        }
    ],
위와 같이 바꿨으면 이제 총 네개의 함수를 만들어야 합니다. 각각의 이름과 역할은 아래와 같습니다.
- setDimStyle(target_cy, style)
모든 node와 edge를 연하게 만드는 역할을 합니다. - setFocus(target_element, successorColor, predecessorsColor, edgeWidth, arrowScale)
선택한 node 와 edge, 그리고 상하위 node와 edge를 크기와 색으로 구분하는 역할을 합니다. - setOpacityElement(target_element, degree)
opacity를 활용해 바로 이웃한 연관관계와 그렇지 않은 연관 관계를 구분하는 역할을 합니다. - setResetFocus(target_cy)
node를 선택하기 전의 상태로 되돌리는 역할을 합니다.
함수의 상세 코드는 아래와 같습니다
function setDimStyle(target_cy, style) {
    target_cy.nodes().forEach(function (target) {
        target.style(style);
    });
    target_cy.edges().forEach(function (target) {
        target.style(style);
    });
}

function setFocus(target_element, successorColor, predecessorsColor, edgeWidth, arrowScale) {
    target_element.style('background-color', nodeActiveColor);
    target_element.style('color', nodeColor);
    target_element.successors().each(function (e) {
        // 상위  엣지와 노드
        if (e.isEdge()) {
            e.style('width', edgeWidth);
            e.style('arrow-scale', arrowScale);
        }
        e.style('color', nodeColor);
        e.style('background-color', successorColor);
        e.style('line-color', successorColor);
        e.style('source-arrow-color', successorColor);
        setOpacityElement(e, 0.5);
    }
    );
    target_element.predecessors().each(function (e) {
        // 하위 엣지와 노드
        if (e.isEdge()) {
            e.style('width', edgeWidth);
            e.style('arrow-scale', arrowScale);
        }
        e.style('color', nodeColor);
        e.style('background-color', predecessorsColor);
        e.style('line-color', predecessorsColor);
        e.style('source-arrow-color', predecessorsColor);
        setOpacityElement(e, 0.5);
    });
    target_element.neighborhood().each(function (e) {
        // 이웃한 엣지와 노드
        setOpacityElement(e, 1);
    }
    );
    target_element.style('width', Math.max(parseFloat(target_element.style('width')), nodeActiveSize));
    target_element.style('height', Math.max(parseFloat(target_element.style('height')), nodeActiveSize));
    target_element.style('font-size', Math.max(parseFloat(target_element.style('font-size')), fontActiveSize));
}

function setOpacityElement(target_element, degree) {
    target_element.style('opacity', degree);
}

function setResetFocus(target_cy) {
    target_cy.nodes().forEach(function (target) {
        target.style('background-color', nodeColor);
        var rank = pageRank.rank(target);
        target.style('width', nodeMaxSize * rank + nodeMinSize);
        target.style('height', nodeMaxSize * rank + nodeMinSize);
        target.style('font-size', fontMaxSize * rank + fontMinSize);
        target.style('color', nodeColor);
        target.style('opacity', 1);
    });
    target_cy.edges().forEach(function (target) {
        target.style('line-color', edgeColor);
        target.style('source-arrow-color', edgeColor);
        target.style('width', edgeWidth);
        target.style('arrow-scale', arrowScale);
        target.style('opacity', 1);
    });
}
이처럼 작성해주시고, 함수를 만들었으니 사용해야겠죠. 아까 만들어 둔 mouse in과 out을 감지하는 부분에
cy.on('tapstart mouseover', 'node', function (e) {
    setDimStyle(cy, {
        'background-color': dimColor,
        'line-color': dimColor,
        'source-arrow-color': dimColor,
        'color': dimColor
    });

    setFocus(e.target, successorColor, predecessorsColor, edgeActiveWidth, arrowActiveScale);
});

cy.on('tapend mouseout', 'node', function (e) {
    setResetFocus(e.cy);
});
위와 같이 함수를 세팅해줍니다. 그러면
인 아웃 이벤트가 잘 작동합니다!
마우스 인 / 아웃시 하이라이트 적용 / 해제 commit log
🌌 브라우저 크기 변경시 cytoscape 크기 조정
이제 브라우저 크기 변경시 cytoscape의 크기가 자동으로 조정되게 해봅시다. seomal.org의 경우
위와 같이 브라우저의 크기가 변경되는 경우 cytoscape의 크기가 자동으로 변하지만
우린 개발자 도구를 열어도 아무 변화가 없습니다. 이 기능을 추가해봅시다. 적용은 간단합니다
cy.on('tapend mouseout', 'node', function (e) {...});

// 추가되는 부분
let resizeTimer;

window.addEventListener('resize', function () {
    this.clearTimeout(resizeTimer);
    resizeTimer = this.setTimeout(function(){
        cy.fit();
    },200);
});
//
위와 같은 코드를 추가해주면
브라우저 크기 변경시 cytoscape 크기가 자동으로 잘 변경됩니다!
위 코드에서 clearTimout과 setTimout 부분을 제외하면 resize 감지는 되는데 cy.fit() 실행은 안되더군요. 일단 여기를 참고해 해결은 했는데 이렇게 작동하는 자세한 이유를 아는 분 혹시 계시면 댓글 부탁드립니다!
브라우저 크기 변경시 cytoscape 크기 조정 commit log
💫 data 추출 & favicon 추가
기능은 다 구현했으니 이제 마지막으로 파일을 정리하기 위해 data를 별도의 json 파일로 추출하고
개발자 도구를 켰을 때 빨간 글씨 나오는 게 깨름칙하니 favicon도 추가해봅시다.
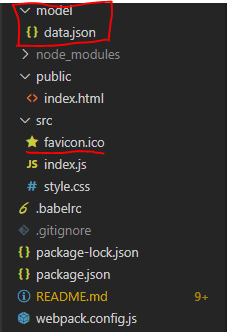
위와 같이 model 폴더 하위에 data.json 파일을 만들고 src 폴더에 favicon으로 사용할 파일도 추가합니다.
그 다음은 webpack.config.js 파일로 가서 module - rules에
  module: {
    rules: [
      {
        test: /\.(js|jsx)$/,
        exclude: "/node_modules",
        use: ['babel-loader'],
      },
      {
        test: /\.html$/,
        use: [
          {
            loader: "html-loader",
            options: { minimize: true }
          }
        ]
      },
      {
        test: /\.css$/,
        use: [MiniCssExtractPlugin.loader,'css-loader']
      },
      // 추가된 부분
      {
        test: /\.json$/,
        type: "javascript/auto",
        loader: "file-loader",
        options: {
          name: "model/[name].[ext]"
        },
        include: [
          path.resolve(__dirname, "./model")
        ]
      },
      {
        test:/\.ico$/,
        loader:"file-loader?name=[name].[ext]",
      }
      //
    ]
  },
위처럼 json과 ico 관련 설정을 추가해 줍니다. 그 다음 index.js로 갑시다. 거기서
const data = [...];
부분에 [ ] 안에 있던 모든 데이터들을 복사해서 model 폴더 하위에 있는 data.json에 붙여넣기 해줍니다.
그럼 이걸 index.js에서 부를 수 있도록 해야겠죠.
먼저 webpack이 번들로 묶어줄 수 있어야 하니 index.js 상단에
import './favicon.ico';
// favicon build
import '../model/data.json';
// data build
data.json과 favicon.ico를 import 할 수 있도록 해주시고
fetch('./model/data.json', { mode: 'no-cors' })
    .then(function (res) {
        return res.json();
    })
    .then(function (data) {
		// 기존 코드
	});
위와 같은 코드를 import 선언해둔 하단에 작성하고 주석 처리 해둔 // 기존 코드 부분에
index.js 내부에 있던, import 선언부를 제외한 모든 코드를 집어 넣고 서버를 시작해보면
favicon도 잘 나오고 화면도 잘 나옵니다. 만드는 과정은 마침내 끝났습니다!
data 추출 & favicon 추가 commit log
🏓 github 활용 hosting
다 만들으니 마지막으로 github를 활용해 hosting을 해봅시다.
소스들을 올려놓은 repository -> settings -> github pages 부분으로 가서
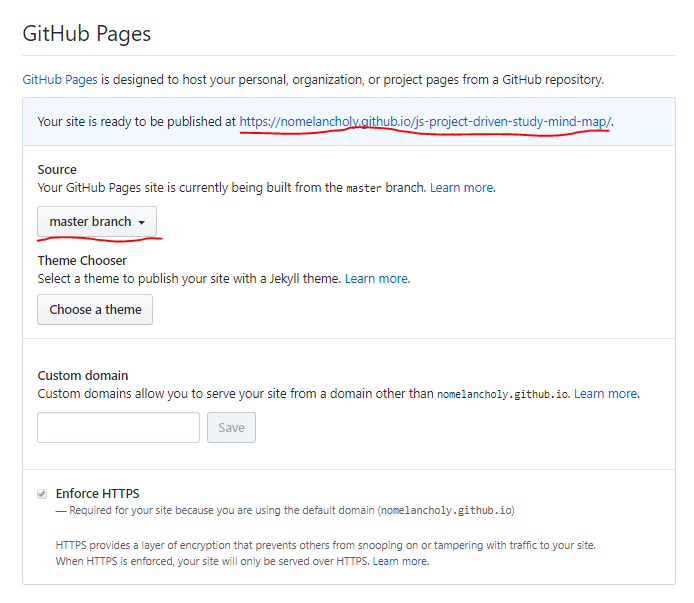
위와 같이 master branch를 선택하면 나오는 저 uri 링크를 클릭해보면 (적용에 시간이 걸릴 수 있습니다)
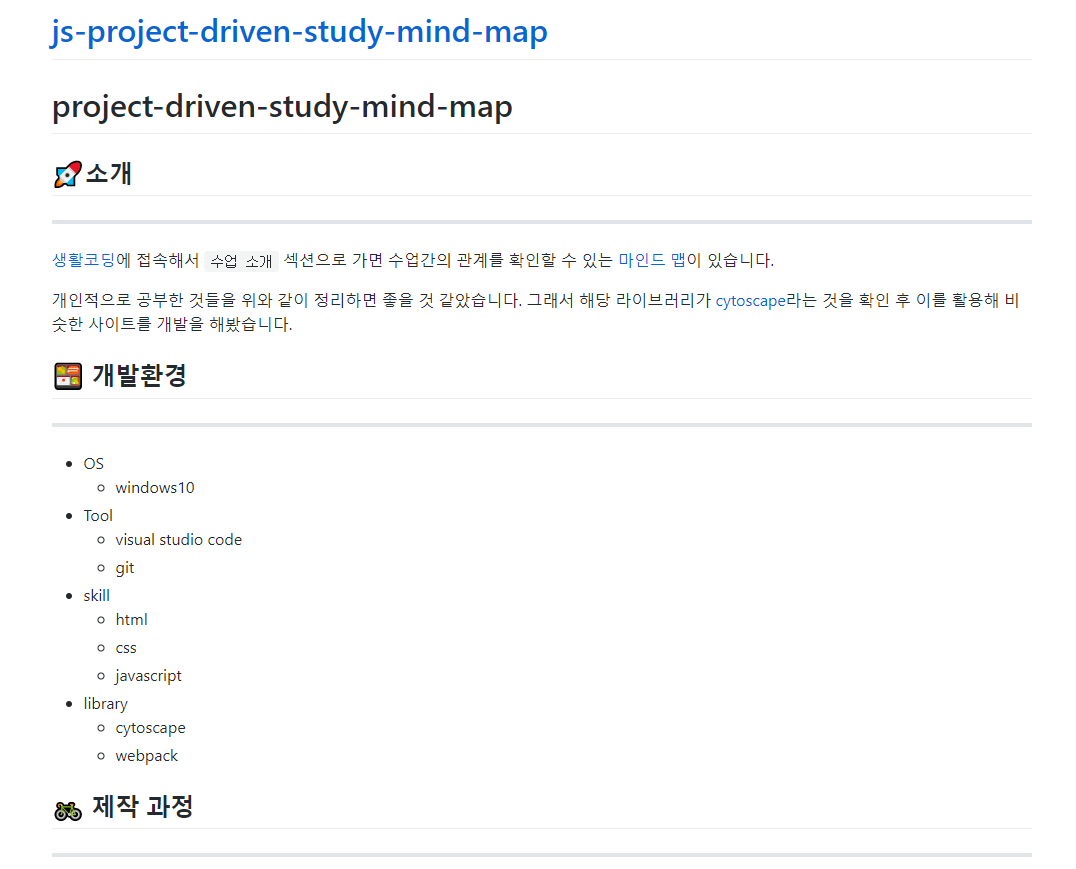
😨 여지껏 만든 페이지가 아닌 readme 파일이 등장합니다. 이유는 이렇습니다.
배포할 파일들은 build 폴더 내부에 있는데 master branch에는 소스 전체가 올라가 있으니 시작점으로 README.md가 잡힌거죠. 실제로 위 uri 뒤에 /build/index 를 추가해서 엔터를 쳐보면
그제야 우리가 만든 페이지가 나옵니다. 이럴 땐 어떻게 해야할까요?
npm에 있는 gh-pages 패키지를 활용하면 build 폴더 내부의 파일들을 쉽게 호스팅할 수 있습니다. 먼저
npm install gh-pages명령어를 입력해 gh-pages를 입력하고 package.json 파일로 이동합니다. 거기서
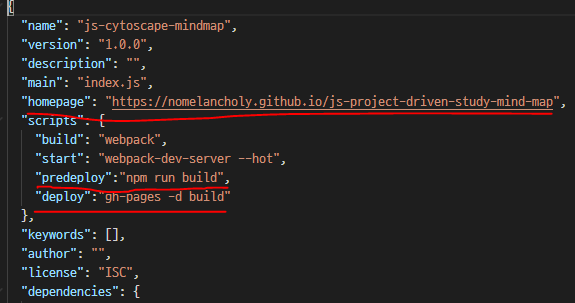
빨간 줄로 표시한 부분 같이
"homepage": "https://본인깃허브아이디.github.io/저장소 이름",
"predeploy":"npm run build",
"deploy":"gh-pages -d build"
위와 같은 정보를 추가해줍니다. 그리고 터미널에서 cd build 입력해 build 폴더로 이동 후
npm run deploy를 입력하고 github - repository - settings - github pages 에 가보면
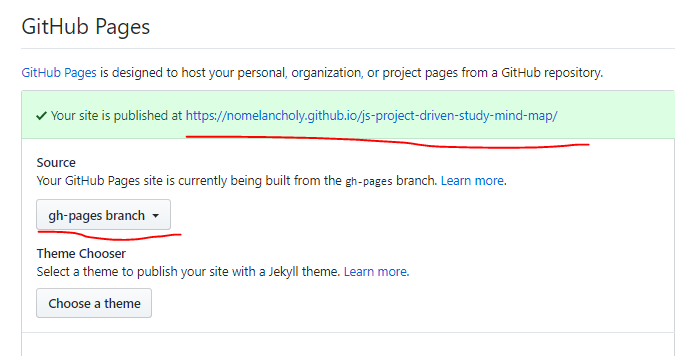
보시는 바와 같이 source에 gh-pages가 선택되어 있고 uri를 클릭하면 바로 개발한 페이지가 나옵니다.
이것으로 마침내 ~포스팅이~ 끝났습니다!
👏 마치며
여러 편에 끊어서 포스팅을 할까 하다가 velog의 목차 기능을 믿고 한편에 다 적어봤는데
너무 중언 부언 한 거 같아 도움이 되셨을지 모르겠네요.
해당 프로젝트의 진행 과정은 github project에 정리해뒀고 소스코드는 repository에 올려뒀으니
설명이 부족했던 부분은 이 두 곳을 참고해주시고 질문은 댓글에 남겨주세요!
모쪼록 도움이 되었으면 좋겠습니다!

5개의 댓글

webpack-dev-server가 webpack serve 로 바뀌었다네요. 에러 때문에 1시간 넘게 찾아보다가 package.json 의 script 부분의 webpack-dev-server를 바꿨더니 해결되었습니다. 다들 저처럼 힘들지 마시라고 씁니다..

좋은 포스팅 감사드립니다! "id가 아닌 라벨이 표시되게" 섹션 바로 전까지만 똑같이 따라 해봤는데요. 저는 브라우저를 띄웠을 때 모든 노드들이 왼쪽 윗부분인 (0, 0) 에 겹쳐서 표시됩니다. 혹시 이런 경우는 무슨 원인 때문인 지 알 수 있을까요?


혹시 저같은 문제를 겪으실까봐 댓글을 남깁니다. webpack이 버전이 바뀌면서 최신 버전과는 맞지 않는 문법이 몇 있습니다. dependencies에서 본문의 버전에 맞게 설치하시면 문제가 없을 것입니다. 그리고 index.html은 public 폴더에 넣어야 하네요. 부끄러운 실수때문에 한참을 헤멨습니다 ㅜㅜ;;
도움 많이 되었습니다. 양질의 포스터 감사합니다.