이제.. 여태까지만든 RDB는 보내주자..
왜냐하면 토큰을 얹고 수정을해야되는ㄷ ㅔ매번 고칠수가없다..
그래서 application.properties에 다음과같이구문을넣어준다면
db를 자동으로만들어준다.. create 는 만들고 끝나면 drop.. update는 있으면 그거쓰고 없으면 만들어줌 ㅇㅇ
spring.jpa.hibernate.ddl-auto=update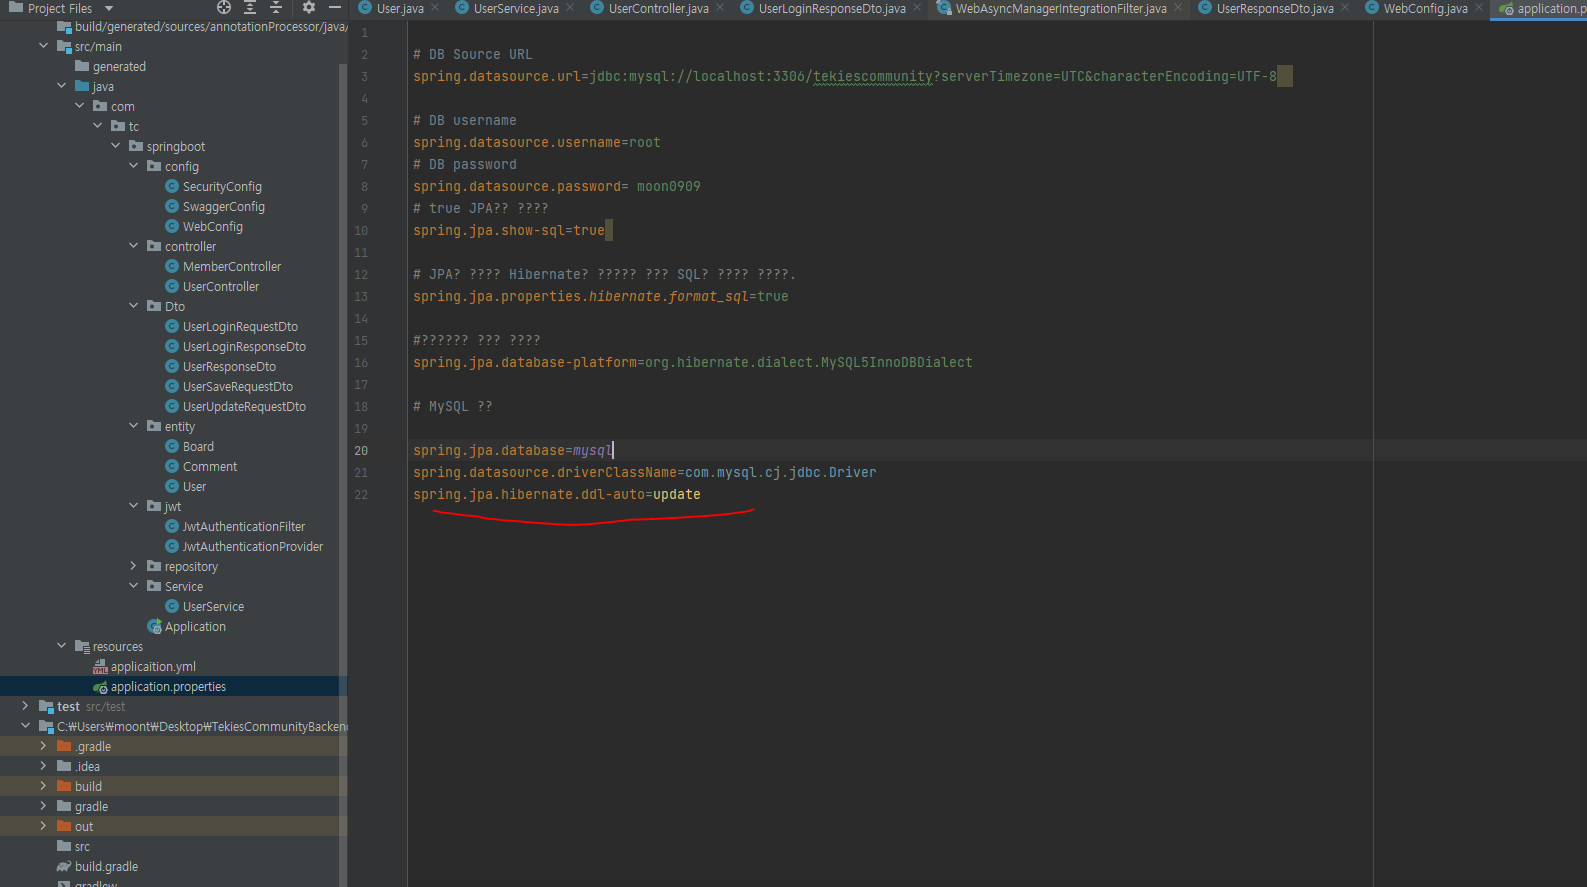
그리고 이제 Security와 jwt를 통한 로그인을 구현할것이다..
그럼 이제 gradle.build에서 다음과같이 의존설정해주어야한다.

    implementation ('org.springframework.boot:spring-boot-starter-security')
    implementation ('org.springframework.boot:spring-boot-starter-validation')
    implementation group : 'com.googlecode.json-simple', name: 'json-simple', version: '1.1'
    implementation ('io.jsonwebtoken:jjwt:0.9.1')
토큰방식으로 할것인데 AccessToken을 통해 접근하는방식이다.
그러나 AccessToken에 더 얹어서 RefreshToken을 발급하는 기능을 이용한다면 더 깔끔할수도있으나.. 필자는..초행이라..일단 AccessToken만 하도록.. 하였다..
그리고 이전까지 작성했엇던.. db를 수정해야되는데.. 앞으로는 JPA방식을 사용할때 RDB를 Entity안에서 적용하는 식으로 진행할예정이다..
즉 이전까지 db다지워주시고.. 위에 ddl-auto update로 적용하시길...
그래서 entity부터 user는 바꿔주엇다..
public class User implements UserDetails {
    @Id
    @GeneratedValue(strategy = GenerationType.IDENTITY)
    private int tc_num;
    private String tc_id;
    private String tc_password;
    private String tc_email;
    @ElementCollection(fetch = FetchType.EAGER)
    private List<String> roles = new ArrayList<>();


    @Builder
    public User(String tc_id, String tc_password, String tc_email) {
        this.tc_id = tc_id;
        this.tc_password = tc_password;
        this.tc_email = tc_email;
        this.roles = Collections.singletonList("ROLE_USER");
    }

    public void update(String tc_password, String tc_email) {
        this.tc_password = tc_password;
        this.tc_email = tc_email;
    }

    @Override
    public Collection<? extends GrantedAuthority> getAuthorities() {
        return this.roles.stream()
                .map(SimpleGrantedAuthority::new)
                .collect(Collectors.toList());
    }

    @Override
    public String getPassword() {
        return tc_password;
    }

    @Override
    public String getUsername() {
        return tc_id;
    }

    @Override
    public boolean isAccountNonExpired() {
        return true;
    }

    @Override
    public boolean isAccountNonLocked() {
        return true;
    }

    @Override
    public boolean isCredentialsNonExpired() {
        return true;
    }

    @Override
    public boolean isEnabled() {
        return true;
    }
}
스프링 시큐리티의 userdetail을 상속받으면 아레 get 파트는.. 어쩔수없이 선언해야하는부분이다. 그리고 roles.stream은 roles를 string으로 만들어주고 다음과같이 바꾸어주는 과정을 거쳐야된다..
이걸바꾸면 서비스도 바꿔줘야한다..
public class UserService implements UserDetailsService {
    private final UserRepository userRepository;
    @Override
    public User loadUserByUsername(String username) throws UsernameNotFoundException {

        return userRepository.findtc_passwordBytc_id(username);
    }
}
userService고 시큐리티의 detailService를 상속받고 다음과같이 바꿔주어야한다..
그렇다면 서비스와 entity준비가 완료되엇다..
그리고 security를 이제 설정을 했다면.. swagger로 이동하면..작동이안될것이다..
그래서 SecurityConfig.java를 다음과같이 작성한다..
@EnableWebSecurity
public class SecurityConfig extends WebSecurityConfigurerAdapter{


    @Override
    protected void configure(HttpSecurity http) throws Exception {
        http
                .httpBasic().disable()
                .cors().and()
                .csrf().disable()
                .formLogin().disable()
                .sessionManagement().sessionCreationPolicy(SessionCreationPolicy.STATELESS)
이러면 일차적으로 swagger에대한 임시방편을 적용햇으나 추가적으로 바꿔주어야 한다..이부분은 이제 jwt파트를 끝낸다음 다시오도록하자..
@Component
@RequiredArgsConstructor
public class JwtAuthenticationProvider {

    private String secretKey = "secret";

    private long tokenValidTime = 1000L * 60 * 60;

    @Autowired
    private UserService userService;

    // JWT 토큰 생성
    public String createToken(String userPk, List<String> roles) {
        Claims claims = Jwts.claims().setSubject(userPk); // JWT payload 에 저장되는 정보단위
        claims.put("roles", roles); // 정보는 key / value 쌍으로 저장된다.
        Date now = new Date();
        return Jwts.builder()
                .setClaims(claims) // 정보 저장
                .setIssuedAt(now) // 토큰 발행 시간 정보
                .setExpiration(new Date(now.getTime() + tokenValidTime)) // set Expire Time
                .signWith(SignatureAlgorithm.HS256, secretKey)  // 사용할 암호화 알고리즘과
                // signature 에 들어갈 secret값 세팅
                .compact();
    }

    // JWT 토큰에서 인증 정보 조회
    public Authentication getAuthentication(String token) {
        User user = userService.loadUserByUsername(this.getUserPk(token));
        return new UsernamePasswordAuthenticationToken(user, "", user.getAuthorities());
    }

    // 토큰에서 회원 정보 추출
    public String getUserPk(String token) {
        return Jwts.parser().setSigningKey(secretKey).parseClaimsJws(token).getBody().getSubject();
    }

    // Request의 Header에서 token 값을 가져옵니다. "X-AUTH-TOKEN" : "TOKEN값'
    public String resolveToken(HttpServletRequest request) {
        String token = null;
        Cookie cookie = WebUtils.getCookie(request, "X-AUTH-TOKEN");
        if(cookie != null) token = cookie.getValue();
        return token;
    }

    // 토큰의 유효성 + 만료일자 확인
    public boolean validateToken(String jwtToken) {
        try {
            Jws<Claims> claims = Jwts.parser().setSigningKey(secretKey).parseClaimsJws(jwtToken);
            return !claims.getBody().getExpiration().before(new Date());
        } catch (Exception e) {
            return false;
        }
    }
}
이렇게 토큰의 암호화 복호화하는과정 그리고 만료 일자 확인등의 기능을 적어서 적용을 해준다..
그리고 여기서 끝이아니라 filter를 통해적용을한다..
public class JwtAuthenticationFilter extends OncePerRequestFilter {

    private final JwtAuthenticationProvider jwtAuthenticationProvider;

    public JwtAuthenticationFilter(JwtAuthenticationProvider provider) {
        jwtAuthenticationProvider = provider;
    }

    @Override
    protected void doFilterInternal(HttpServletRequest request, HttpServletResponse response, FilterChain filterChain) throws ServletException, IOException {
        String token = jwtAuthenticationProvider.resolveToken(request);

        if(token != null && jwtAuthenticationProvider.validateToken(token)){
            Authentication authentication = jwtAuthenticationProvider.getAuthentication(token);

            SecurityContextHolder.getContext().setAuthentication(authentication);
        }

        filterChain.doFilter(request, response);
    }
}
이렇게 했다면 이제..다시.. Security설정파트에서 다음과같이변경을해준다..
@Configuration
@EnableWebSecurity
public class SecurityConfig extends WebSecurityConfigurerAdapter{

    @Autowired
    private JwtAuthenticationProvider jwtAuthenticationProvider;

    @Override
    protected void configure(HttpSecurity http) throws Exception {
        http
                .httpBasic().disable()
                .cors().and()
                .csrf().disable()
                .formLogin().disable()
                .sessionManagement().sessionCreationPolicy(SessionCreationPolicy.STATELESS)
                .and()
                .addFilterBefore(new JwtAuthenticationFilter(jwtAuthenticationProvider), UsernamePasswordAuthenticationFilter.class);
    }
    @Bean
    public PasswordEncoder passwordEncoder() {
        return PasswordEncoderFactories.createDelegatingPasswordEncoder();
    }
    @Bean
    @Override
    public AuthenticationManager authenticationManagerBean() throws Exception {
        return super.authenticationManagerBean();
    }


}
그렇게했다면 컨트롤러로가서 로그인 파트만 다뤄주면된다..
  @PostMapping("/v1/user/login")
    @JsonProperty("requestDto")
    @ApiOperation(value = "로그인")
    public UserLoginResponseDto login(@RequestBody UserLoginRequestDto requestDto,HttpServletResponse response ){
       User user= userService.findPasswordById(requestDto);
       if(user==null){
           throw new IllegalArgumentException("잘못된 계정정보입니다.");
       }
        System.out.println("여기까지됨123" + user.getUsername() + user.getRoles());
        String token = jwtAuthenticationProvider.createToken(user.getUsername(), user.getRoles());
        response.setHeader("X-AUTH-TOKEN", token);

        Cookie cookie = new Cookie("X-AUTH-TOKEN", token);
        cookie.setPath("/");
        cookie.setHttpOnly(true);
        cookie.setSecure(true);
        response.addCookie(cookie);

        return new UserLoginResponseDto(user);
    }
추가적으로 로그아웃파트도 설정해준다.
    @PostMapping("/v1/user/logout")
    @ApiOperation(value = "로그아웃")
    public void logout(HttpServletResponse response){
        Cookie cookie = new Cookie("X-AUTH-TOKEN", null);
        cookie.setHttpOnly(true);
        cookie.setSecure(false);
        cookie.setMaxAge(0);
        cookie.setPath("/");
        response.addCookie(cookie);
    }
그리고 이제 토큰을 이용한 마이페이지 정보조회 컨트롤러작성
  @GetMapping("/v1/user/info")
    @ApiOperation(value = "마이페이지토큰이용")
    public UserResponseDto getInfo(){

       Object details = SecurityContextHolder.getContext().getAuthentication();
      if(details == null) {
            System.out.println("비어있음");
        }
        else {
            System.out.println("안비어있어욤");
            System.out.println(details);
        }
        if(details != null && !(details instanceof  String)) return new UserLoginResponseDto((User) details);


    }
이렇게 작성을 진행하고 이제 swagger로 먼저 이동해서 확인해본다.
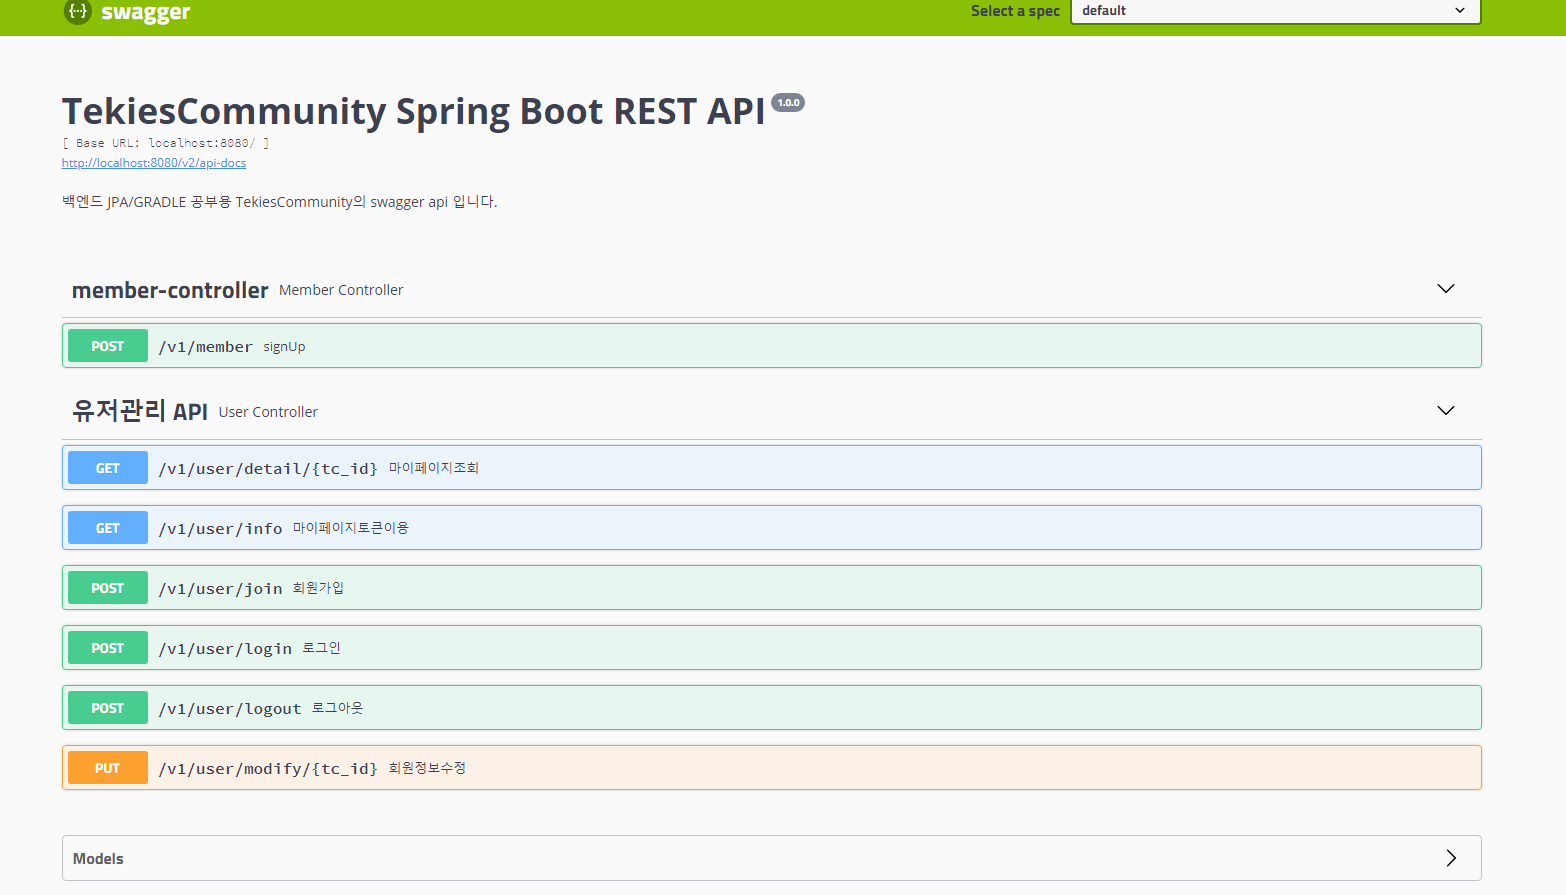
아까 security로 막혓던부분이 잘되고

이렇게정보가잘나온다/.
여기서 테스트해도되지만 postman으로 넘어가서 테스트하면..
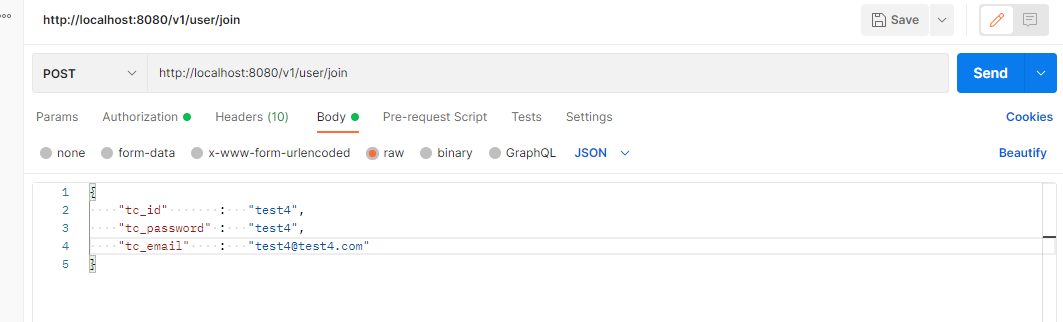

다음과같이회원가입되고 로그인을한다면

엥? 바뀐게없는데요??
request로 받은헤더를보면
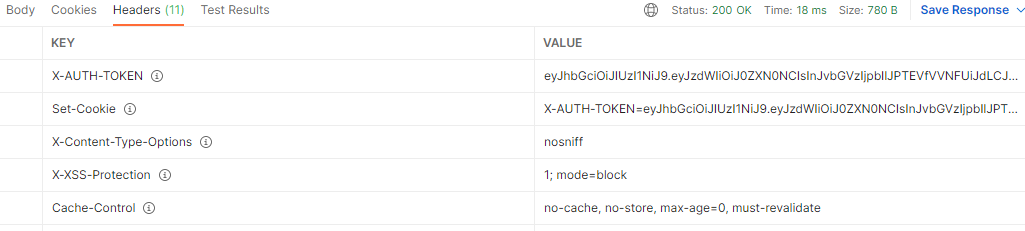
이렇게받게된다..그러면
이걸가지고 조회를 하기위해ㅔ 토큰값을저장하고

조회를하게되면..
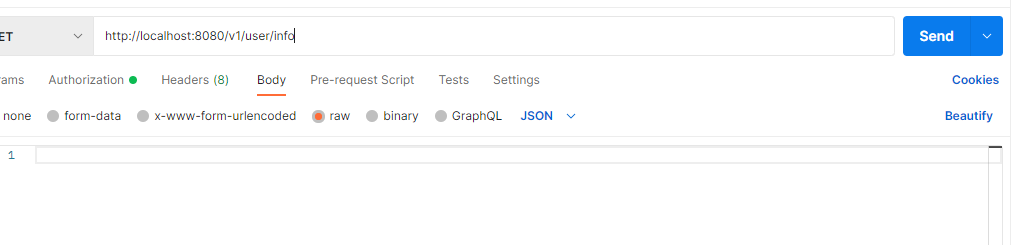
안나온다..
filter과정과 연결되는부분이 문제인거같다.. 그래서 이부분을 해결하기위해
filter의 역할을 직접 해주기로했다.. 그래서 Controller의 info 파트를 다음과같이수정했따..
    @GetMapping("/v1/user/info")
    @ApiOperation(value = "마이페이지토큰이용")
    public UserResponseDto getInfo(HttpServletRequest request){
        System.out.println("Zzz");

        System.out.println(request.getHeader("X-AUTH-TOKEN") + "^.^");  // 토큰값봐보기
        String token = request.getHeader("X-AUTH-TOKEN");  //토큰 헤더에서 직접가져오기
        System.out.println(token+ "^.^");
        String userpk = jwtAuthenticationProvider.getUserPk(token); //토큰으로 아이디값조회
        System.out.println(userpk + " sss");
        // Object details = SecurityContextHolder.getContext().getAuthentication();
       /* if(details == null) {
            System.out.println("비어있음");
        }
        else {
            System.out.println("안비어있어욤");
            System.out.println(details);
        }
        if(details != null && !(details instanceof  String)) return new UserLoginResponseDto((User) details);

        */
        System.out.println("반환값없음");
        return userService.findById(userpk); //아이디값으로 조회한 결과반환
    }
이렇게 해버렷다..ㅠㅠ... filter를썻다면 깔끔한 마무리였을떄 아쉽다..
그리고 다시조회를해보앗다..
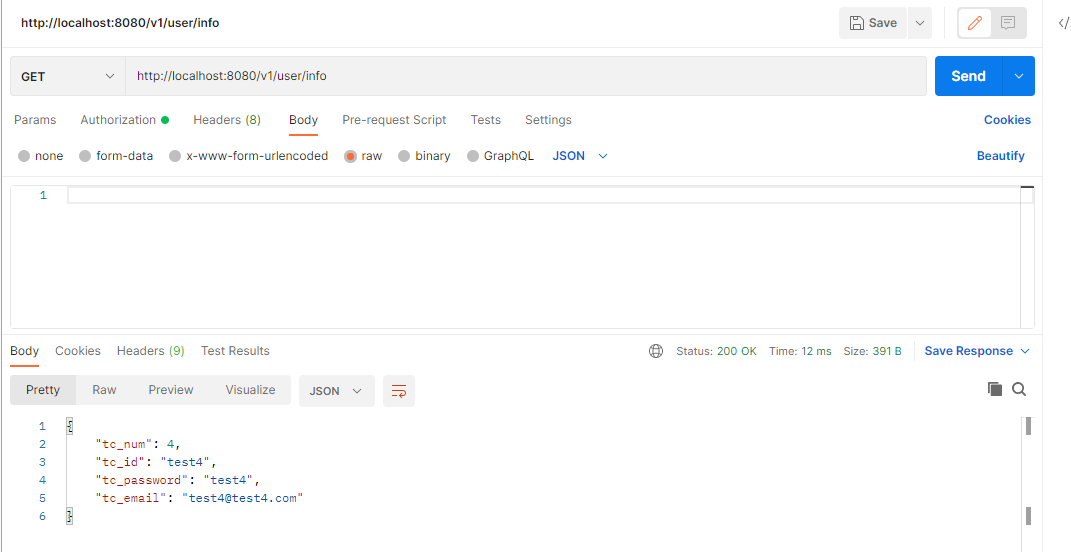
잘나온다..
이렇게 토큰과 security설정을 이용해보았고..다음에 백엔드 프로젝트를 하게된다면 refresh 와 access 를 사용하며 추가적으로 filter를 적용해보도록해야겠다..
남은 포스트에서는 jenkins를 통한 ec2 자동빌드 & 배포를 해볼예정이다.