flutter 프로젝트 셋팅
- 안드로이드 언어 : java
- ios 언어 : swift
- 선택 플랫폼 android/ios/web
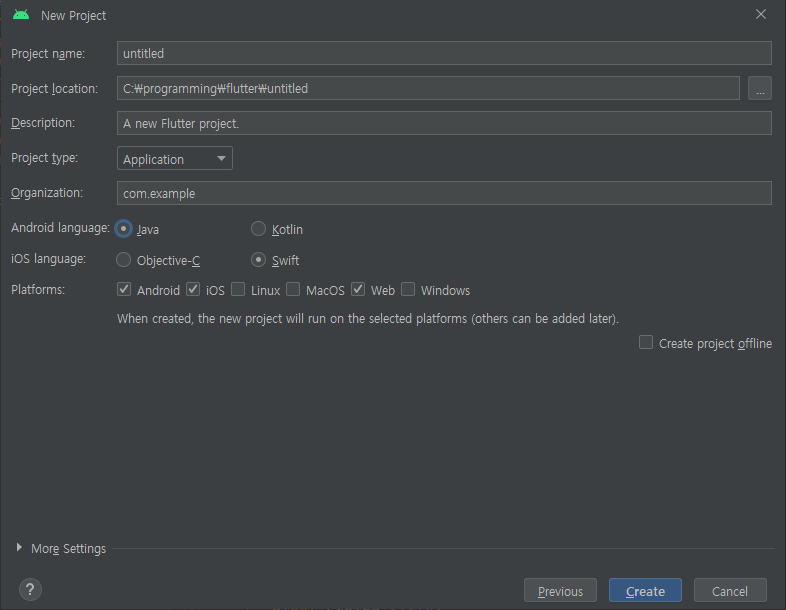
안드로이드 설정시
build.gradle
AndroidManifest.xml
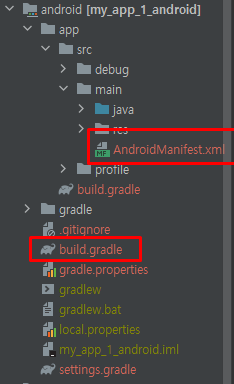
ios 설정시
info.plist
android, ios 에 따라 변경시 변경할 파일들
유지보수
- 웹- 개발하고 나서 시간이 지나도 별로 업데이트 할게 없음.
-> 유지보수 - 신규기능 / 버그- 앱 - 휴대폰 기종 / 안드로이드 ios 버전 / 라이브러리 버전 등등
-> 유지보수 - 모든 휴대폰 화면 대응 / 안드로이드,ios 버전 대응 / 신규기능 / 버그 수정
yaml 또는 yml
# 앱 이름
name: my_app_1
# 앱 설명
description: A new Flutter project.
publish_to: 'none'
# 앱 버전
version: 1.0.0+1
# 다트 버전
environment:
sdk: '>=2.19.3 <3.0.0'
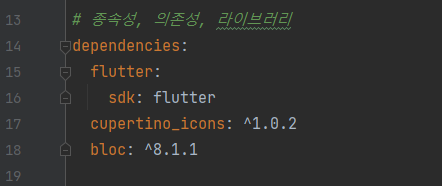
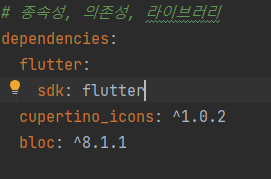
# 종속성, 의존성, 라이브러리
dependencies:
flutter:
sdk: flutter
cupertino_icons: ^1.0.2
dev_dependencies:
flutter_test:
sdk: flutter
flutter_lints: ^2.0.0
flutter:
uses-material-design: true
- dependencies 를 통해 라이브러리 추가 가능
- dependencies(종속성)을 이용하면, 라이브러리가 필요로 하는 모든 하위 라이브러리를 알아서 다운로드하고 관리 해줌.
라이브러리 추가 법
플러터 라이브러리 다운로드 검색 사이트
https://pub.dev/
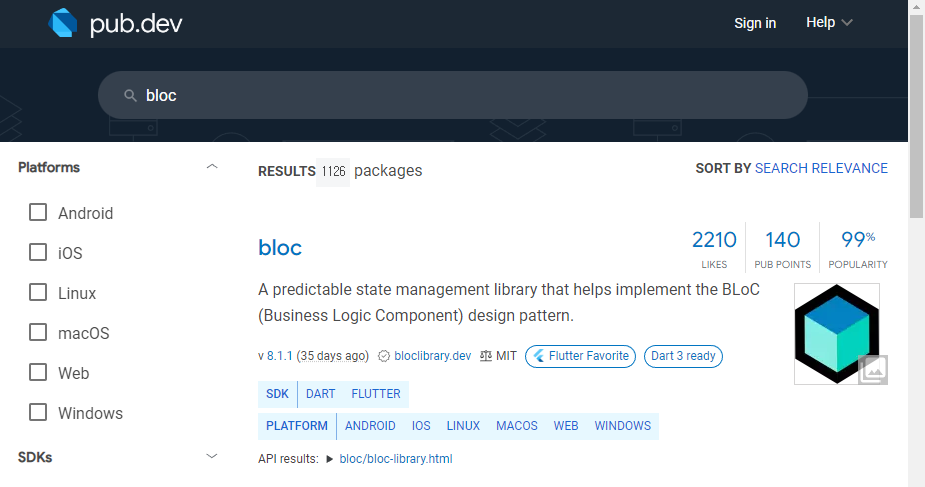
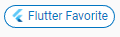
Flutter Favorite : 구글에서 인증한 라이브러리

MIT : 무료 라이센스
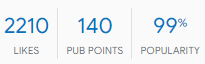
유저가 선호하는 것을 표시하는 화면
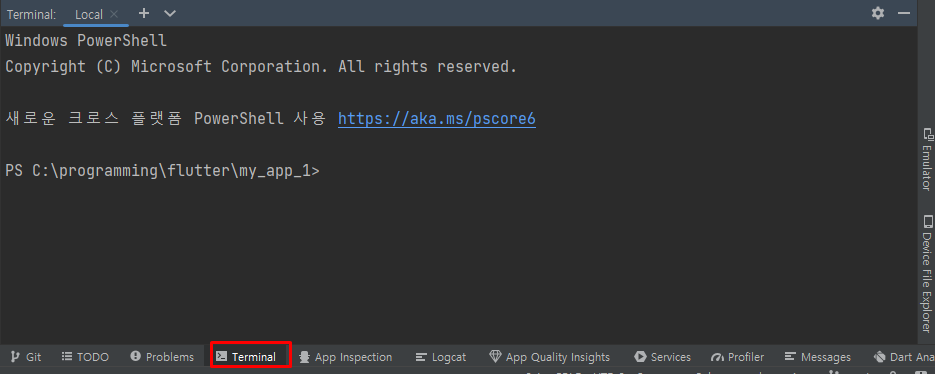
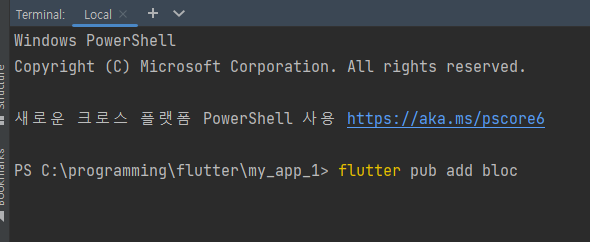
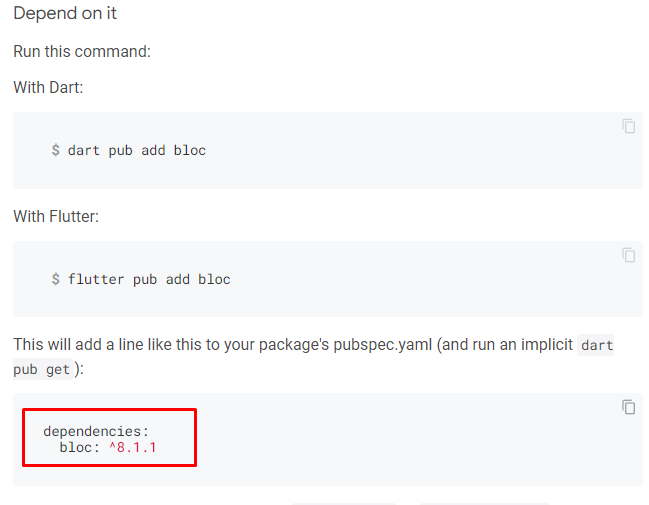
적용 법
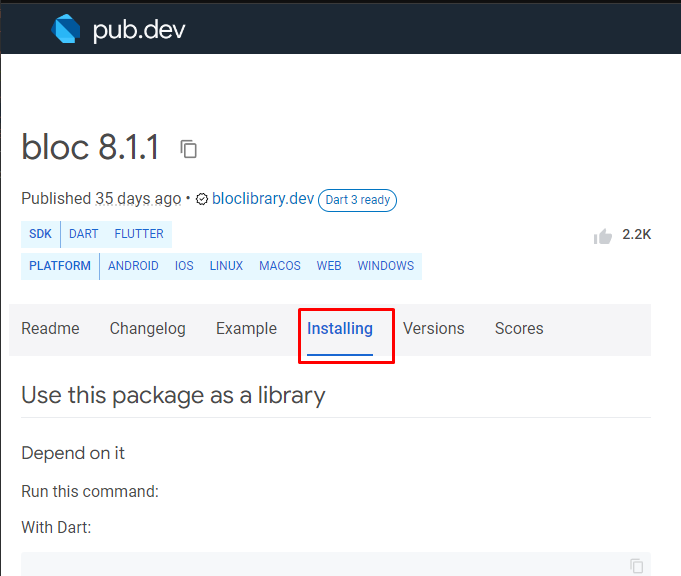
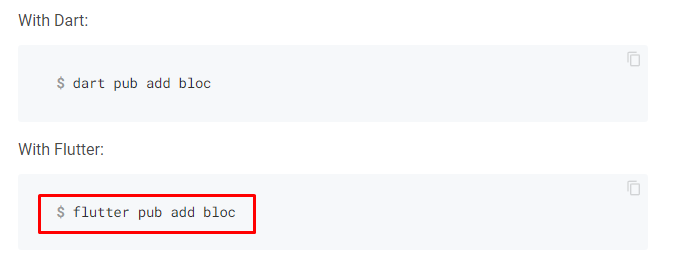
With Flutter: 복사하기
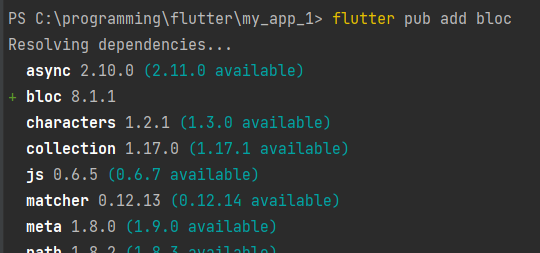
추가됨
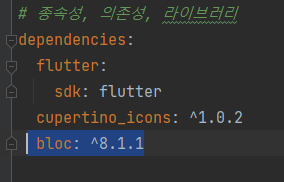
추가후 pubspec.yaml 파일 클릭시 bloc: ^8.1.1 이 추가 됨.
라이브러리 삭제 법
.yaml 파일에서 bloc 지우기
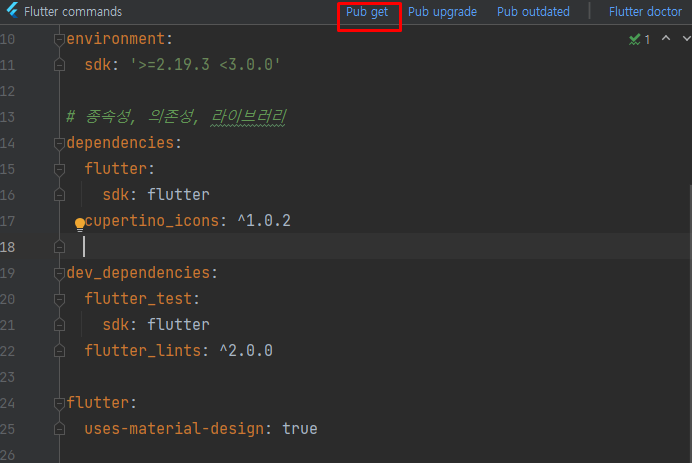
pub get 을 눌러 지우기 실행
라이브러리 추가 법 2
복사 후
.yaml 파일에 넣고
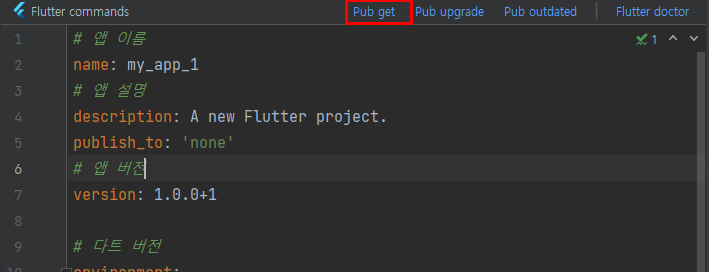
Pub get 누르기
특정 라이브러리 버전에 관련해서
# 종속성, 의존성, 라이브러리
dependencies:
  flutter:
    sdk: flutter
  cupertino_icons: ^1.0.2
  # 버전 앞에 아무것도 없으면 - 버전 고정
  # 버전 앞에 ^ 있으면 - 호환 가능한 최신 버전을 가져옴
  # 버전 앞에 ~ 있으면 - 버그가 수정된 최신 버전 8.1.*
  # 앱 개발 시 ^ 사용
  # 앱 개발 완료 시 기호 없앰앰  bloc: ^8.1.1
  # 앱 유지보수 시 ^ 또는 ~ 또는 최신버전 업데이트
  bloc: ^8.1.1
깃 허브에 앱 프로젝트 올릴시
pubspec.lock, pucspec.yaml 파일은 꼭 올리는 파일들
main.dart
material -> google 스타일 앱
import 'package:flutter/material.dart';
// 프로그램 실행 위해 main 이 필요함.
void main() {
// 플러터는 프레임워크 -> 제어의 역전 (ioc)
// 앱을 실행시켜줘 (개발자가 프레임워크에 요청)
// 매개변수는 Widget
// const 는 컴파일 시점에 데이터 고정
// 바뀌지 않는 화면일 경우만 사용
// 필요하지 않는 화면에는 무조건 const 붙이기
// 데이터를 주입하는 위젯에는 const 미사용
runApp(const MyApp());
}
// 위젯
// 화면을 그리는 단위
// 위젯 클래스를 사용햐면 build 메소드가 실행된다.
// html의 태그와 같은 역할
// StatelessWidget 은 고정된 화면을 만든다.
class MyApp extends StatelessWidget {
const MyApp({Key? key}) : super(key: key);
Widget build(BuildContext context) {
// 안드로이드 스타일 앱 제작 위젯
//
return MaterialApp(
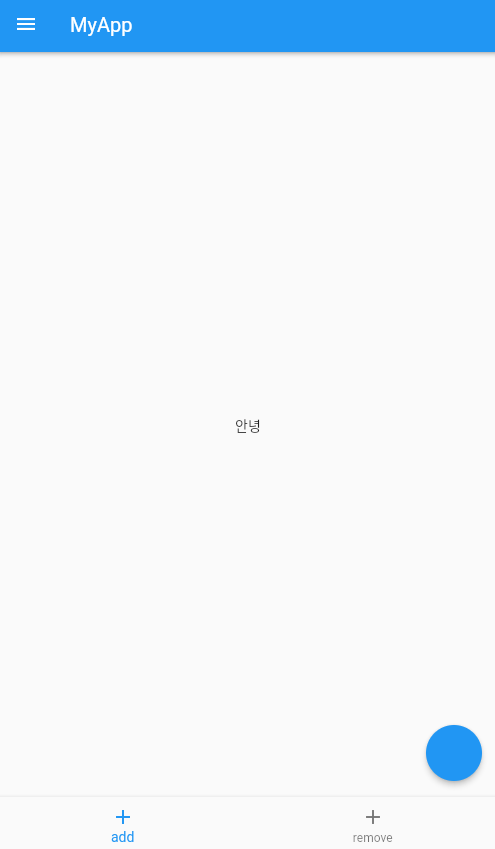
// title : 앱의 제목
title: "MyApp",
// theme : 앱의 색상, 글꼴 / ThemeDate 객체
// debug ~ : 디버그 모드 배너 여부
debugShowCheckedModeBanner: false,
// route 생략
// locale : 앱의 언어를 사용하는 언어에 맞게 설정 할 수 있다.
// home : 앱 실행 시 표시되는 위젯
home: Scaffold(
// Scaffold 바닥
// 앱 구조의 기반을 만드는 위젯
// appBar : 제목, 뒤로가기, 햄버거버튼 등
appBar: AppBar(
title: Text("MyApp"),
),
// drawer : 서랍, 사이드 메뉴 등
drawer: Drawer(),
// bottomNavigationBar 화면 이동 네이게이션
bottomNavigationBar: BottomNavigationBar(
items: const [
BottomNavigationBarItem(
label: "add",
icon: Icon(Icons.add),
),
BottomNavigationBarItem(
label: "remove",
icon: Icon(Icons.add),
)
],
),
//floatingActionButton : 화면 위에 떠 있는 버튼
floatingActionButton: FloatingActionButton(
onPressed: (){},
),
body: SafeArea(
// 폰 기종마다 다른 노치, 알림바 등을 피해서 화면을 노출한다.
// Scaffold - SafeArea 조합은 기본적으로 사용
child: Center(
child: Text("안녕"),
),
),
),
);
}
}
import 'package:flutter/material.dart';
// 프로그램 실행 위해 main 이 필요함.
void main() {
// 플러터는 프레임워크 -> 제어의 역전 (ioc)
// 앱을 실행시켜줘 (개발자가 프레임워크에 요청)
// 매개변수는 Widget
// const 는 컴파일 시점에 데이터 고정
// 바뀌지 않는 화면일 경우만 사용
// 필요하지 않는 화면에는 무조건 const 붙이기
// 데이터를 주입하는 위젯에는 const 미사용
runApp(const MyApp2());
}
class MyApp2 extends StatefulWidget {
const MyApp2({Key? key}) : super(key: key);
State<MyApp2> createState() => _MyApp2State();
}
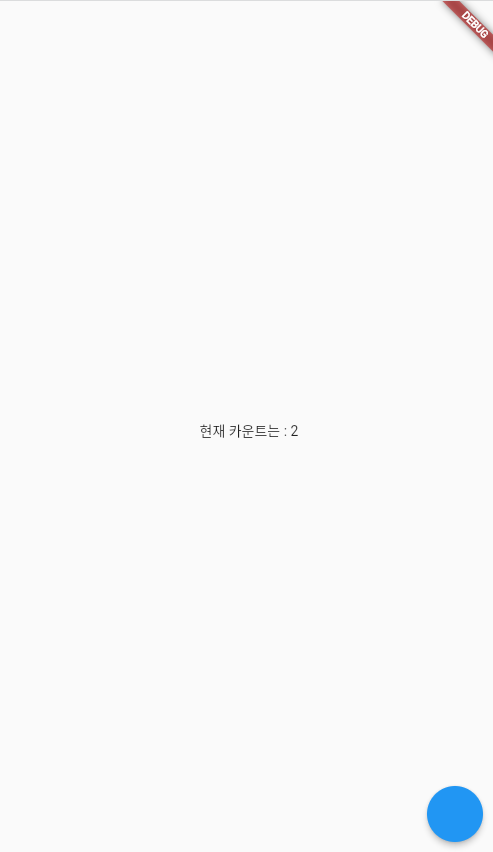
class _MyApp2State extends State<MyApp2> {
// State 안의 변수는 관찰된다.
// 변수의 값이 바뀌면 화면이 바뀐다.
int count = 0;
void increaseCount(){
// Stateful 변수를 변경할 때에는 무조건 setState 함수를 사용한다.
setState(() {
count++;
});
}
Widget build(BuildContext context) {
return MaterialApp(
home: Scaffold(
floatingActionButton: FloatingActionButton(
onPressed: (){
increaseCount();
},
),
body: SafeArea(
child: Center(
child: Text("현재 카운트는 : $count"),
)
),
),
);
}
}
import 'package:flutter/material.dart';
// 프로그램 실행 위해 main 이 필요함.
void main() {
// 플러터는 프레임워크 -> 제어의 역전 (ioc)
// 앱을 실행시켜줘 (개발자가 프레임워크에 요청)
// 매개변수는 Widget
// const 는 컴파일 시점에 데이터 고정
// 바뀌지 않는 화면일 경우만 사용
// 필요하지 않는 화면에는 무조건 const 붙이기
// 데이터를 주입하는 위젯에는 const 미사용
runApp(const MyApp2());
}
// 위젯
// 화면을 그리는 단위
// 위젯 클래스를 사용햐면 build 메소드가 실행된다.
// html의 태그와 같은 역할
// StatelessWidget 은 고정된 화면을 만든다.
class MyApp extends StatelessWidget {
const MyApp({Key? key}) : super(key: key);
Widget build(BuildContext context) {
// 안드로이드 스타일 앱 제작 위젯
//
return MaterialApp(
// title : 앱의 제목
title: "MyApp",
// theme : 앱의 색상, 글꼴 / ThemeDate 객체
// debug ~ : 디버그 모드 배너 여부
debugShowCheckedModeBanner: false,
// route 생략
// locale : 앱의 언어를 사용하는 언어에 맞게 설정 할 수 있다.
// home : 앱 실행 시 표시되는 위젯
home: Scaffold(
// Scaffold 바닥
// 앱 구조의 기반을 만드는 위젯
// appBar : 제목, 뒤로가기, 햄버거버튼 등
appBar: AppBar(
title: Text("MyApp"),
),
// drawer : 서랍, 사이드 메뉴 등
drawer: Drawer(),
// bottomNavigationBar 화면 이동 네이게이션
bottomNavigationBar: BottomNavigationBar(
items: const [
BottomNavigationBarItem(
label: "add",
icon: Icon(Icons.add),
),
BottomNavigationBarItem(
label: "remove",
icon: Icon(Icons.add),
)
],
),
//floatingActionButton : 화면 위에 떠 있는 버튼
floatingActionButton: FloatingActionButton(
onPressed: () {},
),
body: SafeArea(
// 폰 기종마다 다른 노치, 알림바 등을 피해서 화면을 노출한다.
// Scaffold - SafeArea 조합은 기본적으로 사용
child: Center(
child: Text("안녕"),
),
),
),
);
}
}
class MyApp2 extends StatefulWidget {
const MyApp2({Key? key}) : super(key: key);
State<MyApp2> createState() => _MyApp2State();
}
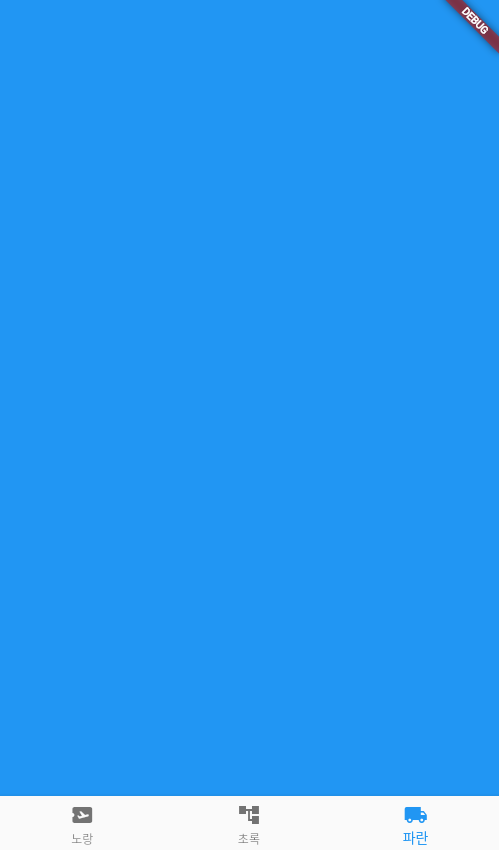
class _MyApp2State extends State<MyApp2> {
// State안의 변수는 관찰된다.
// 변수의 값이 바뀌면 화면이 바뀐다.
// int count = 0;
int navIndex = 0;
void changeNavIndex(int index) {
setState(() {
navIndex = index;
});
}
List _items = [
Container(
color: Colors.yellow,
),
Container(
color: Colors.green,
),
Container(
color: Colors.blue,
),
];
//void increaseCount(){
// Stateful 변수를 변경할 때에는 무조건 setState 함수를 사용한다.
//setState(() {
//count++;
// });
// }
Widget build(BuildContext context) {
return MaterialApp(
home: Scaffold(
bottomNavigationBar: BottomNavigationBar(
currentIndex: navIndex,
// onTap: changeNavIndex,
onTap: (index) => changeNavIndex(index),
items: const[
BottomNavigationBarItem(
icon: Icon(Icons.airplane_ticket),
label: "노랑"
),
BottomNavigationBarItem(
icon: Icon(Icons.account_tree),
label: "초록"
),
BottomNavigationBarItem(
icon: Icon(Icons.local_shipping),
label: "파란"
)
],
),
body: SafeArea(
child: _items[navIndex]
),
),
);
}
}
위젯의 자식 3가지
위젯의 자식은 위젯
1. 단일 위젯 home/body/child
2. 다중 위젯 items/children
3. 자식 위젯 없음 - Text/Image 등
플러터 기본 용어집
https://velog.io/@jaybon/flutter-%EA%B8%B0%EC%B4%88-%EC%A0%95%EB%A6%AC
참고