디자인이 나왔는데 dialog가 안드로이드의 기본 AlertDialog형태지만 폰트, 색상, 크기가 달라 커스텀을 해야했다.
이놈의 dialog들은 커스텀하기가 커스텀 뷰보다 힘든듯, 특히나 AlertDialog는 너무 꼭꼭 숨겨놨다.
어렵사리 찾은 정보로 저장좀 해놔야겠다.
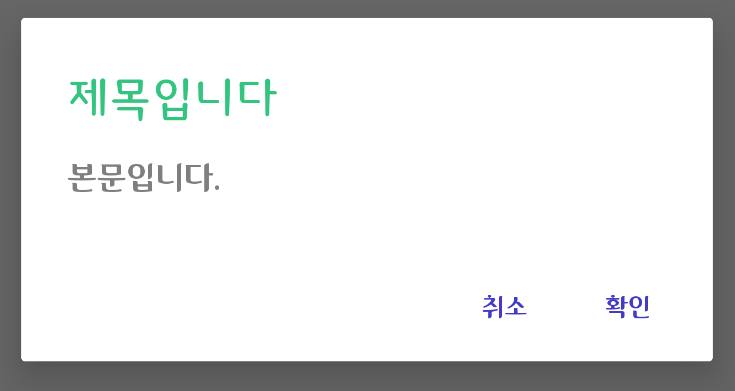
결과물
방법은 2가지가 있다.
1. style.xml로 변경하기
2. 코드로 변경하기
둘 다 가능한데 style로 변경하는거엔 하나 단점이 있다. 아래에서 언급
1. With Style
<style name="AppAlertDialogTheme" parent="Theme.AppCompat.Light.Dialog.Alert">
    <item name="android:windowTitleStyle">@style/AppAlertDialogTitle</item>
    <item name="buttonBarNegativeButtonStyle">@style/AppAlertButtonStyle</item>
    <item name="buttonBarPositiveButtonStyle">@style/AppAlertButtonStyle</item>
    <item name="buttonBarNeutralButtonStyle">@style/AppOtherAlertButtonStyle</item>
</style>

<style name="AppAlertDialogTitle" parent="Widget.AppCompat.Button.ButtonBar.AlertDialog">
    <item name="android:textColor">@color/main_green</item>
    <item name="android:fontFamily">@font/dalseo_m</item>
    <item name="android:textSize">24sp</item>
</style>

<style name="AppAlertButtonStyle" parent="Widget.AppCompat.Button.ButtonBar.AlertDialog">
    <item name="android:textColor">#443AC8</item>
    <item name="android:fontFamily">@font/dalseo_r</item>
    <item name="android:textSize">14sp</item>
</style>

<style name="AppOtherAlertButtonStyle" parent="Widget.AppCompat.Button.ButtonBar.AlertDialog">
    <item name="android:textColor">#D6945B</item>
    <item name="android:fontFamily">@font/dalseo_r</item>
    <item name="android:textSize">10sp</item>
</style>
위에서 부터 AppAlertDialogTheme는 AlertDialog의 전체 리소스 데이터를 집어넣는 변수 공간이다.
뒤에 따라오는 부모로 Light, Night, DayNight를 지정할 수 있으니 다크모드 지원에 따라 넣으면 된다.
밑 속성값들은 말 안해도 View를 조작할 때 쓰이는 xml코드랑 다를게 없으니 간단한 설명만 추가
1. AppAlertDialogTitle, parent="Widget.AppCompat.Button.ButtonBar.AlertDialog"
dialog의 제목을 정하는 style이다.
2. AppAlertButtonStyle, parent="Widget.AppCompat.Button.ButtonBar.AlertDialog"
dialog의 버튼을 정하는 style이다.
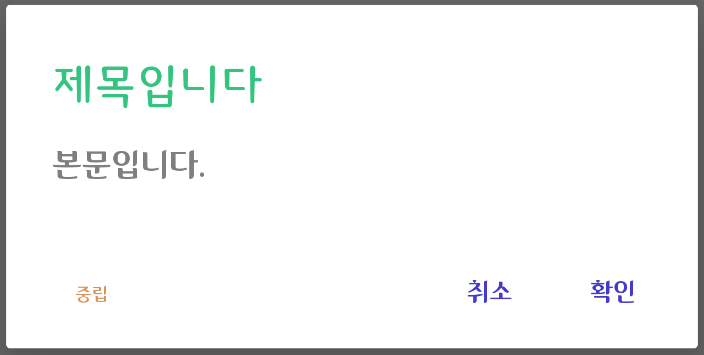
위 코드에선 AppOtherAlertButtonStyle가 하나 더 있는데 버튼 3개 PositiveButton, NegativeButton, NeutralButton을 각각 따로 지정하고 싶으면 위와같이 style을 2개 또는 3개를 정하고 원하는 공간에 넣으면 된다.
뭐 하나 빠진게 있는데 바로 메세지 부분이다. 이것이 style을 이용한 방법의 단점이다. 아무리 리소스 파일을 뒤져봐도 구글링을 해봐도 나와있지 않았고, 결국 '할 수 없다는'블로그 글을 보게 되어 포기했다.
https://pluu.github.io/blog/rxjava/2017/02/04/android-alertdialog/ 플루님 블로그면 믿어야지
그렇다고 메세지 부분을 커스텀 못하는건 아니다. 이는 코드로 조작하면 된다.
AlertDialog.Builder(context, R.style.AppAlertDialogTheme)
    .setTitle(title)
    .setMessage(msg)
    .setPositiveButton(context.getString(R.string.ok)) { _, _ ->

    }
    .setNegativeButton(context.getString(R.string.cancel)) { _, _ ->

    }.show().apply {
        findViewById<TextView>(android.R.id.message)?.apply {
            textSize = 14f
            typeface = ResourcesCompat.getFont(context, R.font.pretendard_regular)
            setTextColor(context.getColor(R.color.sub_text))
        }
    }
위와 같이 Builder의 인자에 context와 방금 만든 style을 넣고, 메세지는 따로 아이디 값을 찾고 변환시키면 된다.
하지만 너무 찝찝하다. 어떤 View는 style로, 어떤 거는 code로 하게 되면 유지보수 때 헷갈릴 수 있는 상황이 올 것 같았다.
그래서 결국 안드로이드 리소스 파일 및 클래스들을 뒤지고 뒤져서 결국 모든 View의 아이디값을 알아냈다.
2. With Code
class AppAlertDialog(
    private val context: Context,
    private val title: String? = null,
    private val msg: String?= null
) {
    private lateinit var positiveListener: () -> Unit
    private lateinit var negativeListener: () -> Unit
	private val dialog: AlertDialog.Builder by lazy {
        AlertDialog.Builder(context)
            .setTitle(title)
            .setMessage(msg)
            .setPositiveButton(context.getString(R.string.ok)) { _, _ ->
                if (::positiveListener.isInitialized) positiveListener()
            }
            .setNegativeButton(context.getString(R.string.cancel)) { _, _ ->
                if (::negativeListener.isInitialized) negativeListener()
            }.setNeutralButton("") { _, _ ->

            }
	}

    fun show(onClickNegative: () -> Unit = {}, onClickPositive: () -> Unit = {}) {
        this.negativeListener = onClickNegative
        this.positiveListener = onClickPositive
        dialog.show().apply {
            /**
             * Title TextView
             */
            findViewById<TextView>(androidx.appcompat.R.id.alertTitle)?.apply {
                textSize = 10f
                typeface = ResourcesCompat.getFont(context, R.font.dalseo_r)
                setTextColor(context.getColor(R.color.sub_text))
            }
           /**
            * Message TextView
            */
            findViewById<TextView>(android.R.id.message)?.apply {
                textSize = 10f
                typeface = ResourcesCompat.getFont(context, R.font.dalseo_r)
                setTextColor(context.getColor(R.color.sub_text))
            }

        	/**
             * Positive Button
             */
            findViewById<TextView>(android.R.id.button1)?.apply {
                textSize = 18f
                typeface = ResourcesCompat.getFont(context, R.font.dalseo_r)
                setTextColor(context.getColor(R.color.red))
            }
            /**
             * Negative Button
             */
            findViewById<TextView>(android.R.id.button2)?.apply {
                textSize = 18f
                typeface = ResourcesCompat.getFont(context, R.font.dalseo_r)
                setTextColor(context.getColor(R.color.main_green))
            }
            /**
             * Neutral Button
             */
            findViewById<TextView>(android.R.id.button3)?.apply {
                textSize = 18f
                typeface = ResourcesCompat.getFont(context, R.font.dalseo_r)
                setTextColor(context.getColor(R.color.sub_text))
            }
        }
    }
}
저 androidx.appcompat.R.id.alertTitle 이거 찾느냐 엄청 고생했다.
위 코드에 주석 달린 곳이 해당 View이다. 각각 TextView, Button형태로 return되니 평소 사용하던대로 커스텀하면 된다.
주의사항으론 setTitle, setMessage, setPositiveButton 등 이 함수들은 View를 생성하고 addView하는 코드 같으니 밑에서 텍스트를 변환한다해도 해당 View들을 사용하겠다면 함수들은 호출해놔야 한다.
위는 Custom AlertDialog를 Class에 넣고 사용하고 있는 코드를 가져왔다. 사실 AlertDialog를 상속 받는 Class를 생성하고 싶었는데 show()함수가 안 먹더라.
사용 코드
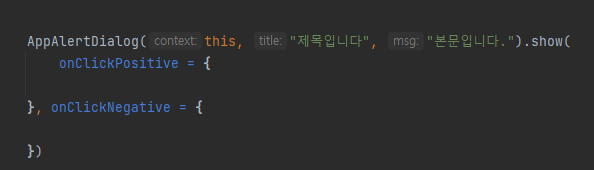
onClickPositive, onClickNegative부분은 람다 변수를 명시하는 것이다. 안써도 상관없음. 하지만 가독성이 올라간다. (추천)
그 외 Neutral도 이벤트를 받고 싶으면 위 코드패턴과 같이 neutralListener도 하나 만들어서 똑같이 사용하면 된다.
fun show(onClickNegative: () -> Unit = {}, onClickPositive: () -> Unit = {})AlertDialog의 Positive 버튼의 이벤트만 사용하면 람다는 맨 뒤에있는 변수를 인식하기에 확인 버튼을 클릭 시에 나오는 이벤트를 할당받는다. 이는 주로 취소 버튼은 클릭시 이벤트라곤 Dismiss밖에 없기에 이런식으로 써도 좋을 듯 하다.

- Positive Button만 이벤트 받는 건 요런식
확실히 AlertDialog는 미리 만들어져 있는 클래스이다보니 간단하게 쓰일 때 좋은 것 같다.
이 정도면 Custom Dialog를 만드는 거랑 다를게 없어보ㅇ..

검색 5일째 ... 동지를 만나다.