React.js
Today I Learned ... react.js
🙋♂️ Reference book
🙋 My Dev Blog
CH 20. 서버사이드 렌더링
part 1 - CRA eject 후config 폴더(paths.js / wepback.config.server.js)
및scripts 폴더(build.server.js) 설정하기.
서버 사이드 렌더링
💡 서버사이드 렌더링 이란?
- UI를 서버에서 렌더링 하는 것.
- 이전 리액트 프로젝트들은 모두 클라이언트 사이드 렌더링을 하고 있었다.
-> 모든 UI 렌더링을 브라우저가 처리하는 것. (js 파일을 실행해야 렌더링 됨)
크롬 개발자 도구의 Network 탭을 켜서 리로드 해보면,
localhost의 response 탭을 보면 #root 엘리먼트가 비어있음을 알 수 있다.
즉, 이 페이지는 처음에는 빈 페이지라는 의미이다.
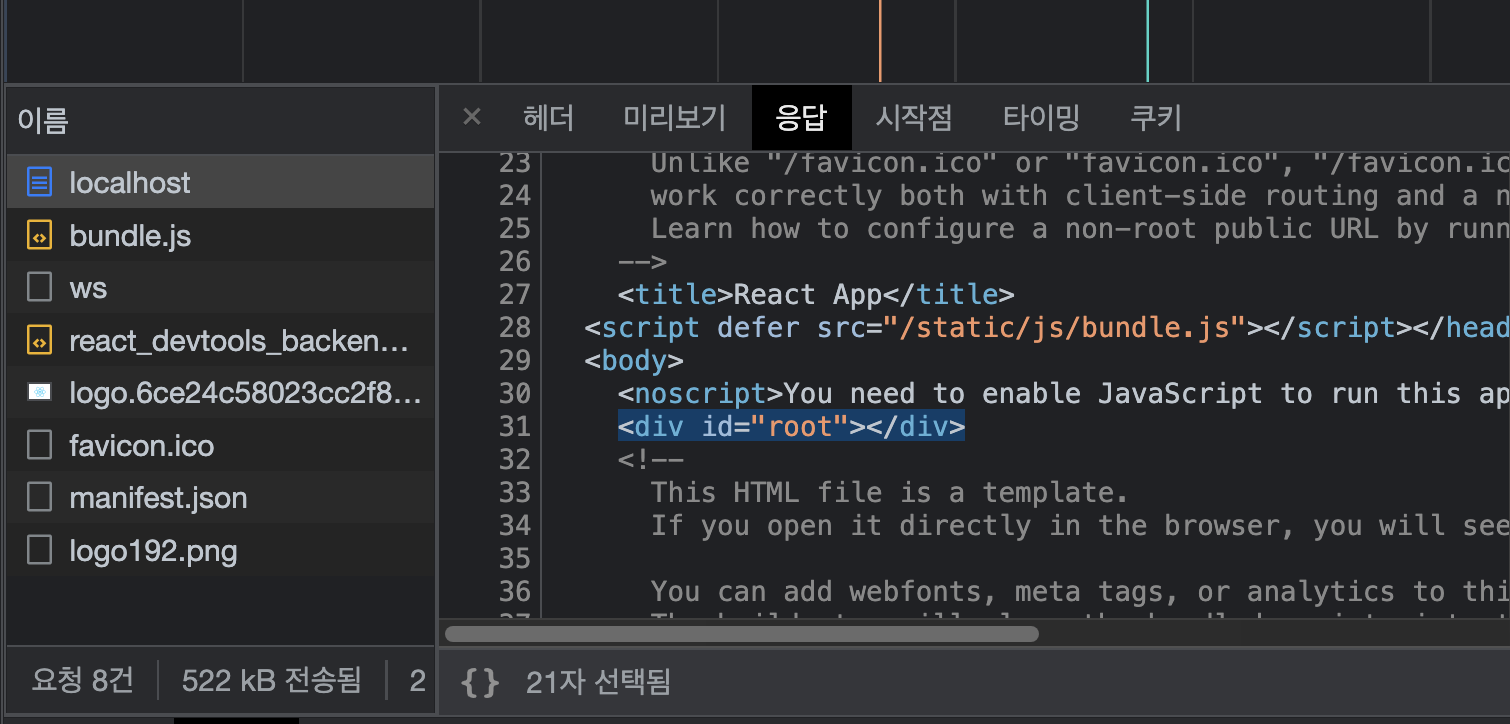
-> 그 이후 js파일이 실행되고 리액트 컴포넌트가 렌더링 되는 것.
서버사이드 렌더링 구현 시
- 사용자가 웹 서비스에 방문시, 초기 렌더링을 서버쪽에서 대신해줌.
- 사용자가 html 파일을 저달받았을 때 그 내부에 렌더링된 결과물이 보임. (element 탭)
서버사이드 렌더링의 장점
1. 검색엔진 최적화 가능
- 검색 엔진이 우리 웹앱의 페이지를 원활하게 수집할 수 있음. (SEO, 검색엔진 최적화 가능)
- 리액트로 만든 SPA는 자바스크립트가 실행되지 않는 환경에서는 페이지가 나타나지 않음.
- 서버에서 클라이언트 대신 렌더링을 해주면 검색 엔진이 페이지 내용을 제대로 수집할 수 있음.
2. 초기 렌더링 성능 개선
- 서버사이드 렌더링이 구현되지 않으면, 자바스크립트가 로딩되고 실행될 때 까지 사용자는 빈 화면을 보고 대기해야 함.
-> 여기에 API까지 호출해야 한다면 대기 시간이 더 길어짐. - 서버사이드 렌더링 구현시 js파일이 로드되기 전에도 html상에 사용자가 볼 수 있는 콘텐츠가 있어
사용자 경험도 향상됨.
서버사이드 렌더링의 단점
- 서버 리소스가 사용됨.
-> 브라우저가 해야할 일을 서버가 대신 처리하는 것 이므로. - 한번에 많은 사용자가 동시 접속시, 서버에 과부하가 올 수 있음.
- 사용자가 많은 서비스라면,
캐싱과로드밸런싱을 통해 성능 최적화가 필요. - 프로젝트 구조가 복잡해짐. (개발 어려움)
참고 - 코드 스플리팅
서버사이드 렌더링과 함께 적용시 작업이 까다로움.
- 서버사이드 렌더링 부분이 먼저 나타남 -> js 로딩시작 -> 아직 불러오지 않은 컴포넌트를 null로 렌더링 -> 코드 스플리팅된 컴포넌트 사라짐 -> 다시 제대로 나타남.
프로젝트 준비
1) 컴포넌트 생성
- 패키지 설치
$ yarn add react-router-domRed.js,Blue.js,Menu.js생성.
(총 3개의 컴포넌트. + css 파일)
- Red.js
import './Red.css';

const Red = () => {
    return <div className='Red'>Red</div>
};

export default Red;- Red.css
.Red {
  background: red;
  font-size: 1.5rem;
  color: White;
  width: 128px;
  height: 128px;
  display: flex;
  align-items: center;
  justify-content: center;
- Blue.js
import './Red.css';

const Blue = () => {
    return <div className='Blue'>Blue</div>
};

export default Blue;- Blue.css
.Blue {
  background: blue;
  font-size: 1.5rem;
  color: White;
  width: 128px;
  height: 128px;
  display: flex;
  align-items: center;
  justify-content: center;
- Menu.js
import { Link } from "react-router-dom";

const Menu = () => {
    return (
        <ul>
            <li>
                <Link to="/red">Red</Link>
            </li>
            <li>
                <Link to="/blue">Blue</Link>
            </li>
        </ul>
    );
};

export default Menu;
2) 페이지 컴포넌트 생성
src/pages 폴더에 페이지 컴포넌트 생성.
- RedPage.js
import Red from "../components/Red";

const RedPage = () => {
    return <Red />
};

export default RedPage;- BluePage.js
import Blue from "../components/Blue";

const BluePage = () => {
    return <Blue />
};

export default BluePage;
3) App 라우트 설정
- app.js
import { Route, Routes } from 'react-router-dom';
import Menu from './components/Menu';
import RedPage from './pages/RedPage';
import BluePage from './pages/BluePage';

function App() {
  return (
    <>
      <Menu />
      <hr />
      <Routes>
        <Route path="/red" element={<RedPage />} />
        <Route path="/blue" element={<BluePage />} />
      </Routes>
    </>
  );
}

export default App;- index.js
import React from 'react';
import ReactDOM from 'react-dom/client';
import App from './App';
import { BrowserRouter } from 'react-router-dom';

const root = ReactDOM.createRoot(document.getElementById('root'));
root.render(
  <BrowserRouter>
    <App />
  </BrowserRouter>
);
4) 서버사이드 렌더링 구현
- 서버사이드 렌더링을 구현하려면 웹팩 설정을 커스텀해줘야 함.
- CRA(create-react-app)에서는 웹팩 설정이 모두 숨겨져 있으니,
먼저yarn eject명령어를 실행하여 밖으로 꺼내줘야 함.
yarn eject를 하기 위해서는 레파지토리에 commit 해줘야 함.
$ git add .
$ git commit -m 'init'

$ yarn eject
아래와 같이 루트 폴더에 config 폴더가 생성되었다.
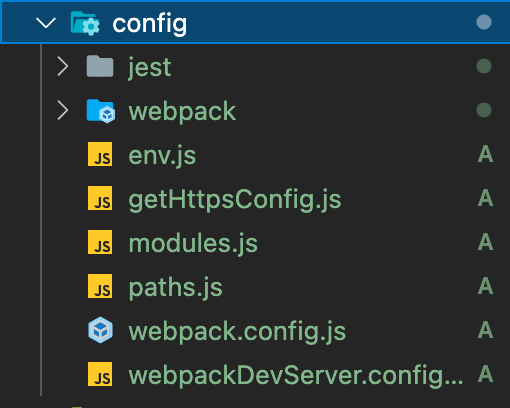
- ㅈㄷ
서버사이드 렌더링용 entry 생성
entry란, 웹팩에서 프로젝트를 불러올 때 가장 먼저 불러오는 파일.
-> 현재 index.js 를 엔트리 파일로 사용함.
- 서버사이드 렌더링을 할 때는, 서버를 위한 entry 파일을 하나 더 생성해야 함.
->/src/index.server.js를 생성
index.server.js
import ReactDOMServer from 'react-dom/server';

const html = ReactDOMServer.renderToString(
    <div>Hello Server Side Rendering!</div>
);

console.log(html);
react-dom 라이브러리의 server 디렉터리 (최적화를 위해 필요한 디렉터리만 가져옴)
->ReactDOMServer을 임포트함.
- 공식문서 참고.
-> 컴포넌트 정적 렌더링을 위해.
ReactDOMServer.renderToString(element)
React 엘리먼트의 초기 HTML을 렌더링함. React는 HTML 문자열을 반환함.
빠른 페이지 로드를 위해 초기 요청 시에 서버에서 HTML을 생성하여 마크업을 보내거나, 검색 엔진 최적화를 위해 검색 엔진이 페이지를 크롤링할 수 있도록 하는데 사용 가능.
paths.js 수정
- 엔트리 파일을 웹팩으로 불러와서 빌드하려면, 서버전용 환경설정이 필요함.
config/paths.js 를 열어 맨 아래부분에 코드 추가.
'use strict';

const path = require('path');
const fs = require('fs');
const getPublicUrlOrPath = require('react-dev-utils/getPublicUrlOrPath');

// Make sure any symlinks in the project folder are resolved:
// https://github.com/facebook/create-react-app/issues/637
const appDirectory = fs.realpathSync(process.cwd());
const resolveApp = relativePath => path.resolve(appDirectory, relativePath);

// We use `PUBLIC_URL` environment variable or "homepage" field to infer
// "public path" at which the app is served.
// webpack needs to know it to put the right <script> hrefs into HTML even in
// single-page apps that may serve index.html for nested URLs like /todos/42.
// We can't use a relative path in HTML because we don't want to load something
// like /todos/42/static/js/bundle.7289d.js. We have to know the root.
const publicUrlOrPath = getPublicUrlOrPath(
  process.env.NODE_ENV === 'development',
  require(resolveApp('package.json')).homepage,
  process.env.PUBLIC_URL
);

const buildPath = process.env.BUILD_PATH || 'build';

const moduleFileExtensions = [
  'web.mjs',
  'mjs',
  'web.js',
  'js',
  'web.ts',
  'ts',
  'web.tsx',
  'tsx',
  'json',
  'web.jsx',
  'jsx',
];

// Resolve file paths in the same order as webpack
const resolveModule = (resolveFn, filePath) => {
  const extension = moduleFileExtensions.find(extension =>
    fs.existsSync(resolveFn(`${filePath}.${extension}`))
  );

  if (extension) {
    return resolveFn(`${filePath}.${extension}`);
  }

  return resolveFn(`${filePath}.js`);
};

// config after eject: we're in ./config/
module.exports = {
  ...
  ssrIndexJs: resolveApp('src/index.server.js'), // 👈 서버사이드 렌더링 entry
  ssrBuild: resolveApp('dist'), // 👈 웹팩 처리 후 저장 경로
  publicUrlOrPath,
};

module.exports.moduleFileExtensions = moduleFileExtensions;
📌 참고 - resolveApp
const path = require('path');

const resolveApp = relativePath => path.resolve(appDirectory, relativePath);
즉, path.resolve(appDirectory, relativePath)를 해준 것.
path.resolve는 무엇인지?
-> 인자로 받은 경로들을 하나로 합쳐서 문자열 헝태로 리턴함.
-> path 인자들을 합쳐나가는중/를 만나면 절대경로로 인식해서 나머지 경로인자들을 무시한다. 만약/를 끝까지 만나지 못하면 /현재경로/생성된경로 형태로 결과를 리턴한다.
📌 참고 2 - path.join과 path.resolve의 차이
path.resolve('foo', '/bar', 'baz') // /bar/baz => baz부터 시작해 /bar를 만나는 순간 종료
path.join('foo', '/bar', 'baz') // foo/bar/baz
웹팩 기본 설정
- config/webpack.config.server.js 수정
1) 웹팩 기본 설정
const paths = require('./paths');
// 🔺 위에서 작성했던 paths.js에서 module.exports 한 객체.

module.exports = {
    mode: 'production',  // 프로덕션 모드로 설정
    entry: paths.ssrIndexJs,  // 엔트리 경로
    target: 'node',  // 노드 환경에서 실행될 것
    output: {
        path: paths.ssrBuild,  // 빌드 경로
        filename: 'server.js',  // 파일 이름
        chunkFilename: 'js/[name].chunk.js',  // 청크파일 이름
        publicPath: paths.publicUrlOrPath,  // 정적파일 제공될 경로
    }
}- 빌드할 때 어떤 파일에서 시작할지 = entry
- 어디에 결과물을 저장할지 = output
2) 웹팩 로더 설정
로더 (loader)
- 파일을 불러올 때 확장자에 맞게 필요한 처리를 해줌.
-> js 파일은 바벨을 통해 트랜스파일링을 해주고, 이미지 파일은 다른 경로에 저장하는 등
- css나 이미지 파일을 별도로 설정해줘서 결과물에 포함되지 않도록 구현.
webpack.config.server.js
const paths = require('./paths');
const getCSSModuleLocalIdent = require('react-dev-utils/getCSSModuleLocalIdent');

// 🔻 정규표현식. 아래 조건에 맞는 것을 찾기 위해 `test`필드에 넣어줌.
const cssRegex = /\.css$/;
const cssModuleRegex = /\.module\.css$/;
const sassRegex = /\.(scss|sass)$/;
const sassModuleRegex = /\.module\.(scss|sass)$/;

module.exports = {
    mode: 'production',
    entry: paths.ssrIndexJs,
    target: 'node',
    output: {
        path: paths.ssrBuild,
        filename: 'server.js',
        chunkFilename: 'js/[name].chunk.js',
        publicPath: paths.publicUrlOrPath,
    },
    module: {
        rules: [
            {
                oneOf: [
                    // JS 를 위한 처리
                    {
                        test: /\.(js|mjs|jsx|ts|tsx)$/,
                        include: paths.appSrc,
                        loader: require.resolve('babel-loader'),
                        options: {
                            customize: require.resolve(
                                'babel-preset-react-app/webpack-overrides'
                            ),
                            presets: [
                                [
                                    require.resolve('babel-preset-react-app'),
                                    {
                                        runtime: 'automatic',
                                    },
                                ],
                            ],
                            plugins: [
                                [
                                    require.resolve('bable-plugin-named-asset-import'),
                                    {
                                        loaderMap: {
                                            svg: {
                                                ReactComponent:
                                                    '@svgr/webpack?-svgo,+titleProp,+ref![path]'
                                            },
                                        },
                                    },
                                ],
                            ],
                            cacheDirectory: true,
                            cacheCompression: false,
                            compact: false,
                        },
                    },
                    // CSS 를 위한 처리
                    {
                        test: cssRegex,
                        exclude: cssModuleRegex,
                        loader: require.resolve('css-loader'),
                        options: {
                            importLoaders: 1,
                            modules: {
                                exportOnlyLocals: true, // 실제 css파일 만들지 않게.
                            },
                        },
                    },
                    // CSS Module 을 위한 처리
                    {
                        test: cssModuleRegex,
                        loader: require.resolve('css-loader'),
                        options: {
                            importLoaders: 1,
                            modules: {
                                exportOnlyLocals: true,
                                getLocalIdent: getCSSModuleLocalIdent,
                            },
                        },
                    },
                    // SASS 를 위한 처리
                    {
                        test: sassRegex,
                        exclude: sassModuleRegex,
                        use: [
                            {
                                loader: require.resolve('css-loader'),
                                options: {
                                    importLoaders: 3,
                                    modules: {
                                        exportOnlyLocals: true,
                                    },
                                },
                            },
                            require.resolve('sass-loader');
                        ],
                    },
                    // SASS + CSS Module 을 위한 처리
                    {
                        test: sassRegex,
                        exclude: sassModuleRegex,
                        use: [
                            {
                                loader: require.resolve('css-loader'),
                                options: {
                                    importLoaders: 3,
                                    modules: {
                                        exportOnlyLocals: true,
                                        getLocalIdent: getCSSModuleLocalIdent,
                                    },
                                },
                            },
                            require.resolve('sass-loader');
                        ],
                    },
                    // url-loader 을 위한 설정
                    {
                        test: [/\.bmp$/, /\.gif$/, /\.jpe?g$/, /\.png$/],
                        loader: require.resolve('url-loader');
                        options: {
                            emitFile: false,
                            limit: 10000,
                            name: 'static/media/[name].[hash:8].[ext]',
                        },
                    },
                    // 그 외 파일들은 file-loader 사용
                    {
                        loader: require.resolve('file-loader'),
                        exclude: [/\.(js|mjs|jsx|ts|tsx)$/, /\.html$/, /\.json$/],
                        options: {
                            emitFile: false,
                            name: 'static/media/[name].[hash:8].[ext]',
                        },
                    },
                ],
            },
        ],
    },
};
🛠 Error Log
Parsing error: [BABEL] /~~: Using `babel-preset-react-app` requires that you specify `NODE_ENV` or `BABEL_ENV` environment variables. Valid values are "development", "test", and "production". Instead, received: undefined. - package.json에 아래와 같이 작성해줌. (eslintConfig 필드에 작성)
"eslintConfig": {
    "env": {
      "NODE_ENV": "development"
    },
    ...
  }
node_moudules 내의 라이브러리 resolve
webpack.config.server.js
module.exports = {
    mode: 'production',
    entry: paths.ssrIndexJs,
    target: 'node',
    output: {
        ...
    },
    module: {
      ...
    },
    // 🔻 추가한 부분
 	resolve: {
        modules: ['node_modules']
    }
};- import 구문으로 라이브러리를 불러오면 node_modules 폴더에서 찾아 사용하게 됨.
- 라이브러리를 불러오면 빌드시 output 파일 안에 해당 라이브러리 관련 코드가 함께 번들링됨.
-> 이를 막기 위해 번들링해줘야함. (webpack-node-externals라이브러리)
webpack-node-externals
$ yarn add webpack-node-externalswebpack.config.server.js (수정)
const nodeExternals = require('webpack-node-externals');환경변수 주입
const webpack = require('webpack');
const getClientEnvironment = require('./env');

const env = getClientEnvironment(paths.publicUrlOrPath.slice(0, -1));
{
module.exports = {
...
module: {
...
},
resolve: {
modules: ['node_modules']
},
// 🔻 추가
externals: [
nodeExternals({
allowlist: [/@babel/],
}),
],
};build 스크립트 작성
루트 폴더에 /scripts 폴더를 열어보면 build.js 파일이 존재함ㅁ.
-> 클라이언트에서 사용할 빌드 파일을 만드는 작업.
이 스크립트와 유사하게 build.server.js 파일을 생성해보자.
scripts/build.server.js
process.env.BABEL_ENV = 'production';
process.env.NODE_ENV = 'production';

process.on('unhandledRejection', err => {
    throw err;
});

require('../config/env');

const fs = require('fs-extra');
const webpack = require('webpack');
const config = require('../config/webpack.config.server');
const paths = require('../config/paths');

function build() {
    console.log('Creating server build...');
    fs.emptyDirSync(paths.ssrBuild);

    let compiler = webpack(config);
    return new Promise((resolve, reject) => {
        compiler.run((err, stats) => {
            if (err) {
                console.log(err);
                return;
            }
            console.log(stats.toString());
        });
    });
}

build();
⚡️ build 테스트
$ node scripts/build.server.js
- 정상적으로 빌드됨.

⚡️ 작동 테스트
$ node dist/server.js
- 정상적으로 작동함.
(초반에 src/index.server.js에 작성했던 내용이 출력됨)
->ReactDOMServer.renderToString()안에 넣어줬던 JSX.

package.json 스크립트 추가
  "scripts": {
    "start": "node scripts/start.js",
    "build": "node scripts/build.js",
    "test": "node scripts/test.js",
     // 🔻 추가
    "start:server": "node/server.js",
    "build:server": "node scripts/build.server.js"
},- 스크립트 실행
$ yarn build:server
$ yarn start:server
이제 서버사이드 렌더링 구현 준비 완료!
서버코드 작성 후 연동하면 끝임.