pub.dev - Table Calendar
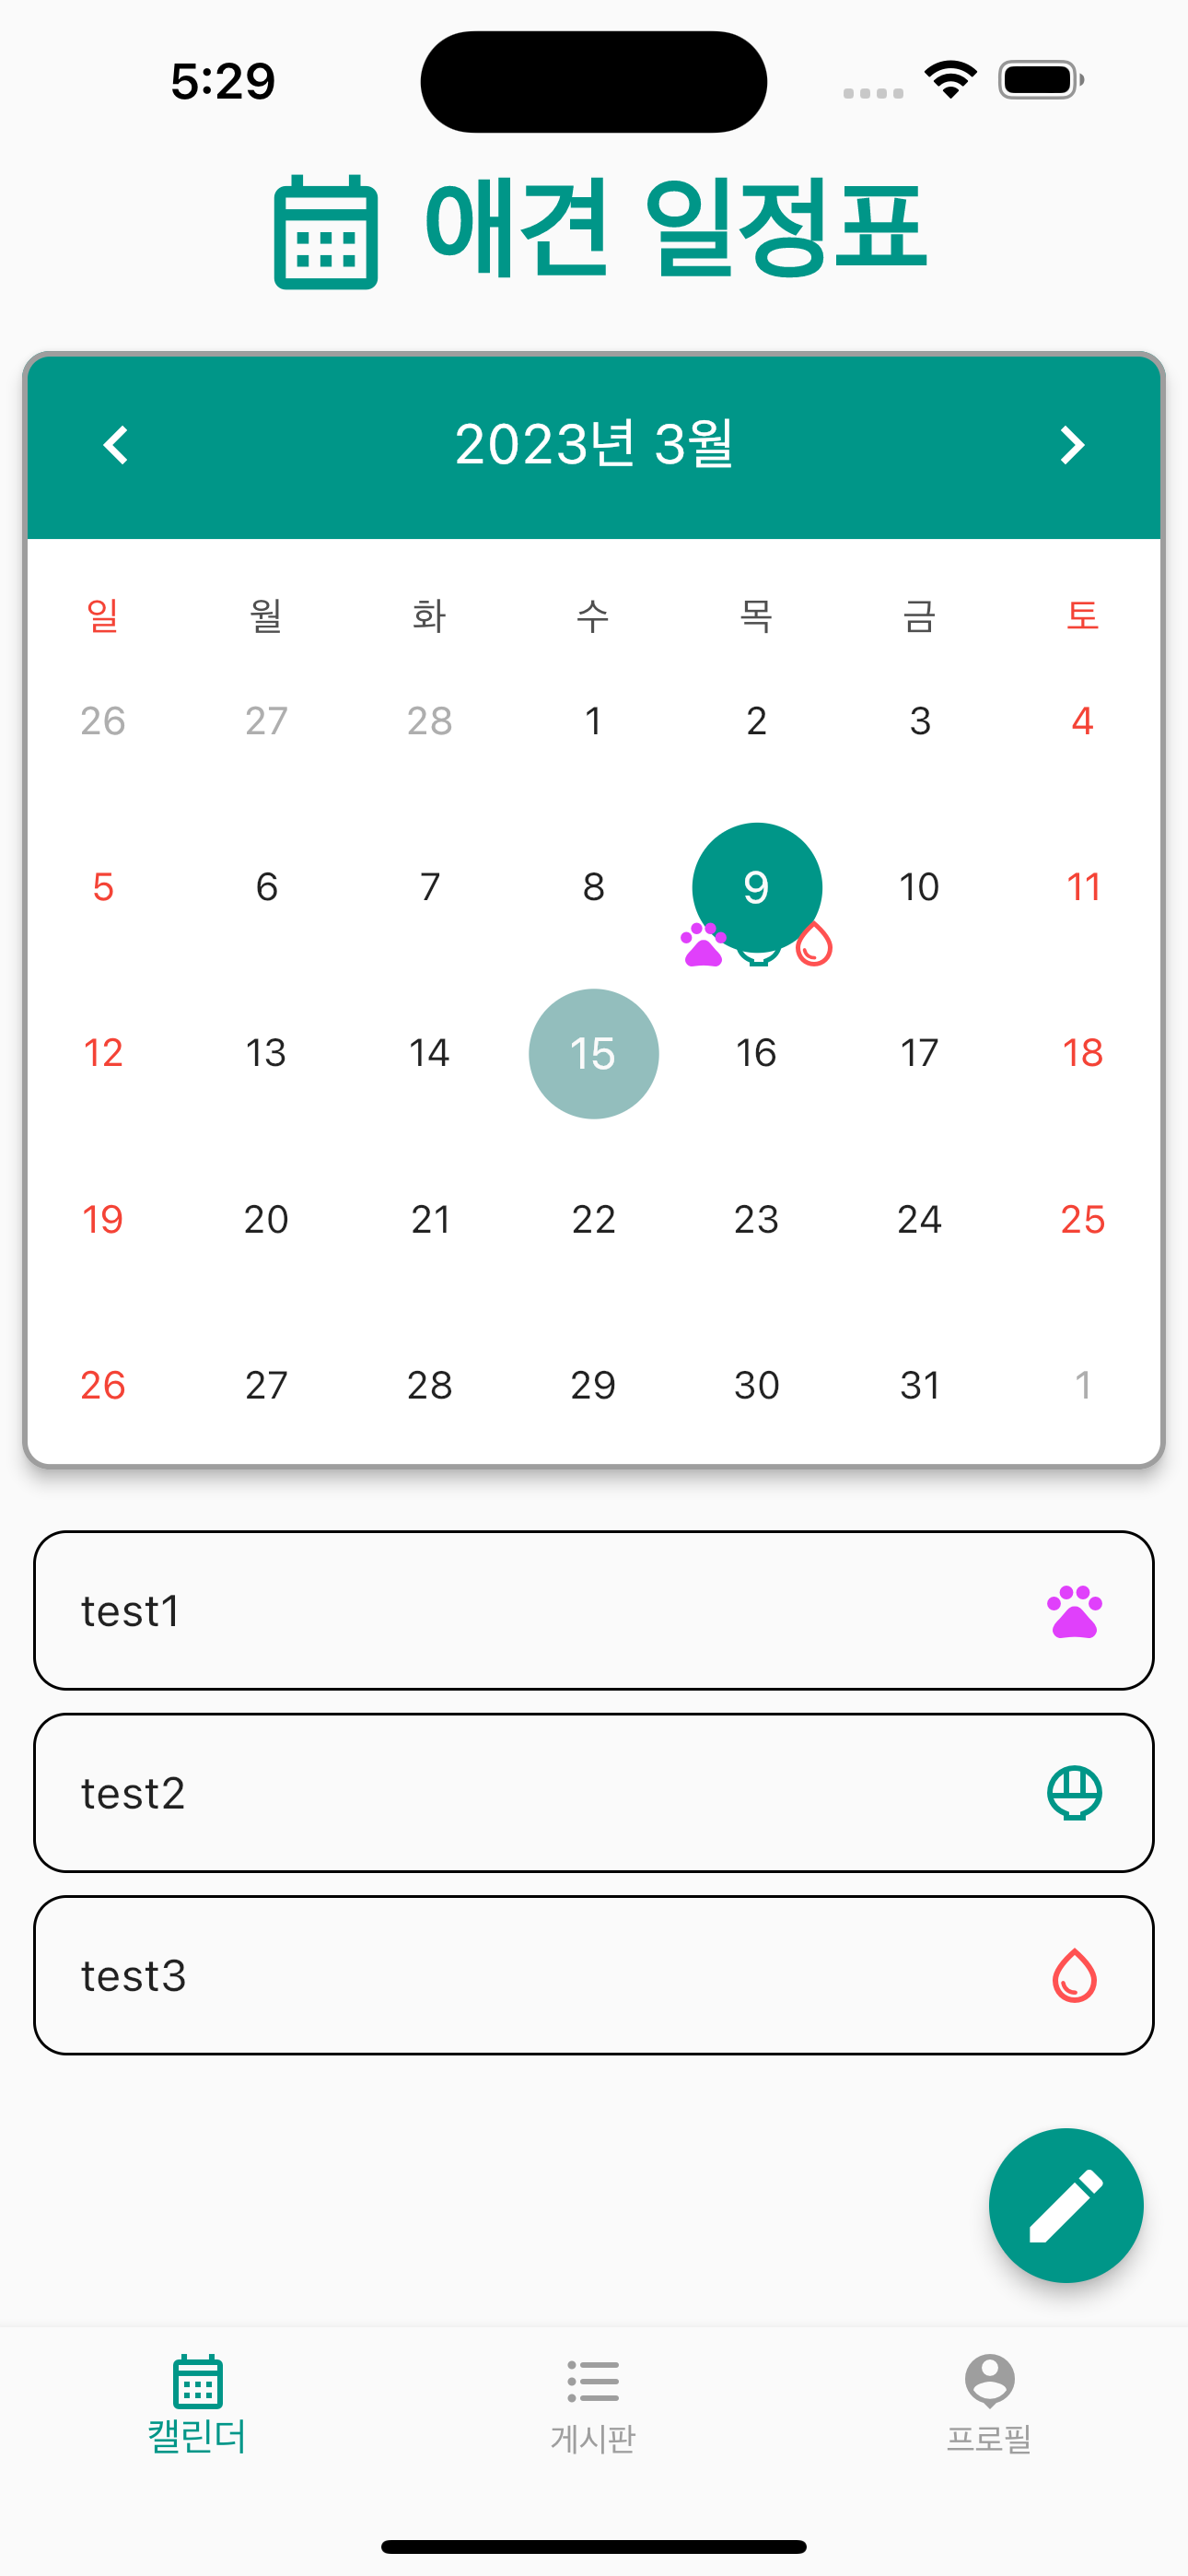
구현된 화면.gif
달력 부분을 구성하면서 제일 애먹은 부분이 바로 원하는 이모티콘을 넣는 기능을 구현하는 것이였습니다. 사용자가 입력하기 원하는 이모티콘을 넣는 기능을 커스텀하는 방식에 대해 찾다가 구현하게 되어 이를 공유하고자 작성하였습니다.
1. Table_Calendar 기본 구성
먼저 기본 구성에 대해 알아보기 위해 라이브러리 개발자가 공유한 깃헙에 베이직 코드를 살펴봅시다.
import 'package:flutter/material.dart';
import 'package:table_calendar/table_calendar.dart';
import '../utils.dart';
class TableBasicsExample extends StatefulWidget {
_TableBasicsExampleState createState() => _TableBasicsExampleState();
}
class _TableBasicsExampleState extends State<TableBasicsExample> {
CalendarFormat _calendarFormat = CalendarFormat.month;
DateTime _focusedDay = DateTime.now();
DateTime? _selectedDay;
Widget build(BuildContext context) {
return Scaffold(
appBar: AppBar(
title: Text('TableCalendar - Basics'),
),
body: TableCalendar(
firstDay: kFirstDay,
lastDay: kLastDay,
focusedDay: _focusedDay,
calendarFormat: _calendarFormat,
selectedDayPredicate: (day) {
// Use `selectedDayPredicate` to determine which day is currently selected.
// If this returns true, then `day` will be marked as selected.
// Using `isSameDay` is recommended to disregard
// the time-part of compared DateTime objects.
return isSameDay(_selectedDay, day);
},
onDaySelected: (selectedDay, focusedDay) {
if (!isSameDay(_selectedDay, selectedDay)) {
// Call `setState()` when updating the selected day
setState(() {
_selectedDay = selectedDay;
_focusedDay = focusedDay;
});
}
},
onFormatChanged: (format) {
if (_calendarFormat != format) {
// Call `setState()` when updating calendar format
setState(() {
_calendarFormat = format;
});
}
},
onPageChanged: (focusedDay) {
// No need to call `setState()` here
_focusedDay = focusedDay;
},
),
);
}
}body: TableCalendar() 이 부분부터 라이브러리 관련 코드가 작성됩니다. 달력의 기본 설정들에 대해 알아봅시다.
firstDay: kFirstDay, // ex) DateTime.utc(2010, 10, 16),
lastDay: lastDay, // ex) DateTime.utc(2030, 3, 14),
focusedDay: _focusedDay // ex) DateTime.now(),
firstDay: 달력에 사용할 수 있는 첫 번째 날을 설정합니다.
lastDay: 달력에 사용할 수 있는 마지막 날로 이 이후에 사용자는 사용할 수 없게 됩니다.
focusedDay: 현재 목표일로 보통 금일을 출력하게 합니다.
selectedDayPredicate: (day) {
	return isSameDay(_selectedDay, day);
},
Table Calendar 패키지의 selectedDayPredicate 함수는 캘린더에서 현재 선택된 날짜를 지정하는 데 사용됩니다. 이 함수는 캘린더에서 각 날짜를 렌더링할 때 호출되며, 현재 선택된 날짜를 표시하기 위해 사용됩니다
onDaySelected: (selectedDay, focusedDay) {
          if (!isSameDay(_selectedDay, selectedDay)) {
            setState(() {
              _selectedDay = selectedDay;
              _focusedDay = focusedDay;
            });
          }
        },
사용자가 캘린더에서 날짜를 선택하면 해당 날짜가 _selectedDay로 업데이트되고 화면이 업데이트되어 선택한 날짜에 대한 변경 사항을 표시하는 코드입니다.
다음으로 화면에 표시될 단위 설정하는 법 입니다.
CalendarFormat _calendarFormat = CalendarFormat.month; // 선언

...

calendarFormat: _calendarFormat, // 사용
달력 포맷을 선언하고 변수에 저장한 다음에 _calendarFormat을 사용하면 됩니다. CalendarFormat.month or CalendarFormat.week ...등을 사용하여 원하는 포맷을 사용하면 됩니다.
기본적인 달력의 코드 사용법에 대해 알아보았습니다. 이제 마커를 구현하고 이를 화면에 출력할 수 있는 코드를 살펴봅시다.
2. 마커 구현 - 달력 위에 아이콘 추가
달력 위에 아이콘을 추가하려면 calendarBuilders 속성을 사용하여 markerBuilder를 지정해야 합니다. markerBuilder는 특정 날짜에 표시할 컨텐츠를 렌더링하는 데 사용됩니다. 예를 들어, 아이콘을 추가하려면 다음과 같이 코드를 작성할 수 있습니다.
markerBuilder: (context, day, events) {
  if (events.isNotEmpty) {
    List iconEvents = events;
    return ListView.builder(
      shrinkWrap: true,
      scrollDirection: Axis.horizontal,
      itemCount: events.length,
      itemBuilder: (context, index) {
        Map key = iconEvents[index];
        if (key['iconIndex'] == 1) {
          return Container(
            margin: EdgeInsets.only(top: 40.h),
            child: Icon(
              size: 20.sp,
              Icons.pets_outlined,
              color: Colors.purpleAccent,
            ),
          );
        } else if (key['iconIndex'] == 2) {
          return Container(
            margin: EdgeInsets.only(top: 40.h),
            child: Icon(
              size: 20.sp,
              Icons.rice_bowl_outlined,
              color: Colors.teal,
            ),
          );
        } else if (key['iconIndex'] == 3) {
          return Container(
            margin: EdgeInsets.only(top: 40.h),
            child: Icon(
              size: 20.sp,
              Icons.water_drop_outlined,
              color: Colors.redAccent,
            ),
          );
        }
      },
    );
  }
},
위 코드에서는 markerBuilder를 사용하여 특정 날짜에 아이콘을 표시하도록 설정합니다. 각 아이콘은 해당 이벤트의 iconIndex 값에 따라 다른 색상의 아이콘으로 표시됩니다.
3. 날짜별 아이콘 데이터 설정
markerBuilder에 전달할 이벤트 데이터를 설정해야 합니다. eventLoader 속성을 통해 각 날짜의 이벤트를 로드하는 함수를 지정하고, 해당 함수에서 이벤트 데이터를 반환합니다.
List _getEventsForDay(DateTime day) {
    String dayT=DateFormat('yy/MM/dd').format(day);
    Map<String, dynamic> events = context.read<EventsProvider>().getEvents();
    return events[dayT]??[];
}

...

eventLoader: _getEventsForDay,
_getEventsForDay 함수는 특정 날짜에 대한 이벤트를 반환하며, 이벤트 데이터는 날짜별로 설정됩니다.
4. 이벤트 데이터 업데이트
이벤트 데이터가 업데이트될 때마다 ValueNotifier를 통해 달력을 리프레시하도록 설정합니다. 아래와 같이 _selectedEvents를 업데이트하면 달력이 변경됩니다.
_selectedEvents.value = _getEventsForDay(selectedDay);5. 기타
마지막으로 유용한 기능들을 코드에 주석을 달아 설명해 놓았습니다.
TableCalendar(
  headerStyle: HeaderStyle(
    // 헤더 스타일 설정
    // ...
  ),
  rowHeight: 60.h, // 각 날짜 행의 높이 설정
  locale: 'ko-KR', // 로케일 설정 (한국어)
  firstDay: DateTime.utc(2010, 10, 16), // 캘린더의 첫 번째 날짜 설정
  lastDay: DateTime.utc(2030, 3, 14), // 캘린더의 마지막 날짜 설정
  focusedDay: _focusedDay, // 현재 포커스된 날짜 설정
  calendarFormat: _calendarFormat, // 캘린더 형식 설정 (월/주/일)
  selectedDayPredicate: (day) {
    // 현재 선택된 날짜 판별을 위한 함수 설정
    return isSameDay(_selectedDay, day);
  },
  onDaySelected: _onDaySelected, // 날짜 선택 시 호출될 함수 설정
  eventLoader: _getEventsForDay, // 날짜에 따른 이벤트를 로드하는 함수 설정
  calendarStyle: CalendarStyle(
    // 캘린더 스타일 설정
    // ...
  ),
  calendarBuilders: CalendarBuilders(
    // 캘린더의 빌더 함수 설정
    // ...
  ),
  onFormatChanged: (format) {
    if (_calendarFormat != format) {
      // 캘린더 형식이 변경되면 setState를 호출하여 상태 업데이트
      setState(() {
        _calendarFormat = format;
      });
    }
  },
  onPageChanged: (focusedDay) {
    // 페이지 변경 시 현재 포커스된 날짜 업데이트
    _focusedDay = focusedDay;
  },
)
코드
제가 구현한 코드는 이곳에서 보실수 있습니다
