Android
Service
예전에 Thread 를 이용하면 Background 작업이 가능하다고 하였습니다. Main Thread 가 작업을 종료하더라도, 프로세스가 종료되지 않는다면 별도의 Thread 는 계속적으로 동작한다고 하였죠. 그런데 Service 도 마찬가지로 Background 작업을 위한 컴포넌트 입니다. 그러면 Thread 와의 차이점은 무엇일까요?
예를 들어, MainActivity 에서 별도의 Thread 를 제어하기 위해 참조변수를 만들어 Thread 를 관리합니다. 단, MainActivity 가 종료된다면, 즉 Main Thread 가 작업이 종료된다면, Thread 객체를 참조하고 있던 참조변수 또한 사라지기 때문에 별도의 Thread 를 관리할 방법이 사라집니다. 이는 큰 문제를 야기하게 됩니다. 이러한 문제점 때문에 나온 개념이 Service 입니다.
예제를 통해 Service 를 알아보겠습니다. 먼저, 차이점을 명확하게 느끼기 위해 Thread 를 이용한 Background 작업을 먼저 해봅시다.
Thread 를 이용한 Background 작업
우리가 해볼 작업은 Start 버튼과 Stop 버튼을 만들어 각각의 스레드 작업을 제어해볼 생각입니다. 화면구성은 간단하므로, 자바 코드만 봅시다.
class MyThread extends Thread{
    boolean isRun = true;
    @Override
    public void run() {

        while (isRun){
            runOnUiThread(()->{
                Toast.makeText(MainActivity.this, "백그라운드 작업중...", Toast.LENGTH_SHORT).show();
                Log.i("Ex61","백그라운드 작업중...");
            });

            try {
                Thread.sleep(5000);
            } catch (InterruptedException e) {
                throw new RuntimeException(e);
            }
        }
    }
}
스레드 클래스 하나를 설계했습니다. Start 버튼과 Stop 버튼을 누르면 이 스레드를 실행시켜 백그라운드 작업을 할 수 있게끔 하겠습니다. 그리고 토스트와 로그를 이용하여 백그라운드 작업이 잘 수행되는지 확인해봅시다.
public void onBackPressed() {
    //super.onBackPressed();
    finish();
}

void clickStart(){
    if(thread != null) return;

    thread = new MyThread();
    thread.start();
}


void clickStop(){
    if(thread != null) {
        thread.isRun = false;
        thread = null;
    } else {
        runOnUiThread(new Runnable() {
            @Override
            public void run() {
                Toast.makeText(MainActivity.this, "Thread 객체를 참조하고 있지 않습니다.", Toast.LENGTH_SHORT).show();
            }
        });
    }
}
Start 버튼을 누르면 5초마다 반복적으로 토스트 메시지와 로그값을 출력합니다. 그리고 Stop 버튼을 누르면 정상적으로 Thread 의 백그라운드 작업이 종료됩니다. 그리고 뒤로가기 버튼을 눌렀을 때 자동으로 호출되는 onBackPressed() 메소드를 이용하여 MainActivity 를 종료시켜봅시다. 그리고 MainActivity 를 종료시켰을 때, Thread 의 백그라운드 작업이 어떻게 되는지 확인해봅시다.

역시 예상대로 Thread 의 백그라운드 작업은 잘 진행되고 있습니다. 하지만 MainActivity 는 종료된 상태죠. 즉, MainActivity 가 가지고 있던 Thread 의 참조변수는 사라진 상태입니다. 그러면 이 상황에서 stop 버튼이나 start 버튼을 누르면 어떻게 될까요? Thread 의 참조변수 thread 는 MainActivty 가 종료되면서 null 로 바뀌었기 때문에 Thread 를 참조할 수 없습니다. 그렇기 때문에 Start 버튼을 누르면 새로운 Thread 객체를 만들겁니다. Stop 버튼을 누르면 토스트 메시지를 띄우겠죠. 예제라서 그 심각성이 느껴지지 않지만 매우 심각한 상황입니다.
Thread 를 이용한 Background 작업에는 이러한 문제점이 존재합니다. 그래서 이번에는 Service 컴포넌트를 이용한 Background 작업을 해봅시다.
Service 를 이용한 Background 작업
Service 컴포넌트 생성하기
Service 를 이용한 background 작업을 확인해보기 위해, 일단 Service 컴포넌트부터 만들어봅시다. 일단 MyService 클래스 부터 만들어줍니다. 그리고 Service 클래스를 상속받겠습니다. 그러면 onBind() 를 반드시 구현해야 합니다. 이 메소드는 bindService() 로 서비스를 시작하면 실행되는 메소드 입니다. 일단 우리는 startService() 로 서비스를 시작했기 때문에 이 메소드는 다음 예제에서 알아봅시다.
public class MyService extends Service {
    @Nullable
    @Override
    public IBinder onBind(Intent intent) {
        return null;
    }
}
Service 또한 안드로이드 4대 컴포넌트 이기 때문에 Intent 를 활용하여 Service를 실행해주어야 합니다. 이제 MainActivity 에서 Service 작업을 시작하고 종료하는 코드부터 작성해봅시다.
protected void onCreate(Bundle savedInstanceState) {
    super.onCreate(savedInstanceState);
    setContentView(R.layout.activity_main);

    findViewById(R.id.btn_start).setOnClickListener(view -> {
        Intent intent = new Intent(this,MyService.class);
        startService(intent);

    });

    findViewById(R.id.btn_stop).setOnClickListener(view -> {
        Intent intent = new Intent(this,MyService.class);
        stopService(intent);
    });
}
각각의 버튼 이벤트에서 인텐트를 각각 생성하고, startService() 와 stopService() 로 서비스를 시작하고 종료할 수 있습니다.
마지막으로 서비스는 안드로이드의 4대 컴포넌트 중 하나이기 때문에, AndroidManifest.xml 파일에 등록해주어야 합니다. <application> 안쪽에 다음과 같은 코드를 작성하여 서비스를 등록해줍시다.
<service android:name=".MyService"/>
여기까지 한다면 서비스를 생성하는 모든 작업이 끝났습니다. 이제 백그라운드 작업을 구현해봅시다.
Service 백그라운드 작업 구현하기
우리는 startService() 와 인텐트를 파라미터로 전달하여 서비스를 시작했습니다. 이 때 자동으로 실행되는 메소드가 있는데 바로 onStartCommand() 입니다. 앞선 Thread 예제에서 했던 작업과 비슷하게 백그라운드 작업을 구현합시다.
public class MyService extends Service {
    MediaPlayer mp;

    @Override
    public int onStartCommand(Intent intent, int flags, int startId) {
        if(mp == null) {
            mp = MediaPlayer.create(this,R.raw.kalimba);
            mp.setVolume(0.7f,0.7f);
            mp.setLooping(true);
        }
        mp.start();
        return START_STICKY;
    }

}-
MediaPlayer mp;
MediaPlayer 의 참조변수 하나를 만들어 줍니다. MediaPlayer 는 Thread 를 상속받아 Thread 의 능력을 사용할 수 있습니다. -
mp = MediaPlayer.create(this,R.raw.kalimba);
새로운 MediaPlayer 를 생성하지 않기 위해, if 문을 활용해줍시다. 그리고 프로젝트의raw파일안에 mp3 파일이 있다면,create()메소드를 이용하여 MediaPlayer 객체를 만들어 줄 수 있습니다. 그리고, Service 는 Context 를 상속받습니다. -
mp.setVolume(0.7f,0.7f);과mp.setLooping(true);를 이용하여 음악파일의 볼륨과, 반복을 설정할 수 있습니다. 그리고mp.start()를 이용해 음악을 재생할 수 있습니다. -
return START_STICKY;
안드로이드 에서는 메모리의 문제로 프로세스가 강제로 서비스를 kill 시켜버리는 경우가 있습니다. 예를 들어 메모리가 부족한 상황에서 전화가 오는 경우, 전화가 가장 최우선 순위가 되기에, 서비스를 종료시키는 경우가 있습니다. 이때, 메모리 부족 문제가 해결된다면 자동으로 다시 서비스를 실행시킬 수 있는데, 그걸 설정하는것이 이 리턴값입니다. 여러 설정값들이 있으며, 이번 예제에서는 다시 실행시킨다는 설정값인,START_STICKY를 사용하겠습니다.
그리고 stopService() 를 통해 서비스를 종료하면 자동으로 실행되는 메소드도 있습니다. 바로 onDestroy() 입니다. 여기에서 서비스를 종료시켰을 때의 작업을 정의해 봅시다.
@Override
public void onDestroy() {
    if(mp != null){
        mp.stop();
        mp.release();
        mp = null;
    }
    super.onDestroy();
}
MediaPlayer 객체가 null 이 아니라면 서비스를 종료시킵니다. mp.stop() 을 통해 종료시킬 수 있으며, 미디어 파일의 경우 파일을 완전하게 메모리에서 해제하기 위해서 mp.release() 가 필요합니다.
Foreground Service
Oreo 버전 부터 Foreground Service 라는 개념이 도입되었습니다. 예전에는 개발자들의 서비스 컴포넌트 사용의 남용으로 인해 사용자들의 배터리가 빨리 닳게 되는 이슈가 발생했습니다. 그래서 안드로이드 에서는 사용자들에게 백그라운드 서비스가 실행줌임을 알려줄 필요성이 생겼으며, 그것을 위해 Notification 의 개념을 사용했습니다.
즉, Foreground Service 란, 사용자에게 서비스가 실행줌임을 인식할 수 있도록 반드시 알림(Notification) 을 보이도록 강제하는 서비스 개념입니다.
퍼미션 등록하기
Foreground Service 는 퍼미션이 필요합니다. 또한 Foreground Service 를 사용하기 위해서는 Notification 의 기능또한 필요하므로 2가지의 퍼미션을 추가해줍시다.
    <uses-permission android:name="android.permission.FOREGROUND_SERVICE"/>
<uses-permission android:name="android.permission.POST_NOTIFICATIONS"/>-
퍼미션 체크 및 요청
public class MainActivity extends AppCompatActivity { @Override protected void onCreate(Bundle savedInstanceState) { super.onCreate(savedInstanceState); setContentView(R.layout.activity_main); findViewById(R.id.btn_start).setOnClickListener(view -> { Intent intent = new Intent(this,MyService.class); if(Build.VERSION.SDK_INT > 26){ startForegroundService(intent); } else { startService(intent); } }); findViewById(R.id.btn_stop).setOnClickListener(view -> { Intent intent = new Intent(this,MyService.class); stopService(intent); }); int checkResult = checkSelfPermission(Manifest.permission.POST_NOTIFICATIONS); if(checkResult == PackageManager.PERMISSION_DENIED){ permissionResultLauncher.launch(Manifest.permission.POST_NOTIFICATIONS); } } ActivityResultLauncher<String> permissionResultLauncher = registerForActivityResult(new ActivityResultContracts.RequestPermission(), new ActivityResultCallback<Boolean>() { @Override public void onActivityResult(Boolean result) { if(result == true){ Toast.makeText(MainActivity.this, "알림 허용", Toast.LENGTH_SHORT).show(); }else{ Toast.makeText(MainActivity.this, "알림 불가. 서비스도 불가", Toast.LENGTH_SHORT).show(); } } }); }-
Build.VERSION.SDK_INT > 26
사용자 휴대폰의 버전 값을 체크해, ForegroundService 를 사용할 수 있는 버전인지 확인합니다. 26 버전이후로 사용할 수 있으므로, 26버전 이상이라면,startForegroundService(intent);으로 Service 를 실행시켜 주어야 하며, 이하라면startService(intent);으로 서비스를 실행시킵니다. -
checkSelfPermission(Manifest.permission.POST_NOTIFICATIONS);
알림 퍼미션의 허용 여부를 체크 합니다. 반환값으로는 int 형을 반환하며,0이면 퍼미션 허용,-1이면 퍼미션이 거부되었음을 뜻합니다. 그리고 그 반환값을checkResult변수에 담습니다. 그리고 if 문을 이용하여 퍼미션이 거부되었을 경우, 퍼미션을 허용할 수 있도록 합니다. 그리고 퍼미션을 허용할 수 있도록 하는 대행사 객체를 만들어 퍼미션 허용을 진행합니다.
-
-
알림 객체 만들기
Foreground Service 는 알림 객체를 만들어야 합니다. 즉, 알림 객체를 만들고, Foreground Service 에게 실행하라고 요청해주어야 합니다. 우리는 Foreground Service 를 만들어야 하므로 알림 객체 부터 만들어봅시다. 그리고 그 알림 객체를 만들기 위해서는
Builder객체 또한 필요합니다.---------------- onStartCommand(Intent intent, int flags, int startId) 메소드 내부 NotificationManagerCompat manager = NotificationManagerCompat.from(this); NotificationCompat.Builder builder = null; if(Build.VERSION.SDK_INT > 26){ NotificationChannelCompat channel = new NotificationChannelCompat.Builder("ch01",NotificationManager.IMPORTANCE_HIGH).setName("Ex62 알림채널").build(); manager.createNotificationChannel(channel); builder = new NotificationCompat.Builder(this,"ch01"); }else { builder = new NotificationCompat.Builder(this,"ch01"); } builder.setSmallIcon(R.drawable.ic_noti); builder.setContentTitle("Ex62 Music Service"); builder.setContentText("Music Service 가 실행중입니다"); Intent i = new Intent(this,MainActivity.class); PendingIntent pendingIntent = PendingIntent.getActivity(this, 100,i,PendingIntent.FLAG_IMMUTABLE); builder.setContentIntent(pendingIntent); Notification notification = builder.build(); startForeground(1,notification);-
NotificationManagerCompat manager = NotificationManagerCompat.from(this);
알림 매니저의 호환성 버전의 객체를 하나 만들어 줍시다. -
NotificationCompat.Builder builder = null;
Notification 의 생성을 해줄 Builder 참조변수도 하나 설정해줍시다. -
NotificationChannelCompat channel = new NotificationChannelCompat.Builder("ch01",NotificationManager.IMPORTANCE_HIGH).setName("Ex62 알림채널").build();
API 26 버전 이상부터, NotificationChannel 을 필요로 합니다.NotificationChannelCompat.Builder에게 채널 객체 하나를 만들어 달라고 합시다. 이름도 설정이 가능하며, 마지막에build()를 해주면 채널객체가 반환됩니다. 반환된 채널객체를channel참조변수에 넣어둡시다. -
manager.createNotificationChannel(channel);
NotificationManager 에게 채널을 만들어달라고 요청합니다. -
builder = new NotificationCompat.Builder(this,"ch01");
우리가 만드려고 하는것은 알림 객체 입니다. 알림 객체를 만들어주는 녀석이 Builder 이며, 여기서 빌더 객체를 하나 만들어줍시다. 파라미터로 Context 객체 하나와 채널 id 값을 넘겨줍시다. -
builder.setSmallIcon(R.drawable.ic_noti);을 통해 알림의 작은 아이콘을 설정할 수 있습니다. 또한builder.setContentTitle("Ex62 Music Service");으로는 알림의 타이틀을,builder.setContentText("Music Service 가 실행중입니다");으로는 알림의 내용을 작성할 수 있습니다. -
Intent i = new Intent(this,MainActivity.class);
알림 객체를 눌렀을 때, 우리는 재생과 정지 버튼을 가진 MainActivity 를 띄워주고 싶습니다. 그래서 인텐트를 이용합시다. -
PendingIntent pendingIntent = PendingIntent.getActivity(this, 100,i,PendingIntent.FLAG_IMMUTABLE);
PendingIntent 를 이용하여 곧바로 MainActivity 를 띄우는것이 아닌, 알림을 눌렀을 때, 띄울 수 있도록 설정합시다. -
builder.setContentIntent(pendingIntent);
이제 알림을 누르면 MainActivity 로 이동합니다. -
Notification notification = builder.build();
그리고 알림 객체를 생성합시다. -
startForeground(1,notification);
startForegroundService() 를 이용하여 서비스를 실행했다면, 반드시startForeground()를 호출해야 합니다. 파라미터로 알림 객체를 전달합시다.
-
Service Bind
Service 는 Service 클래스를 상속받은 별도의 클래스를 만들고, MainActivity 의 Intent 를 이용하여 실행됩니다. 그리고 별도의 Main Thread 를 가지고 있어, MainActivity 가 죽더라도 Service 의 Background 작업은 그대로 수행됩니다. 즉, 안드로이드에서는 Service 를 전혀 다른 앱으로 보고 있다는 이야기도 됩니다. 그러면, MainActivity 에서 Service 에 있는 기능 혹은 자원들을 가져올 수 있는 방법은 없을까요? Binder 가 이 부분을 해결해 줍니다.
Binder 의 작동 원리를 먼저 생각해봅시다. 일단 MainActivity 와 Service 는 전혀 다른 앱이라고 생각합시다. 그러면 자바코드와는 전혀 다른 xml 의 뷰들을 객체로 만들 때, Inflater 를 사용했던 것 처럼, MainActivity 와 Service 를 연결시켜주는 Connection 객체가 있습니다. 이 커넥션 객체를 통해 터널을 뚫는다고 생각합시다.
그리고 이 터널을 통해 Binder 객체가 지나갈 수 있습니다. 다만, 우리의 목적은 MainActivity 에서 Service 를 제어하는것이 목적이므로, Binder 객체에게 Service 의 주솟값을 들려보내야 합니다. 그리고 주솟값을 들고 Connection 터널을 지나간 Binder 객체는 MainActivity 에 도착합니다. 그리고 들고온 주솟값을 이제부터 이용하여 Service 를 제어할 수 있게되는 원리입니다.
일단 이번 예제에서는 MediaPlayer 를 이용하여 Service 객체에서 음악을 재생하는 예제를 해봅시다.
가장 먼저 메니페스트 파일에 서비스를 등록해줍시다.
<service android:name=".MyMusicService"/>그리고 Service 클래스를 상속받은 MyMusicService 클래스를 설계합시다. onBind() 메서드는 필수로 구현해주어야 합니다.
public class MyMusicService extends Service {
    @Nullable
    @Override
    public IBinder onBind(Intent intent) {
        return null;
    }
}
그리고 MainActivity 에서 onResume() 메소드 내부에서 Intent 객체를 생성하고 Service 를 실행시켜 봅시다.
@Override
protected void onResume() {
    super.onResume();

    if(musicService == null) {
        Intent intent = new Intent(this, MyMusicService.class);
        startService(intent);

        bindService(intent,connection,0);
    }
}
MyMusicService musicService = null; 멤버변수로 MyMusicService 의 참조변수를 하나 설정하였습니다. 또한 이 참조변수가 null 을 가진다면, Service 컴포넌트의 주소값이 할당되지 않은것이므로, 인텐트를 활용하여 서비스부터 실행합시다.
-
startService(intent);
이 메서드를 이용하여 서비스를 실행시킨다면, 서비스 쪽의 onStartCommand() 가 실행됩니다. 또한 Service 객체가 없다면 onCreat() 호출 후에 onStartCommand() 메서드를 호출합니다. 객체가 있다면 onStartCommand() 메서드만 호출됩니다. -
bindService(intent,connection,0);
이 메서드를 이용하여 서비스와 연결한다면, 서비스 쪽의onBind()메서드가 실행됩니다. 파라미터로는 보낼Intent객체와,ServiceConnection객체 그리고 flag 값을 전달합니다. 일단ServiceConnection객체는 아래쪽에서 다시 알아봅시다. flag 값에서는 어떠한 방식으로 인텐트를 보낼지 결정합니다.AUTO_CREATE방식은 자동으로 서비스 객체를 생성해줍니다. 주의할 점은AUTO_CREATE로 서비스 객체를 만들게 되면, MainActivity 가 죽었을 때, 서비스의 동작 또한 멈추게 됩니다. 그래서startService()를 이용하여 서비스를 실행시켜 준 뒤,bindService()를 이용하여 서비스와 연결합니다.
이제 bindService() 의 중간 파라미터에 들어갈 ServiceConnection 객체를 만들어봅시다.
ServiceConnection connection = new ServiceConnection() {
    @Override
    public void onServiceConnected(ComponentName componentName, IBinder iBinder) {
        musicService = ((MyMusicService.MyBinder) iBinder).getServiceObject();
    }

    @Override
    public void onServiceDisconnected(ComponentName componentName) {

    }
};

------------------- MyMusicService.java
public IBinder onBind(Intent intent) {

    return new MyBinder();
}

class MyBinder extends Binder {
    public MyMusicService getServiceObject(){
        return MyMusicService.this;
    }
}
onServiceConnected() 은 서비스와 MainActivity 가 연결되었을 때 호출되는 메소드 이며, onServiceDisconnected() 은 연결이 끊어졌을 때 호출되는 메소드 입니다. 이제 이 커넥션을 통해 바인더 객체를 받아올 수 있습니다. 그러면 일단 넘겨줄 바인더 객체를 서비스 쪽에서 준비해야 합니다.
Binder 클래스를 상속받은 MyBinder 클래스를 하나 만들어줍시다. 우리는 이 클래스의 객체를 MainActivity 에 넘겨줄겁니다. 그러면 이 클래스 내부에 MyMusicService 의 주솟값을 리턴하는 기능을 하나 만들어줍시다. 그러면 MainActivity 에 바인더 객체가 넘어갔을때 이 기능을 호출하고, 그러면 서비스 객체의 주솟값을 받을 수 있게됩니다.
getServiceObject() 메소드를 만들어주었으며, 리턴값으로 MyMusicService.this 을 리턴해줍니다. MyMusicService 객체의 주솟값을 리턴하였으며, 당연히 리턴타입 또한 MyMusicService 이 됩니다.
MyBinder 클래스를 설계하였으면, bindService() 실행할 때 자동으로 실행되는 메소드인 onBind() 를 이용하여 바인더 객체를 리턴시켜 줍시다. 이렇게 바인더 객체를 리턴하면, onServiceConnected() 의 두번째 파라미터로 바인더 객체가 전달됩니다. 그리고 musicService = ((MyMusicService.MyBinder) iBinder).getServiceObject(); 를 이용하여 MyMusicService 객체의 주솟값을 받아올 수있었습니다.
이제는 서비스 클래스 내부에 음악 재생, 일시정지, 멈춤의 기능을 만들어놓고, MainActivity 에서 이러한 기능들을 제어할 수 있게됩니다.
코드로 가볍게 살펴보고 넘어갑시다.
----------------- MyMusicService.java

MediaPlayer mp;

public void playMusic(){
    if(mp == null) {
        mp = MediaPlayer.create(this,R.raw.kalimba);
        mp.setVolume(0.7f,0.7f);
        mp.setLooping(true);
    }
    if(!mp.isPlaying()) mp.start();
}

public void pauseMusic(){
    if(mp != null && mp.isPlaying()) mp.pause();
}

public void stopMusic(){
    if(mp != null) {
        mp.stop();
        mp.release();
        mp = null;
    }
}


---------------- MainActivity.java
void clickPlay(){
    if(musicService != null) musicService.playMusic();
}

void clickPause(){
    if(musicService != null) musicService.pauseMusic();
}

void clickStop(){
    if(musicService != null) {
        musicService.stopMusic();
        unbindService(connection);
        musicService = null;
    }

    Intent intent = new Intent(this, MyMusicService.class);
    stopService(intent);

    finish();
}
Alarm
AlarmClock 앱을 사용
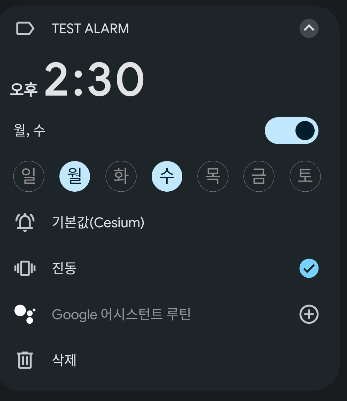
알람의 기능을 설정하는 방법 중, AlarmClock 앱을 직접 사용하는 방법이 있습니다. 이 방법을 사용하기 위해서는 일단 퍼미션이 필요합니다.
<uses-permission android:name="com.android.alarm.permission.SET_ALARM"/>그리고 버튼을 누르면 AlarmClock 앱을 사용할 수 있는 자바 코드 입니다. AlarmClock 앱이라는 다른 앱을 사용하는것이기 때문에, Intent 객체를 활용하여야 합니다.
void clickBtn1(){
    Intent intent = new Intent(AlarmClock.ACTION_SET_ALARM);
    intent.putExtra(AlarmClock.EXTRA_HOUR,14);
    intent.putExtra(AlarmClock.EXTRA_MINUTES, 30);
    intent.putExtra(AlarmClock.EXTRA_MESSAGE,"TEST ALARM");
    intent.putExtra(AlarmClock.EXTRA_DAYS,new int[] {Calendar.MONDAY,Calendar.WEDNESDAY});
    startActivity(intent);
}
AlarmManager 를 사용
이번에는 AlarmManager 를 이용하여 알람 기능을 이용해볼텐데, 10 초 이후에 BroadcastReceiver 에게 인텐트를 보내보는 테스트를 해봅시다. 일단 이 방법 역시 퍼미션이 필요하니, 추가해줍시다.
<uses-permission android:name="android.permission.SCHEDULE_EXACT_ALARM"/>퍼미션을 추가 했다면, 인텐트를 받을 BroadcastReceiver 를 상속받는 클래스 하나를 만들어줍시다. 인텐트를 잘 받았다는걸 확인하기 위해 토스트 하나와 로그 하나를 띄워보겠습니다.
public class AlarmReceiver extends BroadcastReceiver {
    @Override
    public void onReceive(Context context, Intent intent) {
        Toast.makeText(context, "알람 받았음", Toast.LENGTH_SHORT).show();
        Log.i("Ex64","알람 받았음");
    }
}
클래스를 만들었다면 이제 버튼을 눌렀을 때, AlarmManager 를 이용하여 인텐트를 보내봅시다.
void clickBtn2(){
    AlarmManager manager = (AlarmManager) getSystemService(Context.ALARM_SERVICE);

    Intent intent = new Intent(this,AlarmReceiver.class);
    PendingIntent pendingIntent = PendingIntent.getBroadcast(this, 10, intent, PendingIntent.FLAG_IMMUTABLE);
    manager.setAndAllowWhileIdle(AlarmManager.RTC_WAKEUP,System.currentTimeMillis() + 10000,pendingIntent);
}
특정 시간을 선택하여 알람 지정해보기
날짜 선택 다이얼로그
사용자가 원하는 날짜와 시간을 선택하여 알람을 지정해봅시다. 그럼 먼저 날짜를 선택하는 다이얼로그를 만들어봅시다.
void clickBtn3(){
    DatePickerDialog dialog = new DatePickerDialog(this);
    dialog.show();
}
날짜 선택 리스너
선택할 수 있는 다이얼로그는 만들었으니, 이제 선택 리스너를 구현하여 날짜를 선택해봅시다.
int year, month, day;

void clickBtn3(){
    DatePickerDialog dialog = new DatePickerDialog(this);
    dialog.setOnDateSetListener(new DatePickerDialog.OnDateSetListener() {
        @Override
        public void onDateSet(DatePicker datePicker, int i, int i1, int i2) {
            year = i;
            month = i1;
            day = i2;

        }
    });
    dialog.show();
}
nDateSet() 의 파라미터 i, i1, i2 는 각각 년,월,일 을 의미합니다. 그래서 멤버변수를 설정하고, 각각의 변수에 파라미터로 받은 값을 넣어줍시다.
시간 선택
void clickBtn3(){
    DatePickerDialog dialog = new DatePickerDialog(this);
    dialog.setOnDateSetListener(new DatePickerDialog.OnDateSetListener() {
        @Override
        public void onDateSet(DatePicker datePicker, int i, int i1, int i2) {
            year = i;
            month = i1;
            day = i2;

            Calendar calendar = Calendar.getInstance();
            hour = calendar.get(Calendar.HOUR_OF_DAY);
            minute = calendar.get(Calendar.MINUTE);
            new TimePickerDialog(MainActivity.this,timeSetListener,hour,minute,true).show();
        }
    });
    dialog.show();
}
new TimePickerDialog(MainActivity.this,timeSetListener,hour,minute,true).show();
TimePickerDialog()을 이용하여 시계 다이얼로그를 띄울 수 있습니다. 운영체제의 능력이 필요하므로, Context 객체 하나를 전달하고, 시간 선택 리스너, 초기 시간과 분, 24시간제의 여부 정보를 전달하고,show()를 해주면 시계 다이얼로그를 띄울 수 있습니다. 초기 시간과 분은 현재 시간을 기준으로 합시다.Calendar객체를 이용하면 위 코드와 같이 현재 시간을 초기값으로 설정할 수 있습니다.
시간 선택 리스너
TimePickerDialog.OnTimeSetListener timeSetListener = new TimePickerDialog.OnTimeSetListener() {
    @Override
    public void onTimeSet(TimePicker timePicker, int i, int i1) {
        // 파라미터 i, i1 : hour, minute
        hour = i;
        minute = i1;

        Calendar calendar = Calendar.getInstance();
        calendar.set(year,month,day,hour,minute);

        AlarmManager alarmManager = (AlarmManager) getSystemService(Context.ALARM_SERVICE);

        Intent intent = new Intent(MainActivity.this,AlarmReceiver.class);
        PendingIntent pendingIntent = PendingIntent.getBroadcast(MainActivity.this,10,intent,PendingIntent.FLAG_IMMUTABLE);
        alarmManager.setAndAllowWhileIdle(AlarmManager.RTC_WAKEUP,calendar.getTimeInMillis(),pendingIntent);
    }
};
첫번째 파라미터 i 는 시간을, 두번째 파라미터 i1 은 분을 의미합니다. 각각 변수에 담아두면 년,월,일,시,분 이 모두 정해졌으므로, 캘린더 객체를 다시 만들어 주었습니다. 그리고 정한 시간으로 알람을 설정했습니다. 앞선 예제와 마찬가지로 BroadcastReceiver 로 인텐트를 전달해 주었습니다.