📌 애플리케이션 배포방식
1. Pod 타입으로 배포
🔸 애플리케이션을 pod의 형태로 배포
2. ReplicaSet 타입으로 배포
🔸 애플리케이션을 ReplicaSet 형태로 배포
🔸 ReplicaSet은 실행되는 pod 개수에 대한 가용성을 보증하며 지정한 replicas 개수만큼 항상 실행될 수 있도록 관리
3. Deployment 타입으로 배포
🔸 Deployment: 1개 이상의 pod를 관리하는 컨트롤러의 종류 중 하나로써 deployment update와 deployment rollback 지원
📌 Pod 타입으로 배포
1. run 명령어를 이용하여 pod 배포
kubectl run [pod name] --image=[container image name] --port=[port number]
kubectl run nginx-pod --image=nginx --port 80🔸 kubectl get pods를 이용하여 배포된 pod 확인

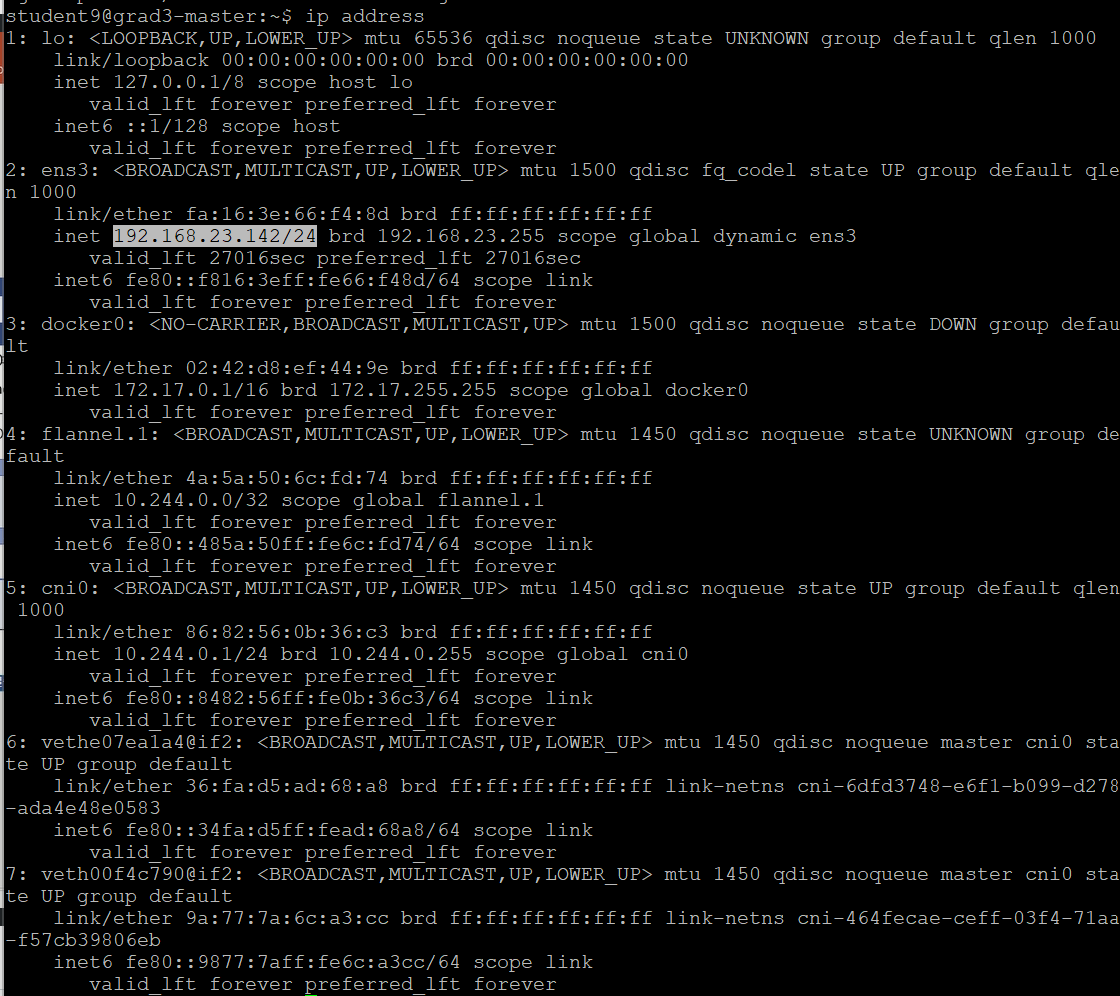
🔸 ip address를 이용해 전체 시스템의 IP 주소 확인
🔸 kubectl get pods -o wide를 이용해 pod의 IP 확인

🔸 kubectl delete pods nginx-pod 이용해 pod 삭제

💡 => yaml 파일로 생성할 때에는 delete pod만 하면 없어지지 않았는데, run으로 pod 생성할 때에는 delete해서 pod 삭제 가능
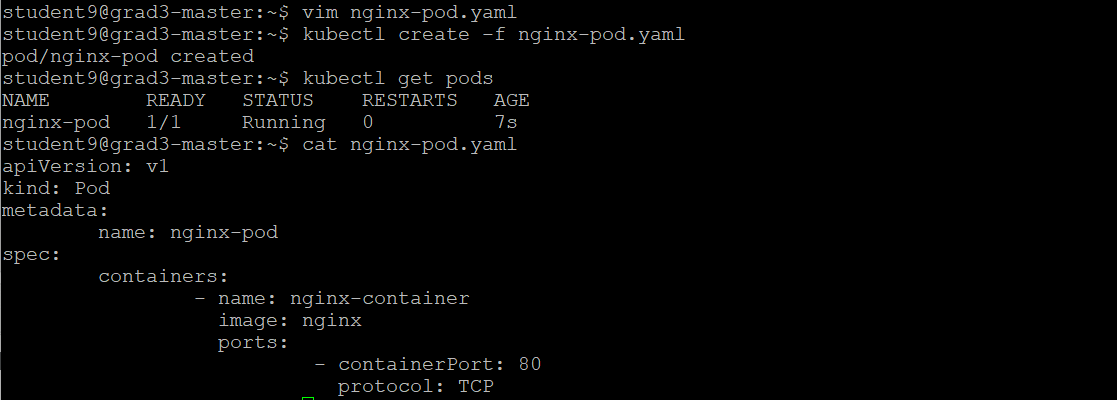
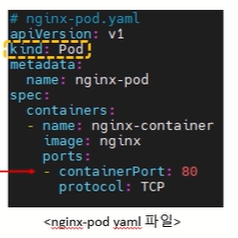
2. yaml 파일을 이용하여 pod 배포
🔸 이전에 yaml 파일 만들어져있어야함
🔸 pwd: 현재 디렉토리 나타내는 명령어
🔸 ls: 현재 디렉토리 안에 있는 파일
kubectl create -f [파일명]
kubectl create -f pod-nginx.yaml🔸 kubectl get pods 명령어를 사용해 pod 생성되었는지 확인
3. 배포한 pod 상세 정보 출력
kubectl describe pods [pod명]
kubectl describe pod nginx-pod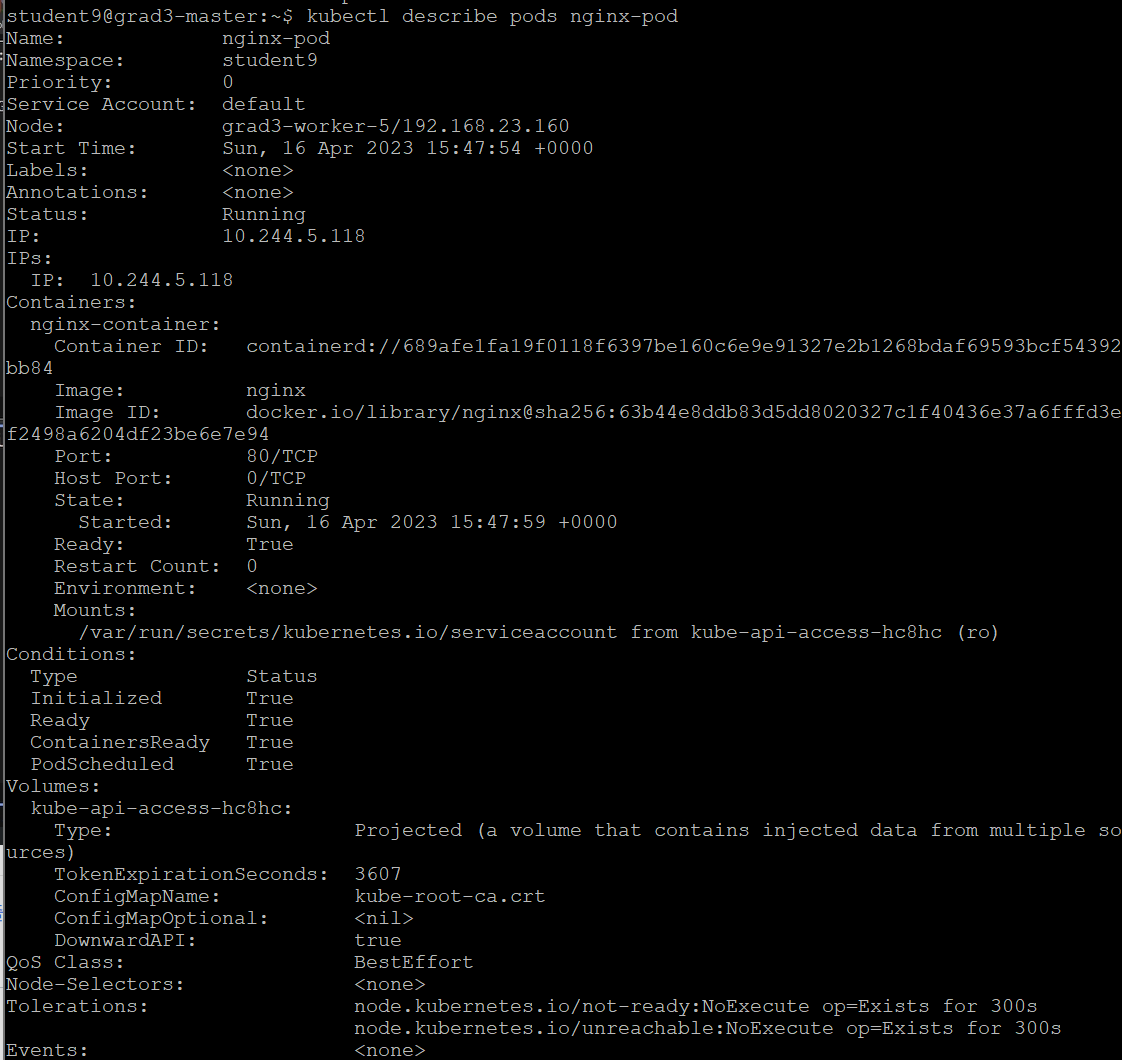
4. exec 명령어로 nginx 컨테이너 접속 후 index.html 파일 수정
kubectl exec [pod name] -- [command]
: 해당 pod의 container에 command 명령 실행
💡 exec 명령어를 통해 nginx 컨테이너에 접속 후 index.html 파일 수정
curl [pod IP]
🔸 기본 화면에서(pod 내부 아님) pod의 IP 확인
🔸 nginx의 초기 화면 나타나고 이를 바꿀 것
kubectl exec -it nginx-pod --/bin/bash
🔸 pod 안으로 들어옴
🔸 nginx 초기 페이지 수정
echo "Hello World" > /usr/share/nginx/html/index.html
🔸 해당 위치에 Hello World로 바꿈
cat /usr/share/nginx/html/index.html
🔸 Hello World가 출력
exit
🔸 pod 밖으로 나감
curl [pod IP]
🔸 Hello World 출력
💡 pod IP는 kubectl get pods -o wide로 확인 가능
📌 ReplicaSet 타입으로 배포
1. yaml 파일을 이용하여 배포
kubectl apply -f [file name]
kubectl apply -f rs-nginx.yaml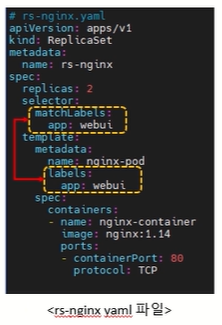
kubectl get replicaset,pods -o wide
🔸 replicaset과 pod 한번에 보기

2. scale 이용해서 replicaset 수정
kubectl scale replicaset rs-nginx --replicas=2
🔸 pod를 3개에서 2개로 수정 => scale 사용
3. 상세 정보 출력
kubectl describe replicasets [replicaset name]
kubectl describe replicaset rs-nginx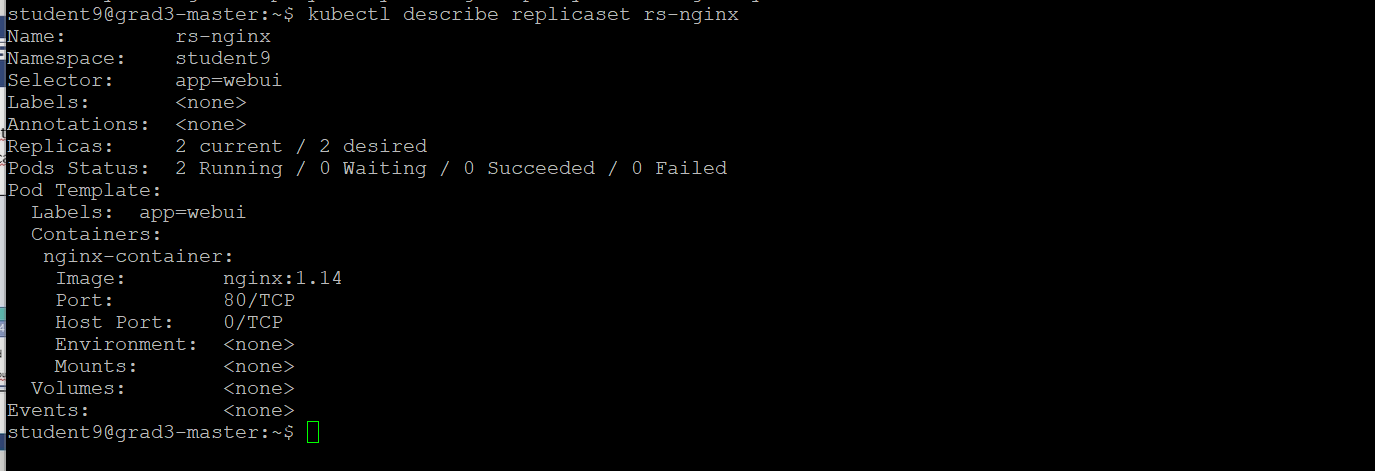
4. replicas 수 유지
kubectl delete pods [pod name]
🔸 replicaset에 의해 새로운 pod가 생성되어 수 유지
kubectl run [pod name] --image=[container image name] --port=[port number]
kubectl run testpod --image=nginx --labels=app=webui --port 80
#해당 replica의 관리를 받아야하므로 labels=app=webui
🔸 pod를 하나 추가해도 삭제해 일정한 수 유지
5. replicas 삭제
kubectl delete replicaset [replicaset name]
kubectl delete replicaset rs-nginx
📌 Deployment 타입으로 배포
1. create 명령어를 이용하여 deployment 배포
kubectl create deployment [deployment name] --image=[container image name] --replicas=2
kubectl create deployment nginx-pod --image=nginx --replicas=2kubectl delete deployments nginx-pod

2. yaml 파일을 이용하여 deployment 배포
kubectl create -f [file name]
kubectl create -f deploy-nginx.yaml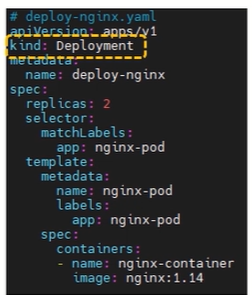
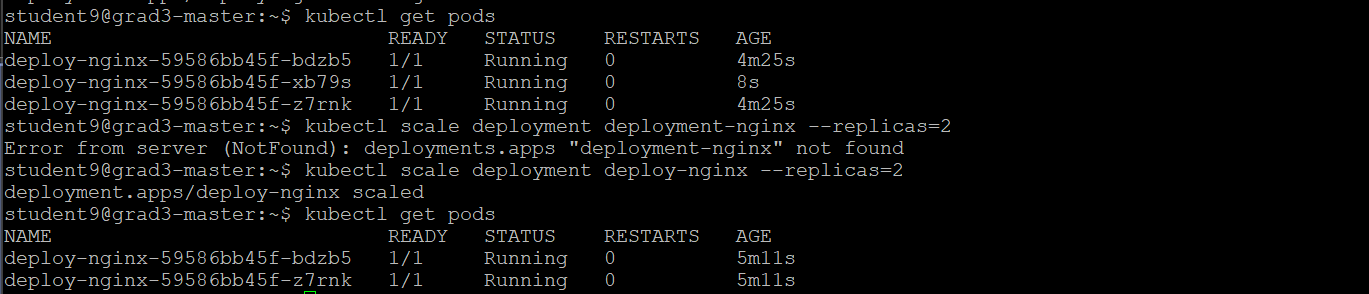
3. scale 이용해 replica 수 변경
kubectl scale deployment deployment-nginx --replicas=2
4. 상세 출력
kubectl describe deployments deploy-nginx
5. replicaset에 문제 발생할 경우
kubectl delete replicaset deploy-nginx [replicaset]
🔸 => replicaset이 사라지는 것이 아니라 해당 replicaset이 관리하는 pod가 재생성됨 But IP 안 바뀜