💡 RecyclerView는 간단하게 있어보일 수 있는 것 같습니다. 여기서는 기본적으로 어떻게 사용하는지 알아보도록 하겠습니다. 앞의 Retrofit 사용법에서 tmdb의 영화정보를 가져온 후 이어서 보시면 보기 편하실 것입니다.
코드 전문의 경우 하단의 링크를 통해 확인할 수 있습니다.
Layout
일단 RecyclerView 같은 경우 옵션을 조금 추가해주고 레이아웃을 만드시면 됩니다.
<androidx.recyclerview.widget.RecyclerView
        android:id="@+id/rv_content"
        android:layout_width="match_parent"
        android:layout_height="0dp"
        android:layout_marginStart="15dp"
        android:layout_marginBottom="50dp"
        android:orientation="horizontal"
        app:layoutManager="androidx.recyclerview.widget.GridLayoutManager"
        app:layout_constraintBottom_toBottomOf="parent"
        app:layout_constraintEnd_toEndOf="parent"
        app:layout_constraintStart_toStartOf="parent"
        app:layout_constraintTop_toBottomOf="@id/radioGroup"
        tools:listitem="@layout/home_item" />
중요한 부분만 설명하자면,
orientation
가로방향으로 스크롤 할지, 세로방향으로 스크롤 할지 정해주는 것입니다.
vertical은 세로, horizontal은 가로입니다.
layoutManager
아이템들을 어떻게 배치해서 보여줄 지 정해주는 것입니다.
보통 LinearLayoutManager와 GridLayoutManager을 많이 사용하는 것 같습니다.
listitem
어떤 아이템을 배치해서 보여줄 지 정해주는 것입니다.
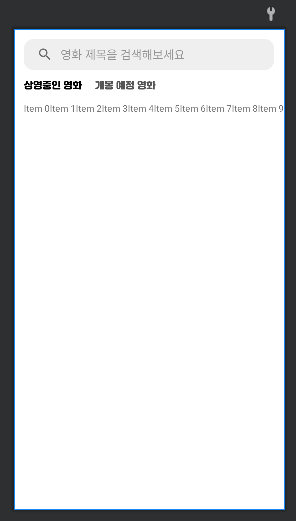
처음에는 item0 ... 이렇게 뜹니다.
우리는 listitem을 추가해줘서 우리가 원하는 뷰를 볼 수 있을 것입니다.
ListItem
보통 RecyclerView를 사용하는 사람들은 똑같은 레이아웃을 필요로하면서 안의 데이터만 바뀌는 것을 원하는 사람들일 것입니다.
그래서 우리는 이 통일된 레이아웃을 만들어 줄 것입니다.
<?xml version="1.0" encoding="utf-8"?>
<androidx.constraintlayout.widget.ConstraintLayout xmlns:android="http://schemas.android.com/apk/res/android"
    xmlns:app="http://schemas.android.com/apk/res-auto"
    android:layout_width="wrap_content"
    android:layout_height="wrap_content"
    android:paddingEnd="20dp"
    android:paddingBottom="20dp">


    <androidx.cardview.widget.CardView
        android:id="@+id/cv_poster"
        android:layout_width="0dp"
        android:layout_height="0dp"
        app:cardCornerRadius="20dp"
        app:layout_constraintDimensionRatio="1:1.5"
        app:layout_constraintBottom_toTopOf="@id/tv_title"
        app:layout_constraintEnd_toEndOf="parent"
        app:layout_constraintStart_toStartOf="parent"
        app:layout_constraintTop_toTopOf="parent">

        <ImageView
            android:id="@+id/iv_poster"
            android:layout_width="match_parent"
            android:layout_height="match_parent"
            android:adjustViewBounds="true"
            android:background="@drawable/background_homeitem"
            android:baseline="150dp"
            android:scaleType="centerCrop"
            android:src="@drawable/ic_launcher_background" />
    </androidx.cardview.widget.CardView>


    <TextView
        android:id="@+id/tv_title"
        android:layout_width="150dp"
        android:layout_height="wrap_content"
        android:layout_marginTop="10dp"
        android:ellipsize="end"
        android:fontFamily="@font/jalnan"
        android:gravity="center"
        android:singleLine="true"
        android:text="임시제목입니다."
        android:textColor="@color/black"
        app:layout_constraintBottom_toBottomOf="parent"
        app:layout_constraintEnd_toEndOf="parent"
        app:layout_constraintStart_toStartOf="parent"
        app:layout_constraintTop_toBottomOf="@id/cv_poster" />


</androidx.constraintlayout.widget.ConstraintLayout>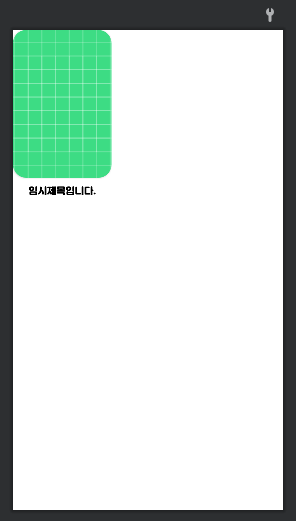
이 레이아웃에 원하는 데이터만 넣어서 우리가 원하는 방식으로 보이도록 하는 것입니다.
이렇게 한 후, 위의 RecyclerView처럼 listitem을 추가해주면
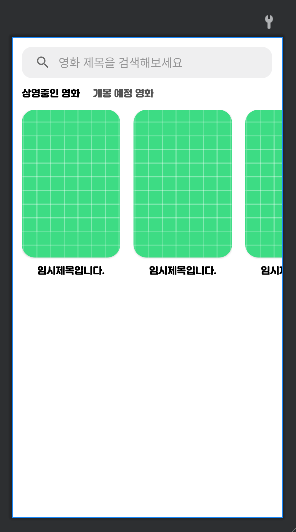
이렇게 보일 것입니다.
이렇게 레이아웃을 만들었으면 다음은 code를 작성해봅시다.
init RecyclerView
❗️ 모든 코드는 뷰 바인딩을 통해 뷰에 접근을 했다고 가정합니다.
private fun initRecyclerView() {
	val layoutManager = GridLayoutManager(this, 2, GridLayoutManager.HORIZONTAL, false)
	recyclerView.layoutManager = layoutManager
    getNowPlayingMovie()
}
xml 내에서 layoutManager를 설정할 수 있지만, 저 같은 경우 거기선 대충 작성해놓고 이렇게 코드상에서 명시하는 것이 편해서 이렇게 합니다.
위의 xml내에서의 사진을 보면 가로로 쫙 배치하는 구조이지만, 저는 2개의 열로 배치하고 싶어 Gridlayout을 사용해서 옵션을 통해 설정했습니다.
getNowPlayingMovie() 함수의 경우 앞의 레트로핏에 적혀있습니다. 그냥 tmdb를 통해 데이터를 불러오는 것입니다.
adapter
Adapter를 통해 RecyclerView 내부에 위치하는 아이템들을 설정할 수 있습니다.
class HomeAdapter(
    private val context: Context,
    private val dataSet: ArrayList<Movie>
) : RecyclerView.Adapter<HomeAdapter.ViewHolder>() {

    override fun onCreateViewHolder(parent: ViewGroup, viewType: Int): ViewHolder {
        val binding = HomeItemBinding.inflate(LayoutInflater.from(parent.context), parent, false)
        return ViewHolder(binding)
    }

    override fun onBindViewHolder(holder: ViewHolder, position: Int) {
        val movie = dataSet[position]

        if(movie.poster_path.isNullOrEmpty()) {
            holder.poster.setImageDrawable(context.getDrawable(R.drawable.ic_launcher_background))
        } else {
            Glide.with(holder.itemView.context)
                .load("https://image.tmdb.org/t/p/w500/${movie.poster_path}")
                .into(holder.poster)
        }

        holder.title.text = "${movie.title}"
    }

    override fun getItemCount(): Int {
        return dataSet.size
    }

    class ViewHolder(private val binding: HomeItemBinding) : RecyclerView.ViewHolder(binding.root) {
        val poster: ImageView = binding.ivPoster
        val title: TextView = binding.tvTitle
    }
}
onCreateViewHolder를 통해서 ViewHolder를 설정한 후,
onBindViewHolder를 통해 뷰에 접근해서 데이터를 주입하는 것입니다.
밑의 ViewHolder 클래스에서 뷰 바인딩을 통해 뷰를 가져왔으면 onBindViewHolder에서 설정하는 것입니다.
RecyclerView Adapter
위에서 Adapter를 설정해주었으면, 이를 다시 RecyclerView와 연결시켜주어야 합니다.
private fun setMovieAdapter(movies: ArrayList<Movie>) {
	if (movies.isNotEmpty()) {
		val recyclerViewState = recyclerView.layoutManager?.onSaveInstanceState()
		val adapter = HomeAdapter(this, movies)

		recyclerView.adapter = adapter
		recyclerView.layoutManager?.onRestoreInstanceState(recyclerViewState)
		adapter.notifyDataSetChanged()
	}
}
movies의 경우 getNowPlayingMovie 함수를 통해 받은 movie 데이터들의 리스트입니다.
이것을 adapter 내에 주입해주고, recyclerView와 연결시켜주는 것입니다.
data가 변하거나, 새로운 데이터를 넣어줄 필요가 있을 때가 있습니다.
data가 아예 변했을 경우,
adapter.notifyDataSetChanged()함수를 통해 새로고침을 해줄 수 있습니다.
그 외의 경우는 adapter의 옵션을 조금만 확인해봐도 직관적으로 알 수 있는 함수이름들이니 확인해보시면 될 것입니다.
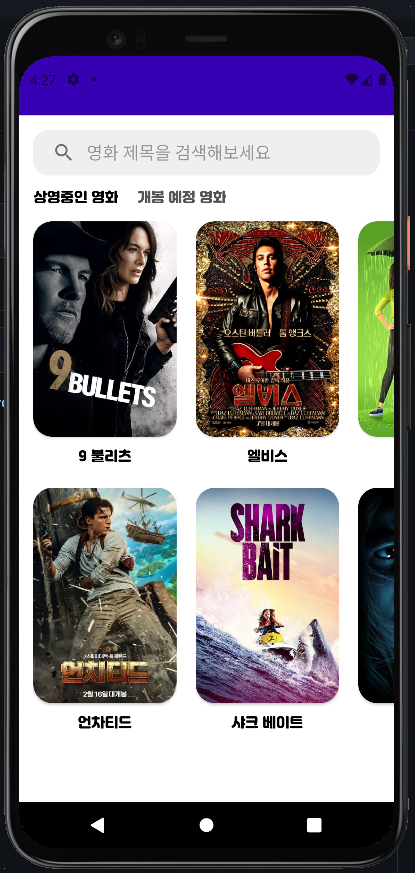
이렇게 데이터들을 넣어주면 우리가 원하는 화면을 볼 수 있습니다.
Code

👍👍