Windows 10 환경에서 Intellij IDEA 2021.3.3 버전을 사용하였습니다.
1. Spring Initializr를 이용해 스프링 부트를 생성
start.Spring.io 를 접속하여
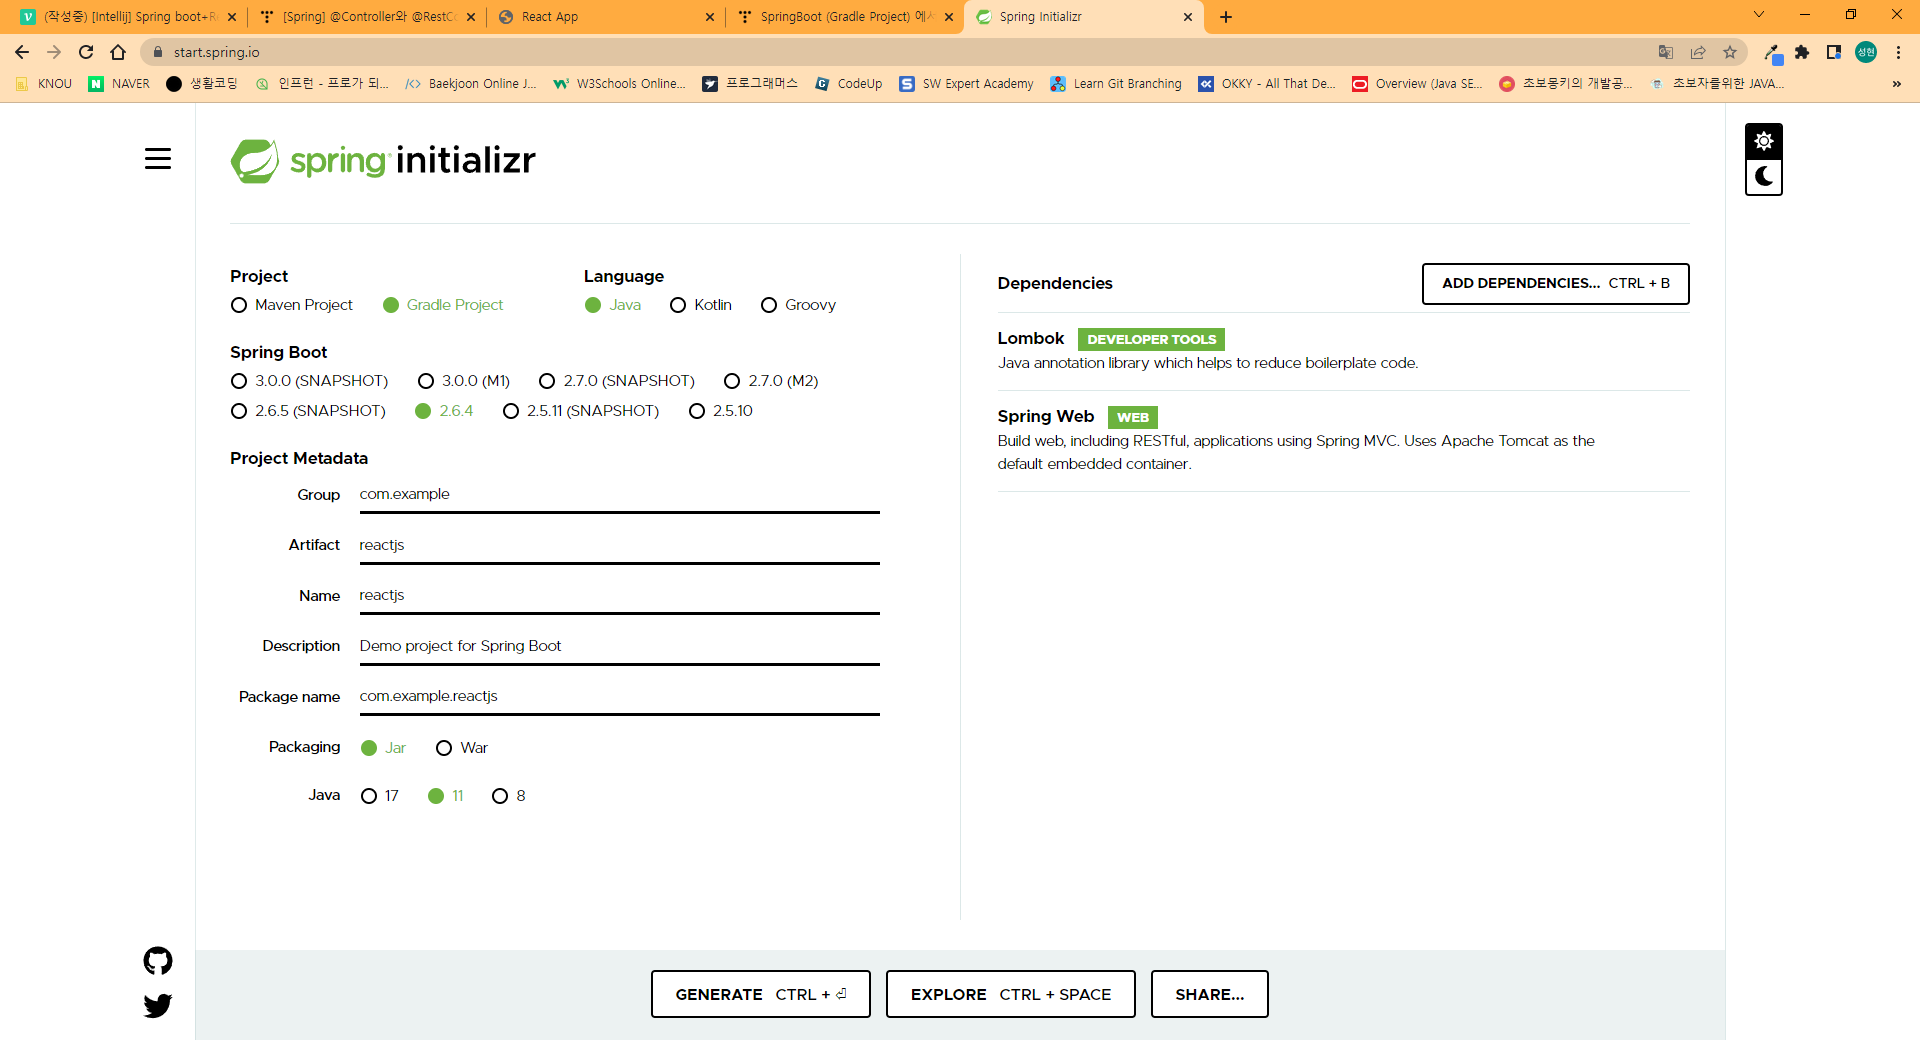
설정하여 Generate 를 해주어 파일을 사용합니다.
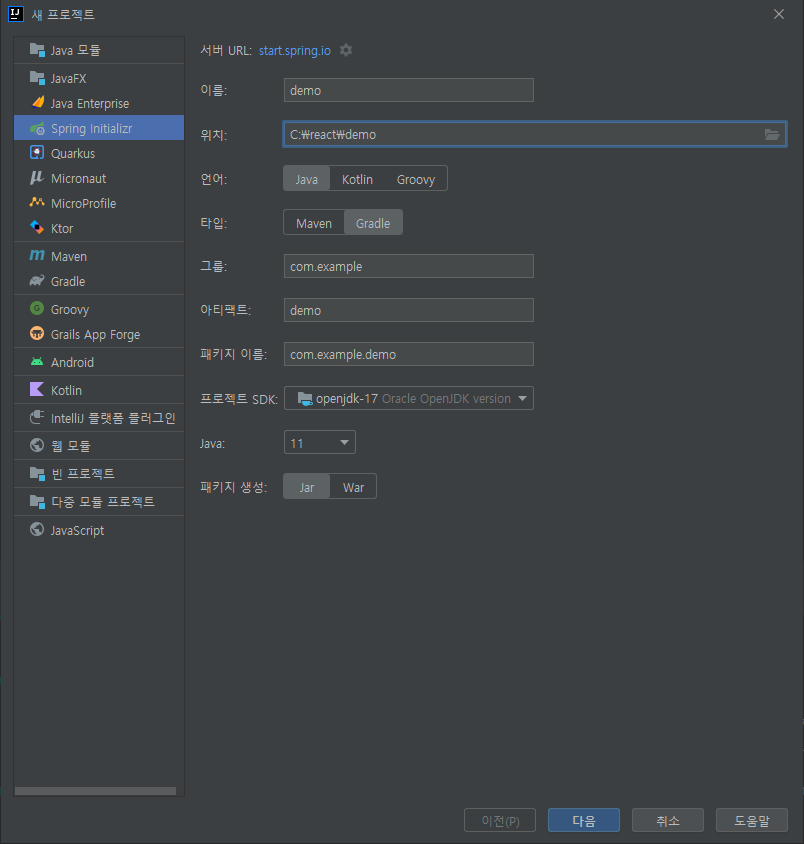
또는, Intellij 에서 Spring Initializr 를 활용할수 있습니다.
해당 글에서는 maven이 아닌 Gradle을 활용하고있어 maven을 gradle 로 변경 하여 사용하고 이 두개의 차이점은 추 후 포스팅할 것입니다.
2. react 설정 하여 Spring Boot와 연동하기.
설치를 완료한 후 Intellij 의 터미널을 활용하여 react를 만들어주기 위해
ProjectName/src/main 으로 경로를 이동시킨 후
create-react-app [projectName] 명령어를 입력합니다.
projectName 에는 임의로 정하여 만들면 되고 저는 reactjs 로 만들어주었습니다.
npx create-react-app reactjs 를 입력 해준 후 1~2분 간의 빌드가 진행됩니다.

정상적으로 실행 후 cd recatjs 실행 , npm start 를 실행 하였을때 react 페이지가 3000 포트로 실행이 된다면.
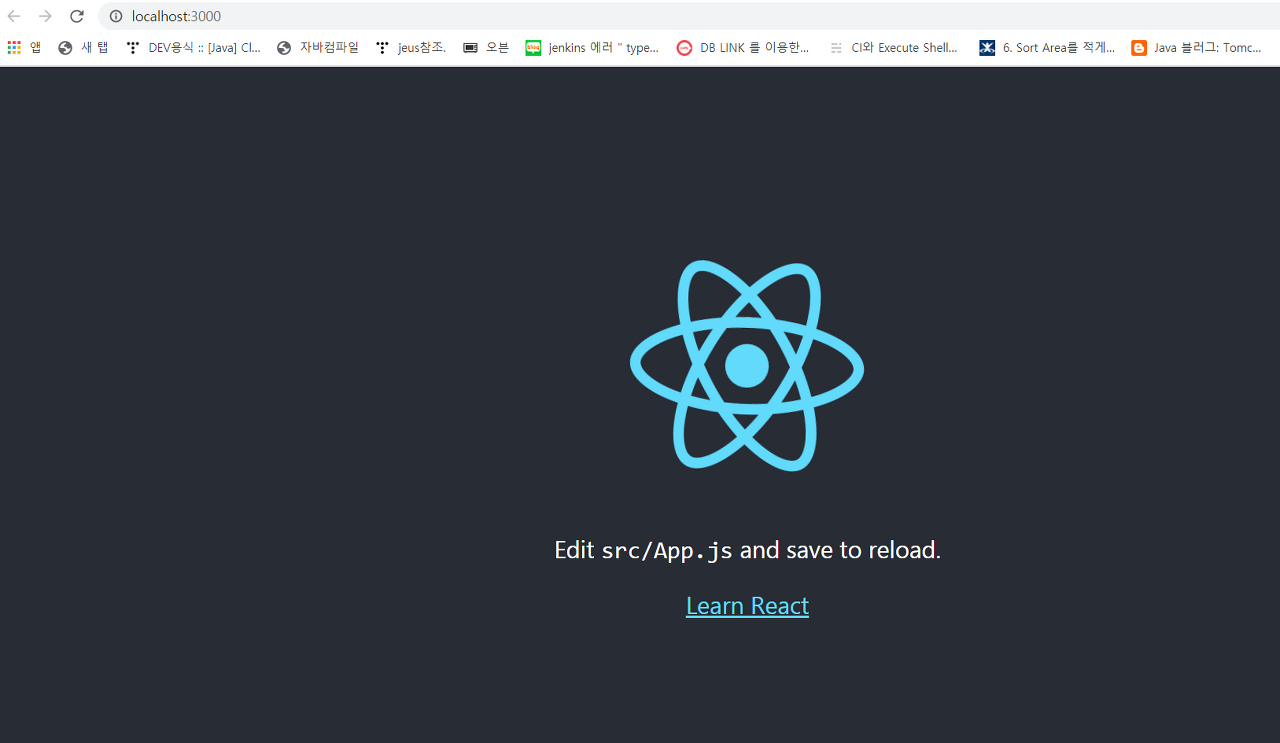
이런 화면이 출력 되고 그 후 npm install , npm run-script build , npm run eject 를 순서대로 실행시킵니다.
reactjs/config/paths.js 파일에 가서 appbuild 에 'build/static' 을 적어줍니다. (buildpath를 지워줬음.)
이 후 reactjs/build 로 가서 모든 파일을 지웁니다.
Spring의 build.gradle 로 가서
plugins {
id 'org.springframework.boot' version '2.6.4'
id 'io.spring.dependency-management' version '1.0.11.RELEASE'
id 'java'
}
group = 'hello'
version = '0.0.1-SNAPSHOT'
sourceCompatibility = '11'
configurations {
compileOnly {
extendsFrom annotationProcessor
}
}
repositories {
mavenCentral()
}
dependencies {
implementation 'org.springframework.boot:spring-boot-starter-web'
compileOnly 'org.projectlombok:lombok'
annotationProcessor 'org.projectlombok:lombok'
testImplementation 'org.springframework.boot:spring-boot-starter-test'
}
//해당 부분 부터 입력
def webappDir = "$projectDir/src/main/reactjs"
sourceSets {
main {
resources {
srcDirs = ["$webappDir/build", "$projectDir/src/main/resources"]
}
}
}
processResources {
dependsOn "buildReact"
}
task buildReact(type: Exec) {
dependsOn "installReact"
workingDir "$webappDir"
inputs.dir "$webappDir"
group = BasePlugin.BUILD_GROUP
if (System.getProperty('os.name').toLowerCase(Locale.ROOT).contains('windows')) {
commandLine "npm.cmd", "run-script", "build"
} else {
commandLine "npm", "run-script", "build"
}
}
task installReact(type: Exec) {
workingDir "$webappDir"
inputs.dir "$webappDir"
group = BasePlugin.BUILD_GROUP
if (System.getProperty('os.name').toLowerCase(Locale.ROOT).contains('windows')) {
commandLine "npm.cmd", "audit", "fix"
commandLine 'npm.cmd', 'install'
} else {
commandLine "npm", "audit", "fix"
commandLine 'npm', 'install'
}
}
//까지 입력
tasks.named('test') {
useJUnitPlatform()
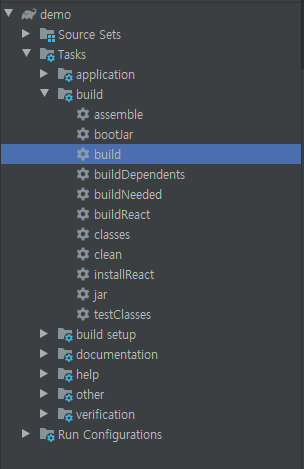
}주석 부분 소스를 추가해준 후 우측 gradle 에서 build를 클릭하여 실행하여줍니다.
마지마으로 reactjs/src/app.js 파일에 소스를 수정하여줍니다.
import logo from './logo.svg';
import './App.css';
import {useEffect, useState} from "react";

function App() {
    const [message, setMessage] = useState([]);
    useEffect(() => {
        fetch("/hello").then((response) => {
            return response.json();
        }).then(function (data) {
            setMessage(data);
        });
    }, []);
    return (<div className="App">
        <header className="App-header"><img src={logo} className="App-logo" alt="logo"/>
            <p> Edit <code>src/App.js</code> and save to reload. </p> <a className="App-link" href="https://reactjs.org"
                                                                         target="_blank"
                                                                         rel="noopener noreferrer"> Learn React </a>
            <ul> {message.map((text, index) => <li key={`${index}-${text}`}>{text}</li>)} </ul>
        </header>
    </div>);
}

export default App;
그리고 springboot 서버를 킨 후 localhost:8080포트를 실행해주면 다음 결과가 나옵니다.
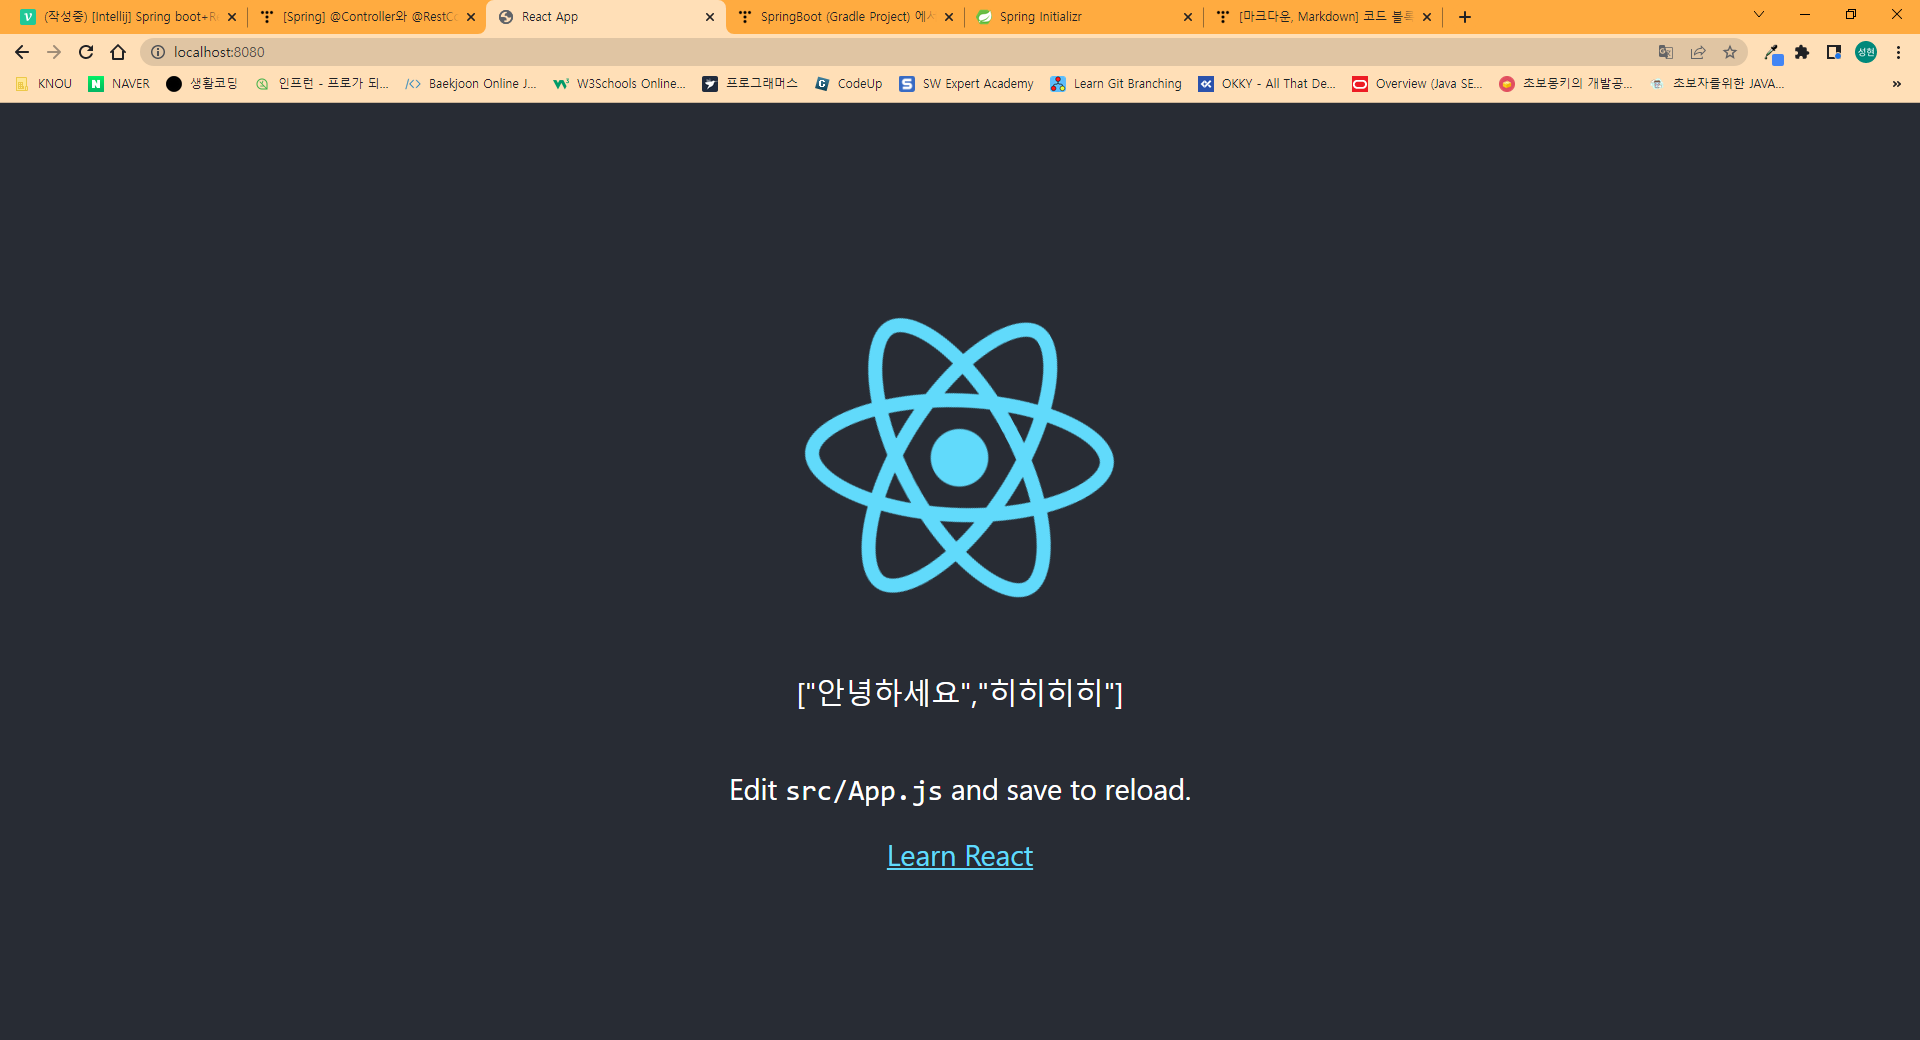
해당 이미지를 보면 SpringBoot 에서 Controller를 하나만들어서 입력해준 부분이 react에서도 출력되고있음을 볼수 있습니다 .("안녕하세요","히히히히")
해당 글은
https://hjjooace.tistory.com/entry/React-Spring-Gradle-Project-%EC%97%B0%EB%8F%99 ,
https://7942yongdae.tistory.com/136
블로그를 참고하여 작성하였습니다.
