짜잔~ 오랜만입니당😀

그동안 사정으로 인해 개인 프로젝트가 잠시 구석에 잠들어있었네요 ㅎㅎ^^;;
변명을 하자면 지금 프로젝트를 2개나 하고 진행하고 있어서 정신없이 코딩만 했습니다.. 아무래도 팀플이 더 중요하다고 생각해서 개인 프로젝트는 잠시 접어뒀네요.
사실 구현은 꽤 했는데 블로그에 올리질 못했어용..일단 서론은 여기까지만 하겠습니다.
글 사이에 이미지를 첨부할 수 있는 게시판 구현하기
이 부분 정말 고민 많이 했습니다. 사실 에브리타임처럼 그냥 글따로, 사진따로 첨부하는게 구현하기 훨씬 편합니다. 하지만 명색이 커뮤니티, 그것도 해외축구를 다루는 커뮤니티면 글 사이에 사진을 첨부하는 블로그 형태로 구현하는 것이 맞다고 생각했습니다! 이 부분은 많은 자료를 조사하면서 애를 먹었습니다. 여러분들이 좀 더 구현하기 쉽도록 플로우를 정리해보겠습니다.
저는 참고로 프론트 따로 없이 타임리프를 사용했습니다!
- AWS S3와 연동하여 이미지를 업로드하고 삭제합니다. 이미지는 저장 시 FileMapping이라는 엔티티에 저장됩니다.
- 이미지는 Post - FileMapping 1:N 형태로 게시글과 조인돼있습니다.
- 만약 사용자가 글 작성 중 사진을 첨부한다면 프론트에서 해당 사진 업로드 요청을 먼저합니다. 서버에서는 사진을 S3에 업로드 후 받은 imgUrl을 넘겨줍니다.
- 이 부분이 정말 중요한데, 우리는 보통 게시글을 작성할 때 사진과 함께 게시글 업로드 요청을 합니다. 하지만 글 사이 이미지를 첨부하기 위해서는 게시글을 작성하기 전 이미지를 먼저 첨부해야합니다! 즉 게시글이 아직 완성되기 전 이미지를 업로드하고 FileMapping을 저장합니다.
- 게시글은 아직 DB에 저장되지 않았기 때문에 FileMapping은 왜래키인 Post가 null값으로 존재합니다.
- 사용자가 글을 모두 작성 후 게시글 업로드 버튼을 누릅니다.
- 프론트는 게시글 업로드 요청을 보냅니다. 서버로 게시글 내용을 다음과 같은 html 형태로 보내줍니다.
<p><img src="imgUrl"/></p>와 같은 태그가 포함된 형태로 넘겨야합니다. 즉 글 따로, 이미지 파일 따로가 아니라 글 사이에 이미지를 표현하기 위해서 html 형태로 보내줘야 합니다.
저는 참고로 텍스트 에디터 SummerNote를 사용했습니다! 프론트에서 텍스트 에디터 사용하는 것이 글 작성 구현도 훨씬 간편해서 추천합니다.
- 서버는 게시글을 먼저 저장하고, 프론트로부터 받은 html에서 url들을 추출하여 해당 이미지들과 저장한 게시글을 연결해줍니다.
- 아직 게시글이 저장되기 전 FileMapping 엔티티에는 Post 값이 null로 존재했지만, 게시글이 저장된 후 생긴 Post를 뒤늦게 다 넣어주는 작업을 합니다.
- 마지막으로 스프링 스케줄러를 이용하여 하루가 지났는데도 Post 값이 null로 존재하는 이미지들은 삭제합니다. 만약 사용자가 글을 작성하는 중 저장하지 않고 나가버린다면 업로드는 됐는데 떠도는 이미지들이 남아있겠죠? 이걸 일정 주기마다 삭제합니다.
게시글 저장하기 전에 이미지를 먼저 업로드하는 이유
첫번째 이유는 프론트에서 위와 같이 html형태로 표현하기 위해서는 imgUrl이 필요합니다. 이를 위해서 게시글 저장하기 전에 미리미리 이미지를 업로드해서 url을 얻어야합니다.
두번째 이유는 제가 여러 글을 참고했을 때, 이미지를 한 번에 업로드하는 것보다 하나씩 미리 업로드하는 것이 효율적이라고 생각했습니다. 실제 기업에서도 이와 같은 형태로 구현한다고 합니다. 이미지를 한 번에 업로드하려고 하면 응답시간이 너무 길어지기 때문에 미리 업로드하고, 나중에 게시글과 매핑하는 작업을 해줍니다.
구현 과정
사실 여러분들이 제일 원하는 게 구현 방법이라는 걸 알고있습니다..ㅎㅎ
S3 연동
-
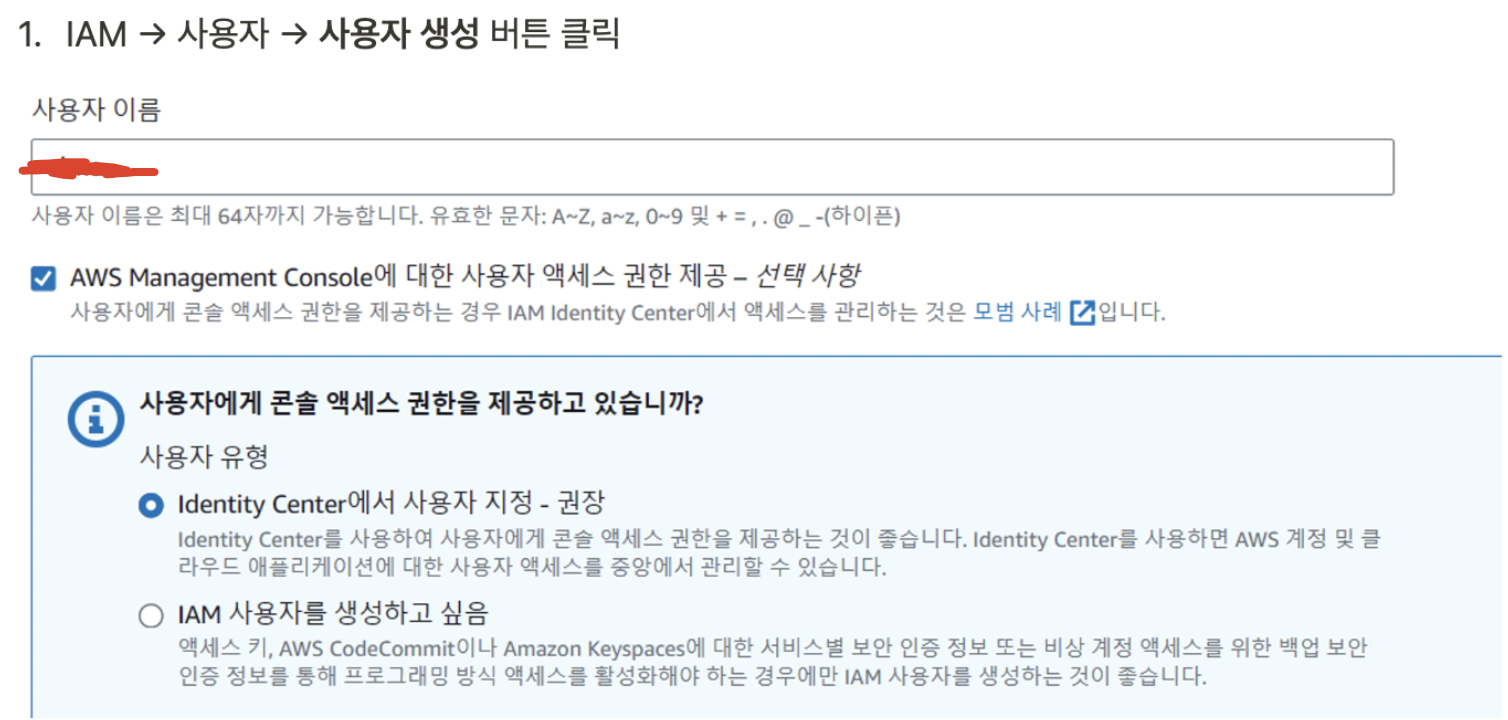
AWS에서 우선 IAM을 먼저 생성합니다.
밑의 사진은 IdentityCenter로 선택했는데 IAM 사용자를 생성하고 싶음으로 선택해주세요! (IdentityCenter 사용하려고 했는데 실패해서..왜 안될까여..)
-
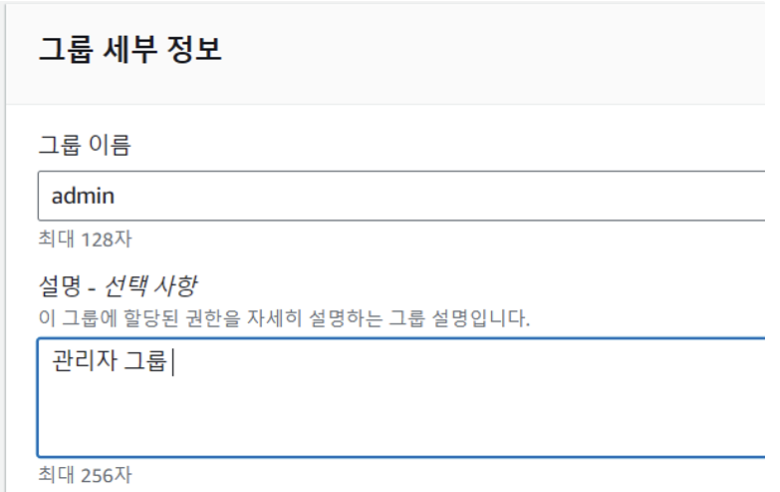
권한 세트 생성 (Admin) → AWS 계정 → 사용자 선택 후 그룹 할당 → 권한 세트 부여
-
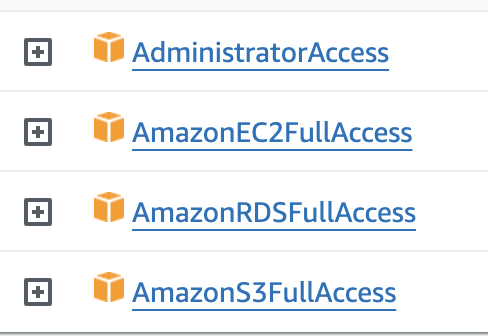
권한 부여 목록
-
사용자 생성 후 사용자 클릭 - 보안 자격 증명 클릭 - 액세스 키 생성
이때 생성한 액세스 키 csv 파일을 다운받거나 꼭 기록해놓으세요!! 나중에 사용합니다. 최초 생성 시 한번만 확인 가능할거에요 -
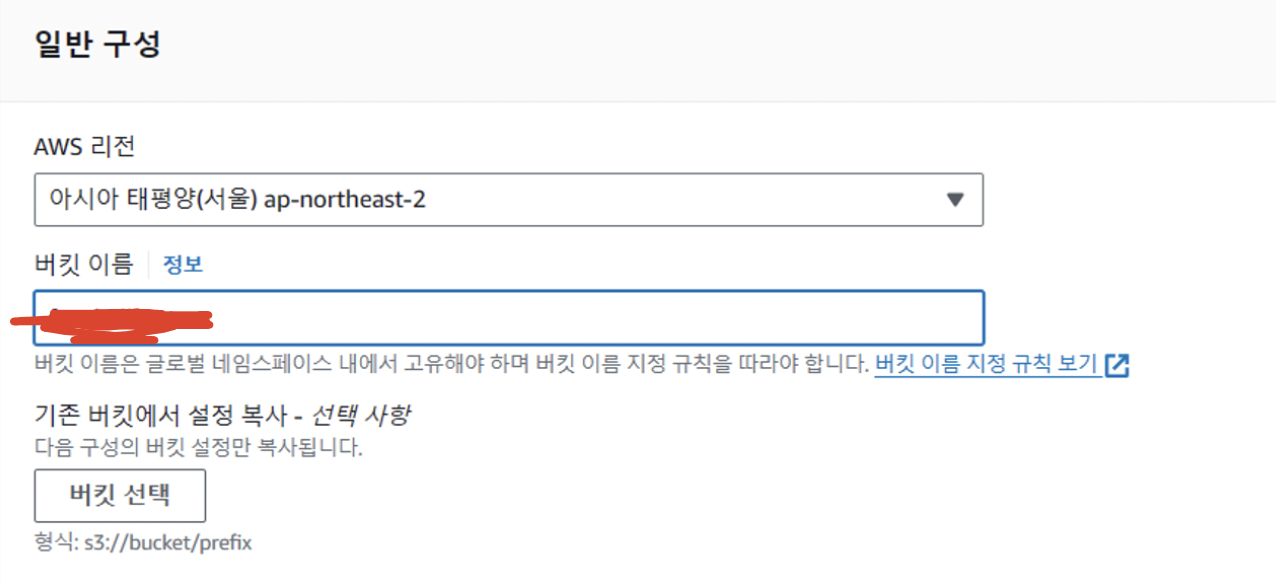
S3 버킷 생성
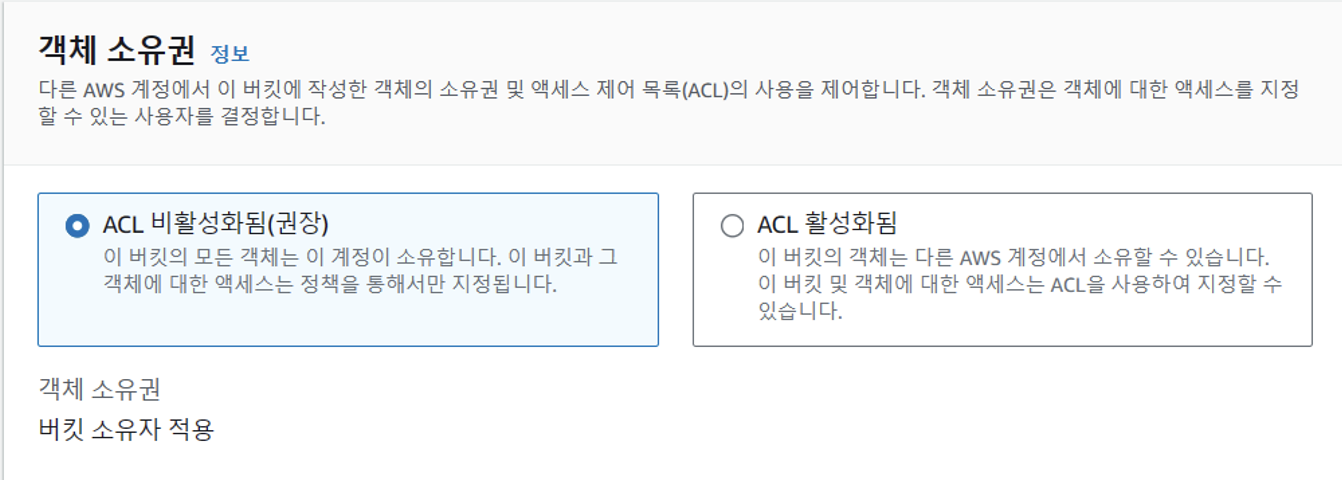
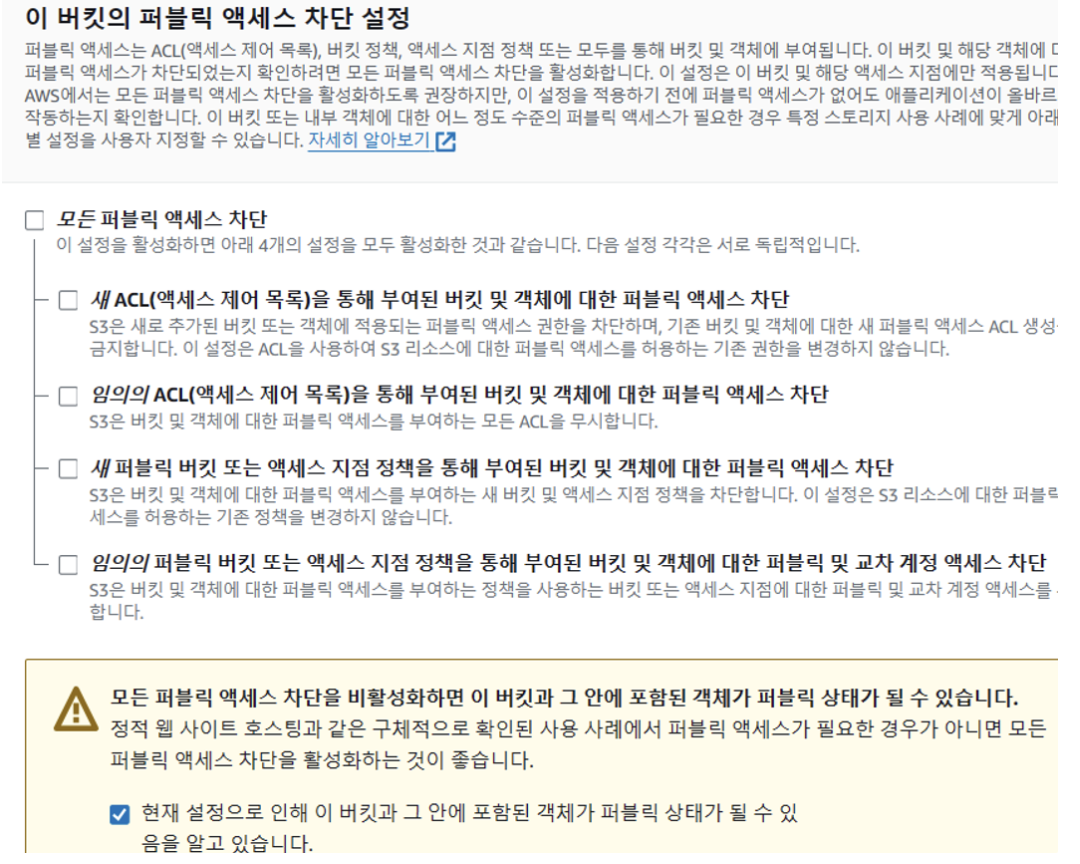
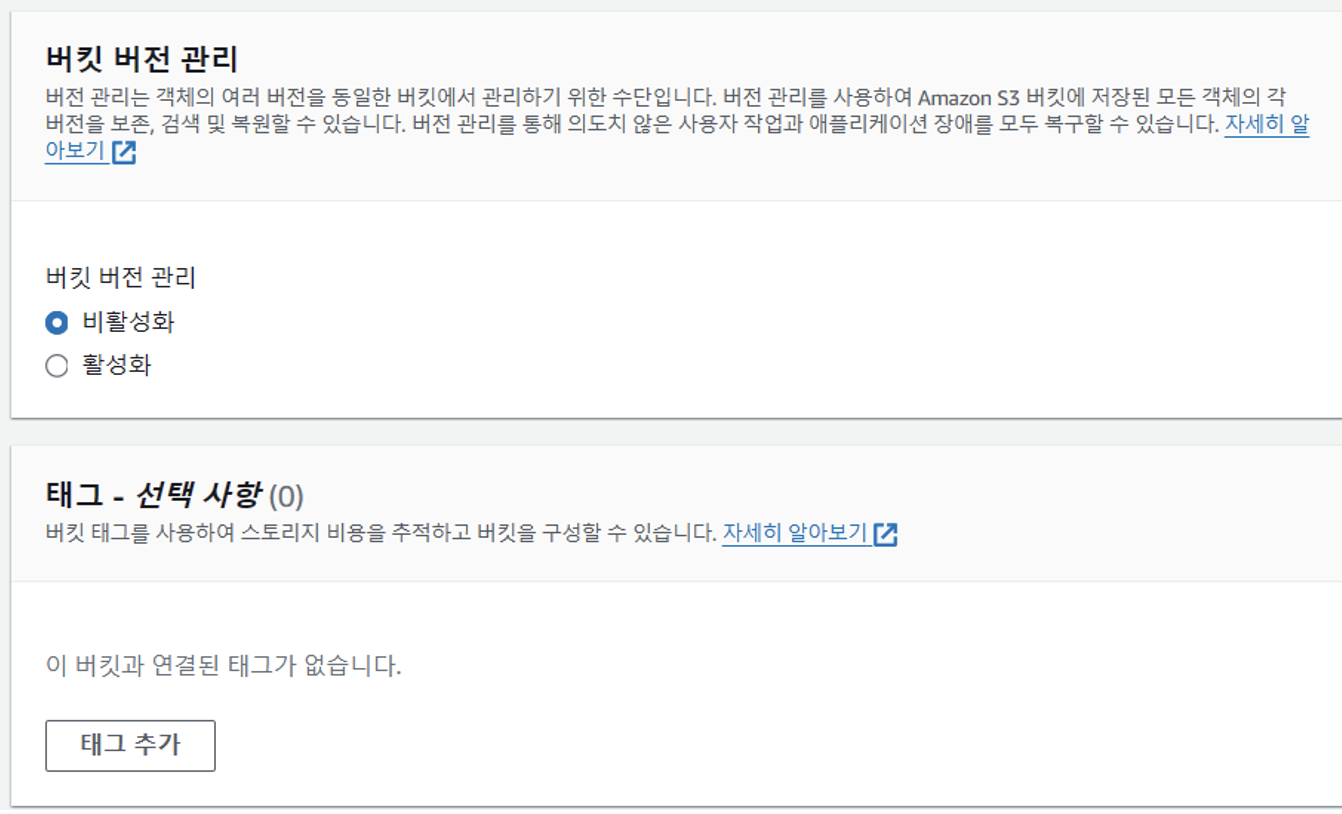
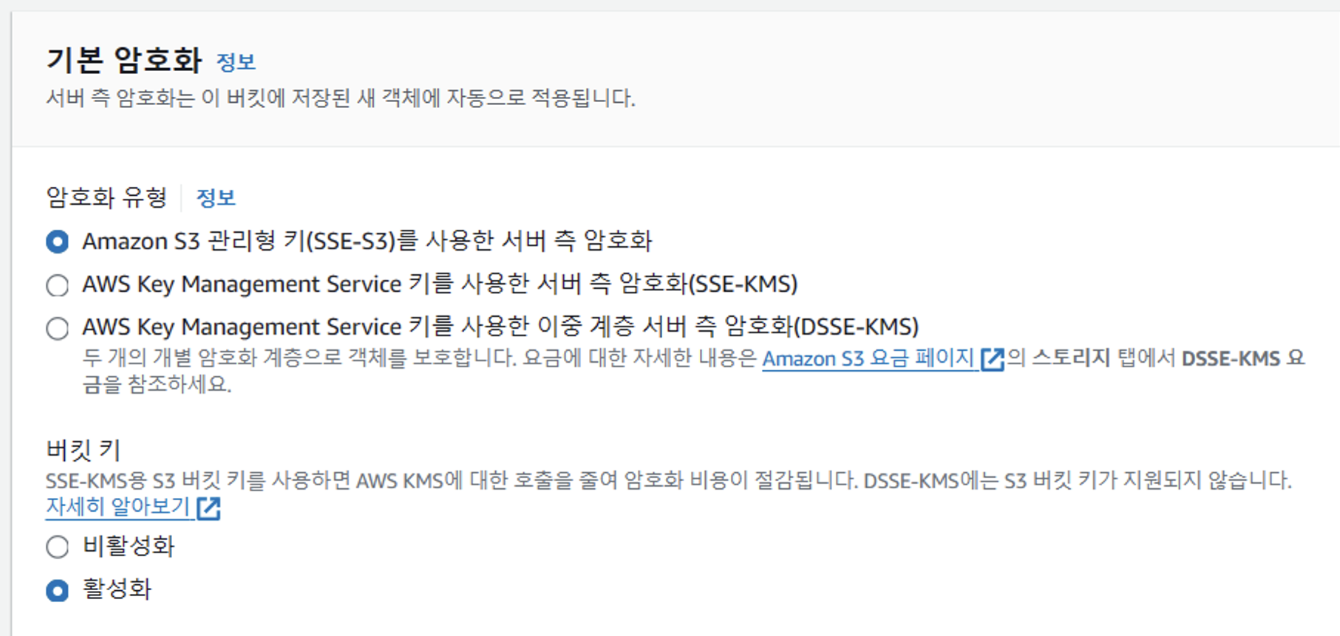
-
S3 버킷 생성 후 버킷 정책 편집(정책 생성기를 통해 정책 입력)

빨간색으로 칠한 부분에 버킷 이름이 들어갑니다.
스프링부트 구현
build.gradle
implementation 'org.springframework.cloud:spring-cloud-starter-aws:2.2.6.RELEASE’ application.properties
아까 위에서 생성한 IAM 액세스 키 잘 갖고 계셨죠?
#AWS S3
cloud.aws.s3.bucket=버킷 이름
cloud.aws.region.static=ap-northeast-2
cloud.aws.s3.bucket.url=https://s3.ap-northeast-2.amazonaws.com/버킷 이름

#Access Key(IAM)
cloud.aws.credentials.accessKey=IAM 액세스 키
cloud.aws.credentials.secretKey=IAM 시크릿 키
cloud.aws.stack.auto=false
S3Config
@Configuration
public class S3Config {
    @Value("${cloud.aws.credentials.accessKey}")
    private String accessKey;
    @Value("${cloud.aws.credentials.secretKey}")
    private String secretKey;
    @Value("${cloud.aws.region.static}")
    private String region;

    @Bean
    public AmazonS3 amazonS3() {
        AWSCredentials awsCredentials = new BasicAWSCredentials(accessKey, secretKey);
        return AmazonS3ClientBuilder.standard()
                .withRegion(region)
                .withCredentials(new AWSStaticCredentialsProvider(awsCredentials))
                .build();
    }
}
Post
@Getter
@NoArgsConstructor(access = AccessLevel.PROTECTED)
@AllArgsConstructor
@Entity
@Builder(toBuilder = true)
public class Post extends BaseTimeEntity {
    @Id
    @Column(name = "post_id")
    @GeneratedValue(strategy = GenerationType.IDENTITY)
    private Long postId;

    @Column(nullable = false)
    private String title;

    @Column(nullable = false)
    private String content;

    @ColumnDefault("0")
    private Long view;

    @ManyToOne // Post(N) : User(1)
    @JoinColumn(name="user_id")
    private User user;

    @Column(name = "category_id")
    private int categoryId;

    @ColumnDefault("0")
    private int favoriteCount;

    @ElementCollection
    private List<String> imgUrl;
}
FileMapping
@Entity
@NoArgsConstructor(access = AccessLevel.PROTECTED)
@AllArgsConstructor
@Builder(toBuilder = true)
@Getter
public class FileMapping {
    @Id
    @GeneratedValue(strategy = GenerationType.IDENTITY)
    @Column(name = "file_id")
    private Long fileId;

    @ManyToOne
    @JoinColumn(name = "post_id")
    private Post postId;

    @Column(name = "file_url")
    @NotEmpty
    private String fileUrl;
}
FileMappingRepository
@Repository
public interface FileMappingRepository extends JpaRepository<FileMapping,Long> {
    Optional<FileMapping> findByFileUrl(String fileUrl);
}
PostRepository
@Repository
public interface PostRepository extends JpaRepository<Post,Long> {

    Page<Post> findAllByUser(Pageable pageable,User user); // 특정 유저의 전체 게시글 조회
    Page<Post> findAll(Pageable pageable); // 전체 게시글 조회
    Page<Post> findAllByCategoryId(Pageable pageable,int categoryId); // 카테고리에 따른 게시글 리스트 조회
    Page<Post> findAllByFavoriteCountGreaterThanEqual(Pageable pageable,int likeCount); // 좋아요 수 10개 이상인 게시글
    // 인기글 카테고리에 따른 분류
    Page<Post> findAllByFavoriteCountGreaterThanEqualAndCategoryId(Pageable pageable,int likeCount,int categoryId);
    Optional<Post> findPostByPostId(Long postId); // 게시글 아이디로 조회
    void deletePostByPostId(Long postId); // 게시글 아이디로 삭제

}
FileService
public interface FileService {
    String upload(MultipartFile multipartFile) throws IOException;
    void fileDelete(String fileName);
}
FileServiceImpl
@Service
@Slf4j
@RequiredArgsConstructor
public class FileServiceImpl implements FileService{
    // @Value는 lombok 어노테이션이 아님에 주의!
    // 버켓 이름 동적 할당(properties에서 가져옴)
    @Value("${cloud.aws.s3.bucket}")
    private String bucket;
    private final AmazonS3 amazonS3;
    private final FileMappingRepository fileMappingRepository;

    @Transactional
    public String upload(MultipartFile multipartFile) throws IOException {
        String s3FileName = UUID.randomUUID() + "-" + multipartFile.getOriginalFilename();

        ObjectMetadata objMeta = new ObjectMetadata();
        objMeta.setContentType(multipartFile.getContentType());
        InputStream inputStream = multipartFile.getInputStream();
        objMeta.setContentLength(inputStream.available());
        amazonS3.putObject(bucket, s3FileName, inputStream, objMeta);
        inputStream.close();
        log.info("S3 upload file name = {}",s3FileName);
        return amazonS3.getUrl(bucket, s3FileName).toString();
    }

    @Transactional
    public void fileDelete(String fileName) {
        log.info(fileName);
        amazonS3.deleteObject(bucket, fileName);
    }

    @Transactional
    public FileMapping createFileMapping(String fileUrl){
        FileMapping fileMapping = FileMapping.builder()
                .fileUrl(fileUrl)
                .build();

        return fileMappingRepository.save(fileMapping);
    }

	// 게시글 저장 후 미리 업로드됐던 이미지들과 연결
    @Transactional
    public List<FileMapping> updateFileMapping(Post post, List<String> fileUrl){
        List<FileMapping> fileMappingList = new ArrayList<>();
        for(String url : fileUrl){
            fileMappingList.add(fileMappingRepository.findByFileUrl(url).get());
        }
        List<FileMapping> updatedFileMappingList = new ArrayList<>();
        for(FileMapping file : fileMappingList){
            FileMapping updateFile = file.toBuilder()
                    .postId(post)
                    .build();
            updatedFileMappingList.add(updateFile);
        }

        return fileMappingRepository.saveAll(updatedFileMappingList);
    }
}
PostService
public interface PostService {
    Post savePost(SavePostRequest savePostRequest, User user);
    void deletePost(Long postId, User user);
    Post updatePost(Long postId,UpdatePostRequest updatePostRequest, User user);
}
PostServiceImpl
@Service
@Slf4j
@RequiredArgsConstructor
public class PostServiceImpl implements PostService{
    private final PostRepository postRepository;

    @Override
    @Transactional
    public Post savePost(SavePostRequest savePostRequest, User user) {
        Post post = Post.builder()
                .title(savePostRequest.getTitle())
                .content(savePostRequest.getContent())
                .categoryId(savePostRequest.getCategoryId())
                .user(user)
                .view(1L)
                .build();
        return postRepository.save(post);
    }

    @Override
    @Transactional
    public void deletePost(Long postId, User user) {
        Post post = postRepository.findPostByPostId(postId)
                .orElseThrow(()->new ResponseStatusException(HttpStatus.BAD_REQUEST,"존재하지 않는 게시글입니다."));
        if(user == null || !user.equals(post.getUser())){
            log.info("삭제 권한이 없음");
            throw new ResponseStatusException(HttpStatus.FORBIDDEN,"삭제 권한이 없습니다.");
        }
        postRepository.deletePostByPostId(post.getPostId());
    }

    @Override
    @Transactional
    public Post updatePost(Long postId,UpdatePostRequest updatePostRequest, User user) {
        Post post = postRepository.findPostByPostId(postId)
                .orElseThrow(()->new ResponseStatusException(HttpStatus.BAD_REQUEST,"존재하지 않는 게시글입니다."));
        if(user == null || !user.equals(post.getUser())){
            throw new ResponseStatusException(HttpStatus.FORBIDDEN,"수정 권한이 없습니다.");
        }
        Post updatedPost = post.toBuilder()
                .title(updatePostRequest.getTitle())
                .content(updatePostRequest.getContent())
                .build();
        Post result = postRepository.save(updatedPost);
        return result;
    }

    /** 이미지 url 추출 */
    @Transactional
    public List<String> extractImageUrl(String content) {
        Document doc = Jsoup.parse(content);
        Elements elements =  doc.getElementsByTag("img");

        List<String> imgurl = new ArrayList<>();
        for (Element element : elements) {
            imgurl.add(element.attr("src")); // src에서 url 추출
        }

        return imgurl;
    }
}
html 타입으로 받은 게시글을 추출하여 이미지 url들을 뽑아냅니다.
SavePostRequest
@Getter
@Builder
public class SavePostRequest {
    @NotEmpty(message = "제목을 입력해주세요")
    private String title;
    @NotEmpty(message = "내용을 입력해주세요")
    private String content;
    @NotNull(message = "카테고리를 선택해주세요")
    private int categoryId;
}
FileController
@RestController
@RequiredArgsConstructor
@Slf4j
@RequestMapping("/file")
public class FileController {
    private final FileServiceImpl fileService;
    private final PostServiceImpl postService;

    @PostMapping("/upload")
    public String uploadFile(@RequestParam("image") MultipartFile multipartFile) throws IOException {
        String imgUrl = fileService.upload(multipartFile); // 파일 업로드 후 url 반환
        fileService.createFileMapping(imgUrl); // 해당 url을 가지는 파일 매핑 생성(아직 post는 null)

        return imgUrl;
    }
}
PostReadService
public interface PostReadService {
    Post getPostById(Long postId);
}
PostReadServiceImpl
@Service
@Slf4j
@RequiredArgsConstructor
public class PostReadServiceImpl implements PostReadService{
    private final PostRepository postRepository;
    private final FavoriteServiceImpl likeService;

    @Override
    @Transactional
    public Post getPostById(Long postId) {
        return postRepository.findPostByPostId(postId).orElseThrow(()->new ResponseStatusException(HttpStatus.BAD_REQUEST,"존재하지 않는 게시글입니다."));
    }
}
원래는 다른 메서드도 많은데 일단 게시글 저장하고 보여주는 것에 필요한 부분만 남겼습니다!
PostController
@Controller
@RequiredArgsConstructor
@RequestMapping(value = "/post")
@Slf4j
public class PostController {
    private final PostServiceImpl postService;
    private final PostReadServiceImpl postReadService;
    private final FileServiceImpl fileService;
    private final SecurityUtil securityUtil;

    /** 게시글 메인 뷰(전체 조회) */
    @GetMapping("/get/all")
    public String getAll(@PageableDefault(page = 1) Pageable pageable, Model model){

        return "post/list";
    }

    /** 게시글 작성 뷰*/
    @GetMapping("/create")
    public String createForm(Model model){
        SavePostRequest savePostRequest = SavePostRequest.builder().build();
        model.addAttribute("savePostRequest", savePostRequest);
        return "post/write";
    }

    /** 게시글 작성 */
    @PostMapping("/create")
    public String create(@Valid SavePostRequest savePostRequest, RedirectAttributes redirectAttributes){
        Post post = postService.savePost(savePostRequest,securityUtil.getLoginUser());
        List<String> imgUrl = postService.extractImageUrl(post.getContent());


        if(!imgUrl.isEmpty())
            fileService.updateFileMapping(post,imgUrl);

        redirectAttributes.addAttribute("postId",post.getPostId());
        return "redirect:/post/{postId}";
    }

    /** 게시글 상세 조회 */
    @GetMapping("/{postId}")
    public String detail(@PathVariable Long postId, Model model){
        Post post = postReadService.getPostById(postId);
        model.addAttribute("post",post);
        setCategoryName(model,post.getCategoryId());
        return "post/detail";
    }

    public void setCategoryName(Model model, int categoryId){
        Map<Integer,String> category = new HashMap<>();
        category.put(0,"전체");
        category.put(1,"프리미어리그");
        category.put(2,"라리가");
        category.put(3,"세리에");
        category.put(4,"분데스리가");

        model.addAttribute("category",category.get(categoryId));
    }

    /** 게시글 수정하기 뷰 */
    @GetMapping("/{postId}/update")
    public String updateForm(@PathVariable Long postId, Model model){
        Post post = postReadService.getPostById(postId);

        UpdatePostRequest updatePostRequest = UpdatePostRequest.builder().build();
        model.addAttribute("updatePost",updatePostRequest);
        model.addAttribute("post",post);

        return "post/update";
    }

    /** 게시글 수정하기 */
    @PatchMapping("/update/{postId}")
    public String update(@PathVariable Long postId, UpdatePostRequest updatePostRequest, @AuthenticationPrincipal User user, RedirectAttributes redirectAttributes){
        postService.updatePost(postId,updatePostRequest,user);
        return "redirect:/post/{postId}";
    }

    /** 게시글 삭제하기 */
    @PostMapping("/delete/{postId}")
    public String delete(@PathVariable Long postId, @AuthenticationPrincipal User user){
        log.info("post id 삭제 = {}",postId);
        postService.deletePost(postId,user);
        return "redirect:/post/list";
    }
}
타임리프
위에서도 언급했다시피 저는 텍스트 에디터 SummerNote를 사용했습니다. 텍스트 에디터라서 html형태로 글을 저장할 수 있고, 글꼴이나 크기 등 자유롭게 조절할 수 있습니다. 무엇보다 글작성 구현이 쉽고 간편하며, 이미지를 첨부뿐만 아니라 복사 붙여넣기가 가능합니다.
이에 대한 자세한 설명은 아래 블로그를 참고해주시고 미리 설치해주세요!.
SummerNote 참고 블로그1
SummerNote 참고 블로그2
write.html
<!DOCTYPE html>
<html xmlns:th="http://www.thymeleaf.org"
      xmlns:layout="http://www.ultraq.net.nz/thymeleaf/layout"
      layout:decorate="~{layouts/default_layout}">
<head>
    <meta charset="UTF-8">
    <title>게시글 작성</title>
    <script src="https://code.jquery.com/jquery-latest.min.js"></script>
    <script src="/js/summernote/summernote-lite.js"></script>
    <script src="/js/summernote/lang/summernote-ko-KR.js"></script>
    <link rel="stylesheet" href="/css/summernote/summernote-lite.css">
    <link rel="stylesheet" href="/css/post/write.css">
</head>
<div layout:fragment="content" class="write-body">
  <form class="write-form" role="form" th:action="@{/post/create}" method="post" th:object="${savePostRequest}">
    <select class="form-select" th:field="*{categoryId}">
      <option value="0">==게시판 카테고리 선택==</option>
      <option value="1">프리미어리그</option>
      <option value="2">라리가</option>
      <option value="3">분데스리그</option>
      <option value="4">세리에</option>
    </select>
    <div class="field-error" th:errors="*{categoryId}">카테고리 오류</div>

    <div class="mb-3">
      <input type="text" class="form-control" th:field="*{title}" th:errorclass="field-error" placeholder="제목을 입력하세요.">
      <div class="field-error" th:errors="*{title}">제목 오류</div>
    </div>

    <div class="mb-3">
      <textarea class="form-control" id="summernote" th:type="text" th:field="*{content}" rows="100" th:errorclass="field-error"
                placeholder="본문을 입력하세요."></textarea>
      <div class="field-error" th:errors="*{content}">본문 오류</div>
    </div>
    <!--summernote-->
    <script th:inline="javascript">
        $('#summernote').summernote({

            // 에디터 크기 설정
            height: 800,
            // 에디터 한글 설정
            lang: 'ko-KR',
            // 에디터에 커서 이동 (input창의 autofocus라고 생각하시면 됩니다.)
            toolbar: [
            // 글자 크기 설정
            ['fontsize', ['fontsize']],
            // 글자 [굵게, 기울임, 밑줄, 취소 선, 지우기]
            ['style', ['bold', 'italic', 'underline','strikethrough', 'clear']],
            // 글자색 설정
            ['color', ['color']],
            // 표 만들기
            ['table', ['table']],
            // 서식 [글머리 기호, 번호매기기, 문단정렬]
            ['para', ['ul', 'ol', 'paragraph']],
            // 줄간격 설정
            ['height', ['height']],
            // 이미지 첨부
            ['insert',['picture']]
            ],
            // 추가한 글꼴
            fontNames: ['Arial', 'Arial Black', 'Comic Sans MS', 'Courier New','맑은 고딕','궁서','굴림체','굴림','돋음체','바탕체'],
            // 추가한 폰트사이즈
            fontSizes: ['8','9','10','11','12','14','16','18','20','22','24','28','30','36','50','72','96'],
            // focus는 작성 페이지 접속시 에디터에 커서를 위치하도록 하려면 설정해주세요.
            focus : true,
            // callbacks은 이미지 업로드 처리입니다.
            callbacks : {
            onImageUpload : function(files, editor, welEditable) {
                // 다중 이미지 처리
                for (var i = 0; i < files.length; i++) {
                    imageUploader(files[i], this);
                }
            },
            onPaste: function (e) {
                var clipboardData = e.originalEvent.clipboardData;
                if (clipboardData && clipboardData.items && clipboardData.items.length) {
                    var item = clipboardData.items[0];
                    if (item.kind === 'file' && item.type.indexOf('image/') !== -1) {
                        e.preventDefault();
                    }
                }
            }
        }});
        function imageUploader(file, el) {
            var formData = new FormData();
            formData.append('image', file); // 꼭 지정 변수명과 일치시킬 것!

            $.ajax({
                data: formData,
                type: "POST",
                url: '/file/upload',
                contentType: false,
                processData: false,
                enctype: 'multipart/form-data',
                success: function (url) {
                    $(el).summernote('insertImage', url, function ($image) {
                        $image.css('width', "25%");
                    });
                    console.log(data);
                }
            });
        }
    </script>

    <button type="submit" class="btn btn-primary">작성</button>
  </form>
</div>
</html>onPaste: function (e) {
var clipboardData = e.originalEvent.clipboardData;
if (clipboardData && clipboardData.items && clipboardData.items.length) {
var item = clipboardData.items[0];
if (item.kind === 'file' && item.type.indexOf('image/') !== -1) {
e.preventDefault();
}
}
}이 부분이 사진 복붙하는 기능입니다.
detail.html
<!DOCTYPE html>
<html xmlns:th="http://www.thymeleaf.org"
     xmlns:layout="http://www.ultraq.net.nz/thymeleaf/layout"
     layout:decorate="~{layouts/default_layout}">
<head>
   <meta charset="UTF-8">
   <title>게시글</title>
   <link rel="stylesheet" href="/css/post/detail.css">
   <script src="https://code.jquery.com/jquery-latest.min.js"></script>
   <link rel="stylesheet" href="https://cdn.jsdelivr.net/npm/bootstrap-icons@1.7.1/font/bootstrap-icons.css">
</head>
<div layout:fragment="content" class="post-detail">
   <div class="post-head">
       <p th:text="${category}" style="color: #737373">카테고리</p>
       <p class="post-title" th:text="${post.title}"></p>
       <div class="post-info-box">
           <div class="post-info">
               <div class="user-info"> <span style="font-weight: bold" th:text="${post.user.nickname}">닉네임</span></div>
               <div class="view-info"><span style="font-weight: bold">조회수 </span><span th:text="|${post.view}회|"></span></div>
               <div class="time-info">
                   <span th:text="|생성일 ${#temporals.format(post.createDate,'yyyy-MM-dd')}|">생성일</span>
                   <span th:text="|수정일 ${#temporals.format(post.modifiedDate,'yyyy-MM-dd')}|">수정일</span>
               </div>
           </div>
           <div class="post-control">
               <button type="button" class="btn btn-primary" th:onclick="|location.href='@{/post/update/${post.postId}}'|">수정</button>
               <button type="button" class="btn btn-secondary" data-bs-toggle="modal" data-bs-target="#checkModal">삭제</button>
               <!-- 삭제 시 모달창-->
               <div class="modal fade" id="checkModal" tabindex="-1" aria-hidden="true">
                   <div class="modal-dialog">
                       <div class="modal-content">
                           <div class="modal-header">
                               <h5 class="modal-title">삭제 확인</h5>
                               <button type="button" class="btn-close" data-bs-dismiss="modal" aria-label="Close"></button>
                           </div>
                           <div class="modal-body">
                               <p>정말 삭제하시겠습니까?</p>
                           </div>
                           <div class="modal-footer">
                               <button type="button" class="btn btn-secondary" data-bs-dismiss="modal">취소</button>
                               <form th:method="POST" th:action="@{|/post/delete/${post.postId}|}">
                                   <button class="btn btn-primary" type="submit">삭제</button>
                               </form>
                           </div>
                       </div>
                   </div>
               </div>
           </div>
       </div>
   </div>

   <div class="post-content">
       <span class="text-dark mb-0" th:utext="${post.content}">본문</span>
   </div>

   <div class="post-button">
       <button type="button" class="btn btn-outline-danger"><i class="bi bi-heart"></i>좋아요</button>
       <button type="button" class="btn btn-outline-secondary" th:onclick="|location.href='@{/post/list}'|"><i class="bi bi-list-task"></i>목록</button>
   </div>
</div>
</html>
이상 글 사이에 이미지 추가해서 글 작성하기였습니다!
아직 글 수정, 스케줄러 작업은 진행 중입니다!
그럼 이만..저는 코딩하러 가볼게요..